How to Add Light Rays to Your Photos
Dodge and Burn techniques have been around since the beginning of film development. In the past, these techniques used exposure times to darken or lighten parts of a photo individually. With powerful editing software, BeFunky’s Dodge and Burn tools create the same effect digitally.
We will go into depth about the origins of these techniques and show you how to use the Dodge and Burn tool. Read on!
What Does It Mean to Dodge and Burn a Photo?
Dodging and burning are two of the first post-production techniques that began in the darkroom of film development. Both of these techniques are local adjustments, rather than adjusting the exposure of an entire image. Burning exposes a photo longer, making it darker, while dodging refers to blocking this light from affecting different parts of the photo, thus keeping those portions of the image lighter.
Now with digital photo processing, these two tools have been created in brush form to achieve the same effect in your photos. Sometimes you will want to adjust the exposure in certain areas of your image while lightening other parts. BeFunky’s Dodge and Burn tools give you the ability to edit these specific parts of your image locally and separately. This means that you can add in things like light rays or make important exposure edits to your portraits.
How to Use Dodge and Burn to Add Light Rays to an Image
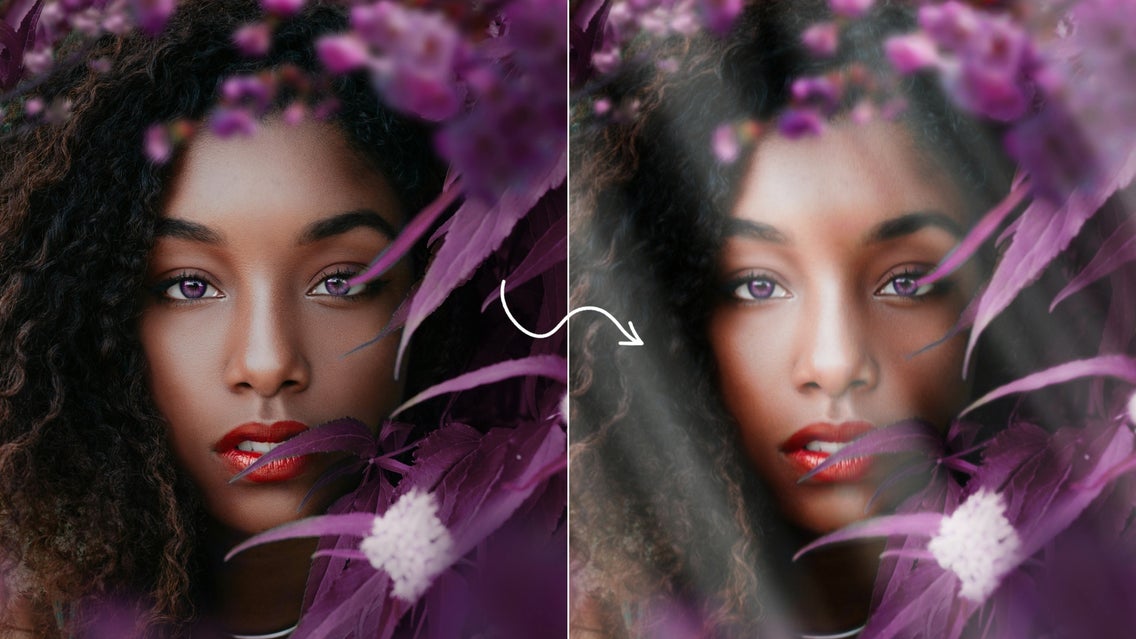
If you are just starting out with dodging and burning, try working with a black-and-white photo since it is easier to see shadows and highlights this way. We are first going to edit this portrait and then we will show you how you can practically use these tools in other scenarios.
Step 1: Open Your Photo
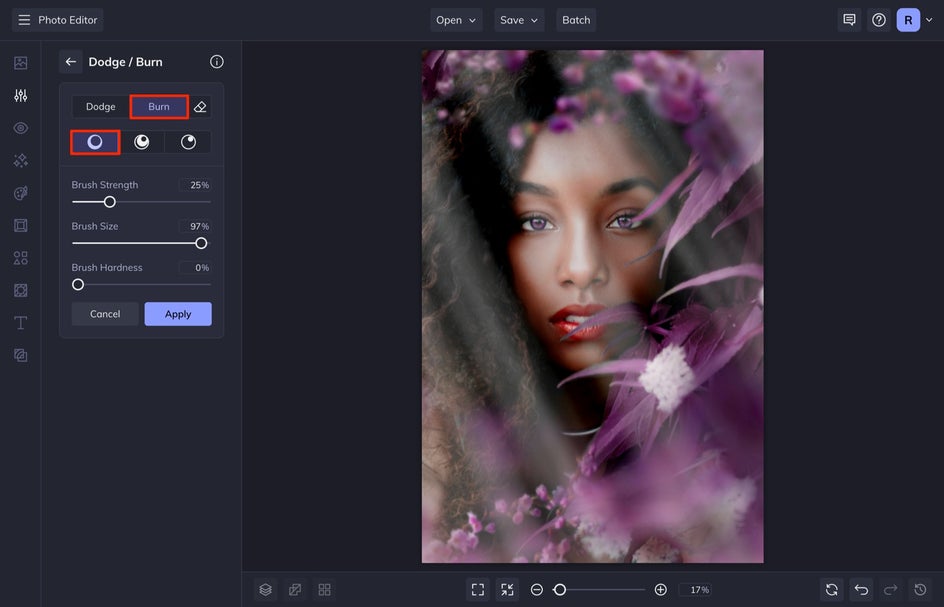
To start, select BeFunky’s Dodge and Burn tool. Choose the image you want by selecting Open and then Computer, or dragging and dropping the image directly onto the canvas.
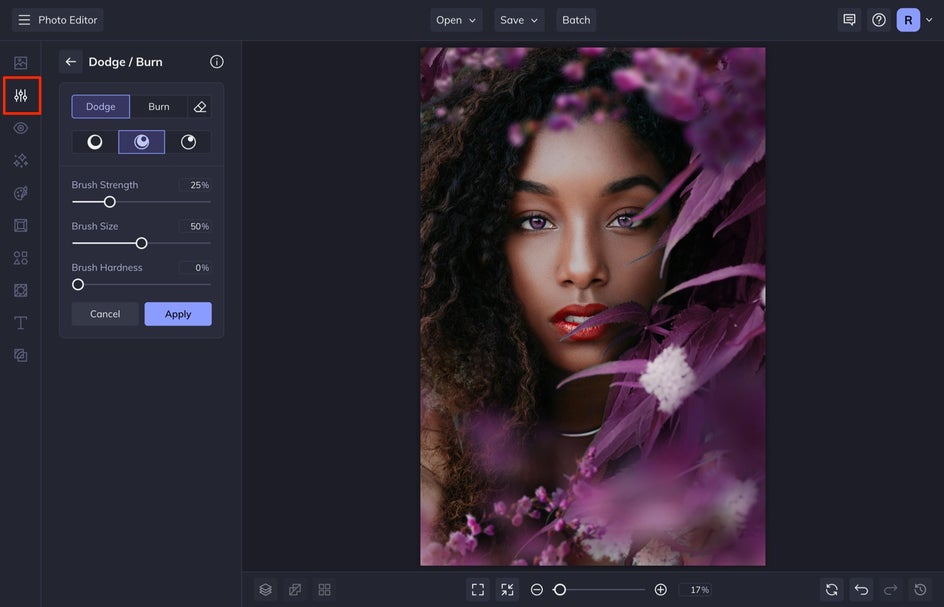
Step 2: Paint Light Rays With Dodge
These tools are set up as brushes. You can see that the menu is separated into Dodge and Burn tabs, and then below these are Shadows, Midtones, and Highlights. After that, we have Strength, Brush Size, and Brush Hardness.
I like building and layering the light rays so that it looks more natural. To add light rays to your image, select Dodge and then Shadows. Next, increase your Brush Size so it is a large brush. I like to keep the brush strength and hardness relatively low for a soft and feathered effect. This type of brush setting will add a wash of light over the part of the image you paint over, which is what we are looking for.
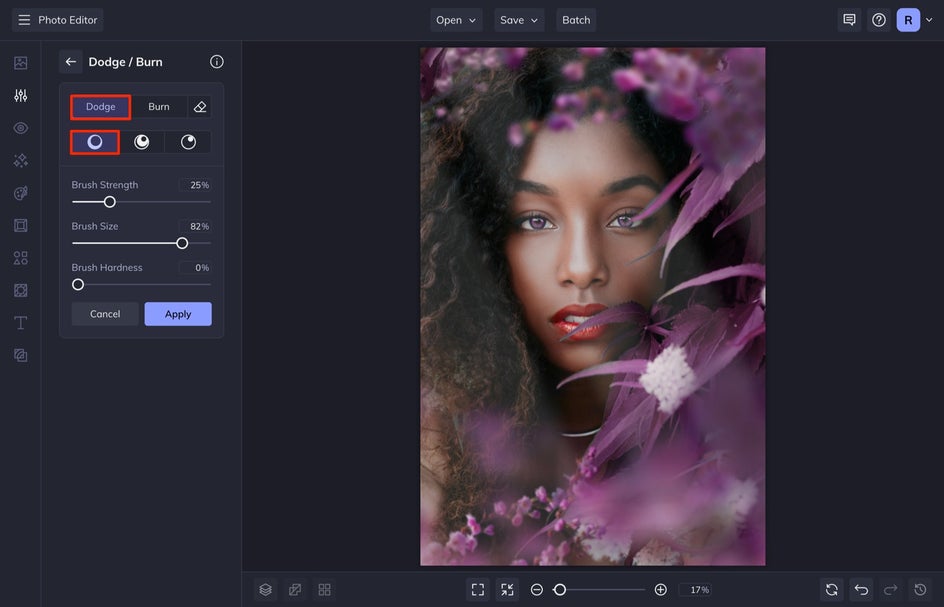
After this, you can reduce the brush size and brush strength and dodge smaller paint strokes over the already-lightened areas. This will create a light ray dimension. You can do this as many times as you want to achieve your desired effect. If you want to keep it subtle, just stick with the first layer of light rays. If you want it to have more dimension, then add this step.
Keep in mind that you want to follow the natural lighting of the image, so pay attention to where the shadows and highlights occur naturally.
If your photo is looking a little flat after adding in your light, sometimes I will increase the contrast of my image at the end by using the Burn tool to create darker shadows. This also blends the light rays with the original photo. You can do this by selecting Burn and then Shadows, and painting over portions of your whole image. You will notice that this brings a lot more depth to your image.
Here is what the final image looks like after you add all of your light rays and then use the Burn tool:

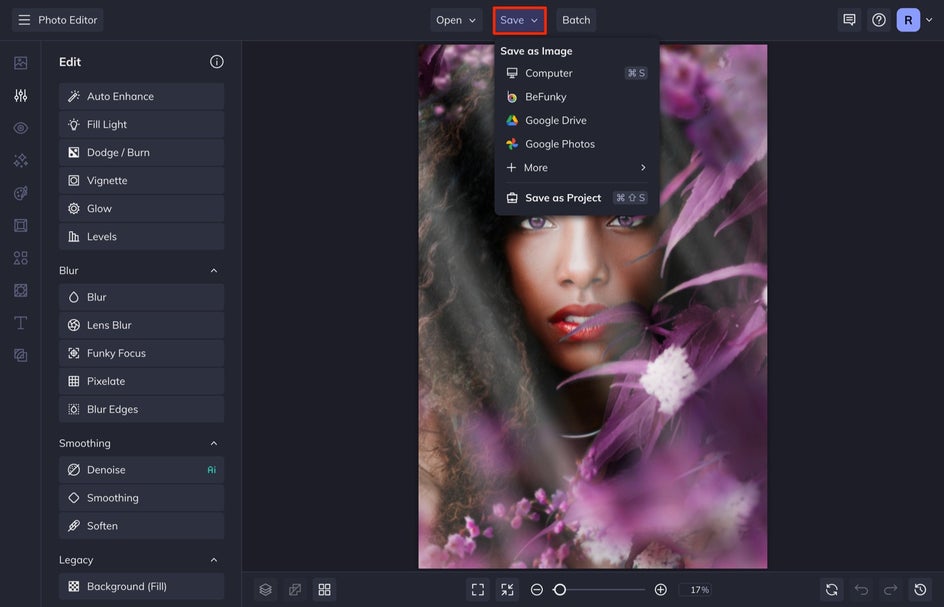
3. Save Your Image
When you are finished adding in your light rays, select Apply. After this, head up to the Save tab and choose your preferred file format.
Using Dodge to Add Light Rays to Indoor Photography
Dodge and Burn isn't just for portrait photography. Add light rays to an otherwise boring indoor scene, or dramatize the light pouring in from a window as we did below.
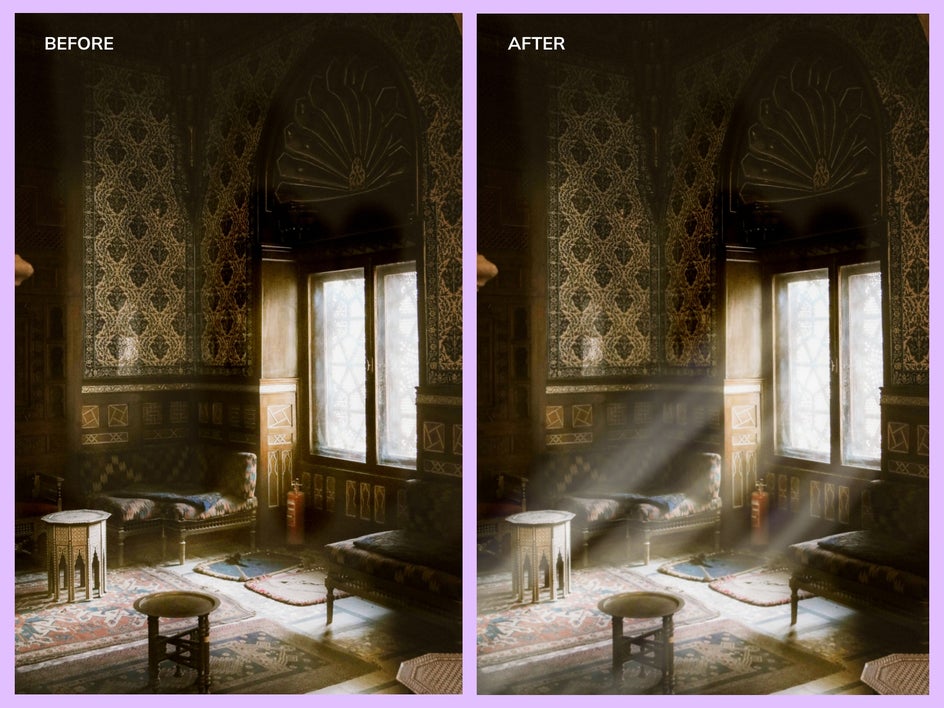
Create Light Rays Using Dodge and Burn
As you can see, the Dodge and Burn tools have many applications that have the power to transform your photos. From portraits to home photography, these tools can add light rays in a truly customizable way. Try out the Dodge and Burn tools in BeFunky on all of your different types of images.