How to Remove Blemishes From Photos

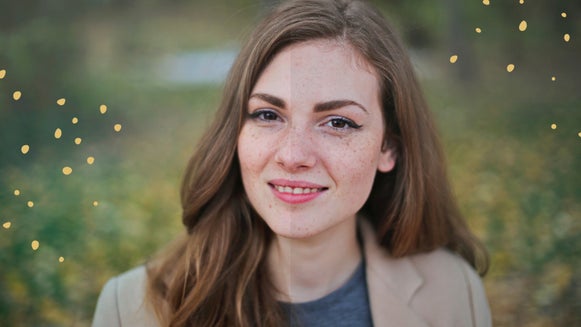
Blemishes are simply part of life, but they don't have to stay in your photos. Whether you're editing a selfie, a professional headshot, or a candid moment, BeFunky's Touch Up tools offer powerful features to help you remove blemishes while keeping your natural features intact.
Whether you're touching up a single photo or editing an entire batch, the right tools make all the difference. BeFunky's Touch Up tab is designed to help you enhance portraits quickly – without over-editing or making skin look unnatural. With just a few clicks, you can create polished and professional-looking results that still feel like you.
From acne spots and uneven skin texture to minor distractions, our suite of tools lets you retouch with precision and ease. In this guide, we'll walk you through the best ways to remove blemishes from photos using BeFunky.

Can You Remove Blemishes on a Phone?
Most built-in editing apps can handle basic adjustments – but when it comes to precise retouching, they fall short. BeFunky’s mobile app is built specifically for portrait editing. You’ll find our full suite of Touch Up tools that give you far more control, along with AI-powered options for one-click enhancements.
How to Remove Blemishes From Photos Online
BeFunky’s Photo Editor includes everything you need to clean up imperfections and polish your portraits. Here’s how each tool works – and when to use it.
Blemish Fix
This tool is designed for quick spot removal. When you open the Blemish Fix tool from the Touch Up tab, you’ll be able to adjust the brush size and hardness to suit the type of blemish you're editing. Once it’s dialed in, simply click on a blemish to remove it.

On high-resolution images, the tool works exceptionally well because it can detect the contrast between blemishes and surrounding skin. For lower-res photos, use the Upscale tool or zoom in and use a smaller brush size to get more accurate results.


Perfect Skin
For a smoother overall complexion, Perfect Skin is the way to go. Instead of targeting individual blemishes, this tool lets you brush over areas of uneven tone or texture – like redness, dry skin, or patches of inflammation.

After selecting the tool, adjust the brush size and hardness, then paint over the skin. A strength slider helps you control how intense the effect appears. The result is a balanced, even look that still feels realistic – not overly airbrushed.


This tool shines when you want subtle enhancement without calling attention to the edits. It’s also great for softening makeup-free skin or calming inflammation in portraits.
Clone Tool
When you need full control over the texture and tone of your edits, turn to the Clone tool. It allows you to copy pixels from one area of the image and paint them over another, which makes it especially useful for fixing more complex blemishes or scars.

Start by selecting a source area – a clean patch of skin near the blemish – then brush over the spot you want to fix. You can fine-tune the brush hardness and size to suit the detail level, blending the new pixels seamlessly into the photo.


This technique is ideal when working around shadows, textured areas, or large imperfections that might not respond well to one-click fixes.
Portrait Enhancer
For an all-in-one improvement, the Portrait Enhancer uses AI to automatically improve facial features, skin tone, and lighting. It’s a single-click tool, but the results are surprisingly natural.

Just adjust the strength slider to find the perfect level of enhancement. It’s a great way to wrap up an edit, especially if you’re working with a batch of portraits and want them to feel consistent in tone and polish.


Try the Online Blemish Remover for Flawless Results
Removing blemishes from photos doesn't have to be complicated or time-consuming. With our suite of Touch Up tools, you can achieve professional-quality retouching directly from your computer or mobile device. Whether you're looking to remove spots from a photo online for free or seeking the best blemish remover app, we’ve got you covered.
Ready to remove blemishes from photos online? Try our revolutionary Touch Up tools today!


