How to Plan and Design Successful Business Updates on Facebook
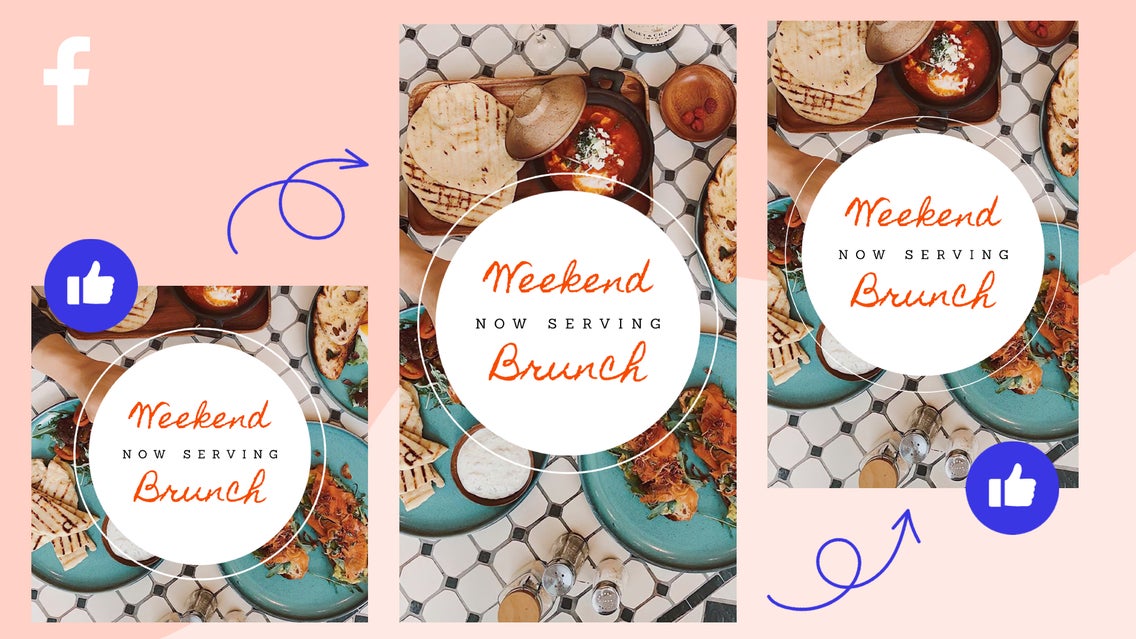
Posting business updates on your Facebook page is crucial to keeping your audience updated with your business happenings. Without these important business update posts, your audience won’t know what is going on and won’t be able to choose what they would like to engage with or not. These kinds of business updates include updated hours at your shop, new menus, or announcing a new feature you are providing to them like an online shop.
The benefit of using social media to update your audience on any business updates is that by using these platforms, you can not only get the information out to people without a lot of effort on your end, but you can also get to know their interests more clearly by seeing what kinds of updates they like and interact with.
We are going to go over the best practices for providing business updates on your social media platforms and then also show you how to make your own business update using BeFunky’s Graphic Designer.
Best Practices for Updating Your Social Media Business Page
If you are still learning or just need to brush up on your business update etiquette, check out these best practices for updating your audience about your business happenings.
1. Choose the Best Social Platform for Your Demographic
Facebook may not be the platform of choice for your business. You must figure out your demographic and which platform they are using before creating business updates and releasing them on your platform. If you are creating content for a demographic that is not on the platform you have chosen, then it won’t garner the attention you need in order for it to be successful.

2. Schedule Your Posts for the Best Performance
Learn where your demographic lives in the world and try to post your business updates during peak times when that demographic is online. There are many online tools or articles, like this one, that show when certain demographics are using each platform.
Just know that once you get to know your audience, they may or may not follow this reported schedule. It is important to start somewhere and then make adjustments as you go. One business I worked with found out that their demographic interacted with their brand the most on Thursday nights and Sunday evenings, which was contrary to what these sites said at the time. You will start to collect your own data and figure out the times that get the most interaction from your audience. These are usually the times to post and share your business updates.
3. Figure Out How Often You Should Share Business Updates
You want to make sure that as a business, you do not want to post all of the time, as this can look desperate and annoying to your audience. There is a sweet spot for how often you should and can post, but again, this will vary depending on your audience. Get to know what they like and how they like to interact with you. With some creative marketing techniques, you could post more business updates, without worrying about being annoying or flooding their feeds with your business content.
4. Use Cross-Promotion Techniques to Make Assets Go Further
Once you create your business update posts, you can re-format them to use different posting methods. For Facebook, you can post on the feed and also reformat the post in order to share it on a story.
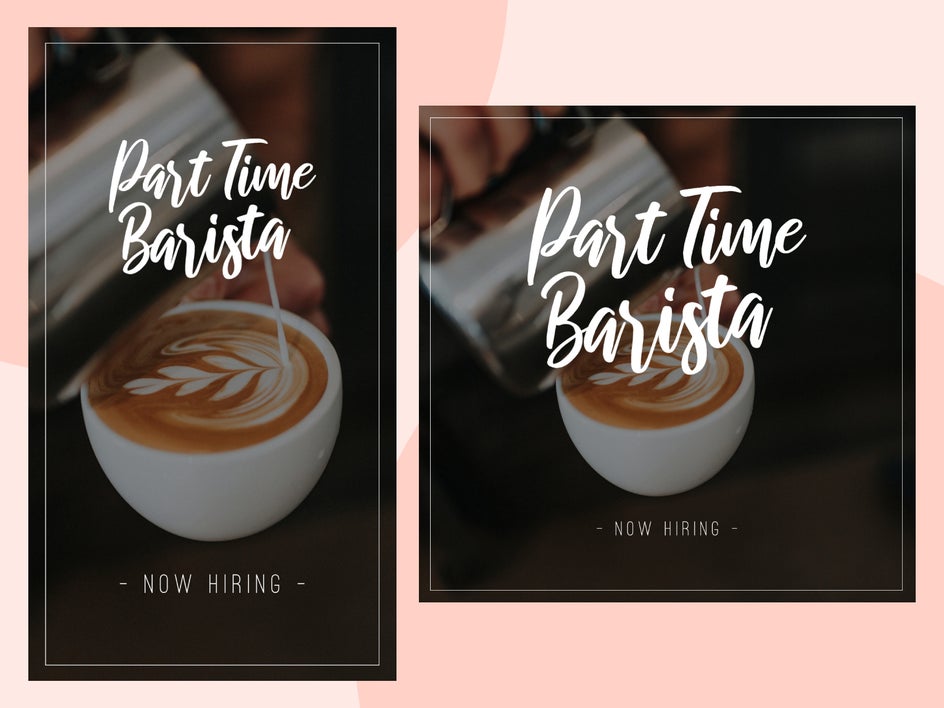
You can also utilize business update posts across different platforms like Instagram and email newsletters. If you are still unsure, this may also help you find the best platform for your demographic. Once you have your business update graphic made, it is pretty simple to post it to different platforms. All you need to do at that point is monitor which ones perform the best over a specific timeline.
How to Quickly Create a Business Update Post
The most important thing when creating a business update post is to make sure that it stands out from the rest of the graphics being posted online. Thankfully, Befunky’s Graphic Designer has pre-made templates designed by professionals that will make the design process a breeze. It is also essential to take a peek at your competitor’s posts and make sure to share graphics that are better than theirs. A little competition goes a long way. Select the Designer when you are ready to get started.
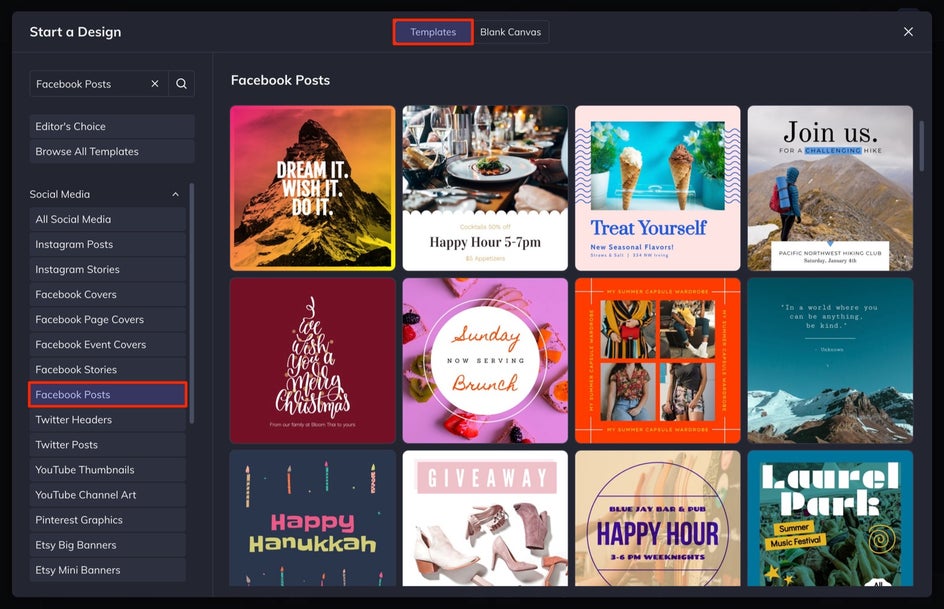
Step 1: Choose a Template
Select Open and then Template to find the right template for you. You can choose the options in the Social Media dropdown menu or find any other template you like and transform it into the kind of business update you want.
Step 2: Add Your Details
You will need to adjust the information in each text box to communicate your business update. To do this, double-click into a text box and type in the updated information. If you need to add more text, select Add Text, or with a text box selected, press “D” to Duplicate.
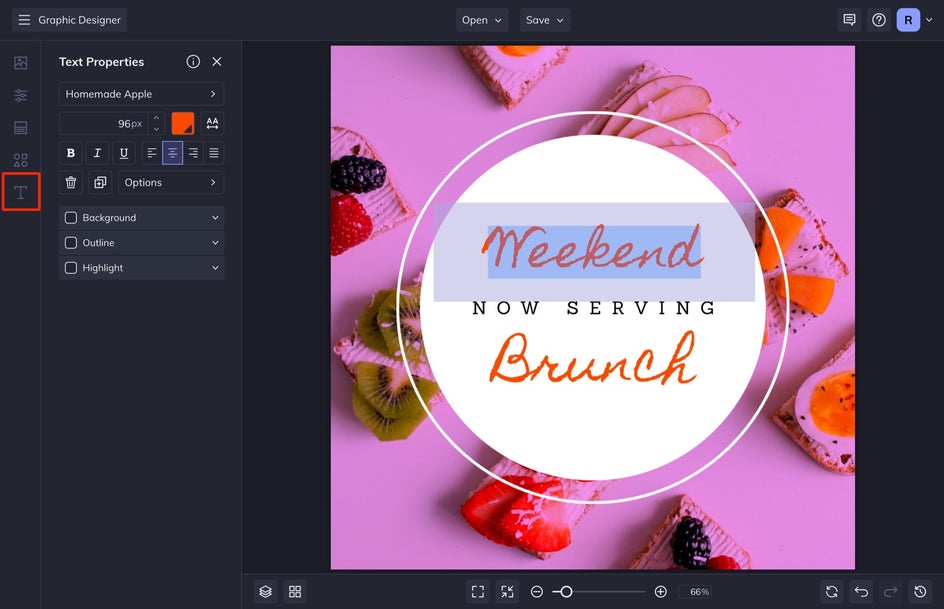
To change the color of your text, a Text Properties menu will appear when you click a text box. You can then customize the Color, Font, Size, Drop Shadow, and more. I like the color and font used here so I am going to keep them the same.
Step 3: Update the Images
If your template has photos, it is important to update the imagery with your own photo or one that communicates the message of your update. You can update it with your own photo by selecting the Image Manager from the left-hand menu and then selecting Computer. You can also update your image with one of the thousands of stock images by selecting Search Stock Images.
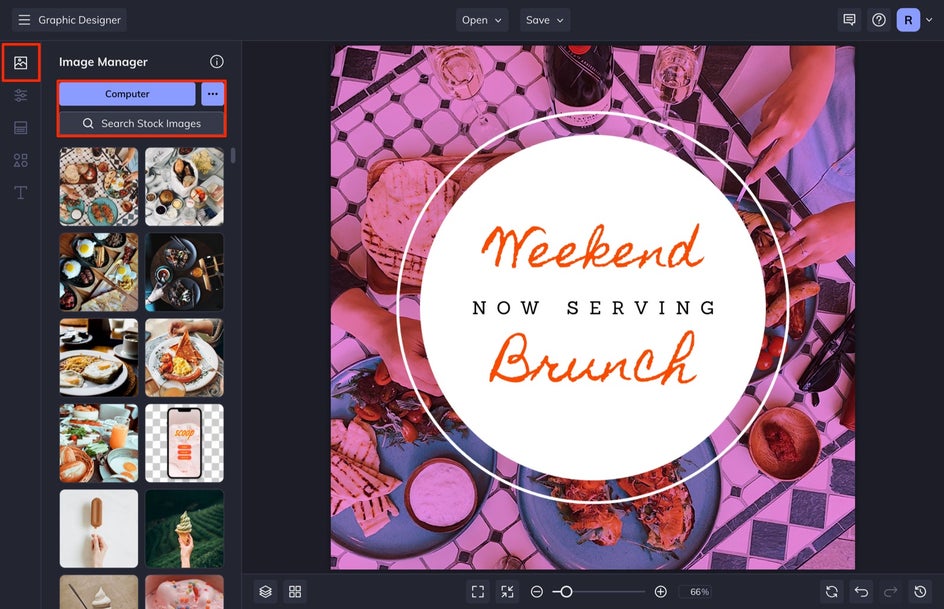
To change the image, click and drag the new image from your image manager over the photo on your canvas and then release. The image will automatically populate into the designated area. You will notice that whatever properties the original image had will be maintained on this new image as well. We can change those next.
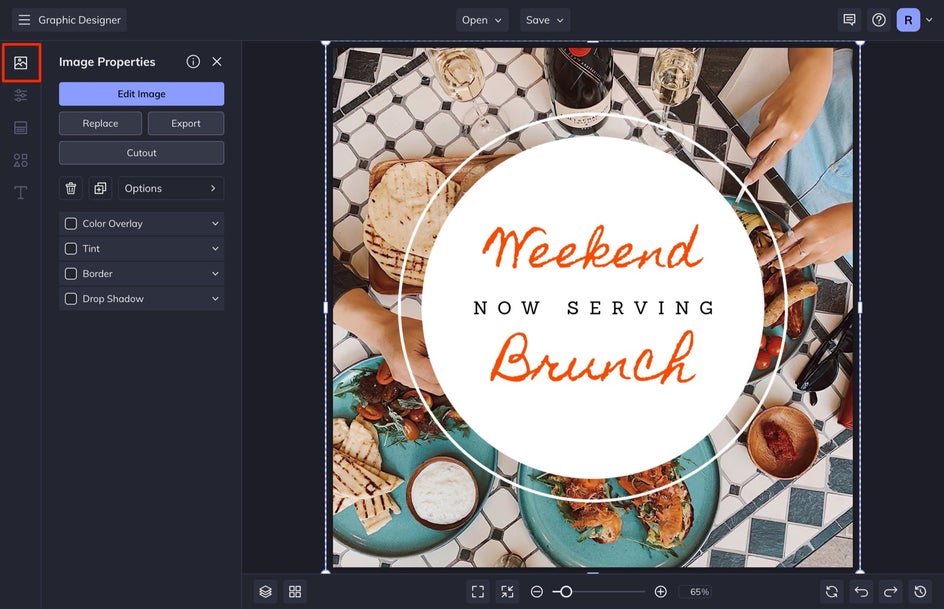
To customize the image, simply select the image and an Image Properties menu will appear. From here, you can adjust the Tint and color Overlay, add a Border, or select Edit Image to use our Photo Editor to add filters and fully edit your image.
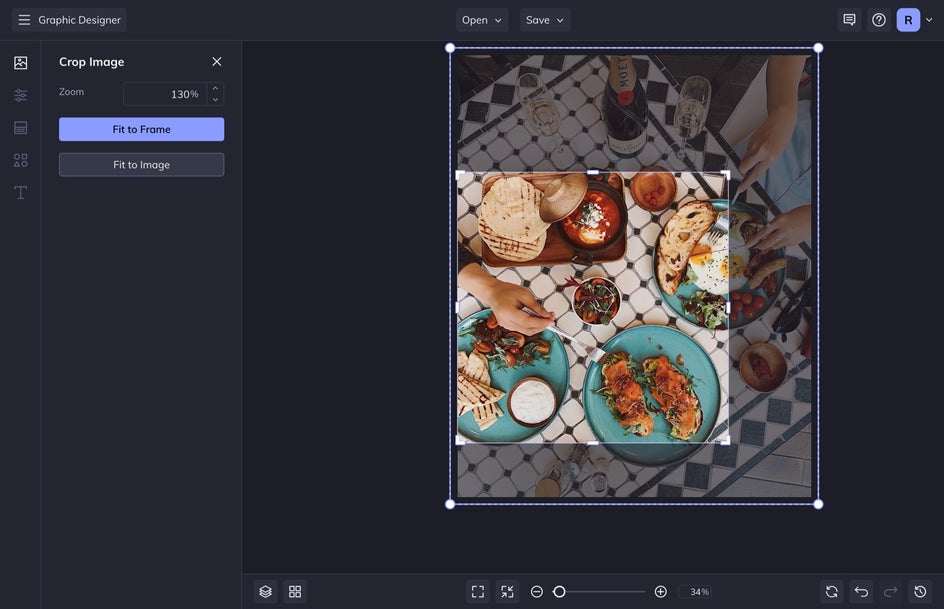
We are going to remove the color Overlay of this image and then adjust the size and Crop of our image. To adjust this, double-click the image and then drag the corners outward. You may need to zoom out to do this part.
Step 4: Save Your Business Update Post
When you are finished designing, select Save at the top of your screen and then select Computer. Save the image as a JPG at high quality. I also like to save these as a project to come back and edit later if I need to. To do this, select Save as Project.
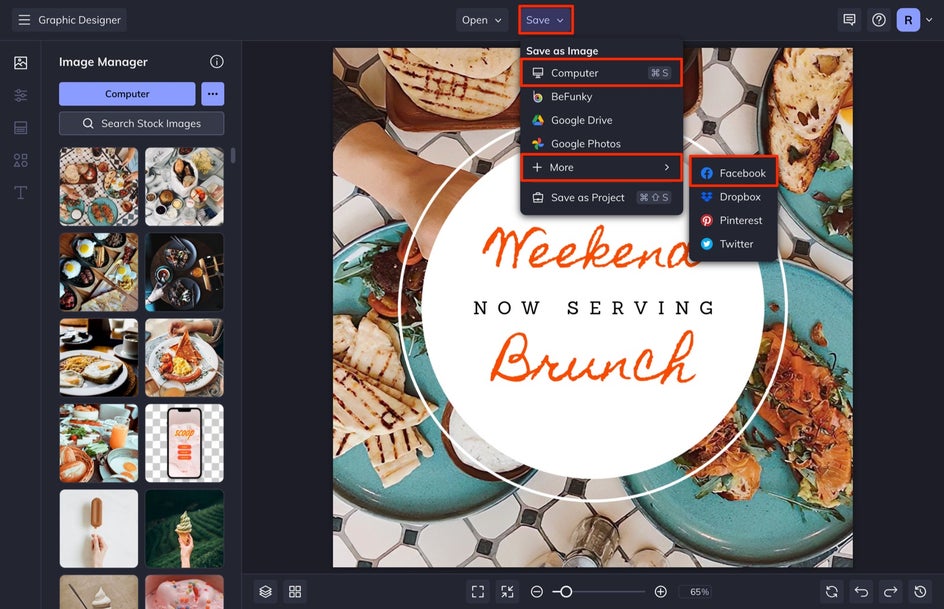
You can also select More and then Facebook to share the image directly to your Facebook profile. I like to save my image to the computer so that I can choose the best time to post for my audience.
Step 5: Adjust the Template Size for Other Platforms
After I save the design to my computer and also as a project, I then head into the Customize tab and select Resize Template. This is so that I can save this same design in different formats to use across platforms.
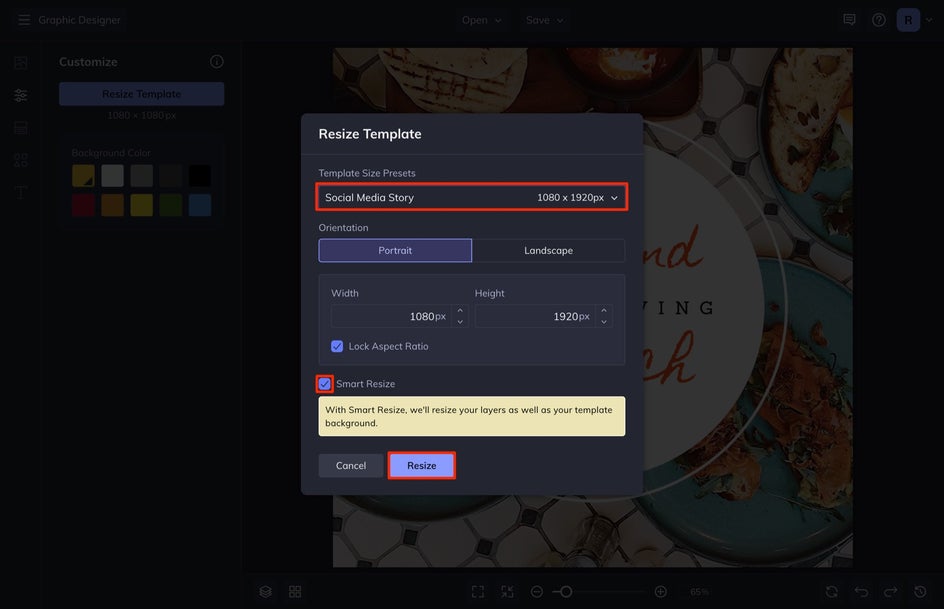
Select the size from the drop-down menu or input the dimensions you want in the Width and Height sections. Make sure the Smart Resize is on since this will help the elements to resize with the correct dimension.
Sometimes when you resize, you will need to adjust the elements to fit your new dimensions. This is okay and is a quick fix. Simply click and drag your cursor from an outside corner of your design to the opposing side, diagonally. This will select every piece in your design at once. You can also do Command+A to select all. Click a corner to drag the edges of your design outward - this will resize the elements.
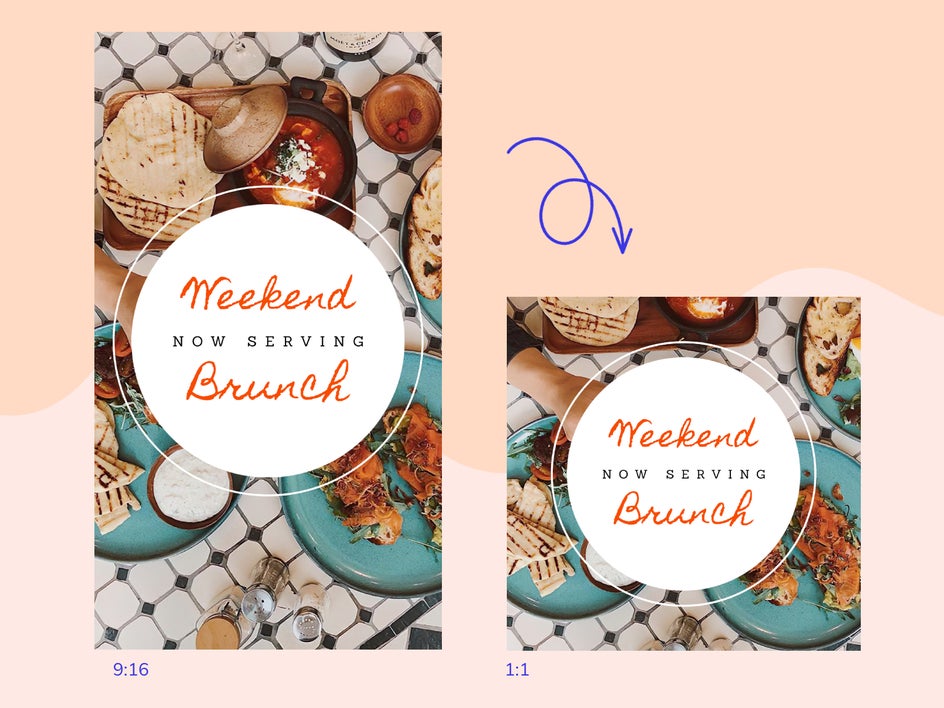
After this, I save the file again using Step 4 above. Check out the final results of both these formats. This is such a quick process that you will wonder why you haven’t been using BeFunky to make your business update posts before this.
Use Business Update Posts to Inform Your Customers
Creating a business update post is one of the quickest ways to inform your audience of any changes or new features that your business is offering. With ready-made templates and easy-to-use resizing tools, you can update your audience across all platforms. Use BeFunky’s Graphic Designer for all of your business update needs.


