Create Picture-Perfect Collages With BeFunky’s Collage Wizard

Imagine if you could create perfectly arranged and high-resolution collages in as little as a click. Well, thanks to BeFunky’s Collage Wizard, creating beautiful photo collages is both easy and incredibly fun. As the name suggests, the Collage Wizard works its magic by arranging your images to create original photo collages. All you have to do is upload your images and then watch as it generates a huge range of perfectly portioned collage layouts with your images. There’s no longer any need to crop, resize, or rotate your photos for them to fit!
If you want to create picture-perfect collages every time, then you’re in luck. Keep reading to find out just how easy it is to use the Collage Wizard in 6 simple steps.
How to Use the Collage Wizard
The Collage Wizard is located within our free online collage maker, so head there to get started.
Step 1: Upload Your Collage Images
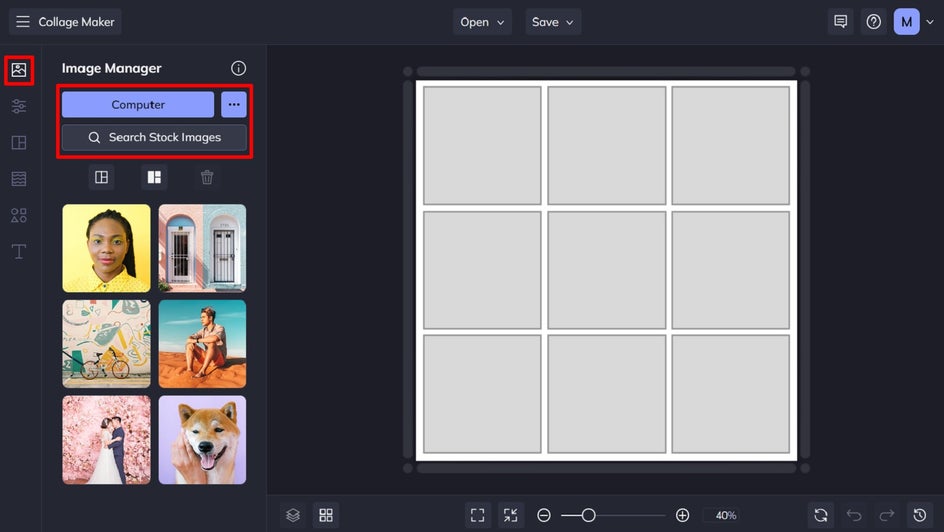
When you launch the Collage Maker, you’ll be taken directly to the Image Manager (the first option in the menu on the left). From here, you can upload the images you wish to use in your collage.
Click Computer to upload images directly from your files. Alternatively, you can click the three dots (…) to upload images from your BeFunky account, Google Photos, or Google Drive. Want to use stock images instead? Simply click Search Stock Images to access BeFunky’s huge library of free stock imagery.
Step 2: Launch the Collage Wizard
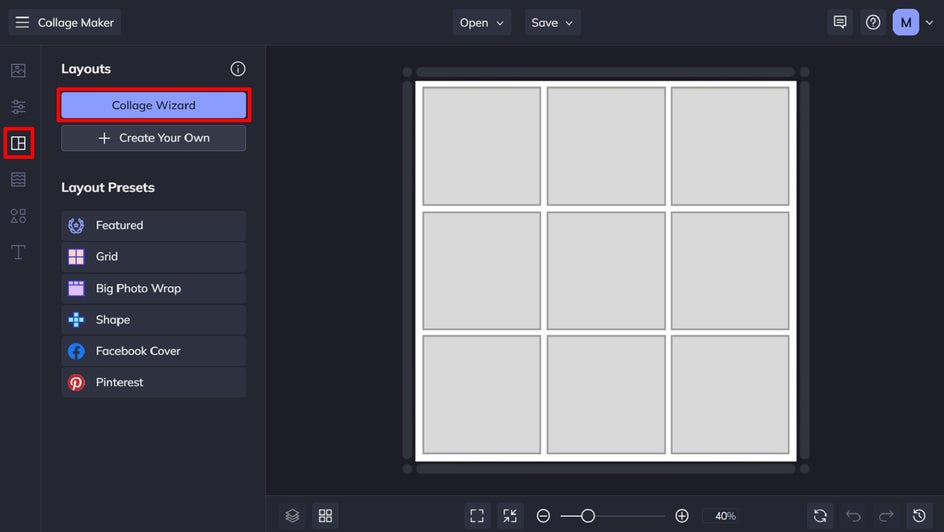
To locate the Collage Wizard feature, navigate to Layouts from the main menu on the left. Then, click the Collage Wizard button located at the top.
Step 3: Select the Images You Wish to Use
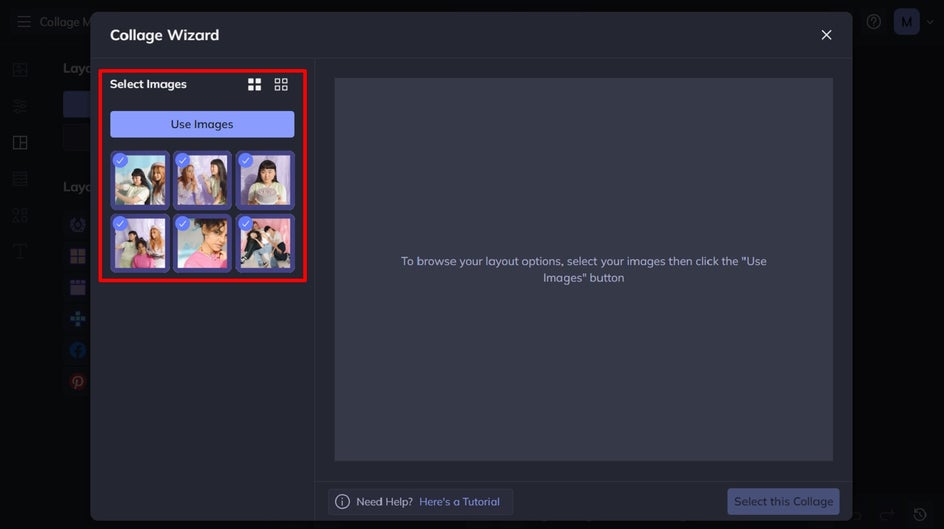
When you click on an image within the Collage Wizard, a blue checkmark will appear on it. Repeat this process for every image you want to use within your collage. You can also use the Select All or Deselect All buttons.
Once you’re ready for the Collage Wizard to generate your picture-perfect collage layouts, click Use Images.
Step 4: Choose Your Collage Layout
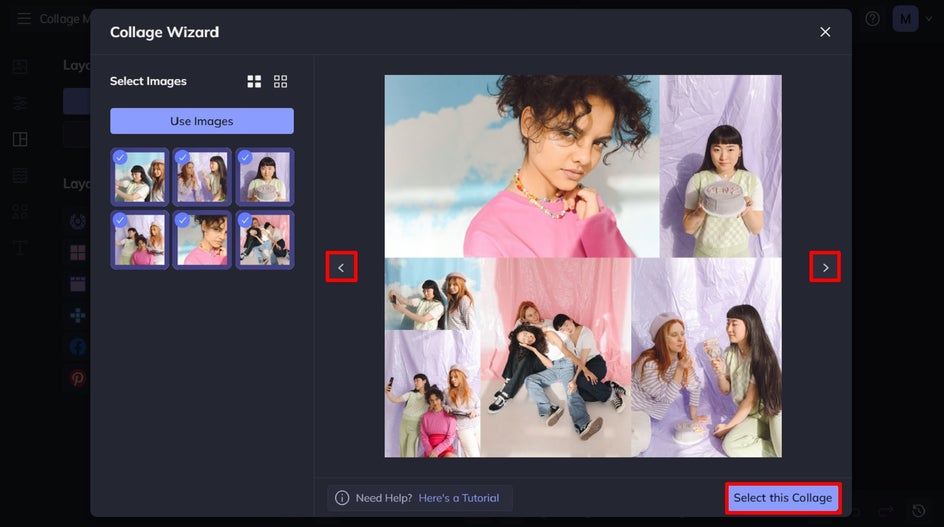
The Collage Wizard will then preview one collage layout at a time. The algorithm also creates vertically and horizontally oriented layouts to provide you with more options. When you add more images, your layout options increase exponentially!
If you’re happy with the presented collage layout, click Select This Collage in the bottom-right corner of the screen. You can also preview more collage layouts by clicking the right arrow or view a previous collage layout by clicking the left arrow.
Step 5: Adjust Your Collage’s Size
When your chosen collage layout loads, you can also customize its size to make it larger or smaller. Simply click on the borders of your collage or collage cells and drag to adjust the size.
Additionally, the Customize menu on the left offers more options to modify your collage, including changing the background color, spacing, corner rounding, and more.
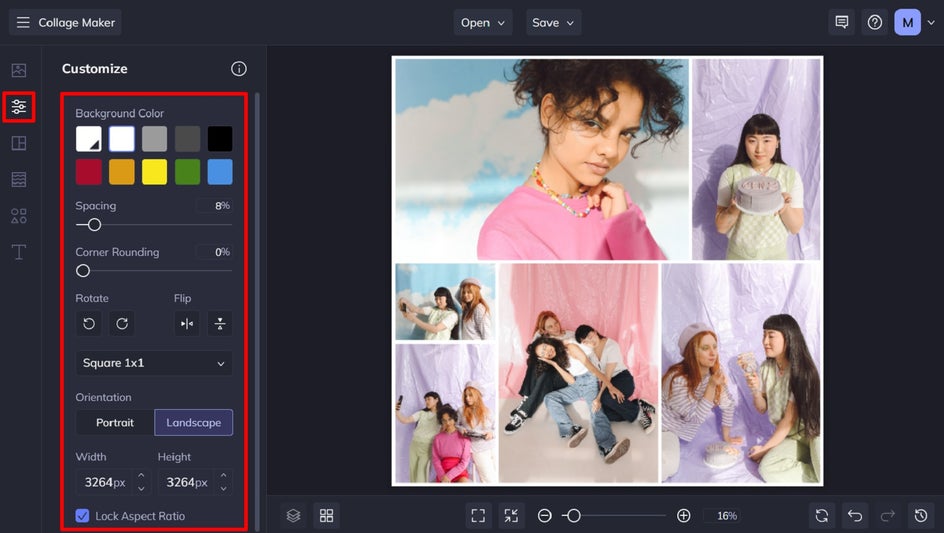
Pro Tip: If you’ve decided you want to remove or change an image from your collage, simply click on it and you have the option to edit it, remove it, or delete the collage cell altogether.
There are also plenty of other ways you can customize your generated collage if you want to. Just some of these include adding text or graphics, or even turning your collage into a greeting card.
Step 6: Save Your Collage
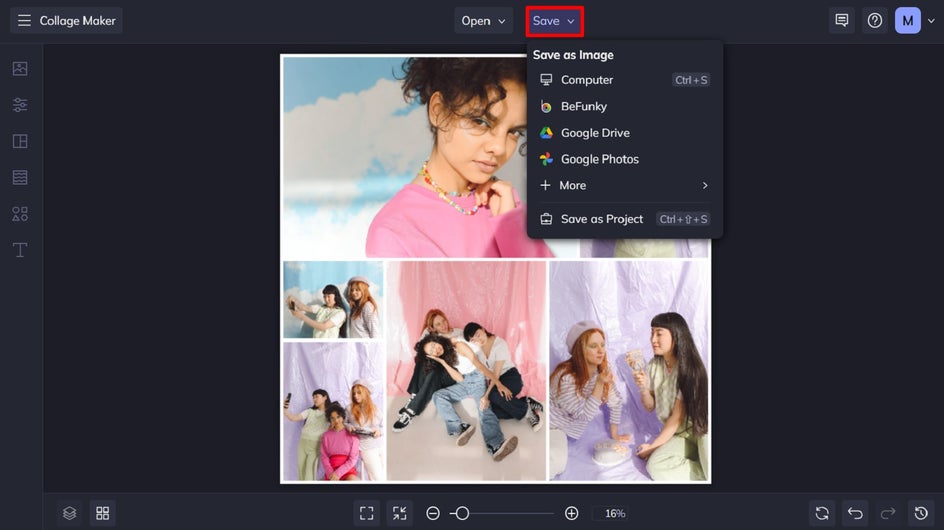
Ready to save your picture-perfect collage? Click Save at the top of the screen, then select your save location. Choose a jpeg file for online use, or PDF for printing.
Same Images, Endless Collage Layouts
There you have it! As you can see, we’ve created three completely different, yet beautiful, collage layouts using the same set of images. The options are endless, however!

Experience the Magic of the Collage Wizard
Thanks to BeFunky's Collage Wizard, you can create photo collages with the click of a button. Forget spending hours cropping or resizing your photos for the perfect arrangement. The Collage Wizard does all of the hard work for you!
Go on, try the Collage Wizard for yourself to see just how easy it is.


