Create YouTube Thumbnails With the Background Remover

YouTube is a growing platform with over 2.5 billion monthly active users. If you want to create a channel of your own, there are a lot of things to consider, including what you want your thumbnails to look like. YouTube thumbnails seem easy enough to create. Many people choose to brand their thumbnails, but statistics show that the designs that get clicked the most are thumbnails with faces or emotional reactions in them.
With so many expensive editing programs on the market, having a tool that could remove a background in a single click sounds like it would be easy to find. Unfortunately, that’s not the case. Instead, you have to learn complicated programs to achieve the same results that you can get with BeFunky’s Background Remover, With this tool, remove and replace the background of any image in a few clicks. This is by far the best online tool for creating YouTube thumbnails.
How to Create a YouTube Thumbnail With the Background Remover
The Background Remover uses artificial intelligence to automatically detect the main subject in your image and remove your background in just a few seconds. Get started by uploading your photo directly to the Background Remover.
Step 1: Apply the Background Remover
Once you upload your photo, the tool’s AI will automatically get to work to detect the main subject in your photo and erase the background behind them in just a few seconds. Any removed area of your image will look like a checkerboard, which means it’s now transparent. If you need to make any additional changes to your cutout, click on the Adjust Selection tab.
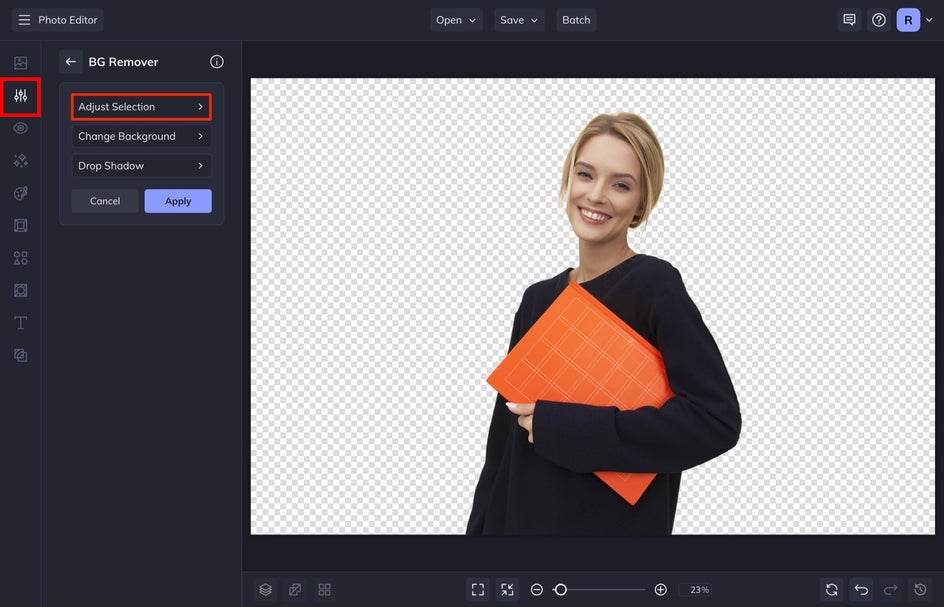
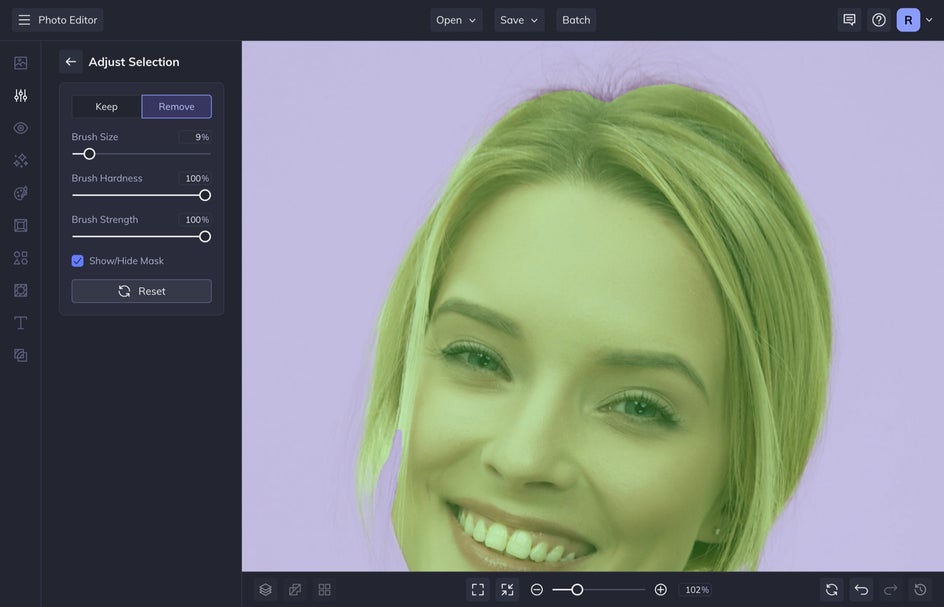
From here, use the brush tool to clean up your selection. Check out our background remover article for a more in-depth look of the Adjust Selection tab.
Step 2: Add a New Background
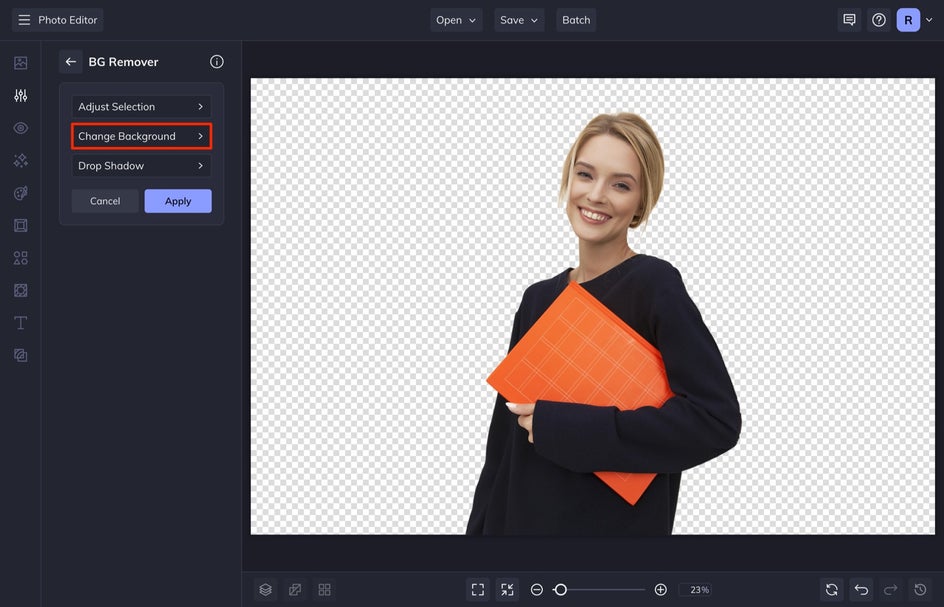
Select the back arrow and then Change Background to select a new background image for your thumbnail. It is easy to replace the background with a single color or with another image by selecting Image – which is what we are going to do for our thumbnail.
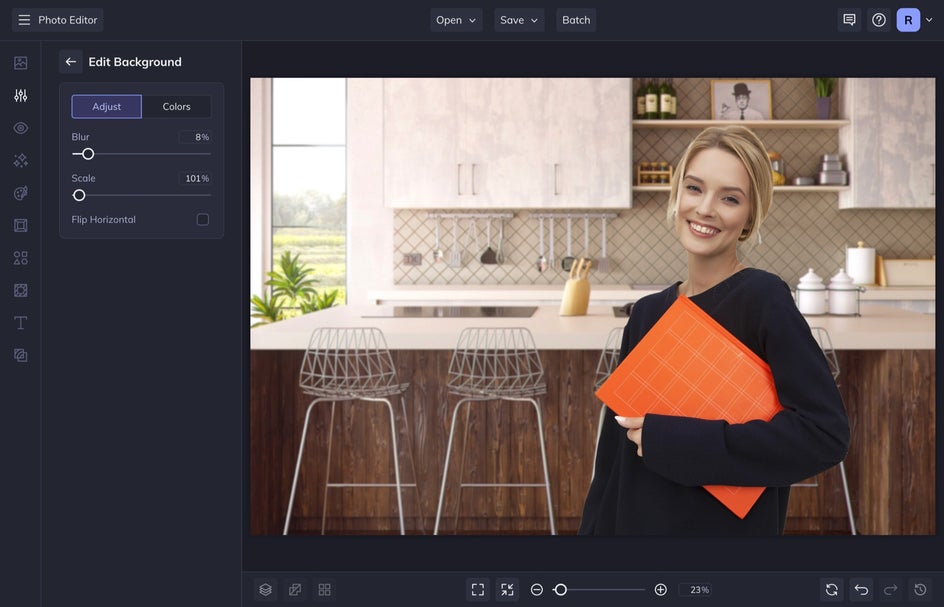
Select one of your own images by selecting Computer or select an image from the thousands of Stock Images we have within our Photo Editor. Because we are creating a thumbnail for home organization, we are going to choose a stock photo of someone’s kitchen.
If you want to reserve a place to add text to your thumbnail, you can move your subject around the canvas by clicking and dragging the subject to a different area of your thumbnail.

Once your photo is selected, head into the image settings to adjust the blur and scale of the image or even change the coloration of the image by selecting the Color tab. We added a slight blur and changed some of the color profiles so that the subject stood out more from the background.
Step 3: Add Thumbnail Text
To add text to your image, select the Text tab from the left-hand menu and then Add Text.

Double-click into the text box to add your text and then use the Text Properties menu to adjust the font, size, color, and more.

Step 4: Adjust the Sizing
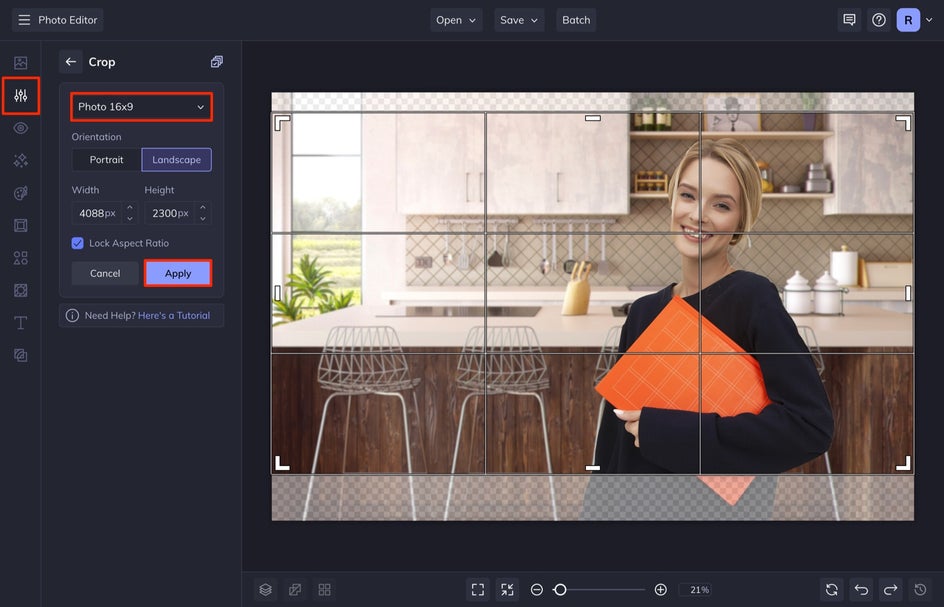
The correct thumbnail size for YouTube is 1280 x 720 pixels – a 16:9 aspect ratio. If you didn't use a template, be sure to make these changes before saving. From the Edit tab, select Crop followed by Photo 16x9 aspect ratio. This will ensure you have the correct size for your graphic. You may need to resize your thumbnail to ensure that the long edge is only 1280 px. This can easily be done with the Resize tool or the Batch Photo Editor tool if you have multiple thumbnails to resize at once.
Step 7: Save Your YouTube Thumbnail
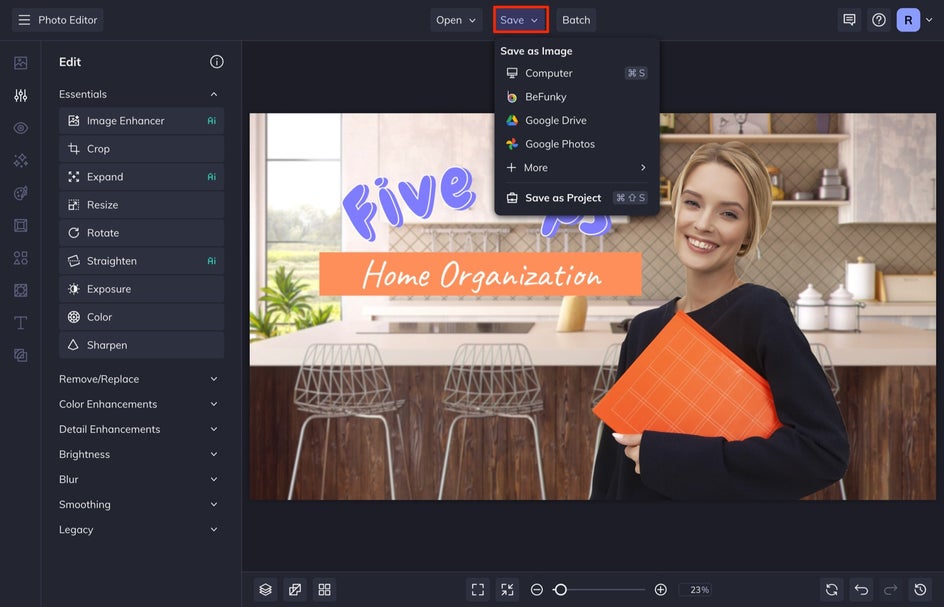
Now that you’ve successfully removed the background of your photo, replaced it with a new background, and added in text – it’s time to save! When you’re ready, click the Save button at the top of the screen.
Take a look at the drastic before and after of this image. Seriously, this tool is really amazing. There is nothing like it on the market that I have used that is easier than this for creating YouTube thumbnails.

More Ways to Make Your YouTube Channel Stand Out With the Background Remover
Quickly use the Background Remover tool to enhance your YouTube thumbnails. These techniques are some of the quickest ways to make the subject pop in your YouTube thumbnails – which attracts more clicks.
1. Add an Outline to Your Subject
One of the easiest effects is to add a colored or white outline to your subject as shown in the image below. After applying a new background, adding a colorful or white outline to your subject can ensure that they really stand out.

You can easily do this with the Cutout tool by isolating the subject and adding a drop shadow. For more direction, check out our in-depth tutorial.
2. Use a Creative Background Image
Quickly transport your subject to another world using the Background Remover. This is a great way to market the theme of your content. Let’s say you’re talking about alien abduction stories – just pick a sci-fi background and some neon green text.

3. Keep It Simple With a Solid Color
If you don’t want to use a photo in the background, swap it out for a solid color! With this strategy, you can draw more attention to your subject and any graphics or text without appearing too busy. And when you add text, try applying a drop shadow to make it pop even more.

Quickly Make Viral YouTube Thumbnails with Background Remover
The Background Remover is one of the fastest ways to create clickable YouTube thumbnails. Remember to check out our predesigned thumbnail templates. Customize them however you want and play around with BeFunky’s Layer Effects to enhance your thumbnails even more.


