BeFunky’s Digital Cross Processing Effect

If you’ve ever been drawn to film photography drenched in cool and warm tones or featuring quirky colors, then you may already be familiar with the Cross Process effect.
Cross processing (or Xpro, as it’s often abbreviated) occurs when film is deliberately processed in the wrong chemicals to create intriguing and unpredictable color changes. While this technique was popular during the darkroom days, you can still achieve this look with your digital photography using BeFunky’s exciting range of Cross Process Photo Effects!
From boosted contrast and otherworldly saturation to Holga-inspired vignettes; keep reading to learn how you can achieve a digital cross-processing effect in just a few clicks!
How to Cross Process a Photo Using BeFunky
Ready to add the cross-processed look to your own digital photography? Head to BeFunky’s Photo Editor and this link will take you directly to the Effects tab to start your project!
Step 1: Open Your Photo
Click Open, then select the destination you wish to open your photo from, including your computer, BeFunky account, Google Drive, Google Photos, and more.
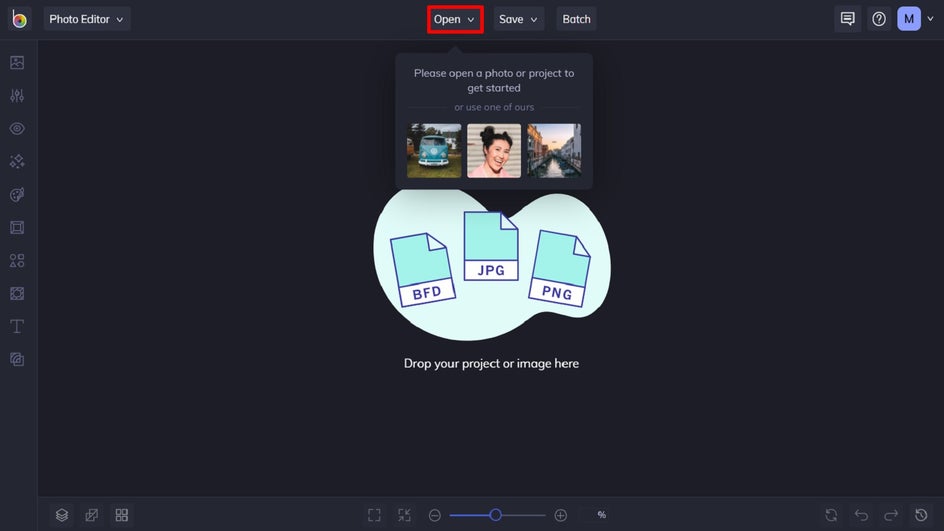
Step 2: Click on the Cross Process Category
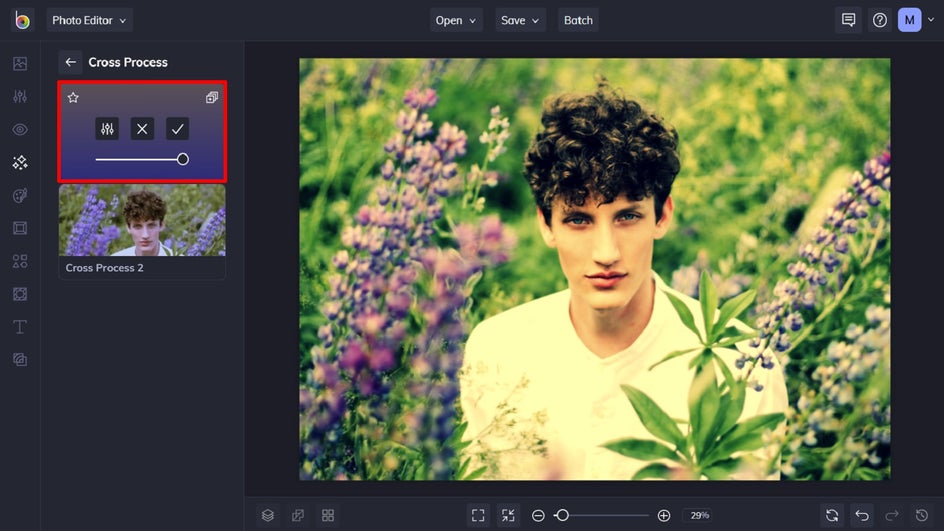
Within the Effects tab, simply click on Cross Process to view these photo effects.

Step 3: Select a Cross Process Effect
Click through each Cross Process effect to preview them on your image. You’ll also notice when you click on an effect, three options are available: Settings, which allows you to alter the effect further; Cancel, which cancels the selected effect; and Apply, which applies the effect as-is. You can also adjust the strength of the effect using the slider.
Once you’ve chosen the effect you wish to use, click Settings to see what further customization options are available.
Step 4: Edit Your Cross Process Effect
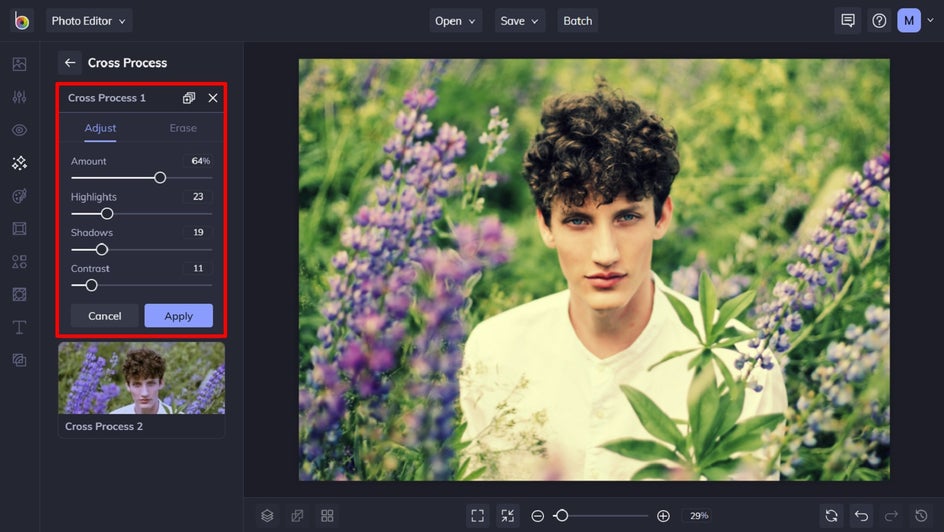
Within Settings, you can further customize elements of the Cross Process effect, including Amount, Highlights, Shadows, and Contrast.
Increasing the Highlights makes the bright areas of your photo even brighter, while increasing Shadows enhances details from the darker areas of your images. Contrast, on the other hand, increases both the light and dark areas of your photo to make the overall image really pop.
Use the sliders located underneath each to increase or decrease the desired effect. Once you’re happy with your changes, click Apply.
Step 5: Save Your Photo
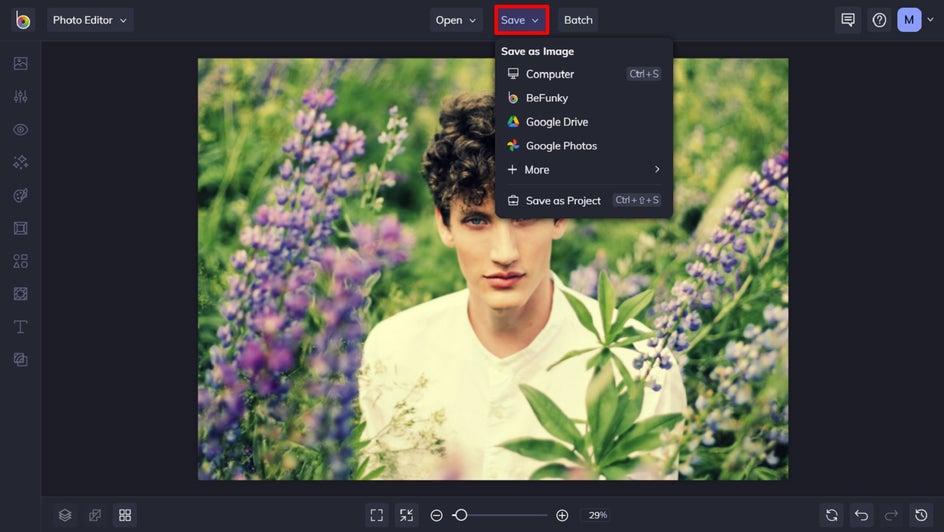
All that’s left to do is to click Save at the top of the screen, then select your desired save location.
Final Result
Through just a few simple tweaks, we’ve managed to entirely change the look and feel of this photo. From a subdued pastel color palette to one bursting with warm tones and rich contrast, it’s amazing what the Cross Process effects can do to your digital photography!


Switch Up Your Photography With Cross Processing
You don’t need an analog camera, a roll of film, or chemicals within a darkroom to achieve the cross-process look. Thanks to BeFunky’s incredibly realistic Cross Process photo effects, switching up the colors, vibrance, and contrast on your images has never been easier. Go on, try the Cross Process effects for yourself to see just how amazing they are!


