How to Make a Digital Pet Portrait
Our pets become our family members, so why not honor them with their very own portrait hanging up in your home? Digital pet art has become extremely popular of late, as it offers a fun and artistic interpretation of your four-legged friend. Plus, pet portraits are the best gift idea for anyone who owns a pet. Custom pet art can come with a hefty price tag, however. Not to mention the time spent waiting on the design and delivery of your new piece. But what if we told you that there’s now a faster, more affordable way?
Luckily, creating your own arty pet portraits is both quick and easy thanks to BeFunky’s photo to art effects. Simply follow our tutorial below to learn how to make a pet portrait in just minutes!
How to Make Digital Pet Portraits With BeFunky
Ready to create your own digital pet portrait? Head to the Graphic Designer to get started!
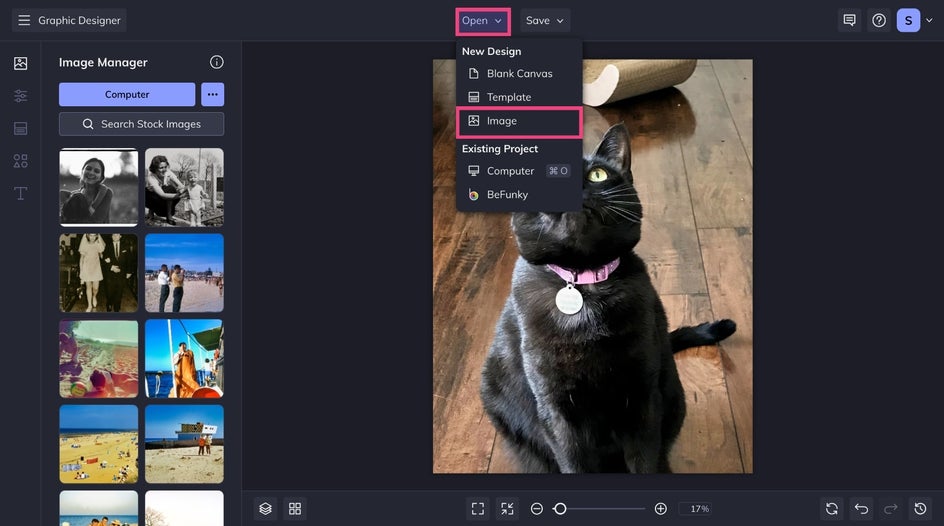
Step 1: Upload Your Pet Portrait
Upload your pet portrait by clicking on the Open button at the top of your canvas, followed by Image. This instantly creates a perfectly-sized template for your photo.
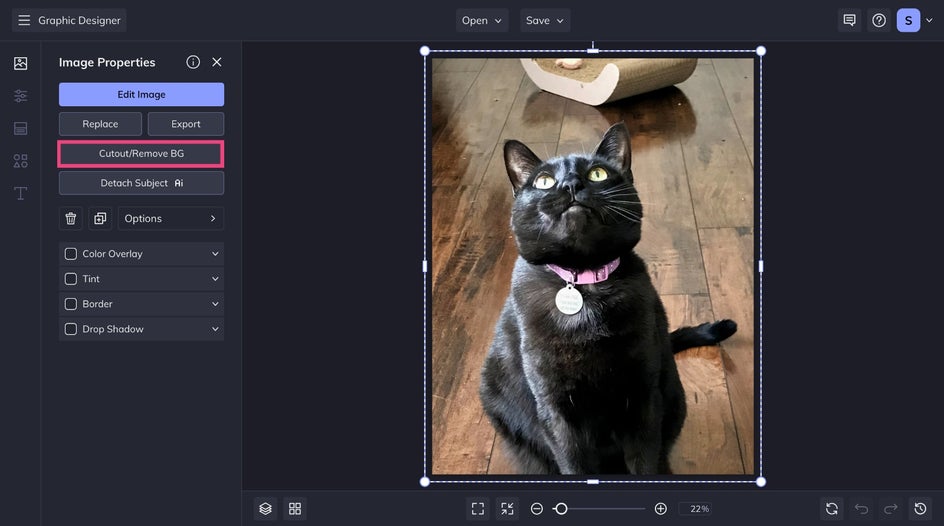
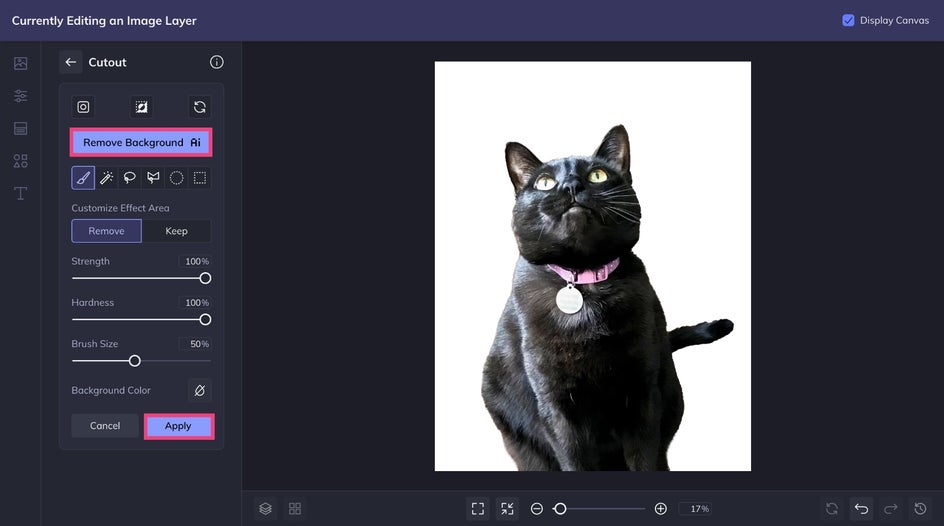
Step 2: Remove the Background
Click on your photo to open the Image Properties menu. From here, click on the Cutout/Remove BG button to remove the current background.
Next, click Remove Background to isolate your pet and remove the rest. The Background Remover gets to work in seconds – making for a perfectly customizable background and image layer in just seconds. Click Apply or use the corresponding brushes to remove or keep specific areas of the results.
Step 3: Choose a New Background
For our pet portrait, we're going to want a plain background with a pop of color. To do this, head to the Customize tab and select a color from the Color Picker. When you've settled on a complimentary shade, it's time to apply a digital art effect.

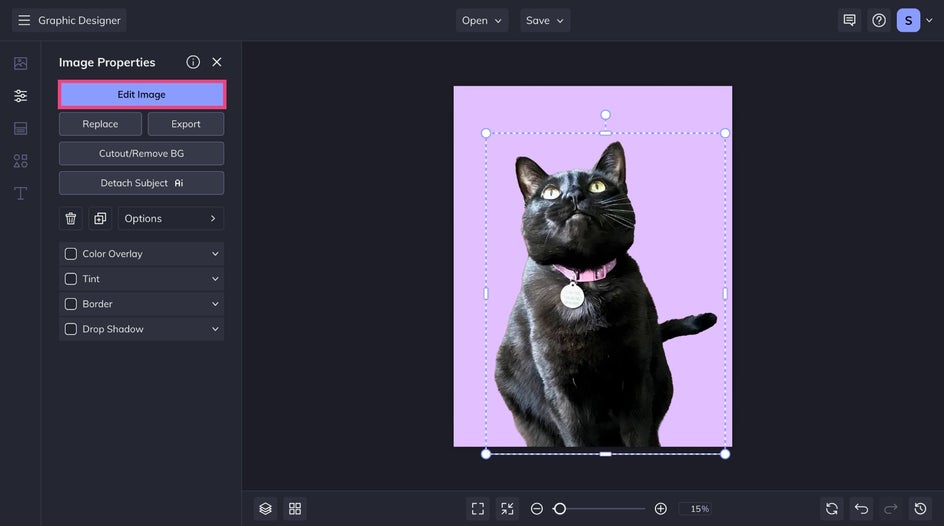
Step 4: Turn Your Pet Into Digital Art
The next step of editing your pet photo is to transform your furry friend into your favorite art style. Click on the image layer, followed by Edit Image, to open the Photo Editor. Head to the Artsy tab to browse our extensive photo to art categories.
We're going to choose Vector Painting GFX from the GFX Series category that houses all of our latest and greatest photo to art AI effects. Click on the Artsy effect to sample it on your pet’s image. Since we're working with your pet as an image layer, the effect will only be applied to them, leaving the background neat and tidy.
You can click the checkmark to apply the effect as-is. Otherwise, click the Settings icon to open the advanced settings menu. From the Adjust tab, you can adjust the fidelity, amount, and more. From the Select tab, you can adjust where the effect is applied. We chose to apply it to our pet specifically.
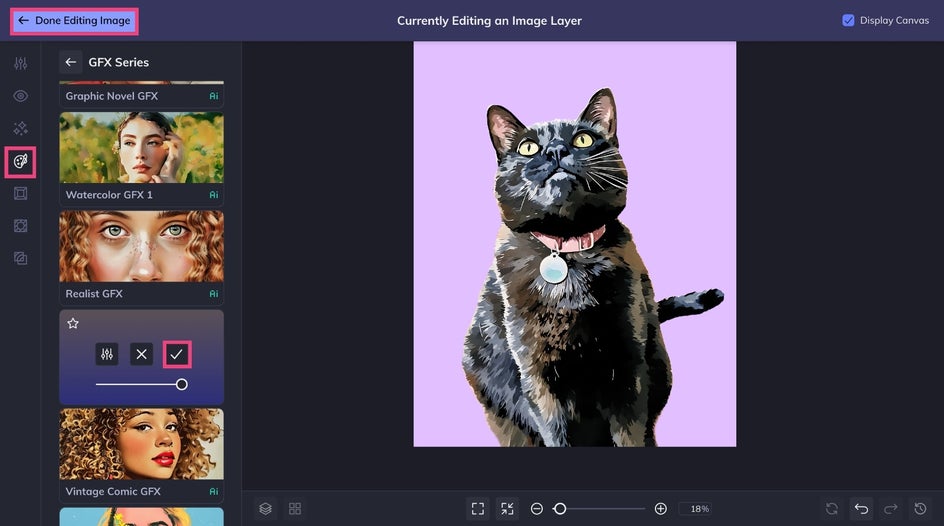
When you’ve finished editing your pet’s portrait within the Photo Editor, just click Done Editing Image in the top-left corner of the screen to return back to your canvas in the Graphic Designer.
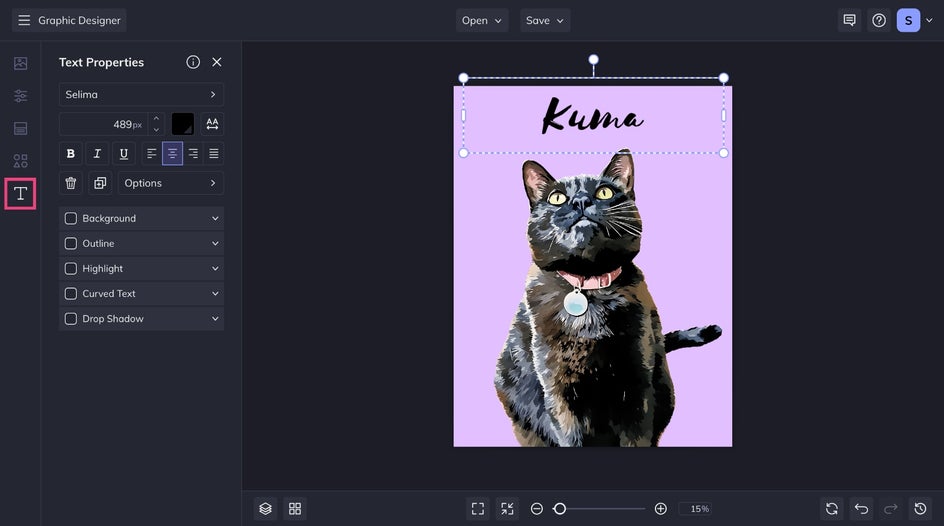
Step 5: Add Your Pet's Name
To add your pet's name to your digital pet artwork (like their name), click on the Text tab in the main menu on the left, then select one of our curated text patches or click Add Text. What's great about having your pet as a separate image layer is the ability to adjust its positioning – which makes it easy to create space for their name. Customize to your liking using the Text Properties menu, and you're done!
Step 6: Save Your Digital Pet Portrait
Once you’ve finished editing your digital pet portrait, click the Save button at the top of the page, then select your desired save location and file type.
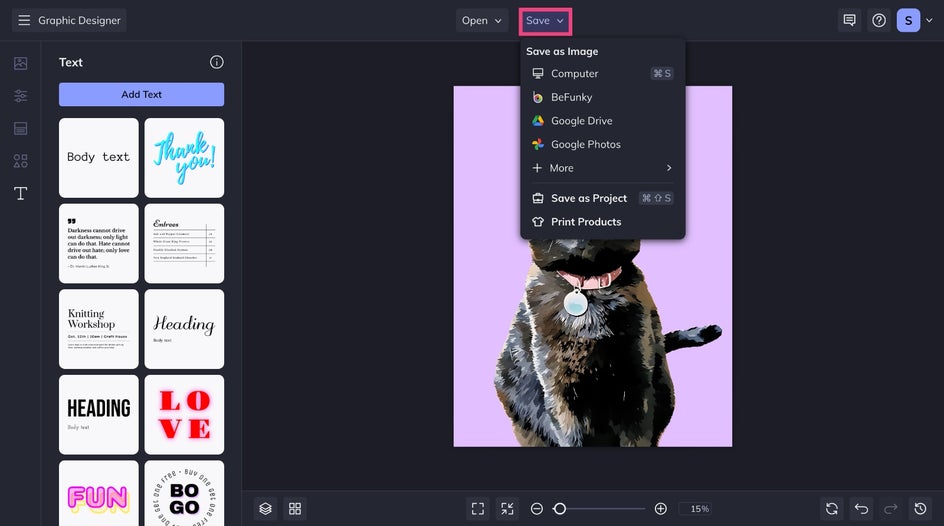
We recommend saving your pet art as a PDF file in Print Quality so it remains the highest quality for printing and displaying. Or, have your pet portrait professionally printed on a canvas, mug, and more by clicking Print Products.
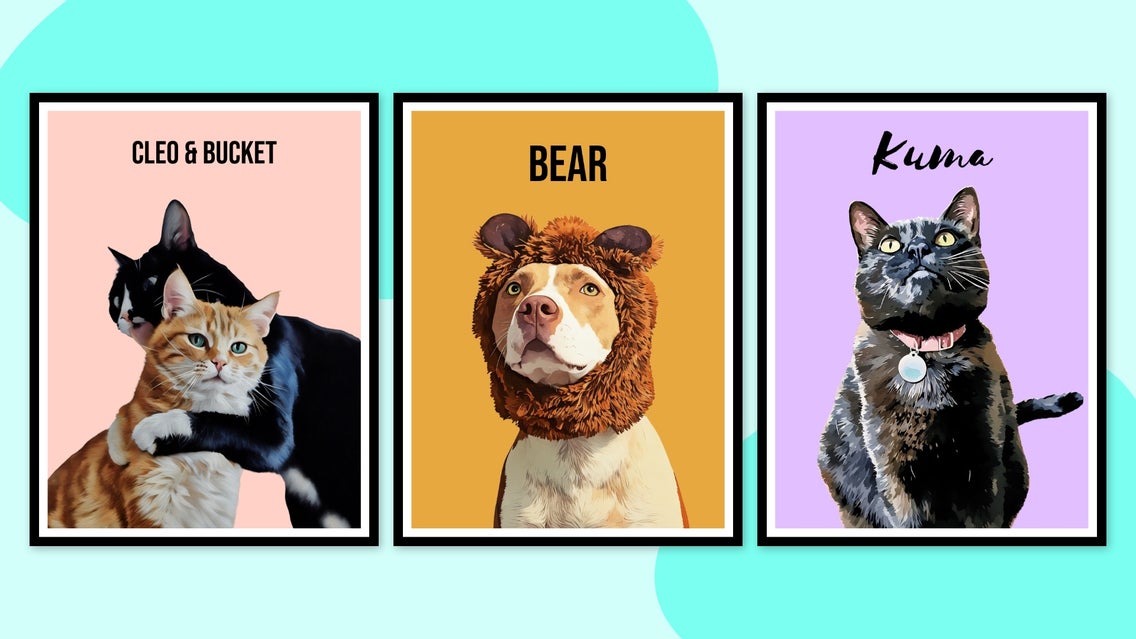
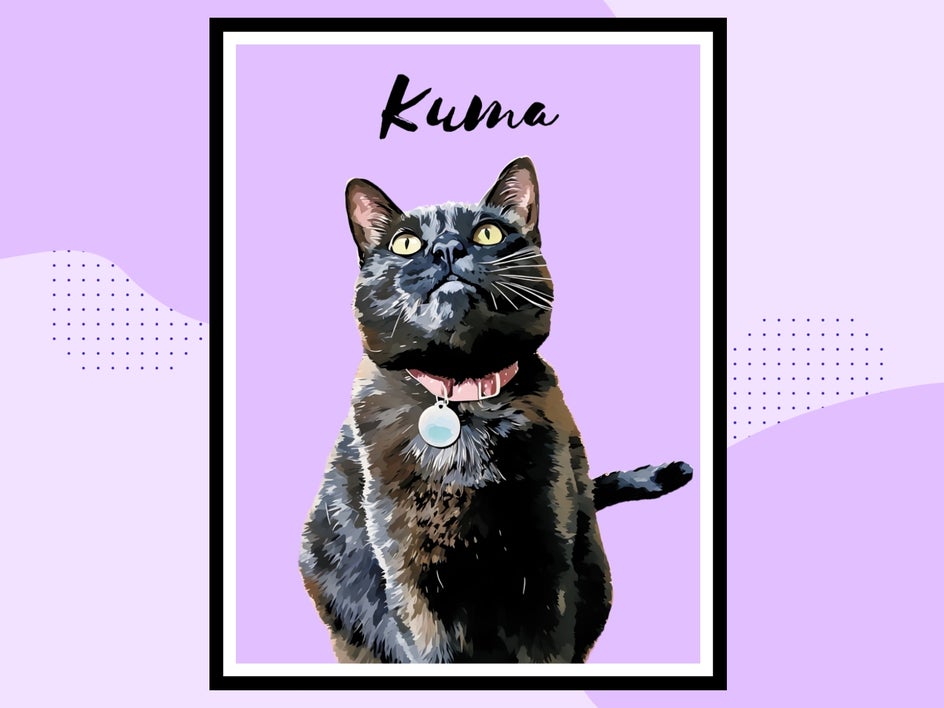
Final Results: A Custom Pet Portrait With Artistic Flair
In just 5 simple steps, you can transform a photo of your pet into a digital work of art. Take a look at how we transformed Kuma's photo into a professional-grade portrait in just seconds. Take on a personalized approach to your favorite
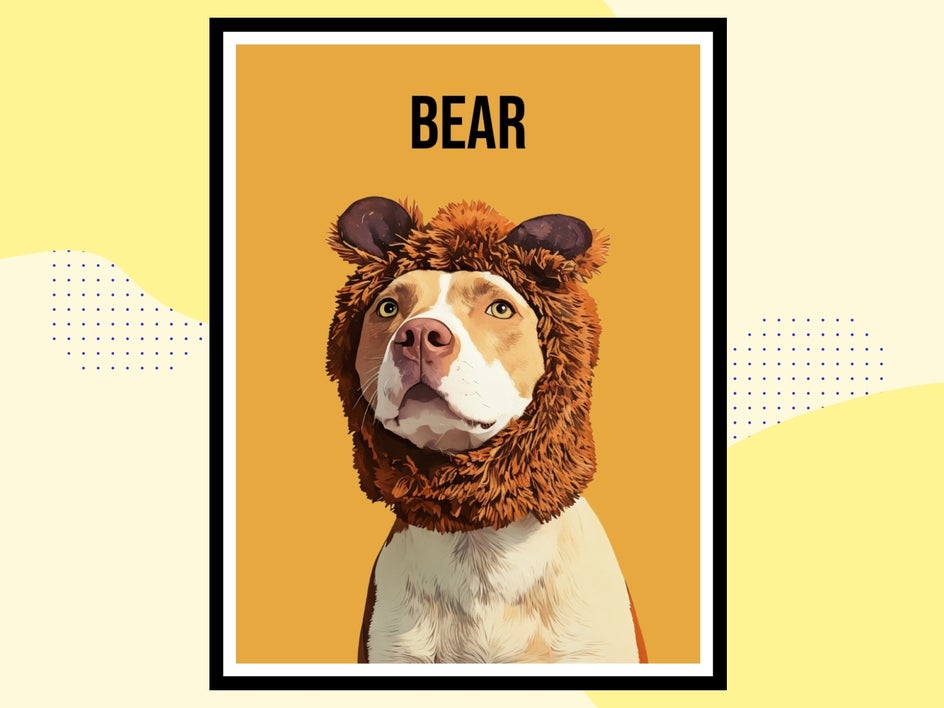
More Digital Pet Portrait Styles to Try
When it comes to creating digital pet art, our Artsy category is home to so many effects that you’ll be spoiled for choice! Here are just three more of our favorites to inspire your next custom pet portrait.
Pet Portrait Cartoon
For soft and painterly pet portraits, consider adding a photo to cartoon effect to your image. In this pup portrait, we love how the digital effect adds depth and accentuates preexisting textures. With this collection, expect bold linework, fun colors, and the most recognizable cartoon styles.
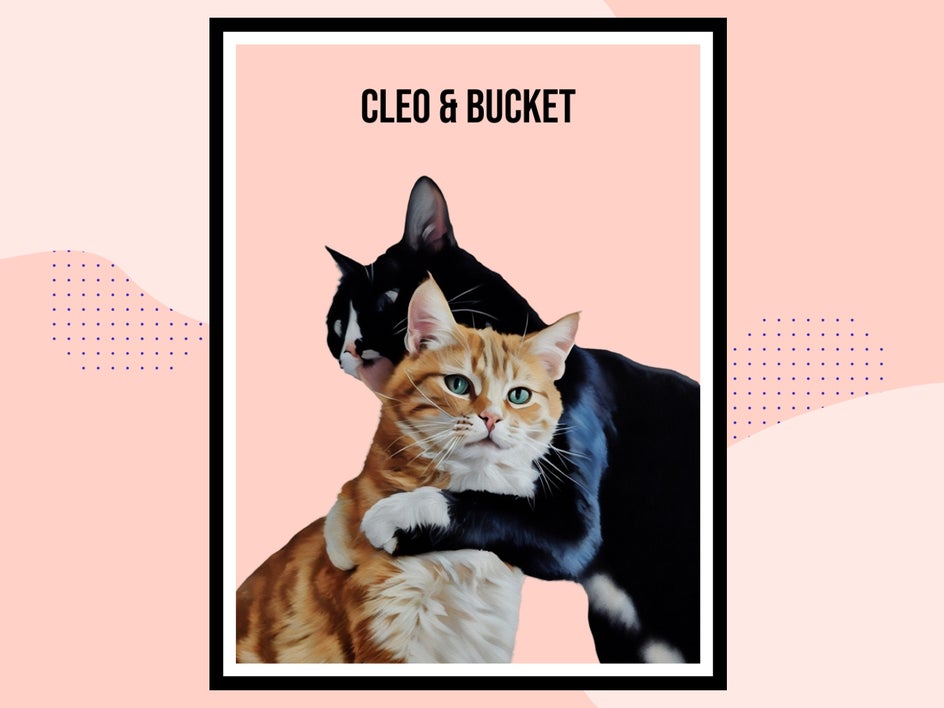
Pet Portrait Painting
How about turning your pet into a painting instead? For those with a taste for fine art, our photo to painting effects will instantly make your pet portrait appear refined and distinguished. We love how the effect was able to produce a realistic rendition while captures this pair's dynamic!
Pet Portrait Drawing
If you’re hoping to turn your own pet portrait into a drawing instead, then you’re in luck. BeFunky is home to sketch-inspired effects like Crayon GFX – which is what we’ve applied here to this custom parrot portrait. By upping the fidelity, we end up with a beautifully detailed sketch that shows off Timothy's feathers and color.

Turn Your Pet Photo Into Digital Art With BeFunky
Whether you’re looking to create pet portraits as gifts for loved ones, or simply want to celebrate your furry friend with an artwork of their own, making your own digital pet art has never been easier. Thanks to BeFunky’s wide range of tools and Artsy Photo Effects, you too can create custom pet portraits in seconds.
Go on, head to the Graphic Designer to start making a custom pet portrait today!