Unlocking Depth and Dimension in Your Portraits with Dodge and Burn
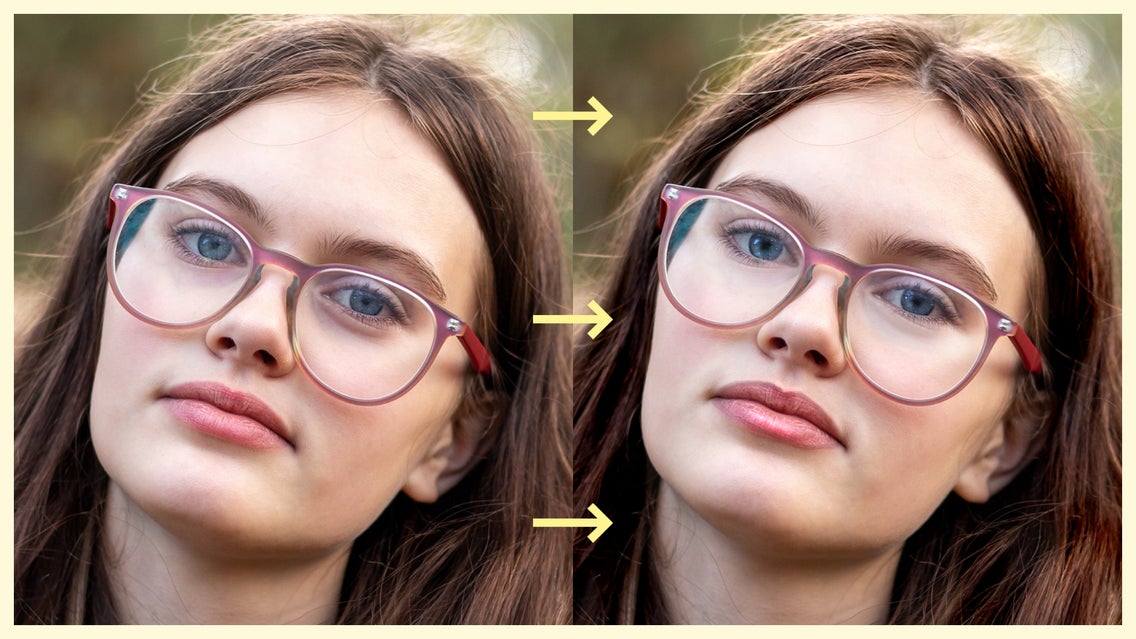
BeFunky's Dodge and Burn tool is a must-have for enhancing photos, especially when it comes to portraits. Dodging lightens specific parts of the image while burning darkens areas—techniques rooted in traditional darkroom photography. In the past, photographers would physically manipulate light using tools like cardboard or their hands to dodge and burn, carefully controlling exposure to bring out the best in their prints. This process allowed them to add depth and balance, but it required skill and precision, as each adjustment was final once the photo was developed.
In modern digital photo editing, these techniques are far easier and more precise. It’s particularly effective for portraits, where lighting and shadows are key to creating a natural yet polished look. With just a few strokes, you can manipulate light to highlight facial features or thicken shadows in a way that feels and looks natural. Whether you want to brighten certain areas or create a dramatic contrast, this tool allows you to control the image’s tone, making it a powerful and versatile asset in portrait photography.
How to Use Dodge and Burn to Enhance Portraits
Now that you have a solid understanding of what the tool does, it’s time to see it in action. This versatile tool can be a game-changer for portrait editing, allowing you to subtly shape light and dark areas for a more dynamic image.
Step 1: Upload Your Portrait
Starting in the Dodge and Burn category of the Edit tab, simply drag and drop your image onto the canvas to begin.
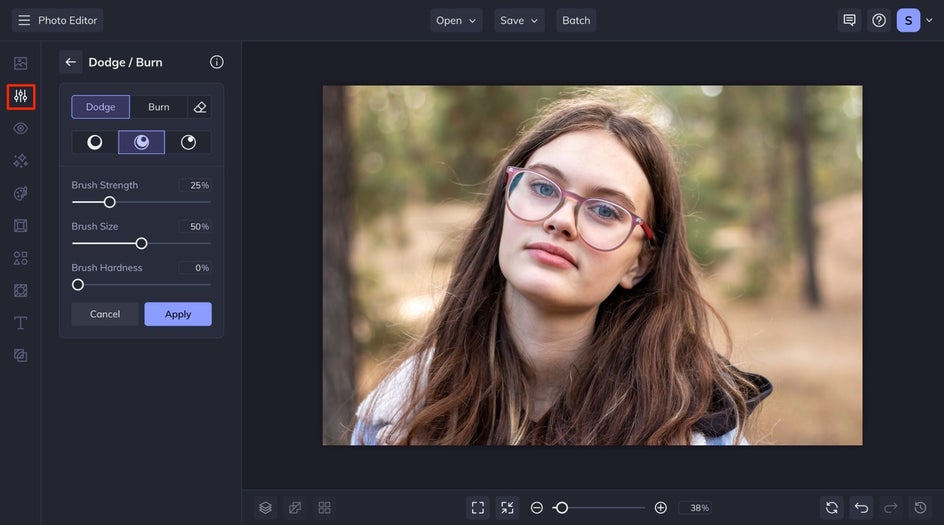
Step 2: Emphasize Facial Features With Dodge and Burn
The Dodge and Burn tool is perfect for enhancing multiple facial features, without compromising the natural look of a portrait. By subtly adjusting highlights and shadows, you can add contrast and definition, resulting in a polished yet authentic appearance. Here are some of our favorite ways to do that:
Make Your Eyes Sparkle
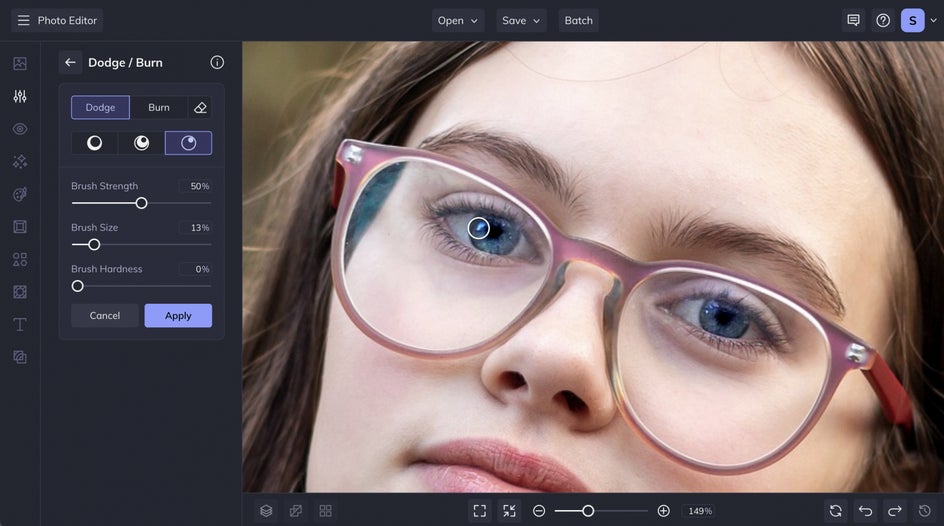
To enhance the pupils start with Burn, and adjust your brush in the Shadows tone. Slide your Brush Strength to 50, then you will want to make sure that the Brush Size is the same as your subject’s iris. Zoom in to get an accurate placement of your burn. Click your cursor a few times to darken the pupils and make them pop.
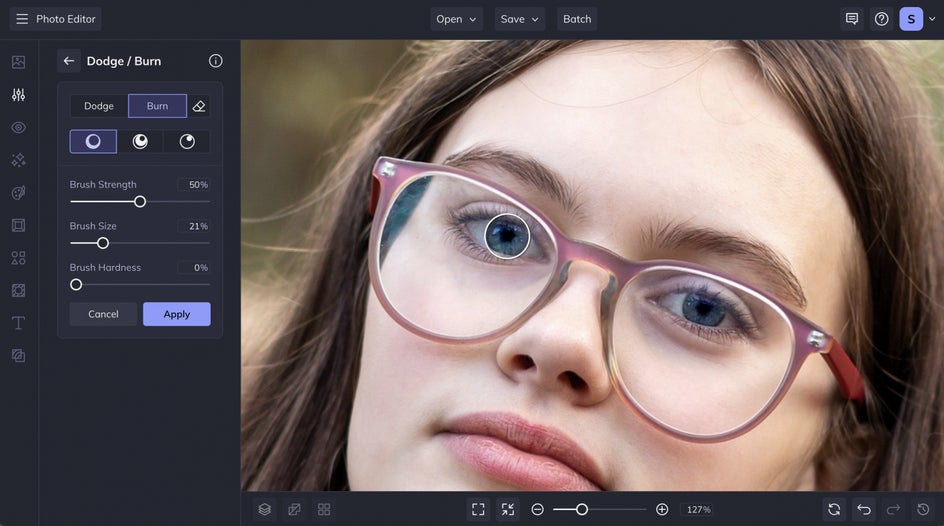
Next, you’ll switch your brush to Dodge and Highlights. You can leave your brush strength at 50, but make sure that your brush size is the size of the subject's iris. You can trace around the iris with your brush to add shine to the eyes. Click and drag your cursor around the iris till you reach your desired brightness. For a more subtle look, you can add small highlights in a few spots by clicking with a small brush size to mimic light reflecting off the eye.
Swipe Away Under Eye Circles
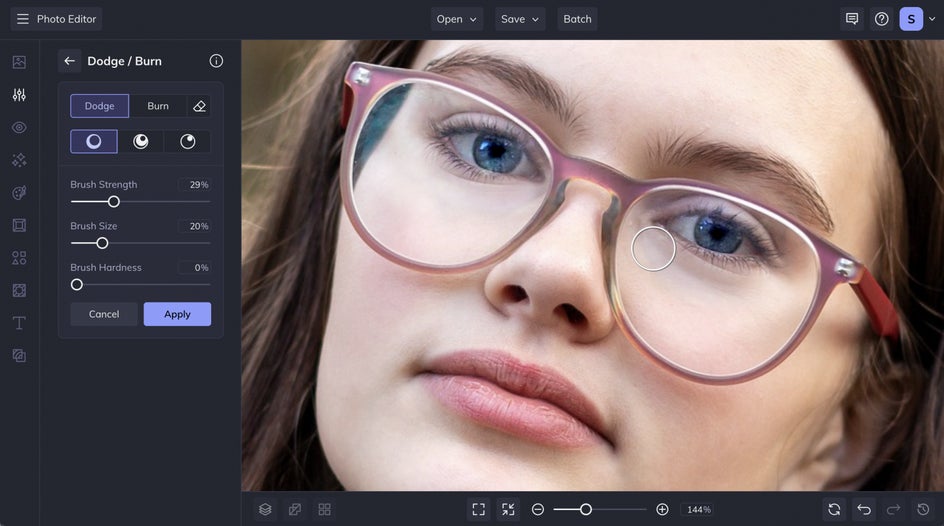
Use the Dodge tool with a lower brush strength set to shadows to swipe dark under-eye circles away. You can make a few passes over the area with the lower brush strength till you get your desired result.
Make Your Hair Shine
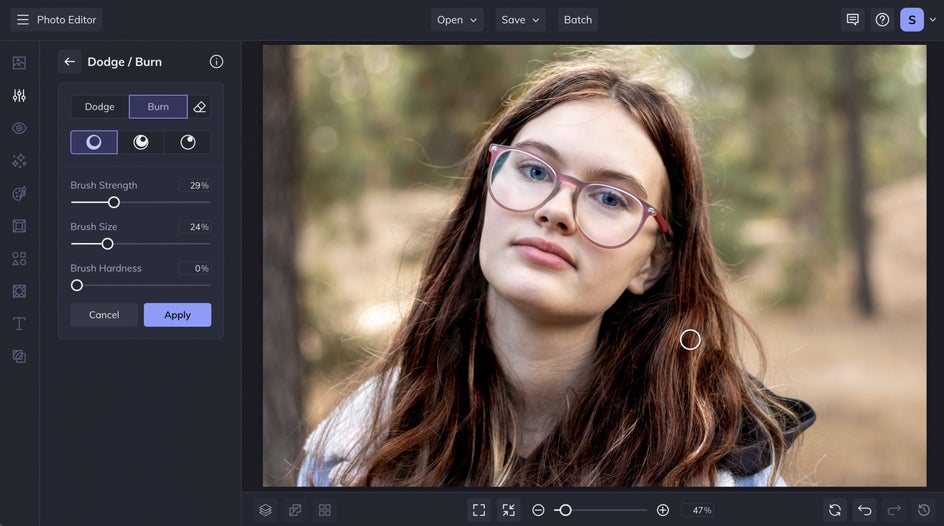
Add more light and definition to your subject's hair by using Dodge with highlights and a larger brush to cover their hair. Then you can use the Burn tool to go in and add dimension in the areas with less light.
Create the Illusion of Fuller Lips
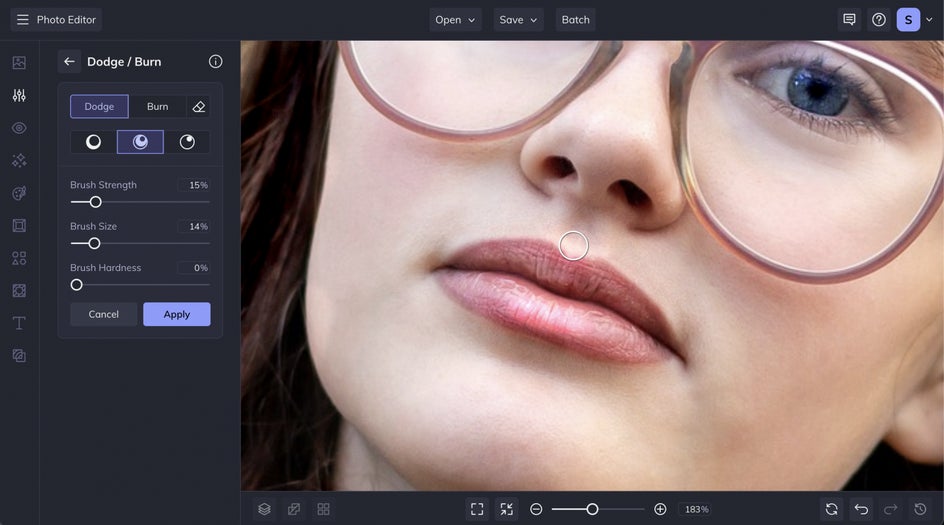
Using a lower brush strength, you can accentuate the subject's lips by lining them with the midtones burn tool, then add some with the highlight dodge tool at the top of the cupid bow and then in the middle of the bottom lip to make them look fuller.
Step 3: Save Your Enhanced Portrait
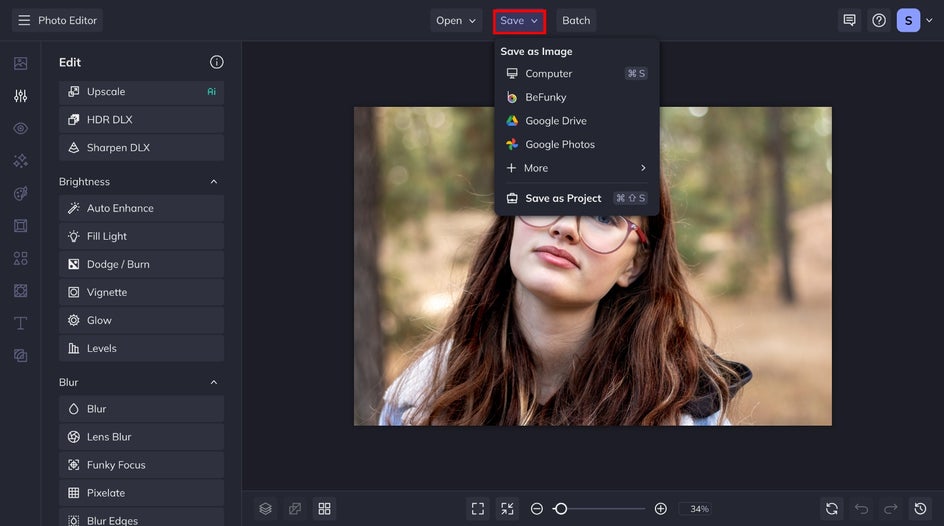
After you are happy with your results, click the Apply button on the tool. Lastly, click the Save button at the top of your canvas to save your image to your desired save location.
Final Results: Bring Portraits to Life
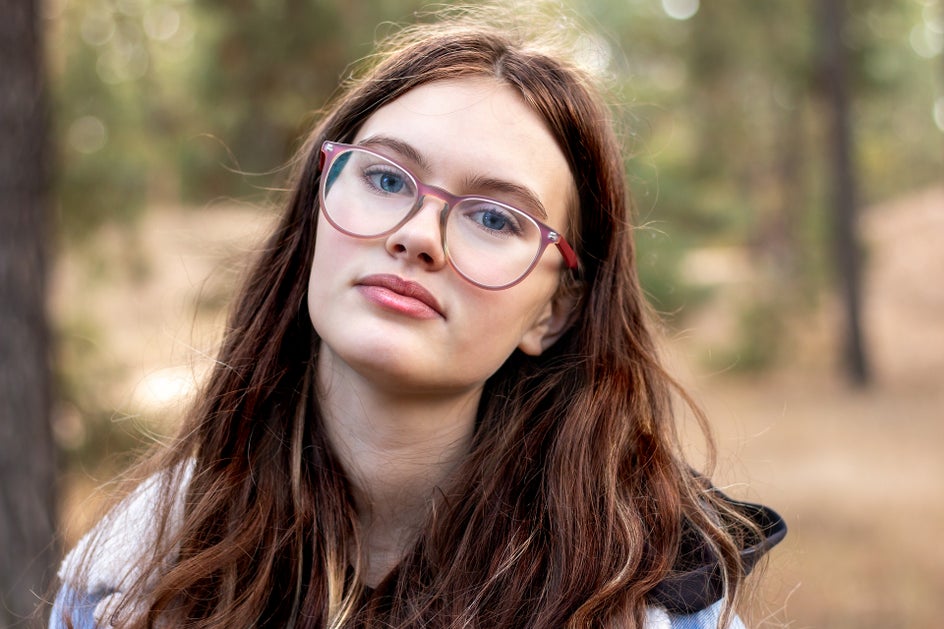
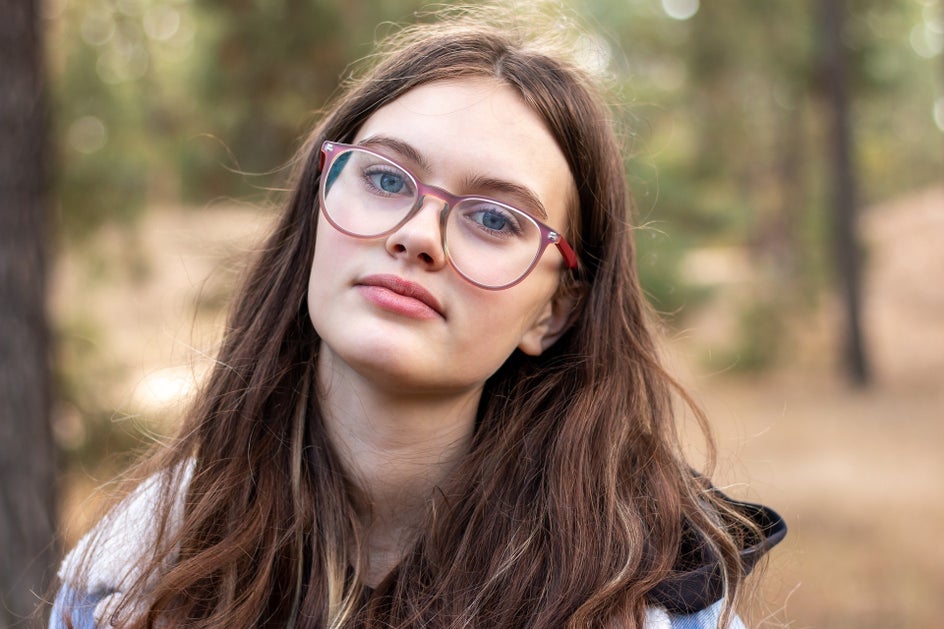
After applying the Dodge and Burn techniques, your portrait should have enhanced depth, with highlights and shadows giving it a more dynamic and polished appearance. The subtle adjustments will bring out key features, creating a balanced and natural look that draws attention to the details.
Unlock New Possibilities With Exposure Manipulation
This tool can be used to adjust exposure in an impactful way for a viarety of portraits. Here are a couple more examples!
Emphasize Light and Shadows to Add Drama
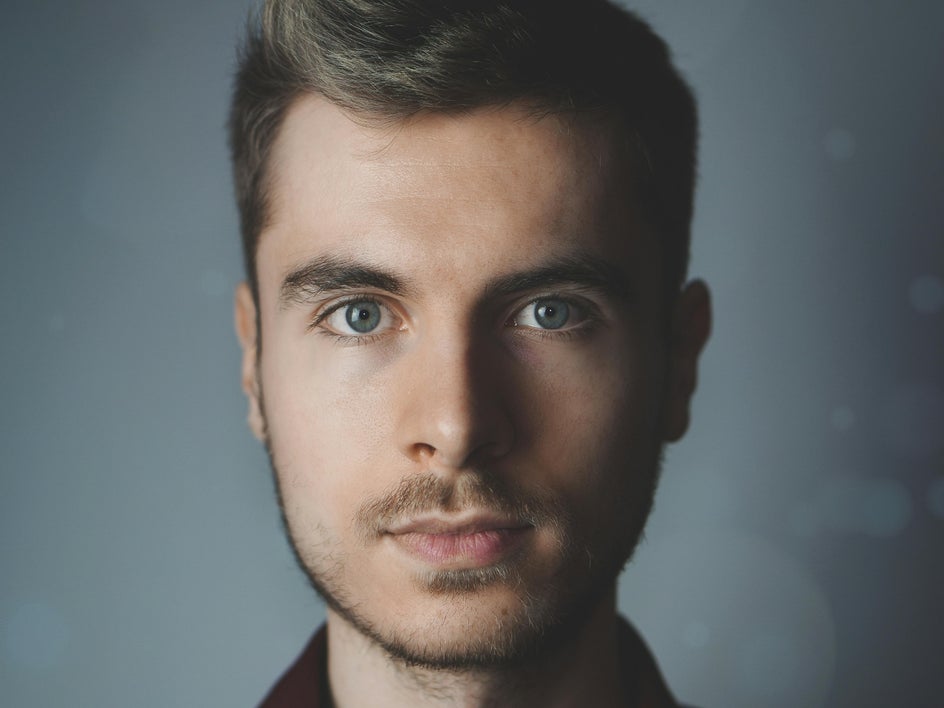
With Dodge and Burn, you can enhance the contour by lightening areas where light naturally hits and darkening areas to create shadows. If the portrait feels flat, apply dodge to brighten select spots and burn to introduce contrast in key areas, giving the image more dimension. By adjusting the brush strength and brush size, you can build a balanced, natural look while still adding drama and definition to the overall portrait.

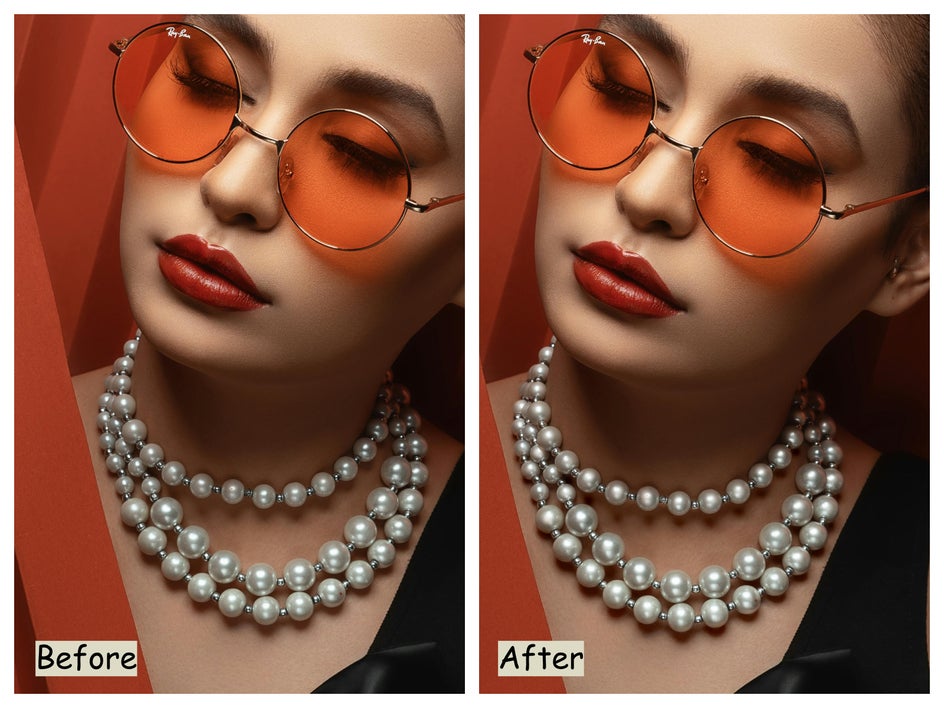
Make Your Jewelry Shine
Dodge and Burn is perfect for making jewelry stand out and glow. Use the dodge tool to brighten the highlights on metal or gemstones, enhancing their shine and sparkle. Then, apply the burn tool to deepen the shadows around the jewelry, creating a contrast that makes the piece pop and appear more three-dimensional. This technique adds a touch of brilliance, making the jewelry look more vibrant and eye-catching.
Mastering Dodge and Burn for Stunning Portraits
The Dodge and Burn tool is an invaluable asset for portrait photographers looking to elevate their images with depth and dimension. By skillfully lightening and darkening specific areas, you can enhance facial features, refine details, and create a more dynamic and engaging composition. Whether you’re aiming to highlight jewelry, add drama to shadows, or give your subject a polished, natural look, mastering these techniques will unlock new creative possibilities and ensure your portraits stand out with professional flair. Start enhancing your images now!


