How to Create Colorful Drop Shadow Portraits
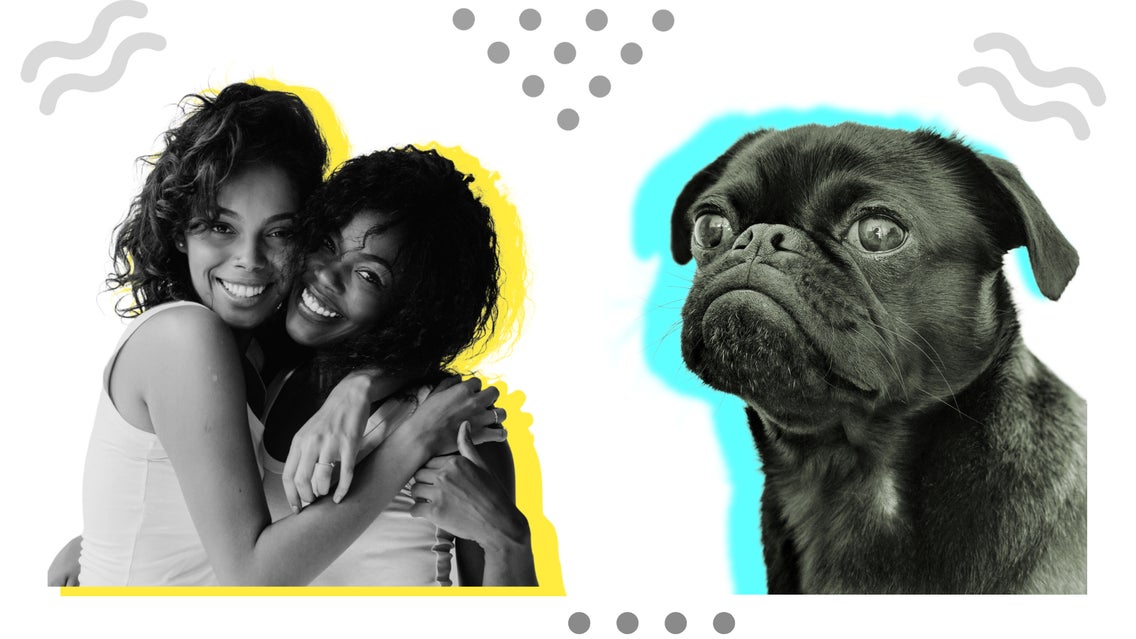
If you’ve got a special portrait worth framing, you’ve probably been thinking about ways to truly make it pop. Here’s an idea you may not have thought about, however: cutout portraits featuring a colorful drop shadow.
You may have seen this artistic style of portrait doing the rounds on social media and wondered how you could create something similar for yourself or a loved one. Creating such an artwork can cost a small fortune when enlisting the services of a graphic designer or artist. However, by using BeFunky’s Graphic Designer and photo editing tools, you can create your own for free!
While creating cutout portraits with a colorful drop shadow might look tricky, we can assure you it’s anything but. We’ve broken the process down into a few simple steps that anyone can master – no graphic design experience necessary!
How to DIY a Drop Shadow Portrait
Ready to create your own cutout portrait? To get started, head to the Graphic Designer. Then, just follow the 6 easy steps below.
Step 1: Start With a Blank Canvas
Click Blank Canvas at the top of the screen, then select your desired canvas shape from the options available. Alternatively, you can type your chosen dimensions into the Width and Height sections within the sidebar.
For this tutorial, we’re using a letter (8.5” x 11”) sized canvas.

Step 2: Add Your Portrait to Your Blank Canvas
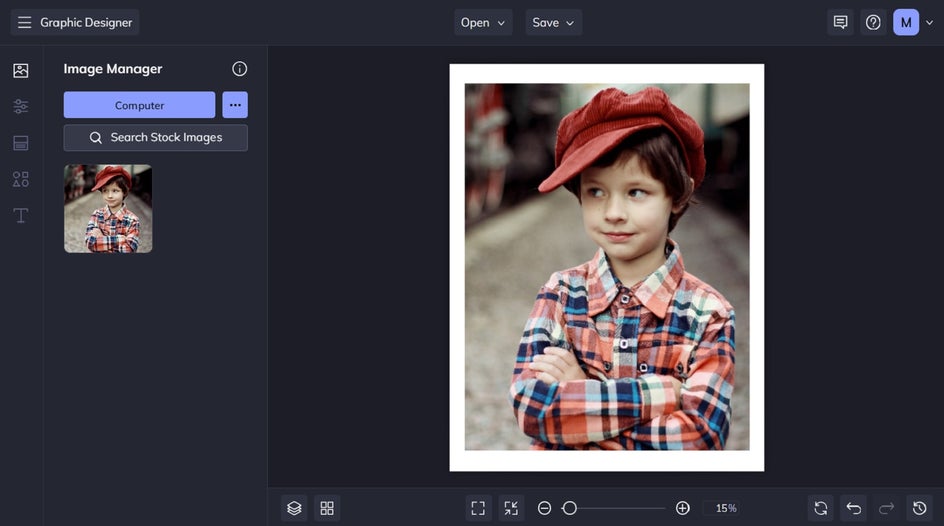
To add your photo to your blank canvas, navigate to Image Manager in the main menu on the left. Then, click Computer to upload your photo from your own files.
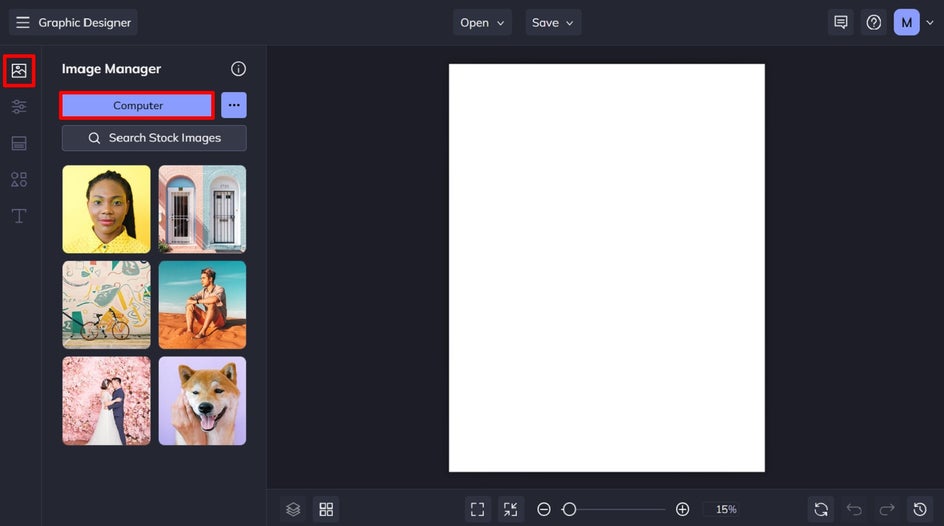
Once your image has been added to your Image Manager, simply drag and drop it onto your canvas.
Step 3: Remove the Background From Your Portrait
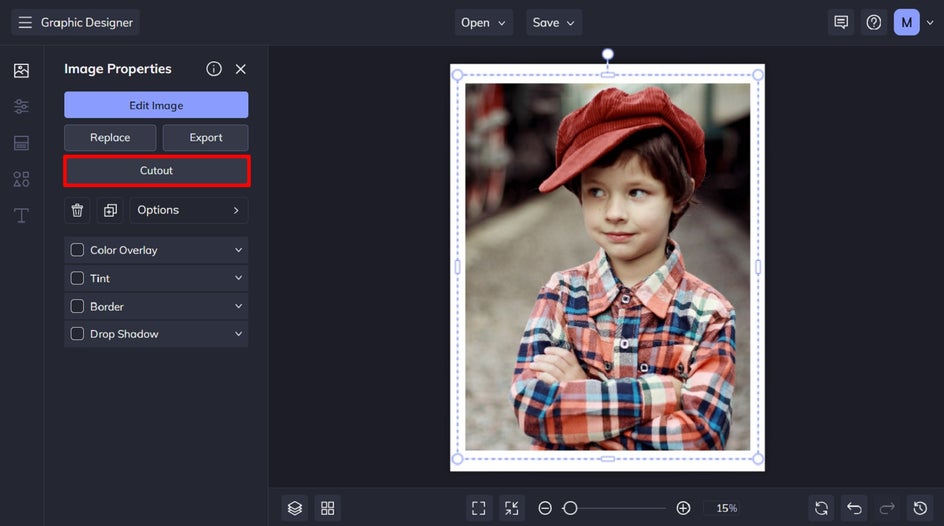
To remove the background from your portrait, select it with your cursor. Then, from the Image Properties panel which appears, click Cutout.
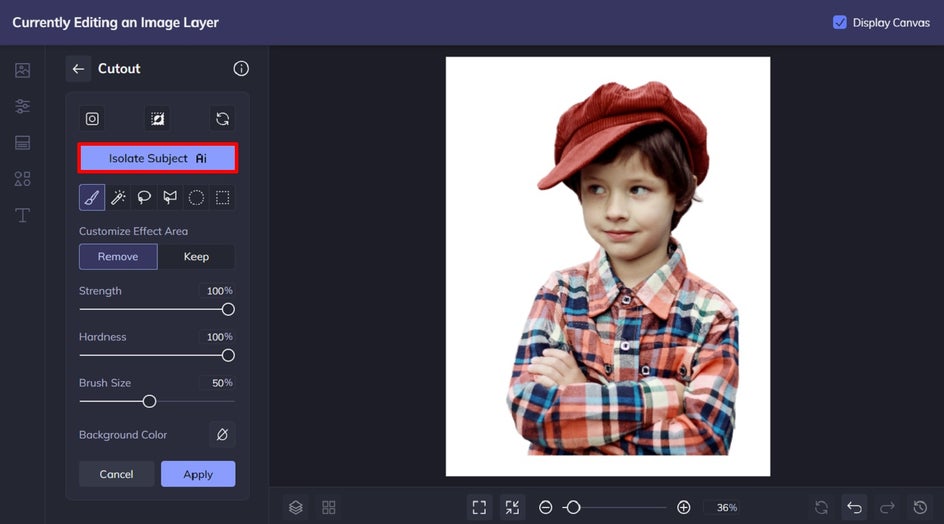
Within the Cutout menu, simply click the Isolate Subject button to remove your portrait's background in a single click using AI technology.
Step 4: Make Your Portrait Black and White
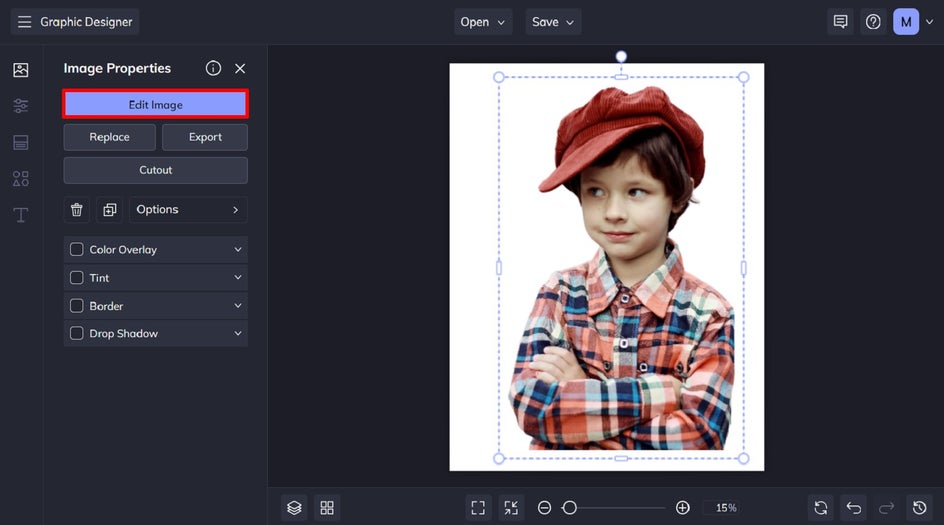
Keeping within the Image Properties panel, you can now click the Edit Image button to open your portrait within the Photo Editor. This is optional!
Then, click Effects from the main menu on the left, followed by Black & White.
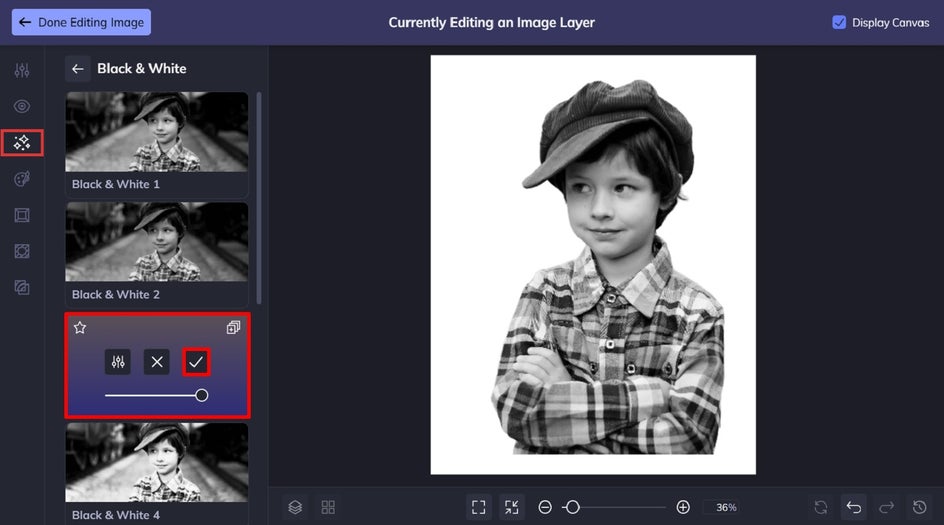
Click on an effect to sample it on your portrait. You can also adjust the strength of the effect using the corresponding slider. When you’re happy with your chosen effect, just click the checkmark button to apply. Then, click Done Editing Image in the top-left of the screen to return to the Graphic Designer.
Step 5: Add and Customize the Drop Shadow
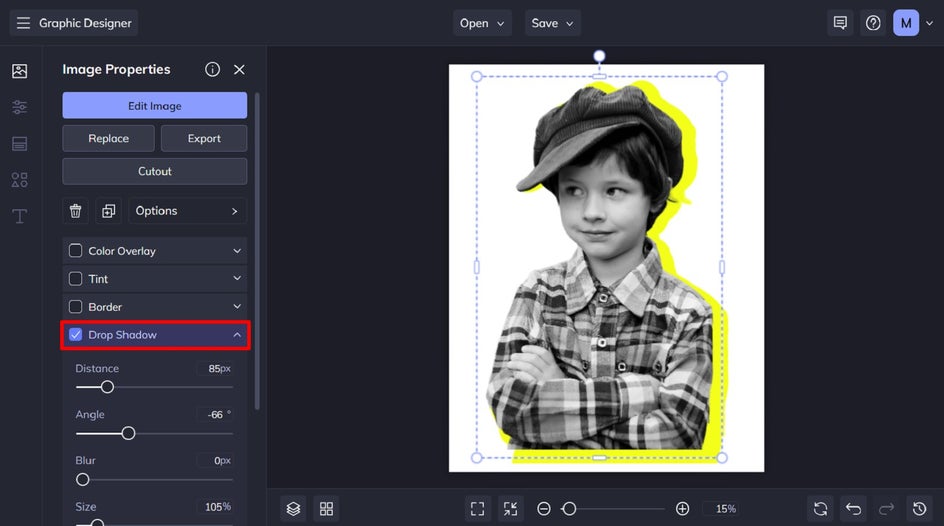
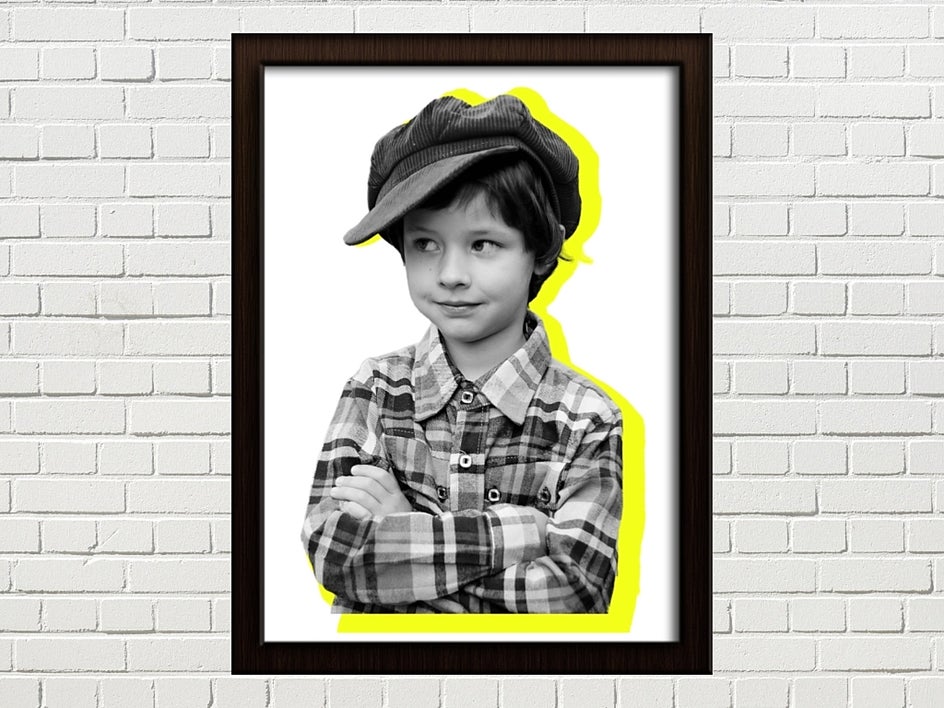
The Drop Shadow option is also located within the Image Properties panel. Select the checkbox located next to Drop Shadow, then adjust the settings to create the look you had in mind. For this example, we’ve chosen a bright yellow color, but you can select any color you desire from the Color Picker.
Step 6: Save Your Custom Portrait
Finally, all that’s left to do is to save your new DIY drop shadow portrait. Click Save at the top of the screen, then select your save location and file type.
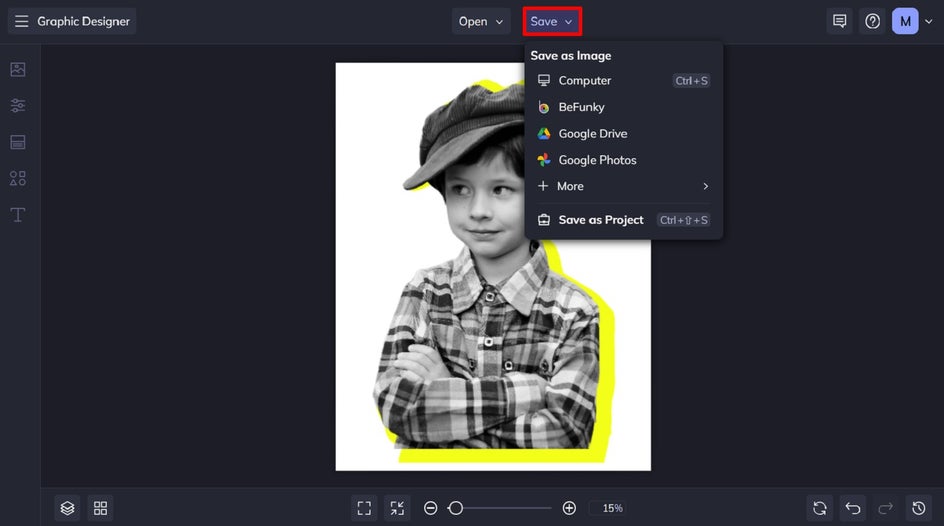
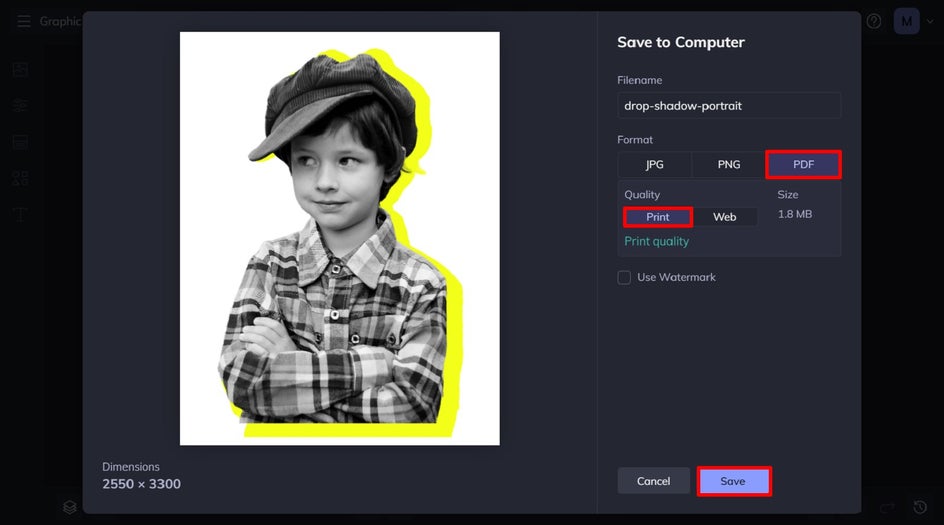
We recommend saving your portrait as a PDF in Print Quality, as this will ensure the highest quality file for printing.
Final Results: A Creative Cutout Portrait With a Pop of Color
Who knew making creative and eye-catching portraits could be so easy? Trust us, you won’t be able to stop at just one!
What Other Drop Shadow Portraits Can You Create?
This style of artistic portrait is incredibly versatile, whether you want to use it to transform your wedding photos, commemorate a special pet, or more. Here are just three of our favorite ideas to inspire your next project!
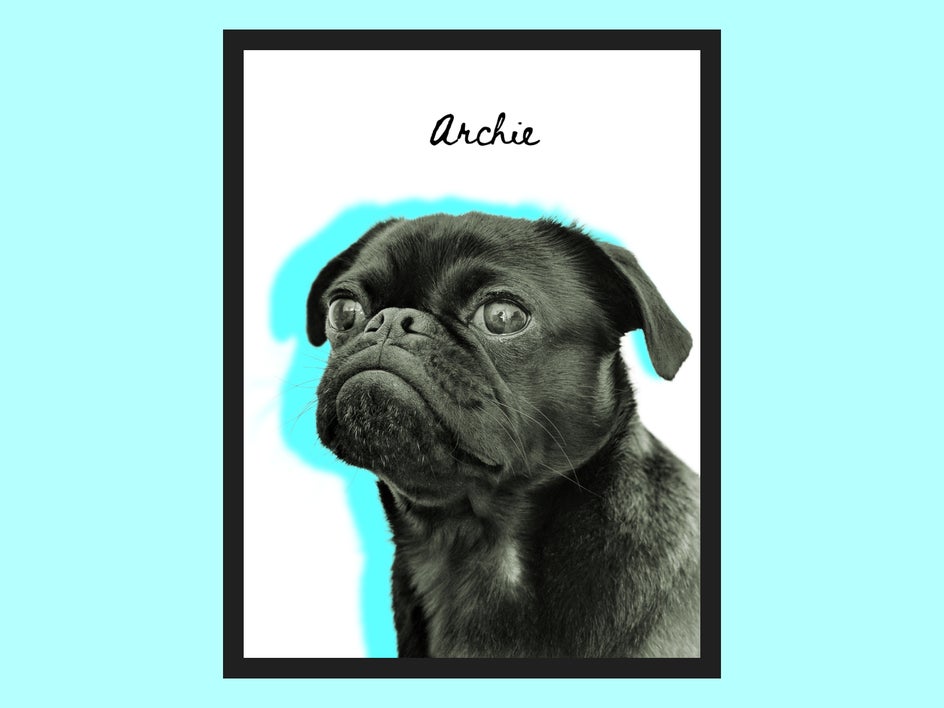
Pet Portraits
Why should humans have all of the fun? We love this pet portrait idea for those wanting to think outside of the box. Simply add your pet’s name for more of a personalized touch. Whether you make one for yourself or a loved one, this portrait is sure to take pride of place within any home.
Wedding Portraits
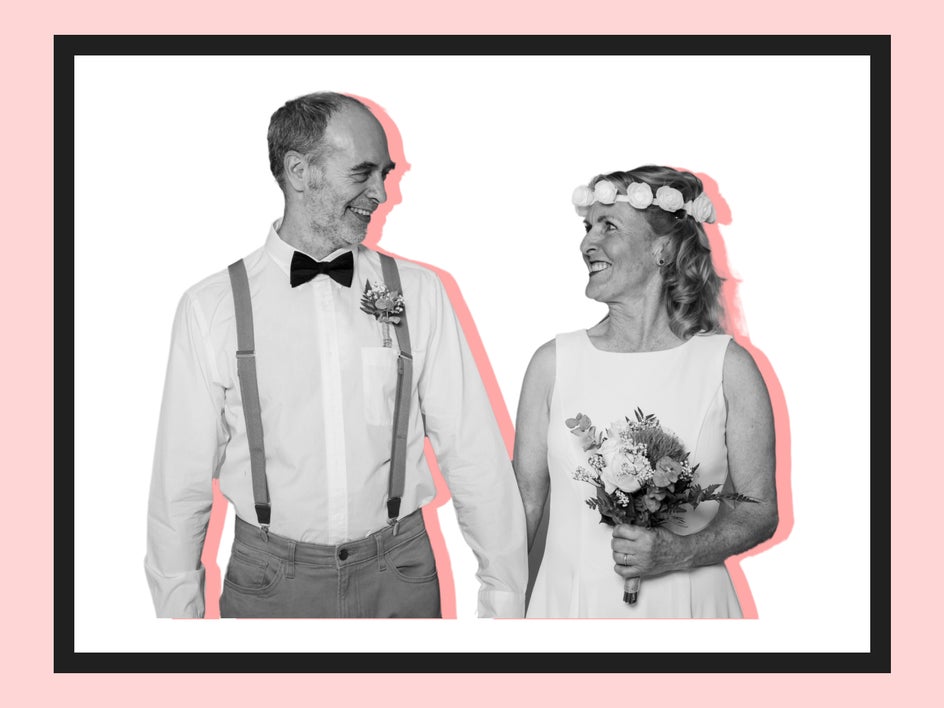
If you’re looking for an artistic way to display your favorite wedding photo, consider this style. We love how the cutout effect places the couple front and center, while the pop of color from the drop shadow further catches our attention. This also makes for a great DIY gift idea that you can print and frame for the happy couple.
BFF Portraits
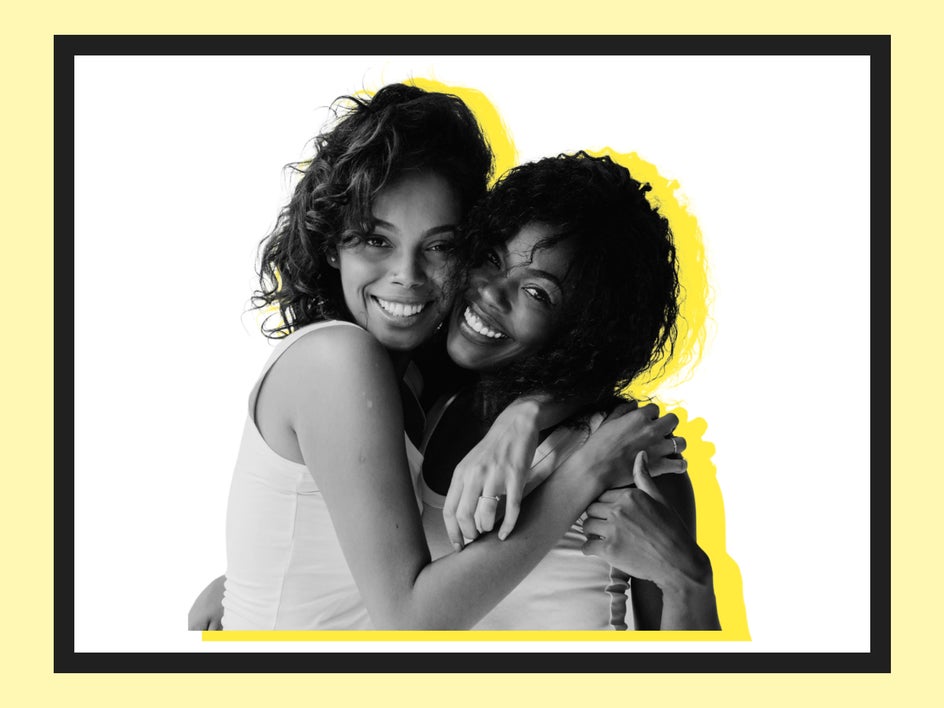
This creative portrait idea isn’t just reserved for solo portraits or wedding photos. You can also transform your favorite photo featuring you and your friends and turn it into a work of art. Want to get even more creative? Consider turning your artistic cutout portrait into coasters or other DIY photo gift ideas!
Get Creative With Cutout Portraits Featuring Colorful Drop Shadows
Now that you know just how easy it is to create these eye-catching and on-trend portraits, there’s no limit to your creativity. Experiment with photo effects, subjects, and drop shadow settings to produce something that’s one of a kind.
Head to the Graphic Designer to see just how amazing it is!


