Enhance Portraits in Your Designs With Touch Up Tools

Have you ever been in the middle of a graphic design project and wished you could retouch a photo or two? Erase a blemish here, whiten a smile there, maybe smooth out a few wrinkles or add some light blush for color . . . Whether you’re branding a business, crafting content for social media, or sprucing up website visuals, there are times when a quick portrait fix would come in handy. Luckily, when you use Graphic Designer, you can do just that. Whether you’re starting a design from scratch or taking advantage of one of the Designer’s many templates, you’ll have an entire array of powerful Touch Up tools at your disposal.
BeFunky's Touch Up tools are simple enough for anyone to use, even if you’re primarily a designer and not a photo editor. Tools like Blemish Fix, Eye Brighten, and Flashspot can elevate portraits and group photos for branding projects, social media posts, blogs and websites, and other professional purposes such as business cards and event posters. The Touch Up tools are intuitive and easily accessible through the Graphic Designer, saving you time and ensuring consistent quality across all your visual content.
With this seamless integration between design software and photo editing software, there’s no need to switch from platform to platform. Not to mention everything is completely online – no hefty software downloads required. In this article, we’ll show you how to quickly get to the Touch Up tools from the Designer, helping you transform your portrait-heavy graphic design projects from good to great.
How to Use Touch Up Tools to Elevate Your Graphic Design
While Touch Up tools are in the Photo Editor, you can also easily access them from the Graphic Designer. This comes in handy when your top priority is your design. Not to mention that photos look different in different contexts, and you may not even know what changes you want to make to an image until you see it on the canvas! To get started on your project, just open up the Graphic Designer.
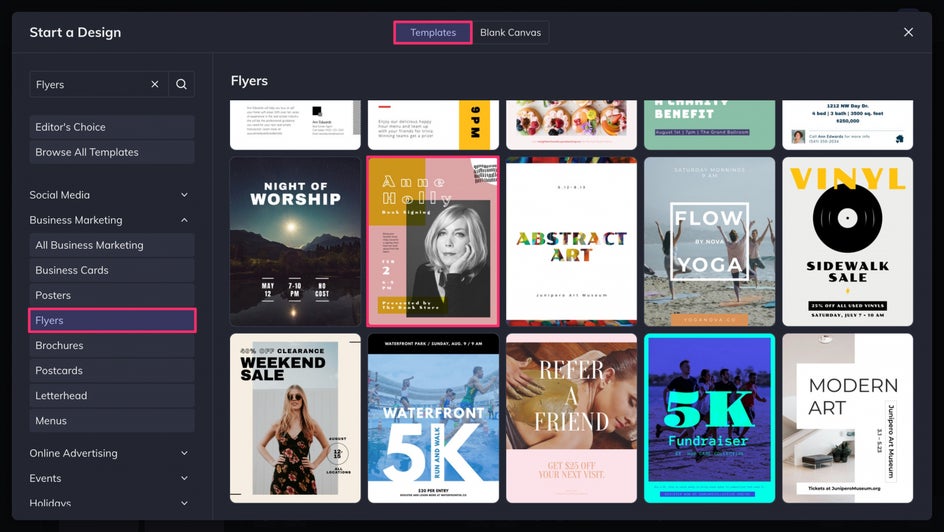
Step 1: Choose Your Template
In the Designer, you can choose from a variety of templates or begin with a blank canvas. Here we’re promoting a book signing, so we’re going to use a premade event flyer template.
Step 2: Add and Enhance Photos
Once you’ve chosen your template or created your own design, you can upload photos to the Image Manager and then add them to your project.
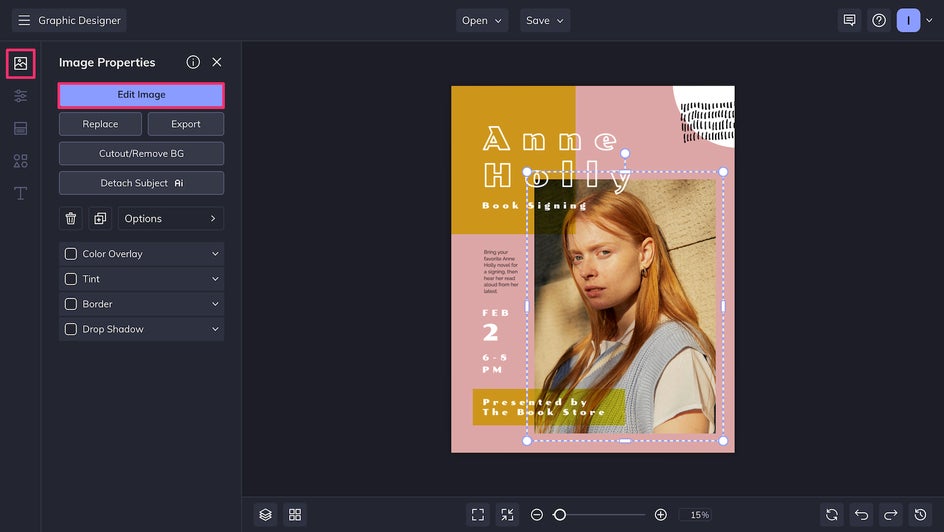
This portrait already looks good, but would benefit from a few small touch-ups. To access the Touch Up tools, simply select the photo you want to adjust and then click Edit Image.
You’ll find the Touch Up tools on the left-hand sidebar – just click the eye icon. Once here, if you’re looking for a one-click wonder, you can use the Portrait Enhancer to immediately clean up, smooth, and brighten your photo. But if you want a little more control, you can explore the rest of the Touch Up tools.
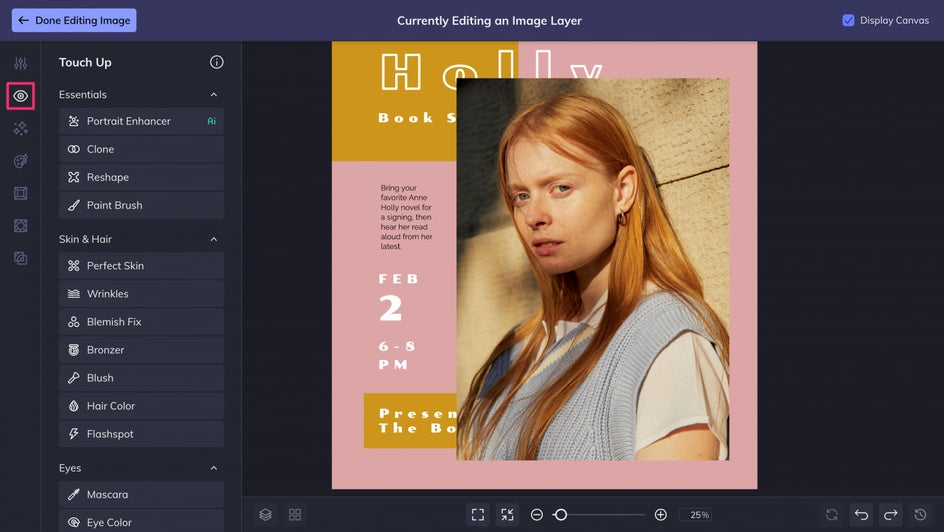
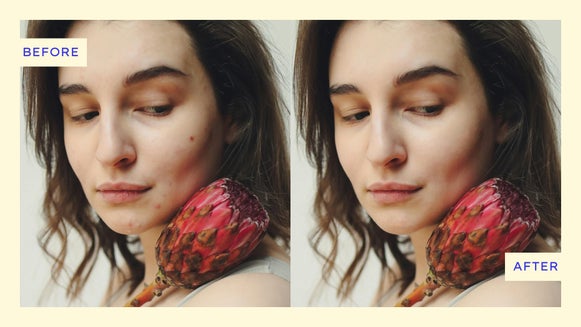
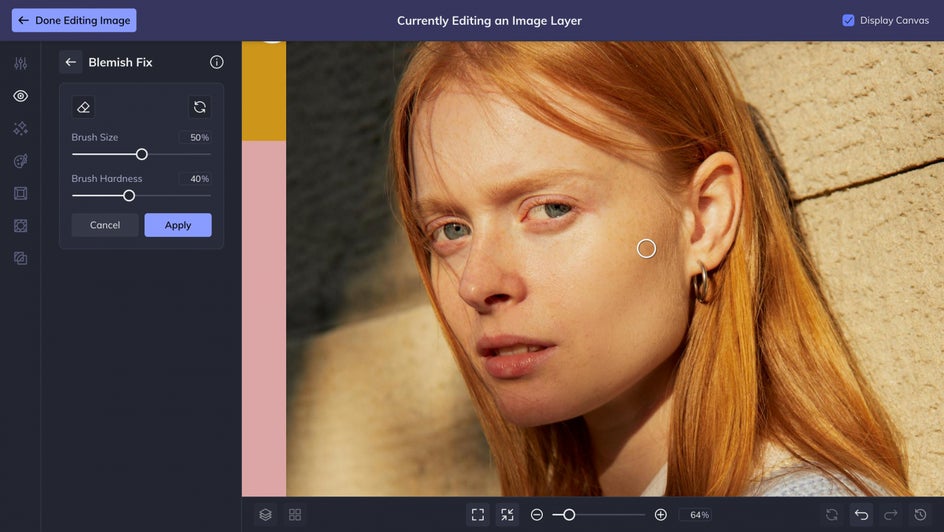
Tools like Perfect Skin and Blemish Fix can help smooth, brighten, and soften skin:
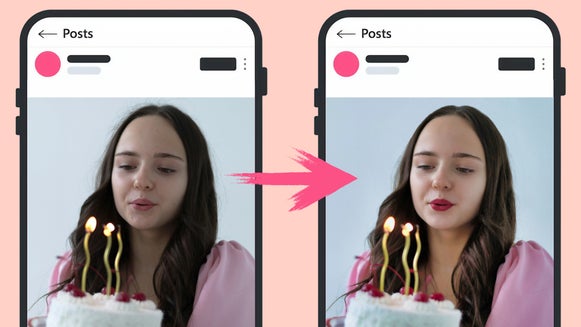
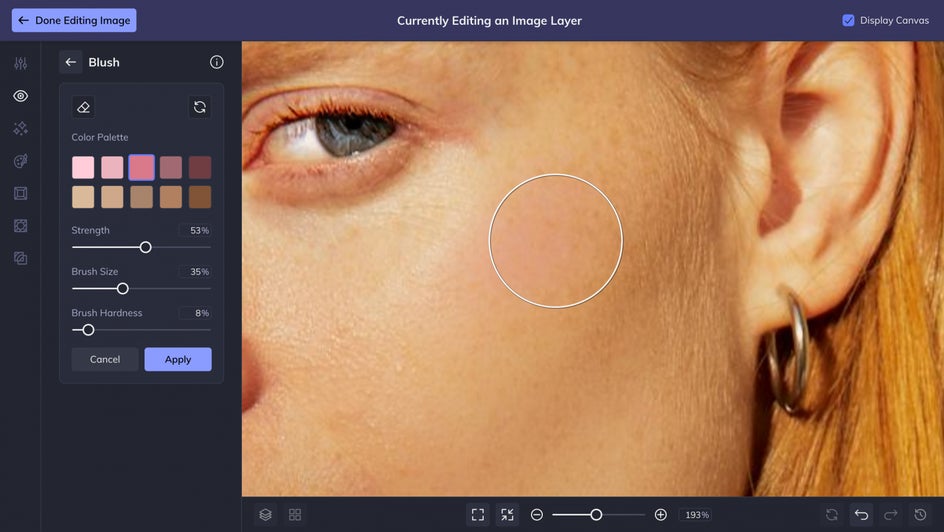
You can also add small touches of makeup like mascara, lipstick, eyebrow pencil, or bronzer. These tools will help increase contrast and visual interest in your photos. Her, we’ve used the Blush tool.
There are also a few tools that make your portrait look cleaner and more professional overall, such as Teeth Whiten and Eye Brighten.
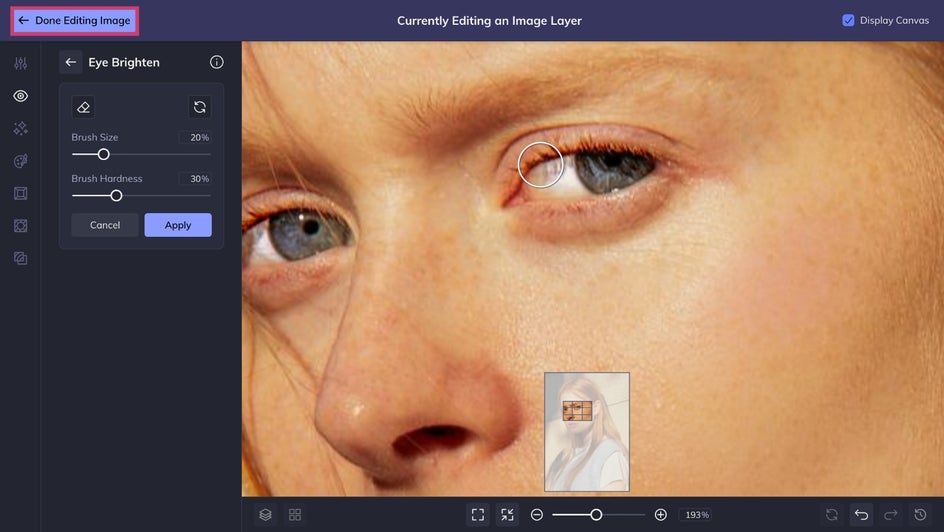
Once you’re finished making touch-ups, simply click Done Editing Image to return to the Designer and finish up your design.
Step 3: Wrap It Up and Save
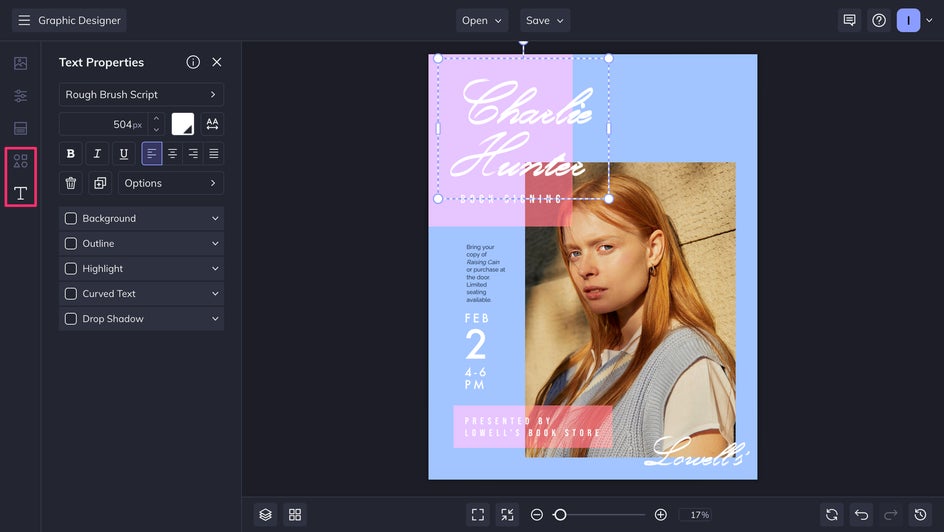
Now that you’re back in the Designer, you can continue editing text, colors, and graphics until you’re satisfied. Switching between the Designer and Touch Up tools is seamless, meaning you can also make more edits to your photo at any time.
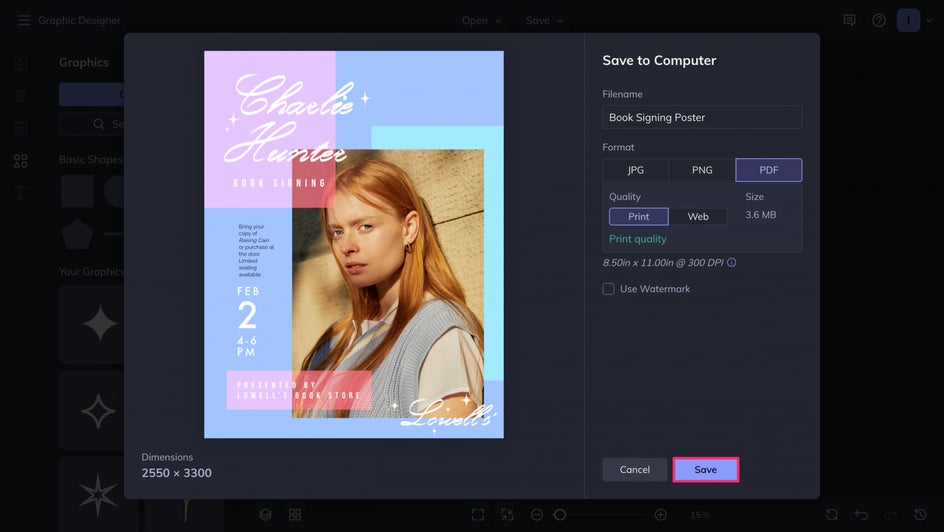
Once you’re finished with your design, hit Save at the top of the page. If you’re using your finished graphic design for digital purposes like social media or your website, save it as a high-quality PNG. A print-quality PDF will be better for physical prints.
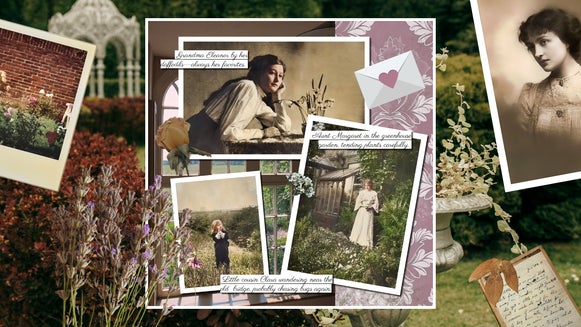
And here’s the finished design, including our enhanced portrait!


More Ways to Use Touch Up Tools in Your Designs
Touch Up tools come in handy whenever you’re working on graphic design projects that include people, portraits, and group photos. Here are just a few ways you can use the Touch Up tools to elevate your personal and professional design projects.
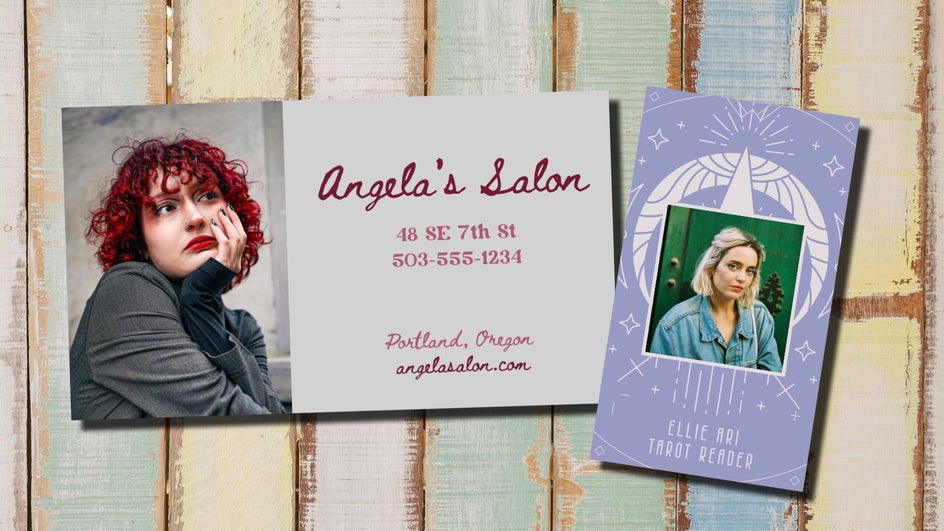
Better Business Cards
Believe it or not, business cards don’t need to be boring. A great business card can actually make a significant first impression, so why not make it the best it can be? Use BeFunky’s Touch Up tools to smooth skin, brighten eyes, and whiten teeth for your business card headshot. This extra level of care ensures you look polished and professional, and helps you make a lasting impression on everyone you hand your card to.
Engaging Blog and Website Visuals
Adding enhanced portraits to your blog or website can significantly boost its credibility and aesthetic appeal. Polish home pages, blog headers, event announcements, and team profiles with subtle Touch Up enhancements. This extra step makes your site look professionally maintained, inviting new visitors to trust your content and brand.
Spruced Up Social Media Content
Whether you're building your brand on Instagram, LinkedIn, X, or elsewhere on the internet, high-quality images make all the difference. Quickly touch up any graphic designs that include portraits or group shots to ensure consistency and a clean look across all your social media platforms. Bright, engaging portraits increase visibility and encourage interactions, helping you grow your following organically.
Promotional and Marketing Materials
Designing a promotional flyer, advertisement, or event poster? Incorporate portrait enhancements effortlessly using BeFunky's Touch Up tools. Touch up images to ensure every face featured in your promotional materials has a natural glow. Using both Graphic Designer templates and Touch Up tools can help your designs look more professional, capturing attention and conveying a trustworthy image of your brand or event.

Elevate Your Design Projects Today With Touch Up Tools
Whether you're a seasoned designer and editor or new to the photo editing world, the combined Graphic Designer and Touch Up tools allow you to elevate your visuals effortlessly. With hundreds of available templates and the Touch Up tools just a click away, you can retouch any photo in your graphic design without having to leave the platform. Explore BeFunky's Touch Up Tools in the Graphic Designer today!