How To Create Custom Facebook Event Covers
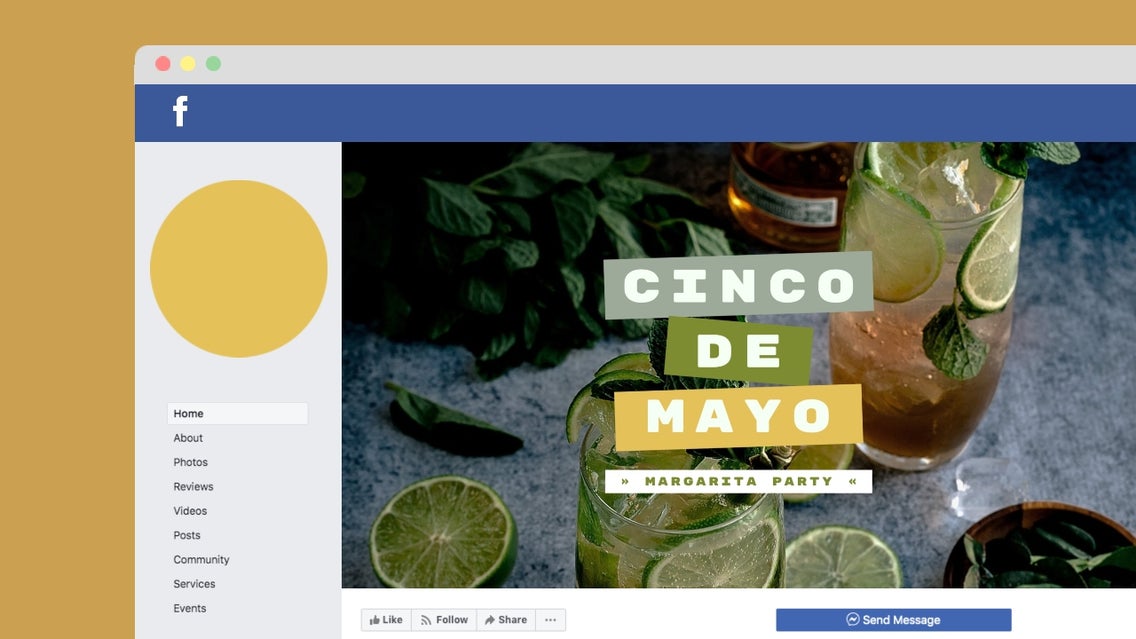
When it comes to spreading the news of your upcoming event, times have changed. Gone are the days of calling around your circle of friends or posting a classified advertisement. Instead, you can just create a Facebook Event, send a mass invite to all of the people liking your business page or invite a small, private guest list. Voila! Job done.
Whether you’re organizing a grand opening for your business, a market stall for your side hustle, or a surprise party for a friend, organizing and responding to gatherings through Facebook Events is the way to go. But what about that all-important header image? How can you get the sizing and design on-point so that it captures everyone’s attention?
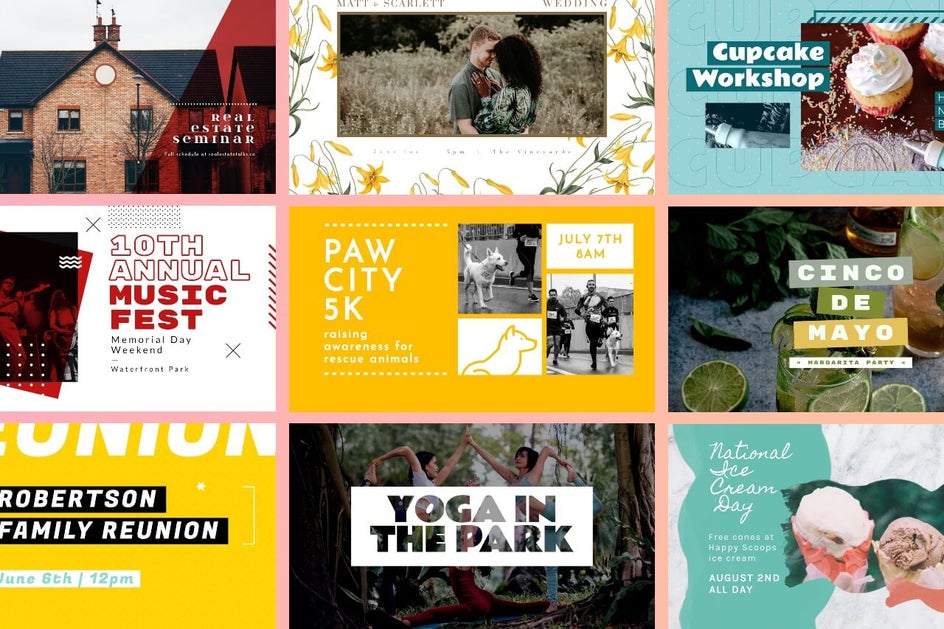
Thankfully, the new Facebook Event Cover templates in BeFunky's Graphic Designer are here to help. They’re pre-designed to perfection and all it takes to customize them is your imagination and our easy-to-use design tools. Keep reading to find out how!
Types of Facebook Events
Did you know once you've created a Facebook Event, you can no longer change its privacy settings? This is why it’s super important to first decide what type of event you’ll be posting – either one with an ‘open invite’ policy, or a private shindig with an ‘invite-only’ rule. If it sounds a little confusing, don’t fret. We break down each type of Facebook Event below!
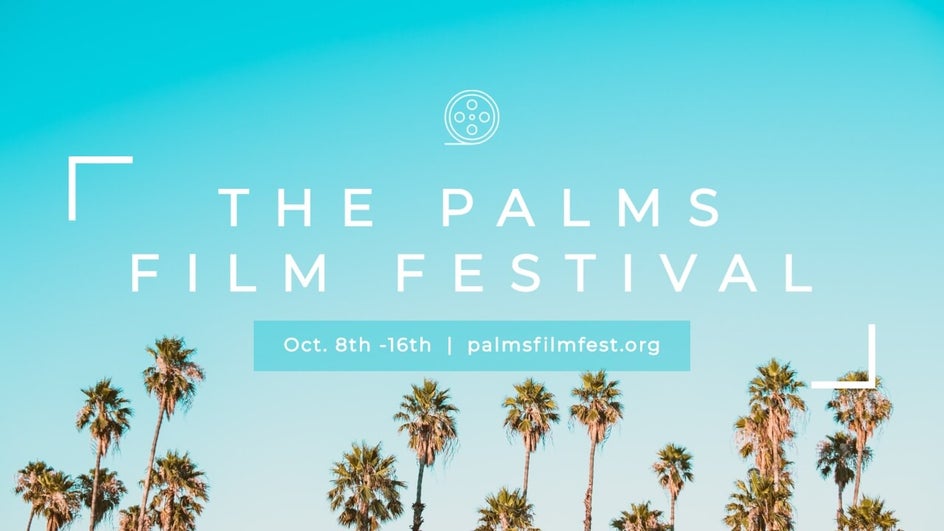
Open Invite: If you’re hosting an event where you want to invite the masses (i.e a grand opening, album release party, film festival, etc.), then this calls for a public Facebook Event. Additionally, anyone will be able to see your event and search for it, even if you aren't friends. Open invite (or public) events are most commonly created by businesses or organizations as a way to market their event to the public and increase attendance.
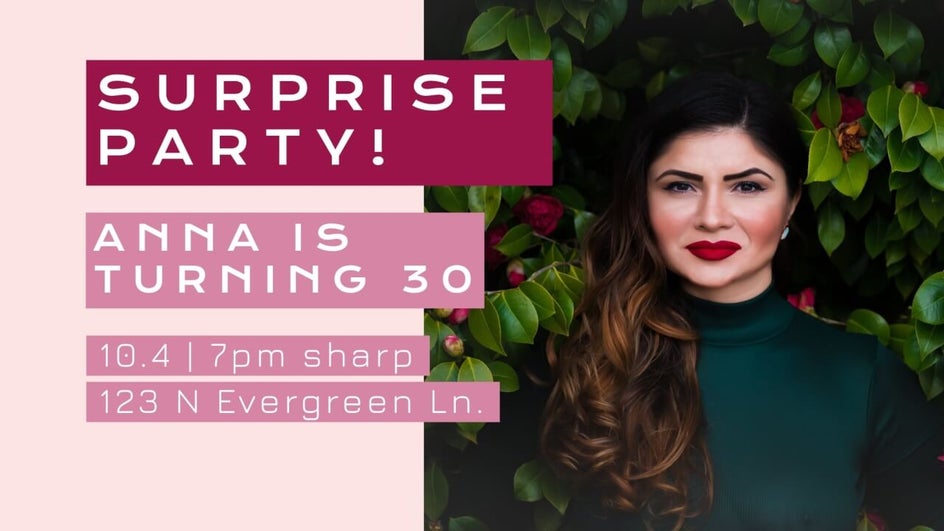
Private: If you’ve ever organized a small gathering on behalf of yourself, a friend, or a family member (i.e. a birthday party, spring picnic, housewarming celebration, or engagement party), then chances are you may have created a private Facebook Event. This allows you to specifically choose who you want to invite to your event and only invited guests will be able to see your event’s details, photos, and guest list.
Once you have an idea of what type of Facebook Event you want to organize, it’s time for the fun part – creating your Facebook Event cover graphic!
How To Create Facebook Event Cover Graphics
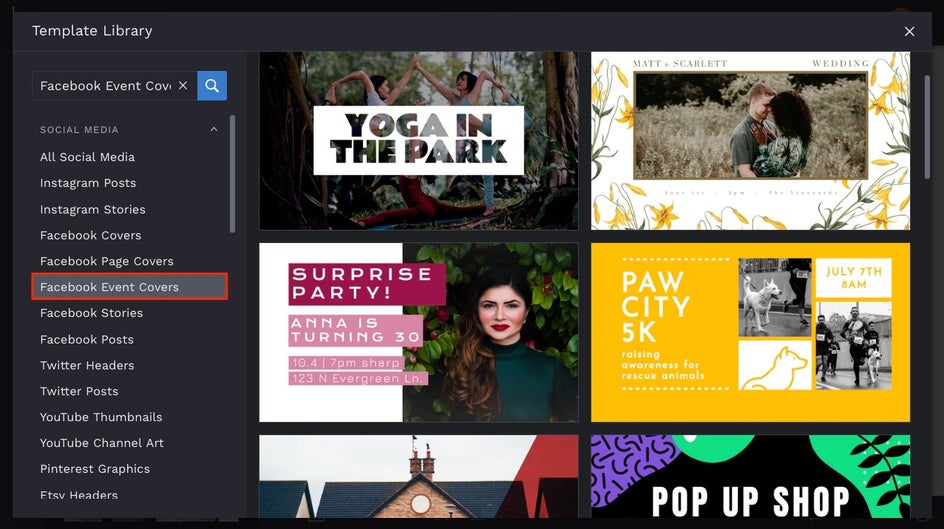
To get started, head to BeFunky’s Graphic Designer and choose your desired Facebook Event Cover template. You’ll find these in the Templates tab of the main menu on the left. Click Search Templates to access the Template Library.
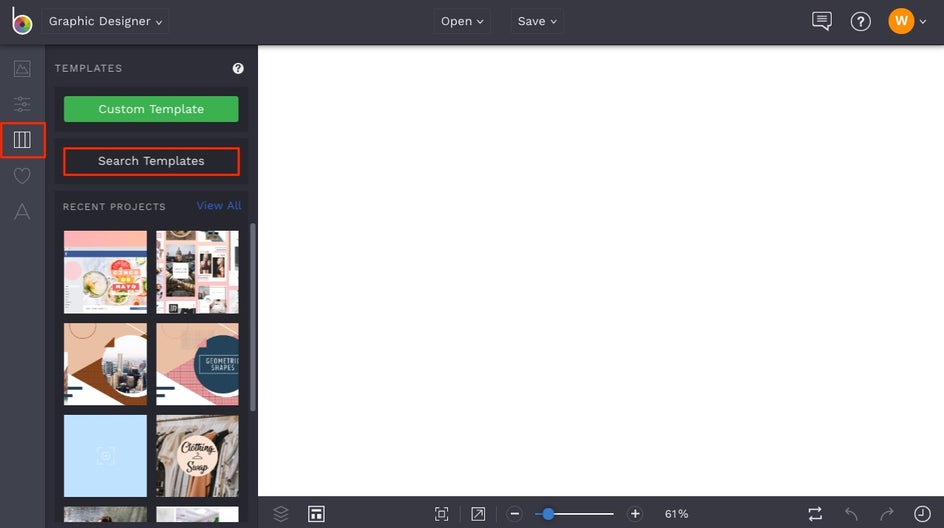
Once you’re in the Template Library, you’ll find Facebook Event Covers underneath the Social Media category in the menu on the left. Browse through the Facebook Event Cover templates until you find the perfect one and notice that when you click on any template, you get a zoomed in preview. Choose the Select Template button to load it onto your canvas and begin customizing.
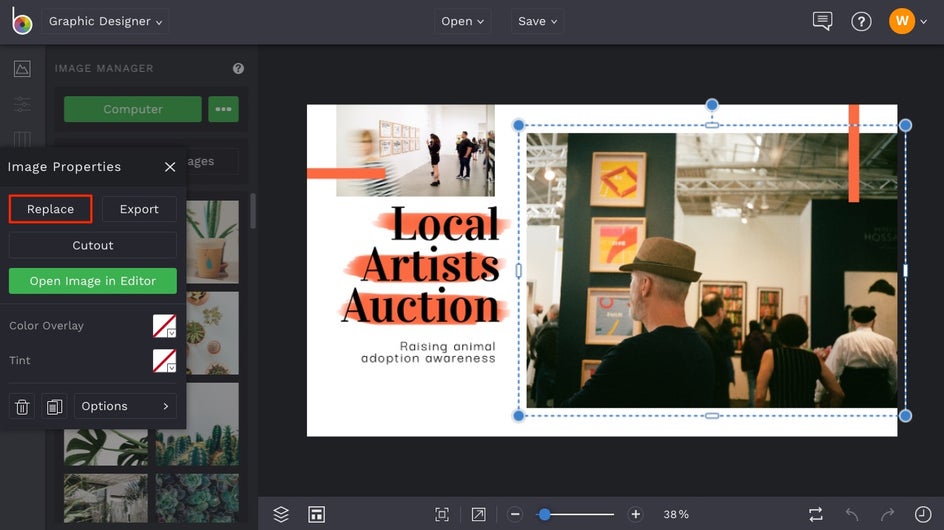
The first thing you’ll want to do with your new template is to swap the images out for ones tailored to your own event. You can do this in two ways:
Click on the image, then select Replace from the Image Properties toolbar that appears. This allows you to directly replace the template’s existing image with an image from your Computer.
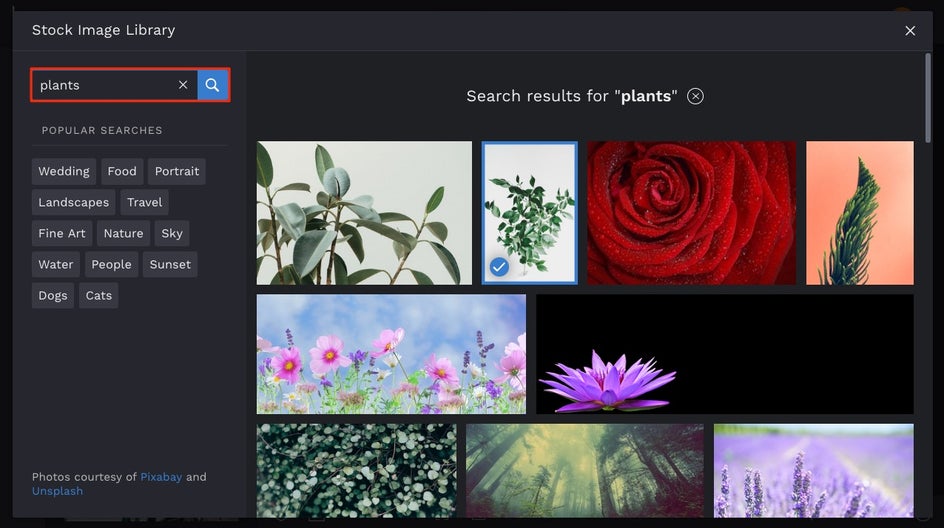
Alternatively, you can open the Image Manager tab in the menu on the left to upload a new image from your Computer, BeFunky, Facebook, or from our extensive Stock Images Library. To access the Stock Images Library, click on the Search Stock Images button. Enter your search term (i.e. ‘plants’) into the search box at the top left and click on the images you wish to use.
They’ll be added to your collection as thumbnails in the Image Manager that you can drag-and-drop to replace any image on your design template.
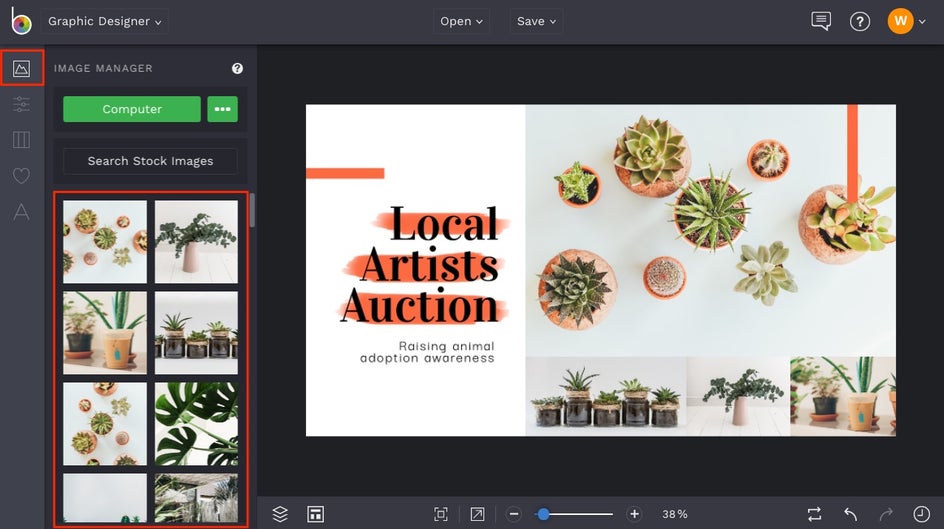
Next, you might want to change the existing text in your template to better reflect your Facebook Event. To alter elements such as Font, Font Size, Font Color, Spacing, Alignment, and more, click on the text box once. You’ll see a Text Properties toolbar appears containing a number of different customization options. To customize what the text says, just double-click it with your mouse and type what you want.
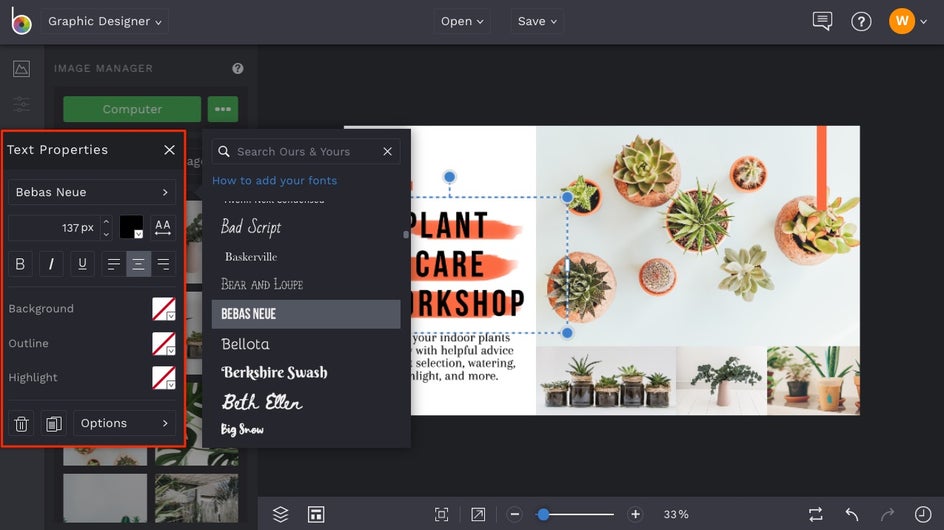
Once you’re happy with your text, it’s time to focus on your template’s existing design elements or add in some more. To delete any elements you don’t wish to keep, select them with your mouse and hit Delete on your keyboard. Alternatively, you can use your mouse to drag the element into a new position.
To insert a new graphic more suited to your Facebook Event, navigate to Design Elements tab (the heart symbol) in the main menu on the left. From here, you can choose from a selection of basic shapes or click Search Graphics to explore our entire library of graphics covering a wide array of themes.
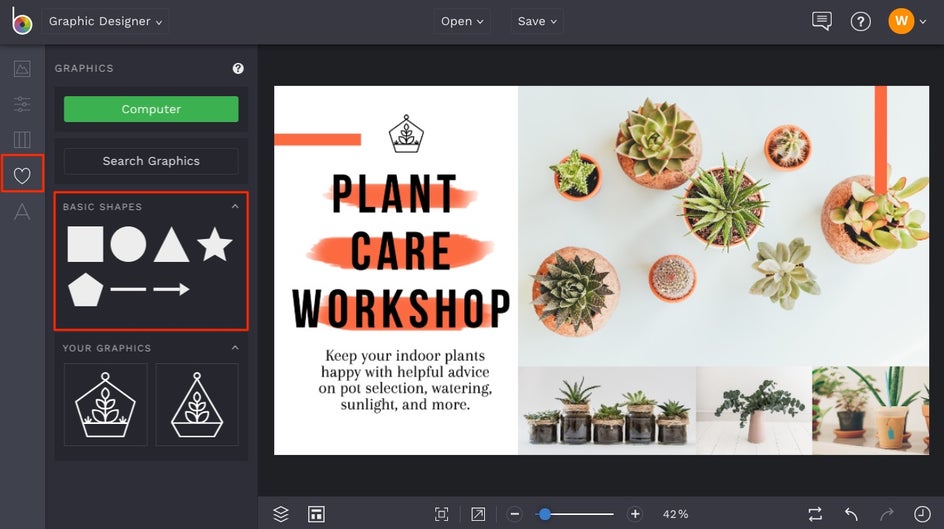
If you wish to change the color of any graphic, just click on it then select Color Overlay from the Graphic Properties toolbar that appears. You can use the Color Chart to select a new color, or type the Color HEX Code into the provided space if you have a specific hue in mind. You can also select an existing color in your design by using the Eye Dropper Tool.
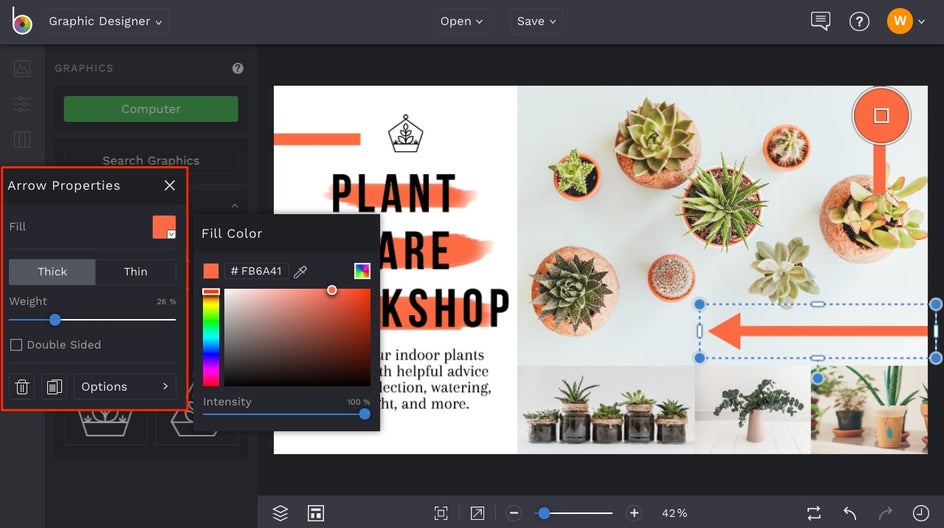
Once you’re happy with your customized Facebook Event Cover template, it’s time to save your design so it’s ready to upload! Click Save at the top to save your work to your Computer, as well as Facebook, Dropbox, and more!
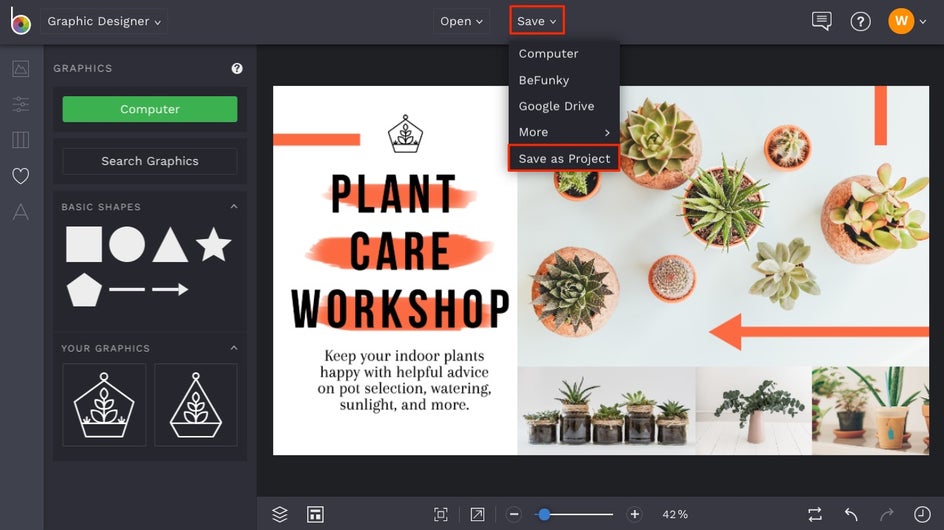
If you want to come back to your project at a later date (i.e. to use your design for another event), then we also recommend the Save as Project option (which lets you save it as an editable BeFunky Project file to your BeFunky account or Computer).
Final Results
Ta-da! Wasn’t that easy? You've now got a Facebook Event Cover that will attract all the right attendees!
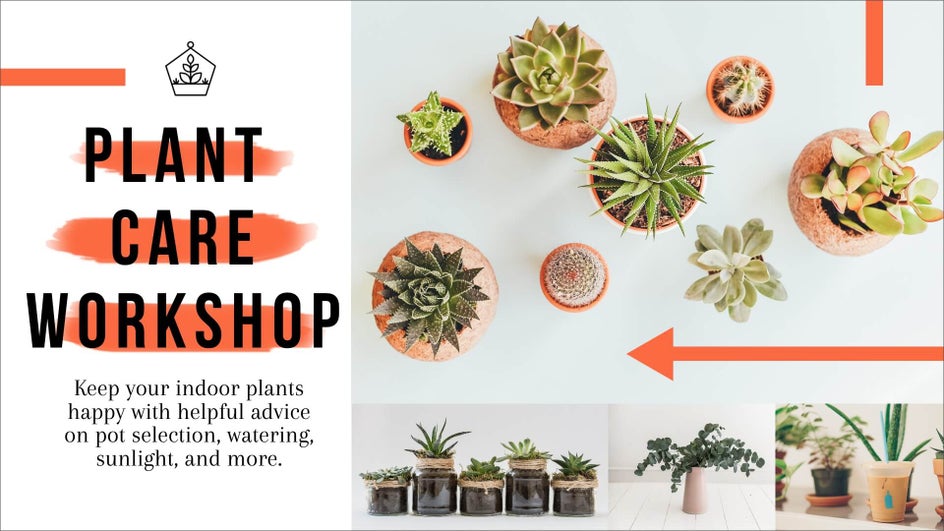
Ready to get the party started? Now that your Facebook Event Cover is on-point, it’s time to create the Facebook Event, provide all of the details, choose your guest list, and (of course) upload your rockin’ new event cover photo. You’ll be celebrating in no time!


