How to Add a Ghostly Photobomb to Your Images
There’s nothing quite as spooky as discovering a translucent figure lurking in the background of your photos. It’s the kind of eerie photobomb that leaves everyone wondering, "How did we miss that?" Ghost photobombs are a classic Halloween trick, but they’re also a fun way to add some supernatural charm to your photos year-round. Whether you want to create a subtle and shadowy figure that’s barely noticeable or a full-on spectral presence, BeFunky’s Photo Editor makes it easy to bring your ghostly visions to life.
Best of all, creating a ghost photobomb is quick, easy, and doesn’t require any advanced photo editing skills. Looking to haunt your photos? Keep reading, because we’ll show you how to create that classic "ghost in the background" effect using BeFunky!
How to Add a Ghost to the Background of Your Photo
Ready to create a spine-chilling surprise? Head to the Photo Editor, then follow these 6 easy steps to add a ghost to your photo.
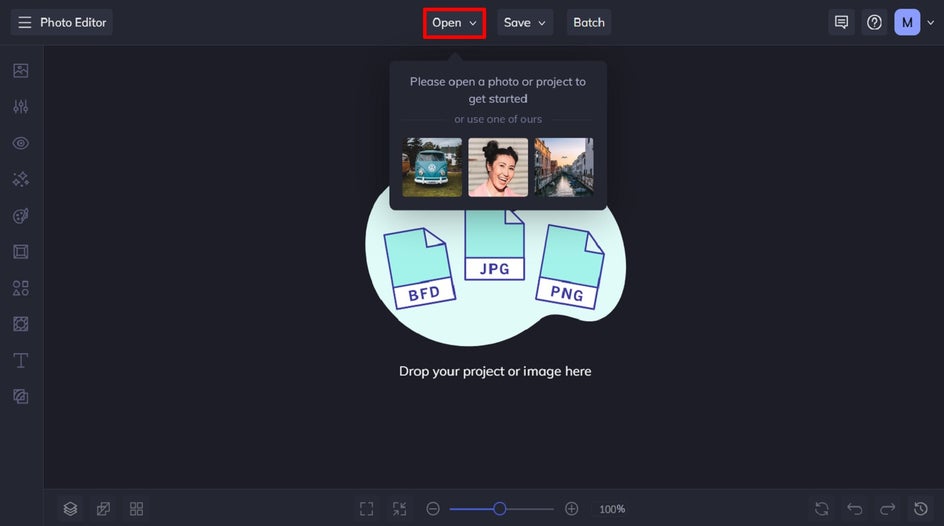
Step 1: Open Your Photo
Click Open at the top of the Photo Editor and select a photo. This could be a family photo, engagement or wedding photo, or even a selfie – there’s no limit to what you can turn into a supernatural photo!
Step 2: Add the Ghost Image Layer
Upload the photo of your ghost (or the person you want to turn into a ghost) to the Image Manager. Or, drag and drop it straight from your desktop. Then, add it as a layer.
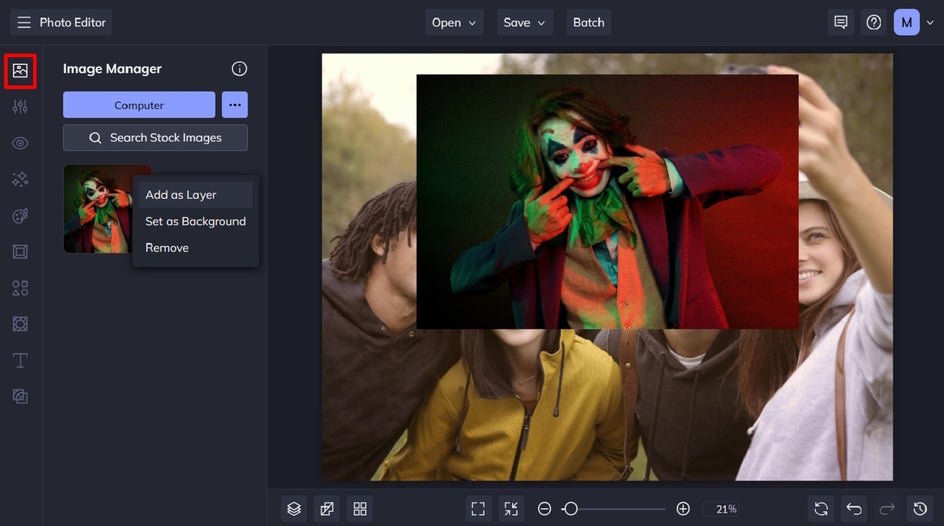
Click on the image layer, followed by Cutout from the Image Properties menu.
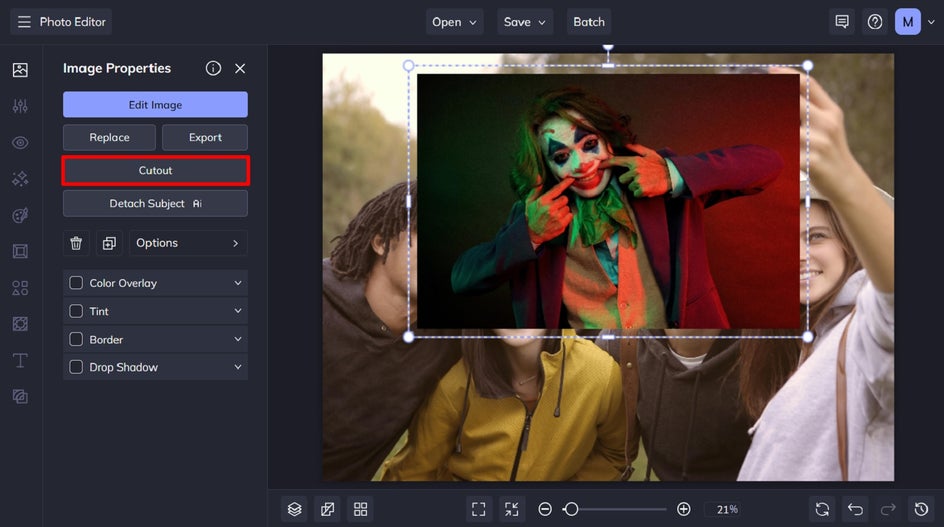
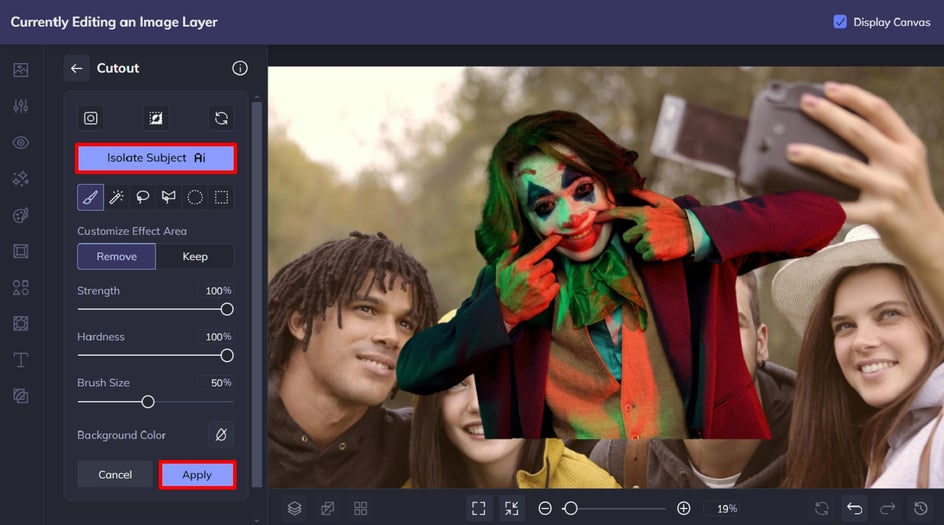
From the Cutout tool, click Isolate Subject to remove the background from your subject. Then, click Apply to keep your changes.
Step 3: Add a Ghostly Effect
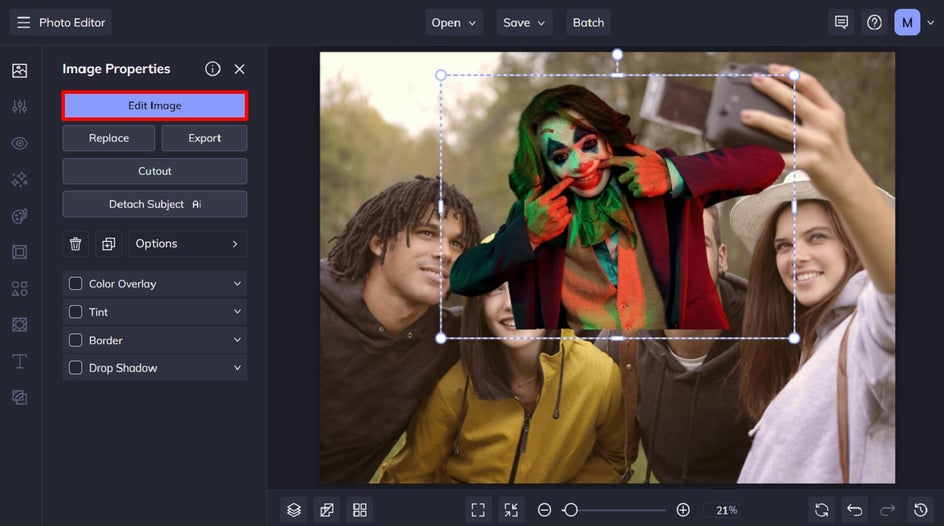
It’s time to turn up the spook factor! Click your subject again, but this time click Edit Image from the Image Properties panel.
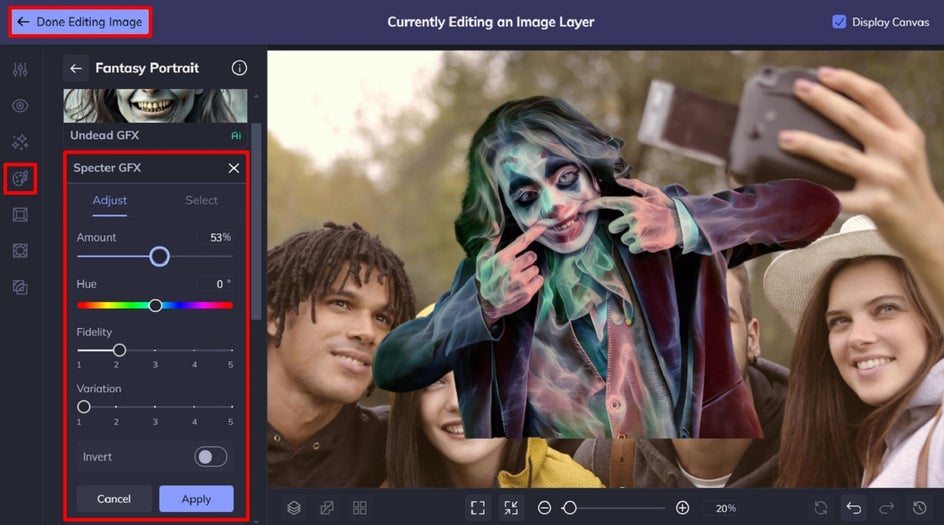
Next, navigate to Fantasy Portrait, which you can find in the Artsy tab. To turn our subject into a ghost, we’re adding the Specter GFX effect. Make any necessary adjustments to the effect, then apply your changes. Then, click Done Editing Image in the top-left of the screen.
Step 4: Adjust the Position and Opacity of Your Ghost
Now it’s time to create our eerie ghost photobomb. Because we want to place our ghost behind the group of people in our main photo, we also need to use the Detach Subject tool to create separate subject layers. You’ll find this within the Image Properties menu.
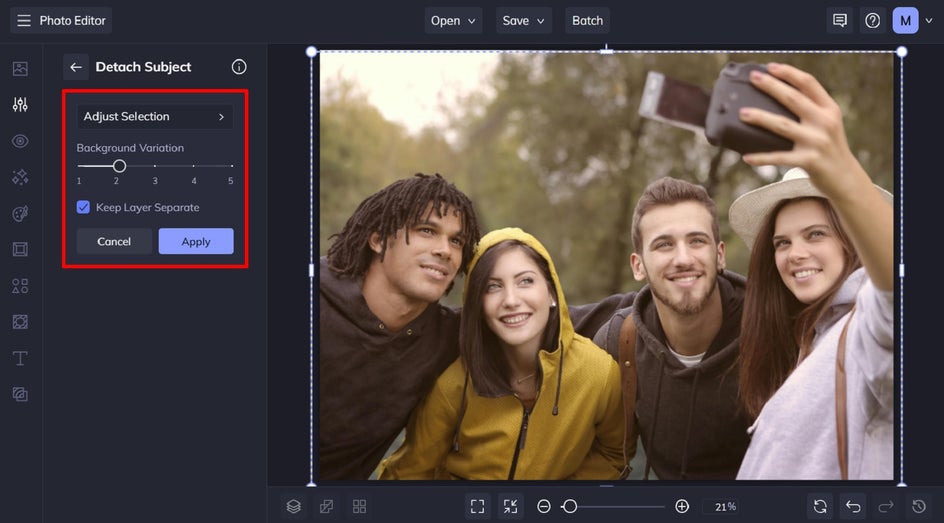
Click and drag your subject to reposition them within the background of your main image.
To make our ghost photobomb even more realistic, we’re also going to adjust its opacity. Select the ghost subject with your cursor, then click Options from the Image Properties panel. This will allow you to view and adjust the Opacity slider, which makes your subject more translucent.
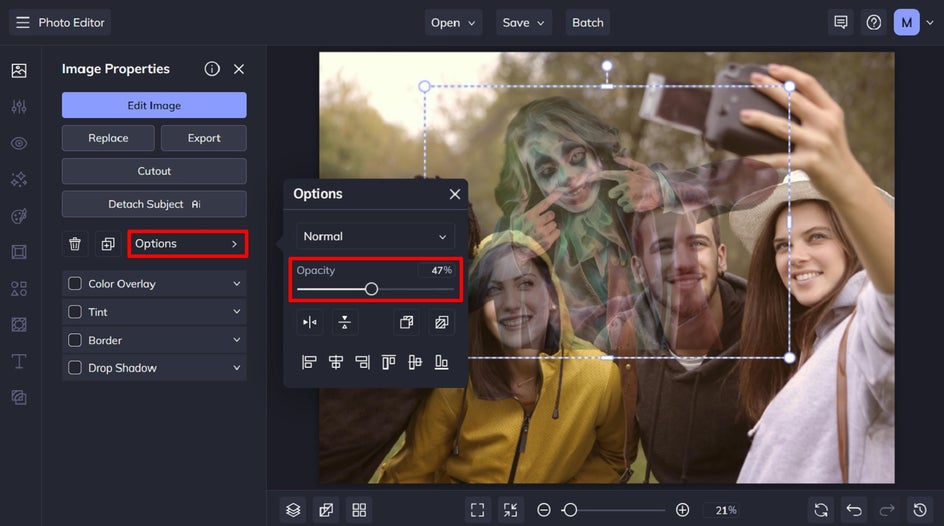
If you want to go one step further, you can also add an eerie glow to your ghost using the Drop Shadow feature.
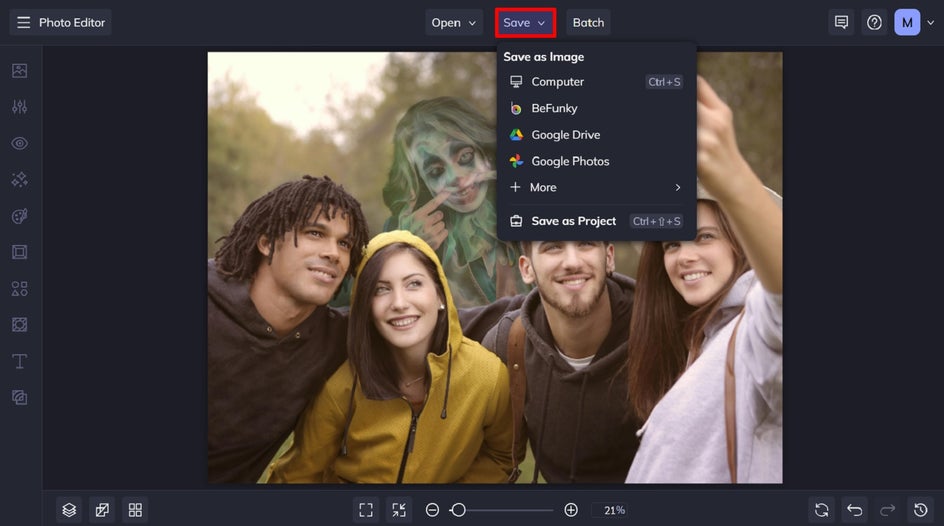
Step 5: Save Your Supernatural Photobomb
Once you’ve finished adding a ghost to your photo, all that’s left to do is to save it. Click Save at the top of the screen, then select your desired save location and format.
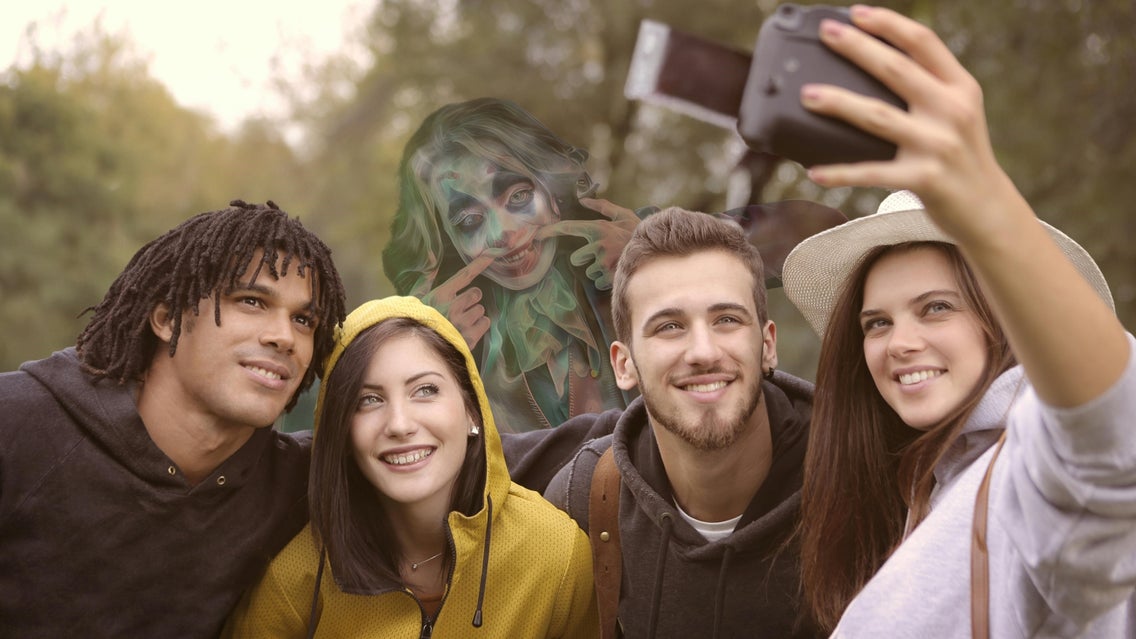
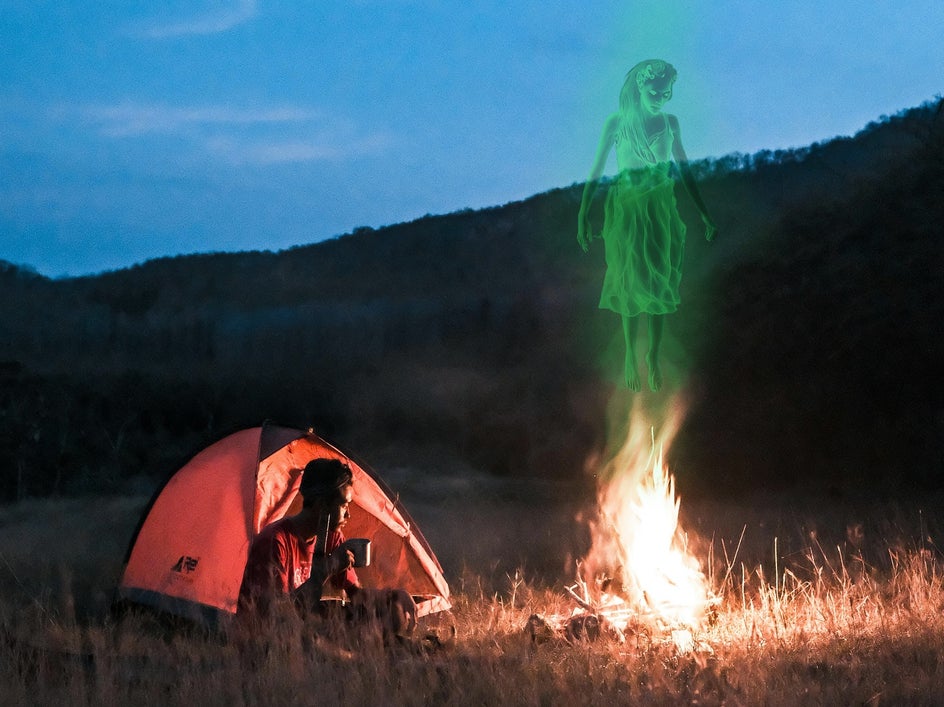
Before and After: A Ghouly Photobomb Surprise
All it took was a few minutes to create this surprise specter. It certainly adds an eerie touch to this unsuspecting group photo!


Ghost Photobomb Inspiration
If you’re looking to add a little extra creativity to your ghost photobomb, here are a few eerie ideas to take your images to the next level:
Supernatural Glow
If you want to amp up the paranormal factor, consider giving your ghost a glowing, ectoplasmic look. To do this, simply apply a slight green or bluish tint to the ghost, replicating the eerie glow often associated with supernatural beings. This otherworldly hue will make your ghost stand out as something truly supernatural.
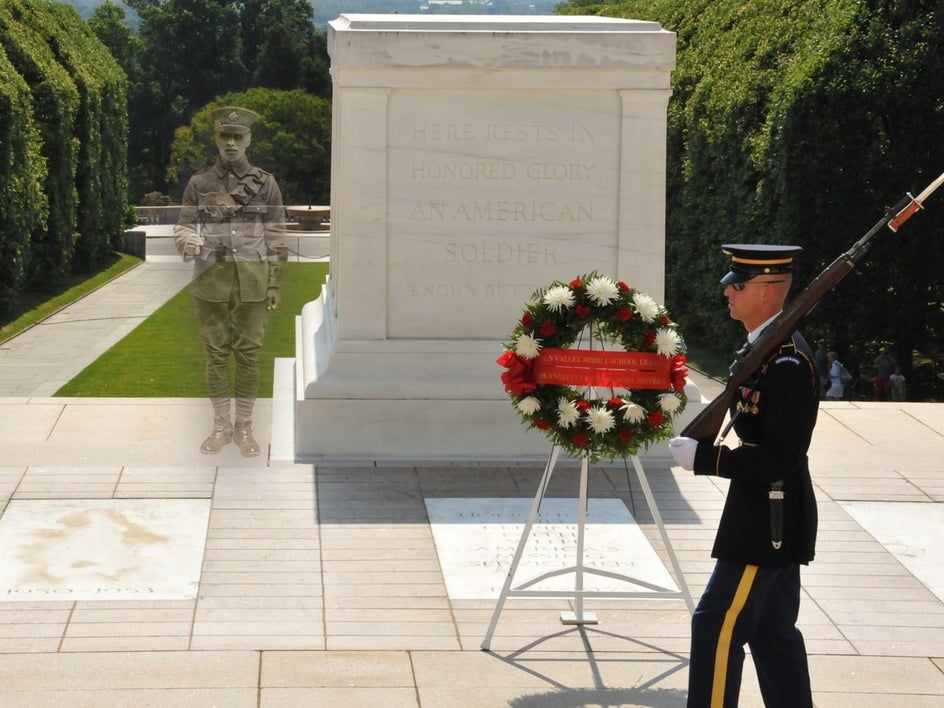
The Time-Traveling Ghost
Want to play with timelines? Add a ghostly figure from a historical event or era into a modern-day photograph. Imagine a ghostly soldier haunting a modern-day battlefield, or Marie Antoinette herself wandering through a 21st-century garden party. This effect adds a surreal, time-traveling twist to your images and can spark creative storytelling through your photos. Consider using a sepia or black and white photo effect to heighten the old school, haunted vibe.
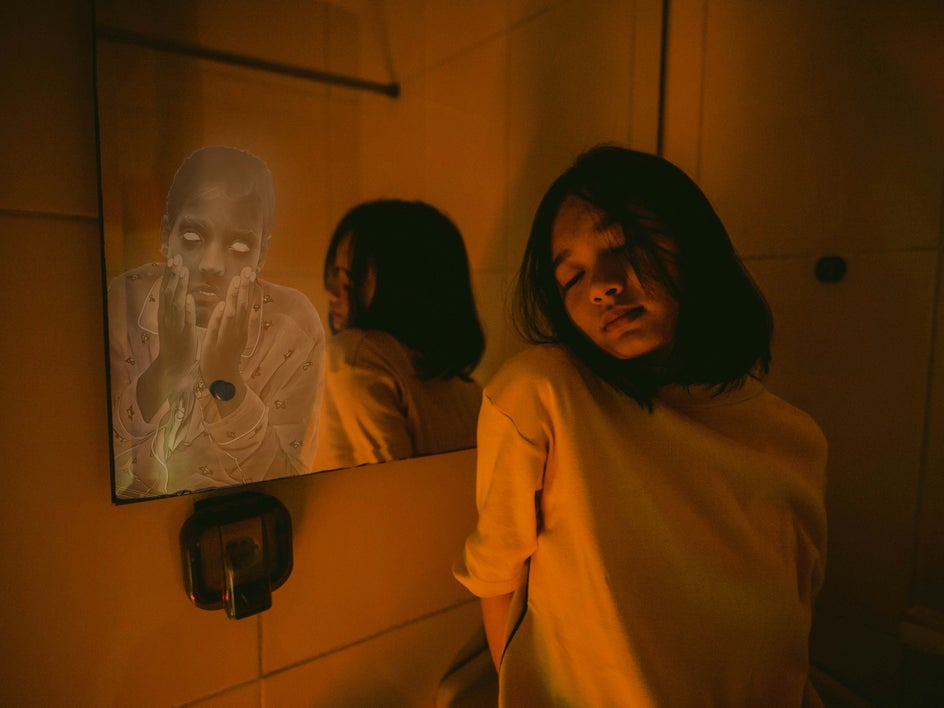
Haunted Mirror Reflection
Take your ghost photobomb to the next level by adding a spectral figure to a mirror reflection. Start with a photo that includes a mirror in the background, whether it’s in a room, hallway, or even part of a selfie. Then, use the Cutout Tool to insert a ghostly figure inside the mirror, as if they were lurking behind the subject but only visible in the reflection. This eerie ghost photobomb technique adds a spine-chilling twist to your photo, making it seem like a supernatural presence is hiding in plain sight, waiting to be discovered.
Create Your Own Ghost Photobomb
Creating a ghost photobomb is a fun and easy way to add a supernatural twist to your photos. With BeFunky’s Photo Editor, you can quickly and easily add a secret ghost to the background of any photo to create the perfect eerie surprise.
Visit BeFunky’s Photo Editor to start adding a ghost to your photo today!