AI Background Remover: Instantly Transport Yourself Anywhere
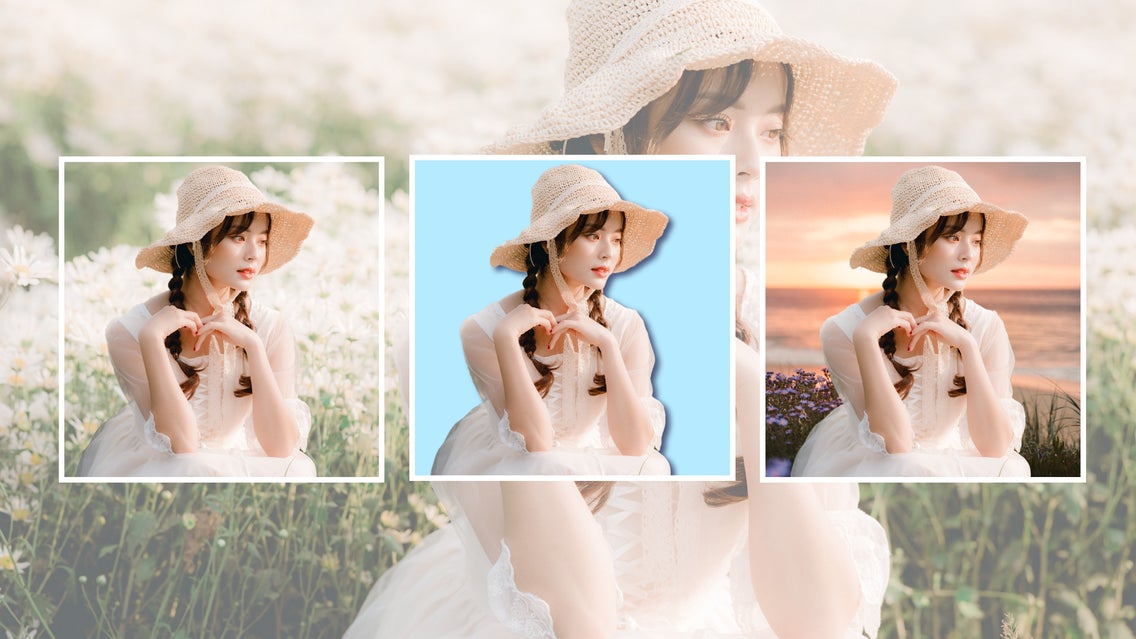
Changing photo backgrounds used to be a lengthy process of manually erasing a background, pixel by pixel, and adding a new background behind it. This required expensive photo editing software and plenty of extra time on your hands. Luckily, BeFunky’s AI Background Remover allows you to add backgrounds in a single click.
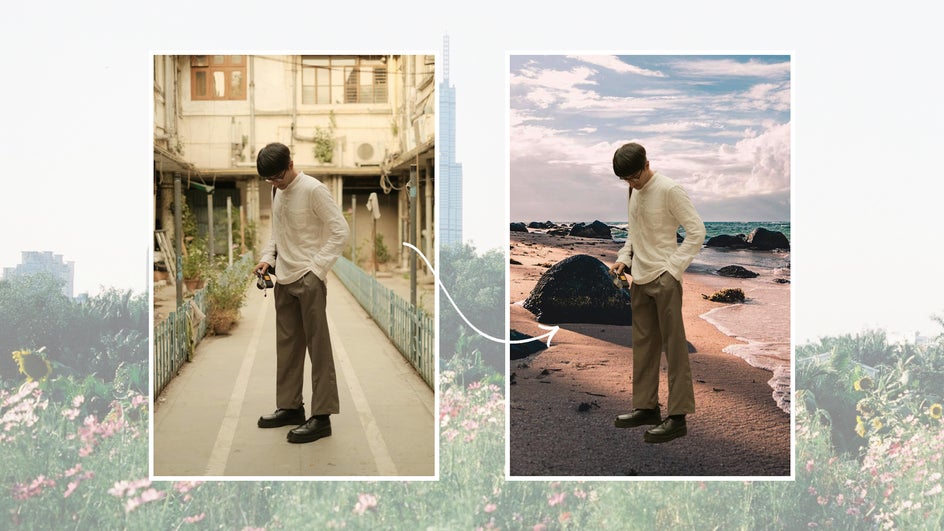
In this tutorial, we’ll show you the many capabilities of the AI-powered Background Remover, from adding stock photo backgrounds to studio images to changing outdoor backgrounds completely. You can also use this photo background changer for more creative purposes like social media posts, stationery, and more.
What Is a Background Changer?
A background changer tool can add a new photo background in just a few clicks. There are a few free background changers online, but these often have limited capabilities and aren’t great at isolating the photo’s subject. Meanwhile, pricey photo editing software like Photoshop requires many extra steps to change a background. The AI Background Remover tool uses artificial intelligence to accurately isolate your subject and add a photo background that looks natural from the start.
When to Change an Image Background
There are many times you might want to change a photo background. For instance, there could be lots of clutter and distracting elements in the original background, and you want to clean it up to draw more focus to your subject. (This comes especially in handy for shooting portraits.) If you’re using the photo for a specific brand or event, you might want to put the subject in a different context, or choose a different color palette. Maybe you shot in a studio for the best lighting and now you want to add a new image background that isn’t just blank space.
Ultimately, there’s no limit to the type of backgrounds you can add to a photo. You can change the location, the season, and the time of day. (Looking to replace a sky background specifically? We’ve got the tool for you.) You can create fantasy scenes for cosplay photos or book covers. And, if you’re simply not happy with the location where you shot your subject, you don’t have to go reshoot a completely new set of photos somewhere else!
A background changer also comes in handy for social media posts. If you’re trying to stick to a specific aesthetic for your Instagram, it’s helpful to be able to add a similar background to all your photos regardless of where they were shot. You can add solid backgrounds, abstract backgrounds, or just use other photographs.
You can also make stationery items like cards and stickers with the Background Remover by adding a solid background behind your subject. For example, rather than using a vector graphic at the front of a birthday card, you can use an image of their pet, of them, or even of you!

How to Add a New Photo Background
The Background Remover is an amazingly simple photo editing tool that packs a big punch. If you’re ready to try it out for yourself, just click here to head directly to the Background Remover and upload any photo.
Pro Tip: If you're starting from a different section in the app, the Background Remover can be found in the Edit tab.
Step 1: Adjust Selection (Optional)
Once you’re in the tool, the Background Remover automatically creates a transparent background for your photo. This is done using AI that can almost perfectly distinguish the edge of your subject from your background. In this case, it’s worked perfectly:
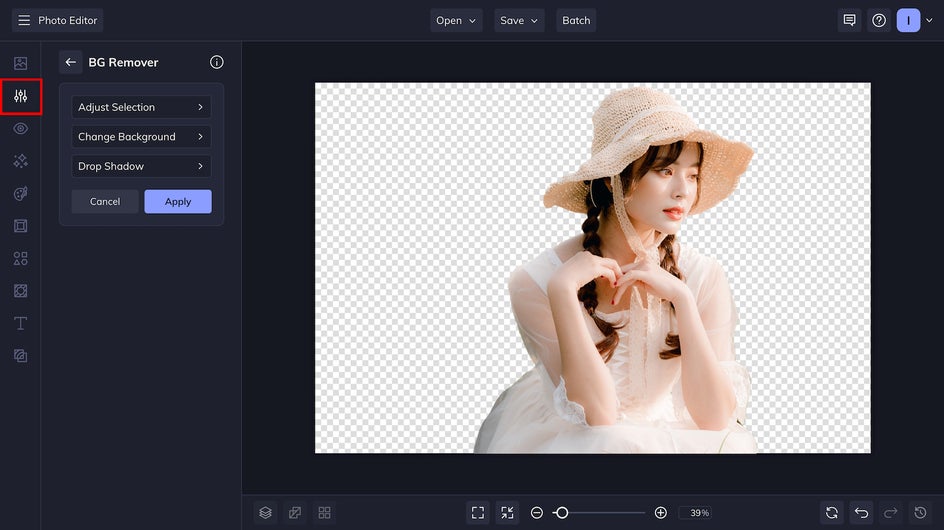
However, if the Background Remover has kept some part of the original photo background you didn’t want included, or erased a part of your subject, you can Adjust Selection and manually edit the mask. Usually, these will be minimal changes like wisps of hair or small gaps between fingers. A silhouette with a high amount of detail may need a little more editing.
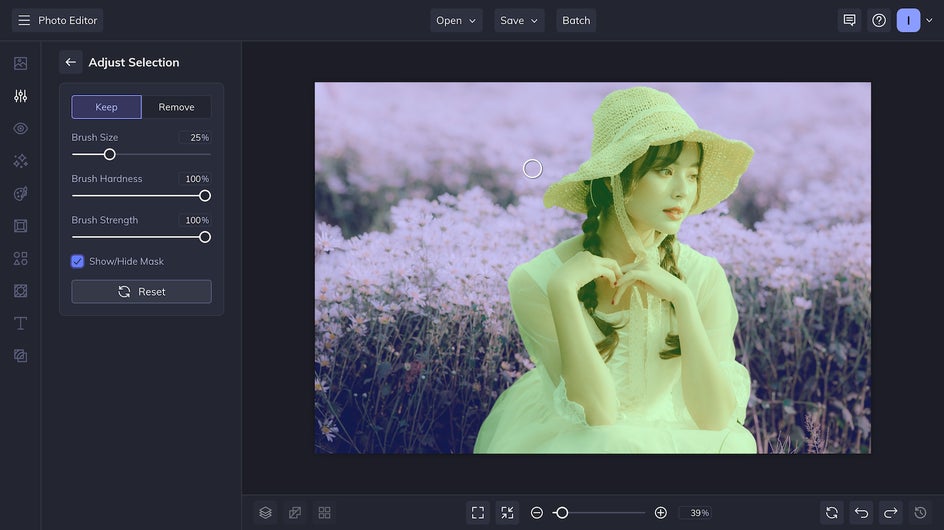
Additionally, if you are using an image where your subject is a similar color to the background, consider adjusting the contrast of your image before using the Background Remover.
Step 2: Change Photo Background
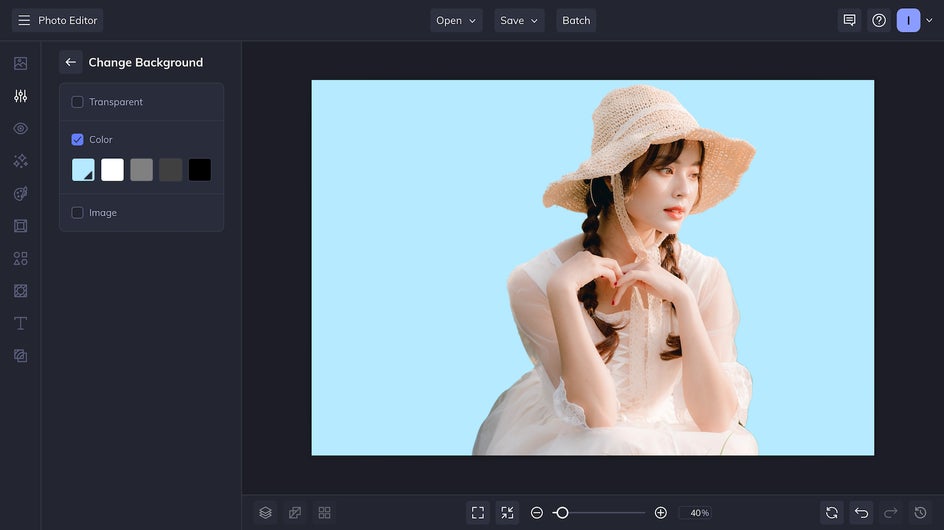
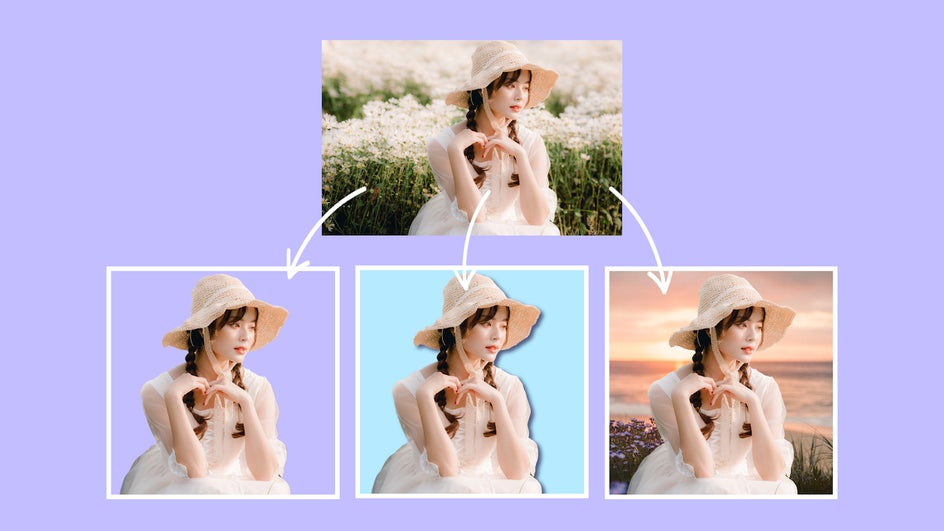
If you want to add a new background to your photo, Change Background tool allows you to pick one of three options: Transparent, Color, or Image. Transparent is the default, visualized by the gray and white squares. When you save this as a PNG, it will have no background at all, and can be used as a kind of digital sticker that you can place wherever you want. This comes in handy when you want to use the same photo subject for a wide variety of purposes.
Checking the Color option allows you to add a solid color background to your photo.
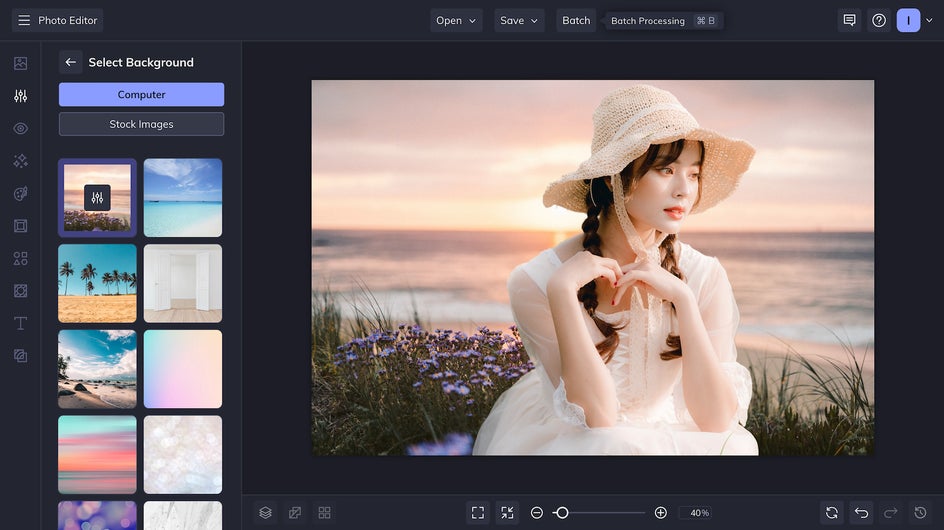
The Image option lets you add a completely new background by picking a stock image or uploading one from your computer. Switch between multiple backgrounds to figure out which one works best for your subject!
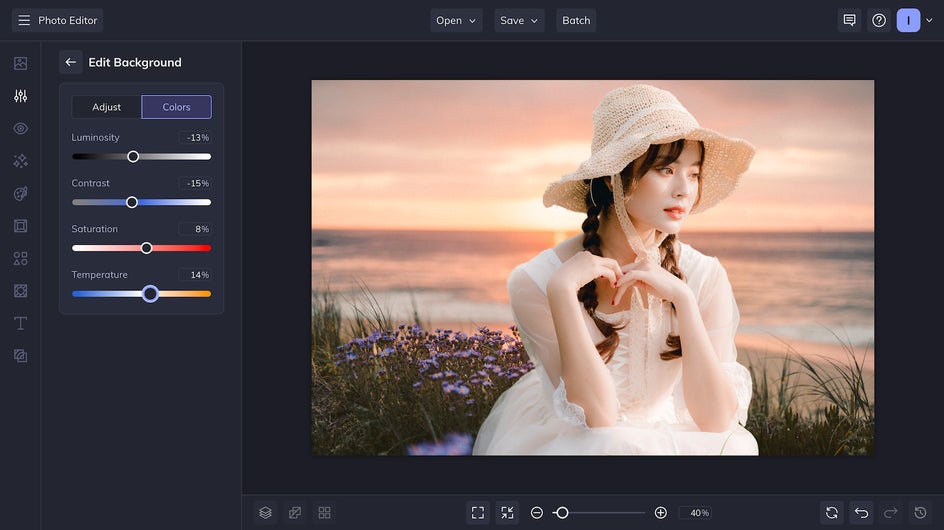
With the Edit Background tool, you can scale your new photo background to your subject, or even adjust the colors to make it look more natural. Because you can do this directly with the Background Remover tool, it saves you the extra step of editing a background photo beforehand.
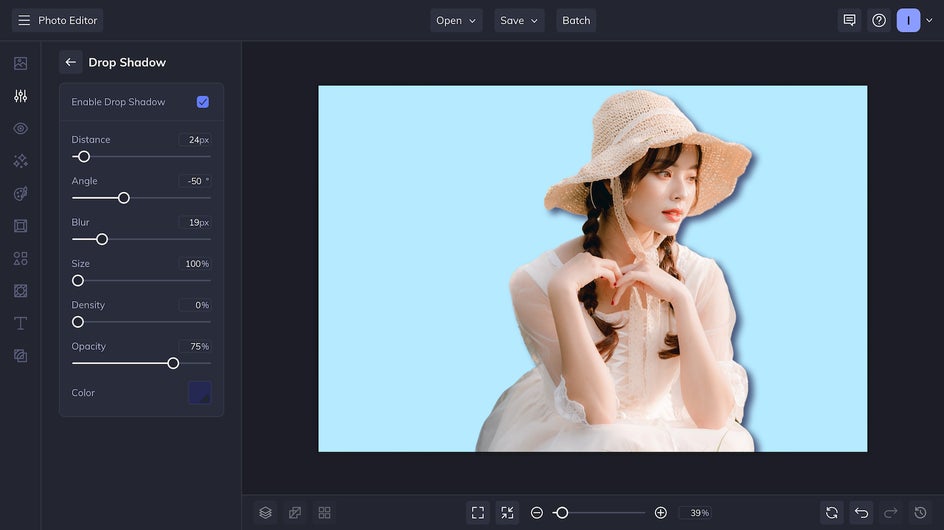
Once you’ve chosen your new image background, you can add a Drop Shadow to make your subject and background blend seamlessly. This works best with solid colors and very close-up backgrounds like a wall or texture.
Step 3: Save Your Photo
The last step is to Save your image at the top of the screen. Don’t forget to save it as a high-quality PNG!
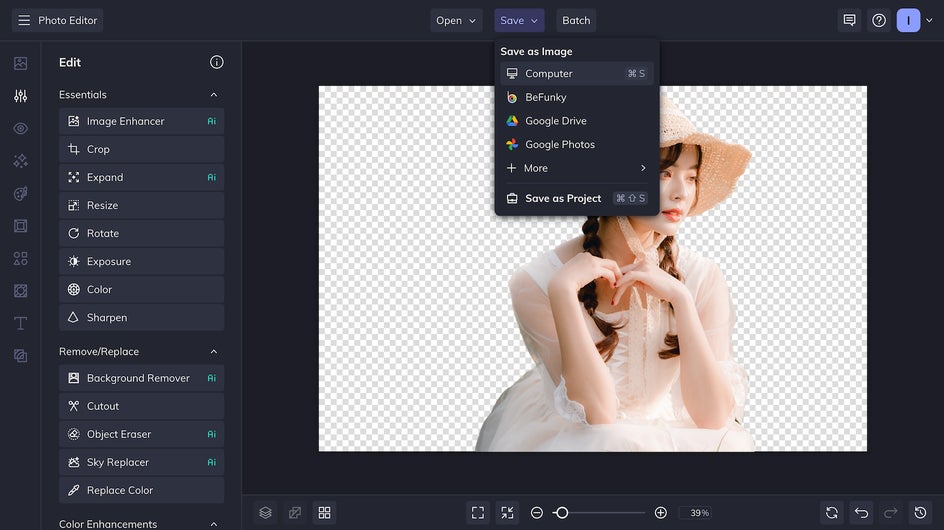
And that’s it! In just one or two clicks with the AI Background Remover, you’ll have a completely new image background. Here’s how all of these photo backgrounds turned out:
Change Photo Backgrounds in One Click
If you’ve been looking for a background changer that’s simple, effective, and inexpensive, BeFunky’s Background Remover is the tool for you. Once you can make changes to your image backgrounds in a single click, the possibilities are endless! Try out the AI-powered Background Remover for yourself today.


