Sky Replacer: How to Apply a Solid Color or Tint the Sky of Any Image
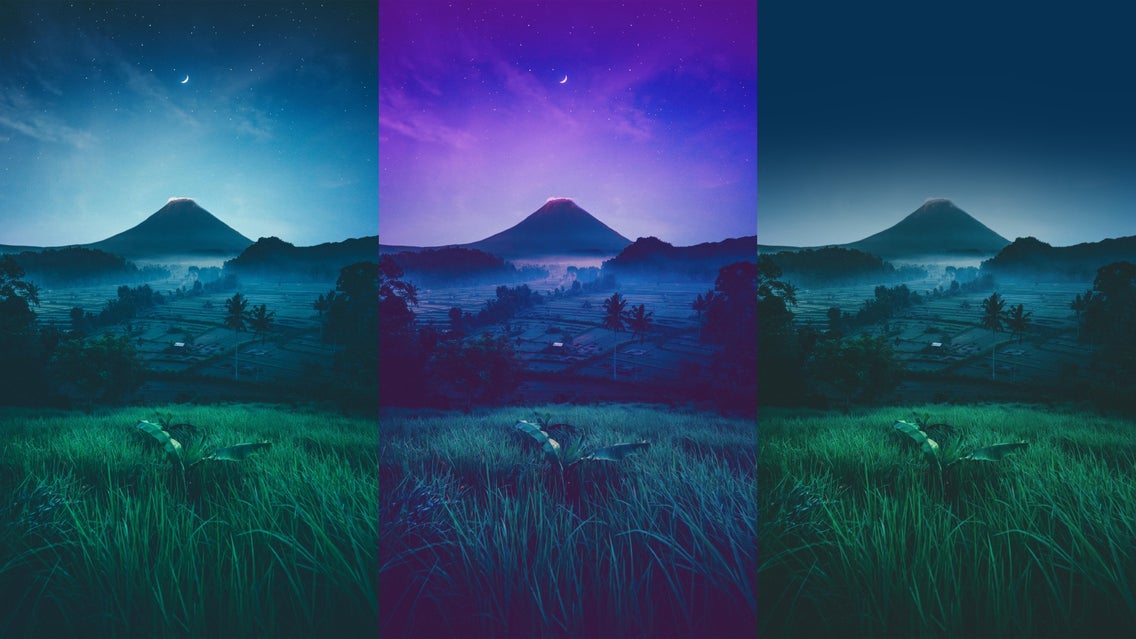
Have you ever wanted to change the sky in an image? If so, you may have already heard of our Sky Replacer tool. And if not, where have you been? With your head in the clouds? All jokes aside, here at BeFunky we’re always coming up with easy and exciting ways to get creative. And with our advanced image processing power, we take subject and background manipulation to the next level.
The Sky Replacer allows you to do what the name suggests – replace the sky of any photo. Our AI isolates the sky of your image and provides all of the sliders you need to achieve seamless results. This tool also includes the ability to turn the sky of your image into an opaque, uniform color. And with a small adjustment to the opacity slider, you can achieve a subtle tint effect as well. Read on to learn how to get creative with the Color category of the Sky Replacer!
How to Replace Your Sky With a Solid Color
To turn your sky into a solid color – aka completely opaque – head to the Sky Replacer with your photo. Either drag and drop directly onto the canvas, or click on the Open tab to find your preferred method.
Step 1: Prep Your Photo
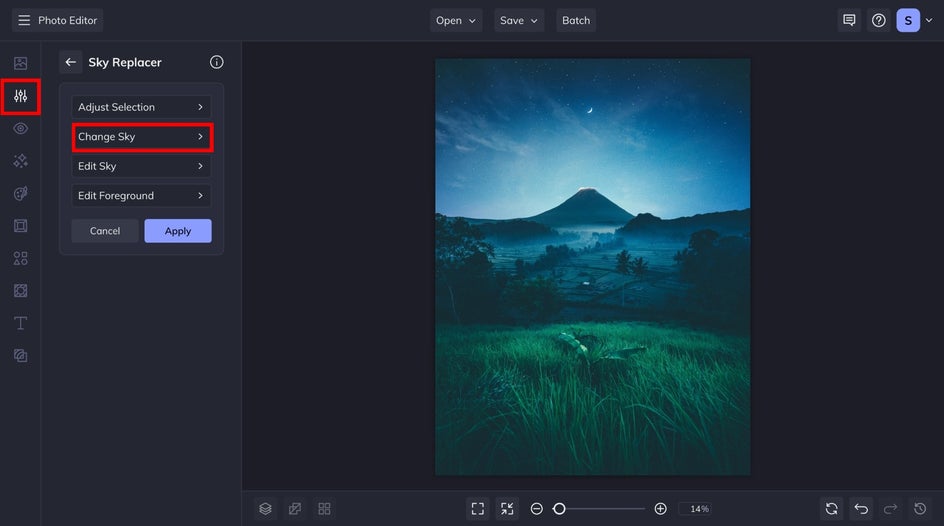
Once your image is uploaded onto the canvas, our tool will automatically isolate the sky. Head to the Adjust Selection menu if you need to make any changes to what was identified as the sky. Then, head to the Change Sky menu.
Step 2: Choose a Color
From the Change Sky menu, check the Color box and the sky of your image will automatically be replaced with an opaque blue by default.

Click on the default color swatch to open the Color Picker, where you can choose any other color on the spectrum.

Keep the Opacity slider at 100 to maintain a bold, solid color skyline. But if you’re looking for more of a tinted effect, keep reading. Whichever direction you choose, be sure to check out the Color Settings tab to make the results look even more refined.
Step 3: Adjust and Apply It
In the Color Settings menu, we cranked up the Affect Foreground slider to subtly apply the sky color to our foreground. We also turned up the Edge Lighting slider to create natural light to the bottom edge of the sky. Those edits, paired with a toned-down Edge Hardness and Shift Edge, make for a flawless, early morning skyline.

Step 4: Save Your New Sky
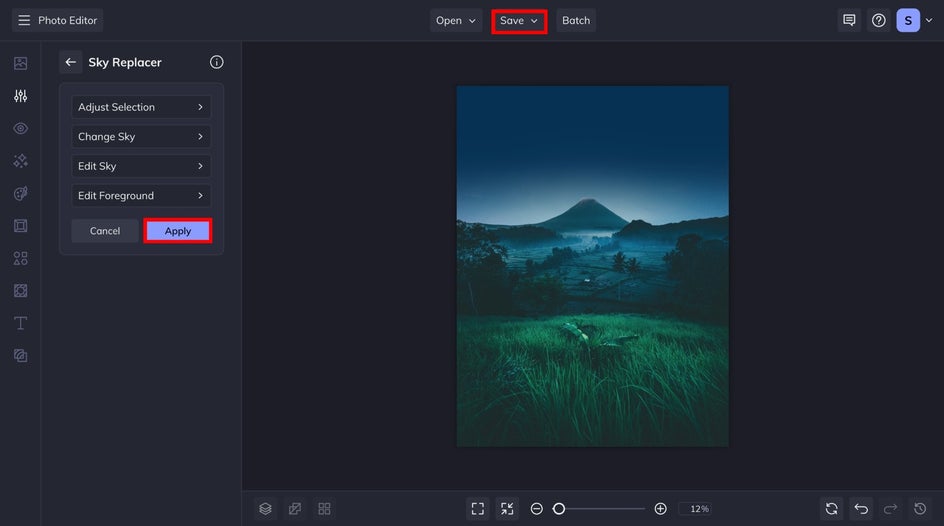
Once you’re done, head back to the main menu of the Sky Replacer and click Apply. Then, choose your ideal save location for easy printing and sharing. And that’s it! It’s really that easy to completely change the sky of your image. It only takes a few seconds.
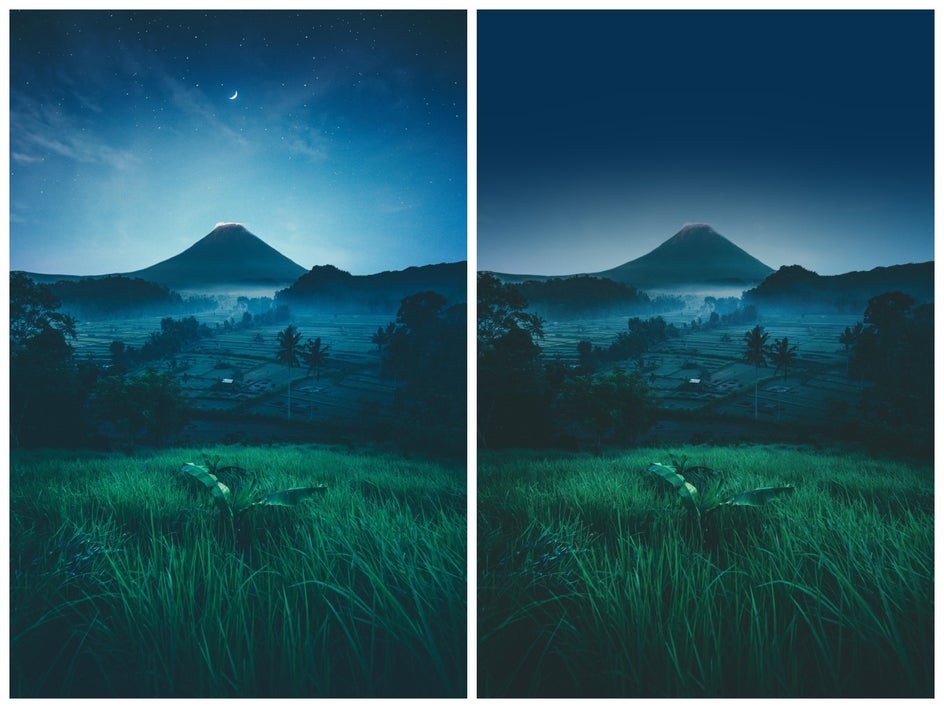
In this example, we applied a solid blue color to our sky and ended up with a clean and polished image. It still resembles a sky, but draws more focus to our foreground. Next, learn how to utilize the Opacity slider to create a tint effect!
How to Apply a Tint to a Sky Photo
Adding a tint to your sky follows almost all of the same steps that we outlined above – with one key difference. The Opacity slider! After choosing a color, bring that slider down until you get the perfect, tinted skyline. Then, utilize the Color Settings tab to either make your foreground stand out or blend it in.
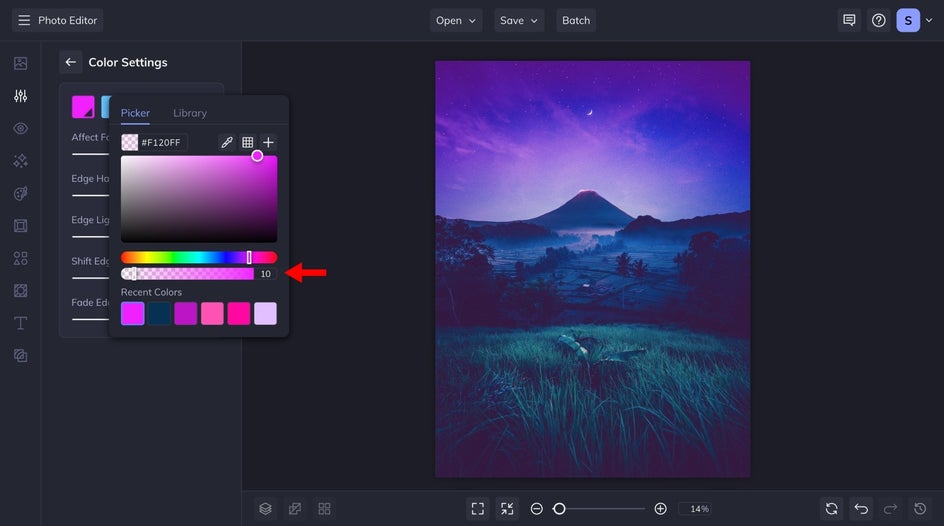
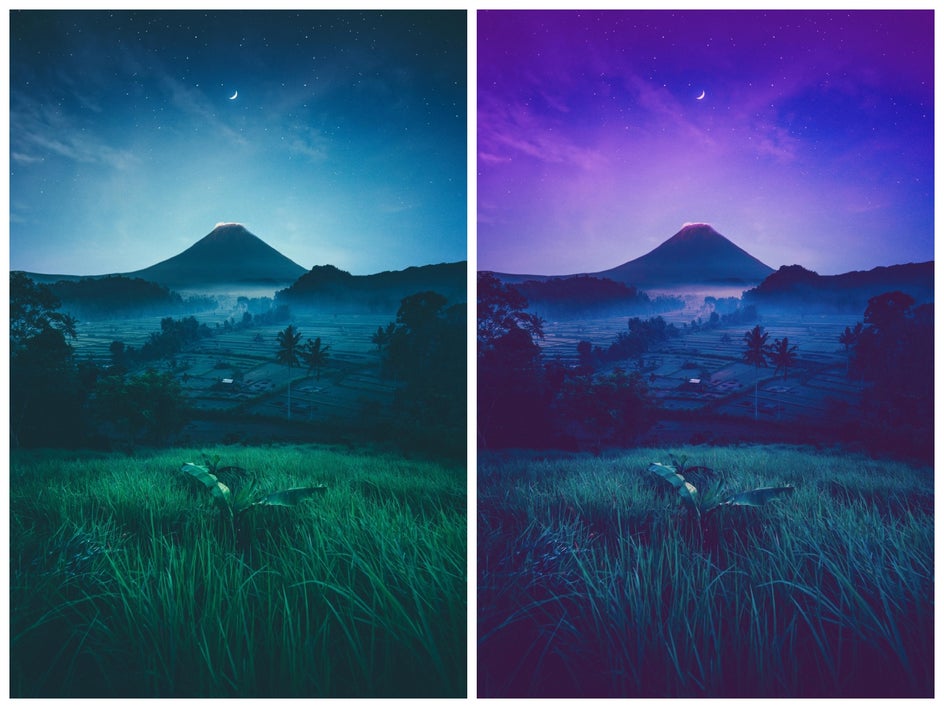
See how we added a sweet pink tint to give our image a more romantic feel? You don’t always need to change the sky to create an entirely new scene completely. And by lightly applying the tint to our foreground, the image looks perfectly blended.
Apply a Solid Color or Tint Your Sky in Seconds
With the Sky Replacer, there are dozens of ways you can get creative. Simply upload any image featuring a sky, and our advanced AI will handle the rest. Whether it’s with an image or solid color, we guarantee seamless results – every time. For those seeking a more subtle effect, try applying a tint to your sky to transform the mood and ambiance of your photo. Get started today!


