How to Customize Your Bluesky Profile

Bluesky is making waves as the fresh, decentralized alternative to traditional social media platforms like Twitter. With its sleek interface and focus on user freedom, it's no wonder people are flocking to it. But just like any social platform, first impressions matter – starting with your profile! The platform allows you to upload a profile picture and a banner to express your unique personality or brand. Whether you're joining Bluesky to connect with friends, share your creativity, or build a professional presence, your profile is the perfect place to start.
Keep reading, because we’ll walk you through how to create and customize your photo and banner so your Bluesky profile stands out!
What Makes Bluesky Unique?
Bluesky is a new social media platform that puts users in control. It’s built on an open system called the AT Protocol, which means you own your data and can customize your experience. Unlike other platforms, Bluesky focuses on transparency and giving users more freedom.
So, what can you do on Bluesky? You can share posts, like and reply to others, and grow your following – just like on Twitter. However, Bluesky has a simpler design and fewer ads, making it a more relaxed way to connect online.
Bluesky Profile and Banner Image Dimensions
To get started, make sure your images are optimized for the platform:
- Profile Picture: 400 x 400 pixels (1:1 aspect ratio).
- Profile Banner: 1500 x 500 pixels (3:1 aspect ratio).
- File Size Limit: Both images must be under 2MB.
How to Customize Your Bluesky Banner Template
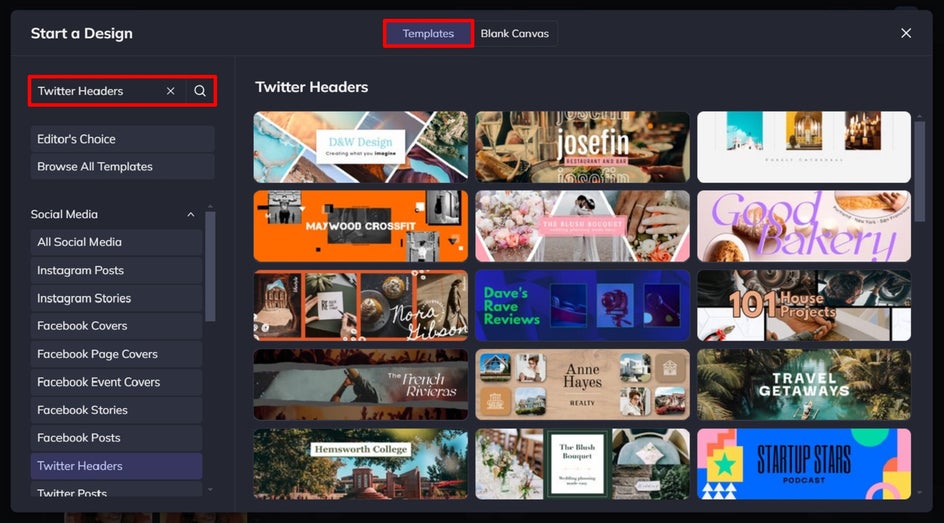
Your Bluesky profile banner is the perfect space to highlight your personality or brand. Thankfully, our Twitter Header Templates are the exact size you need for a Bluesky profile banner.
Step 1: Choose a Bluesky Banner Template
Select the banner template that takes your fancy, then click Use This Template to begin.
Step 2: Add Your Banner Photo(s)
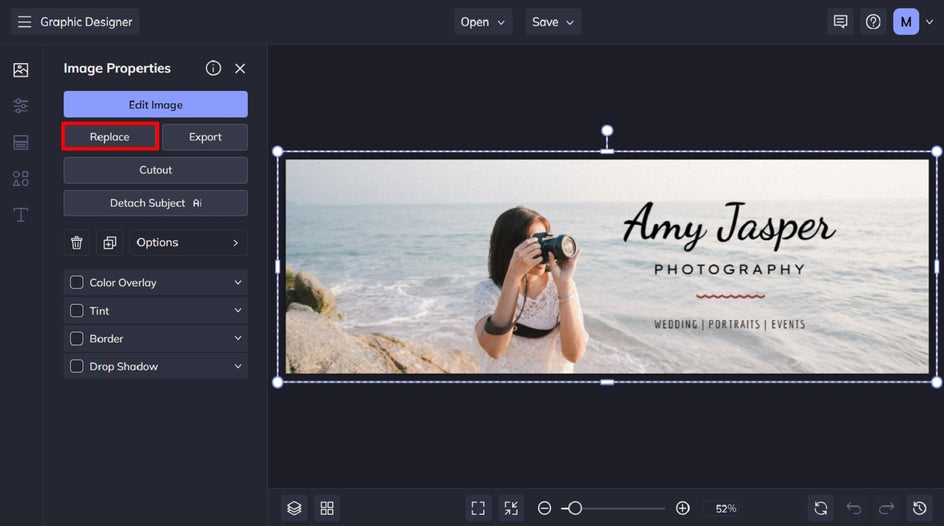
To personalize your Bluesky profile banner, you’ll first want to swap out the existing imagery for your own. Click on the photo you want to change, then click Replace from the Image Properties panel. This allows you to open a file from your computer.
Step 3: Customize the Template
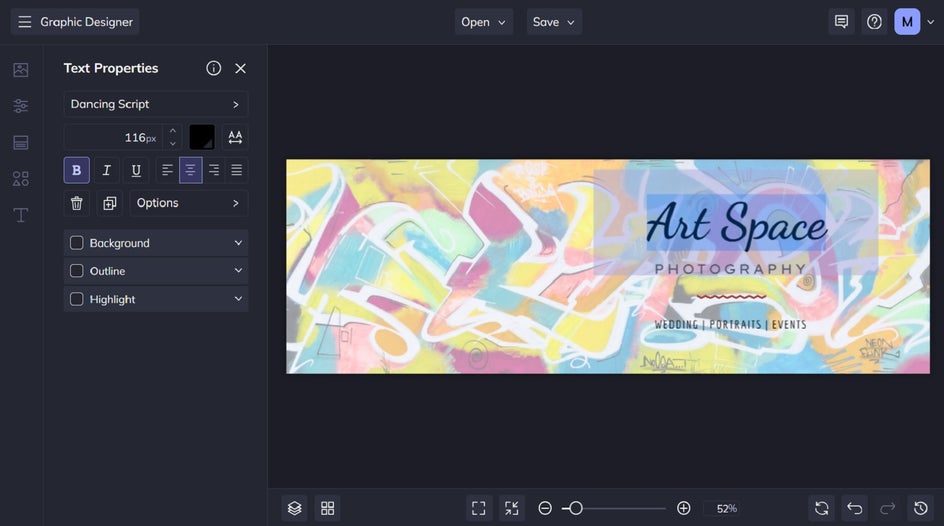
Next, you’ll need to add your own text to the banner template. Double-click on the text box you wish to edit, then type in what you want it to say.
You’ll also notice when you have a textbox selected, a Text Properties panel will appear on the left. From here, you can change the font, font color, letter spacing, and so much more.
If you want to add some graphics to your Bluesky profile banner, then you can do this by navigating to Graphics in the main menu to the left, followed by Search Graphics.
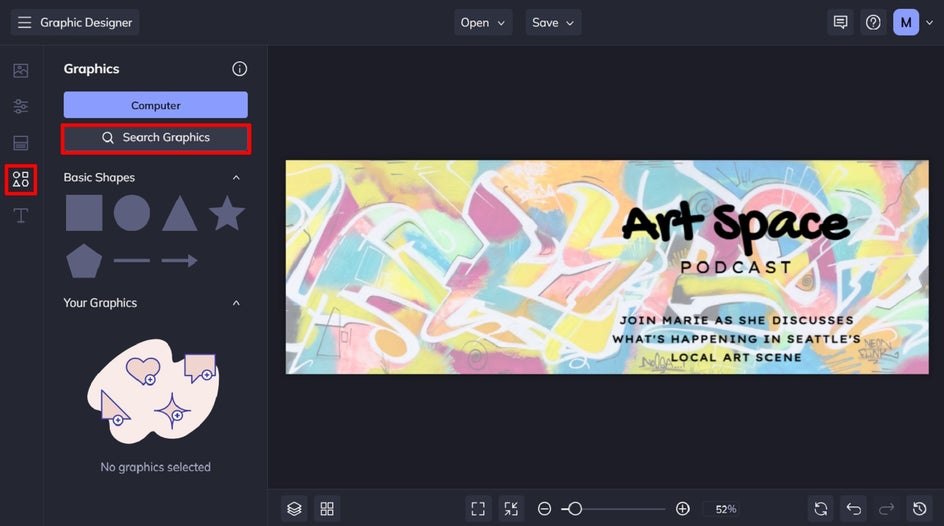
Click on any graphics you wish to use within your banner design. These will then be available within the Your Graphics section once you exit the Graphics Library.
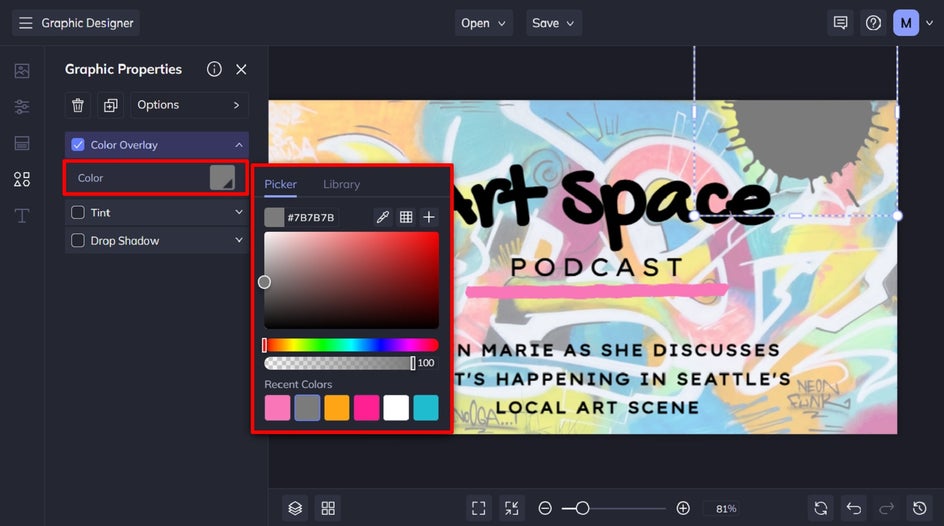
Want to change the colors of those graphics? Just click the graphic or shape you wish to change, and a Graphic Properties panel appears. From here, you can adjust the color overlay, tint, drop shadow, and more.
Step 4: Save Your Bluesky Banner
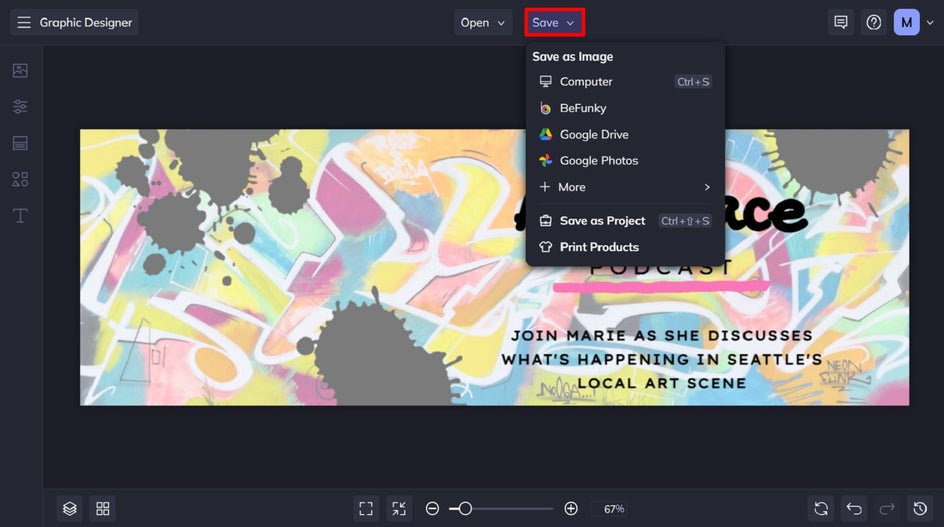
Once you’re happy with how your Bluesky banner looks, it’s time to save it so it’s ready to upload to your profile. Click Save at the top of the screen, then choose your desired save location.
How to Perfect Your Bluesky Profile Photo
Now that you’ve created the perfect banner for your Bluesky profile, it’s time to ensure your profile photo is on-point too. Head to the Graphic Designer and start with the Square Social Post blank canvas. Then, just follow these 6 simple steps!

Step 1: Prep the Canvas
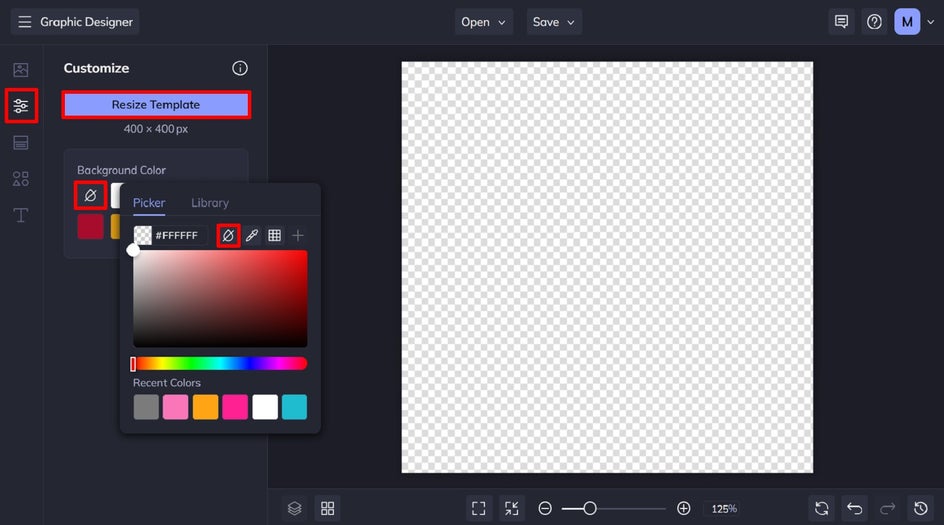
To begin, you’ll need to resize your canvas to the perfect dimensions for Bluesky’s requirements: 400 x 400 pixels. To do this, navigate to Customize in the main menu, then click Resize Template. Type in your desired Width and Height, then click Resize.
We also recommend making your canvas transparent, as this will help you to create a circle-shaped profile photo (rather than a square image that the platform will have to crop into a circle for you). Click the first color swatch underneath Background Color, then click the transparent symbol (the paint droplet with a diagonal line through it).
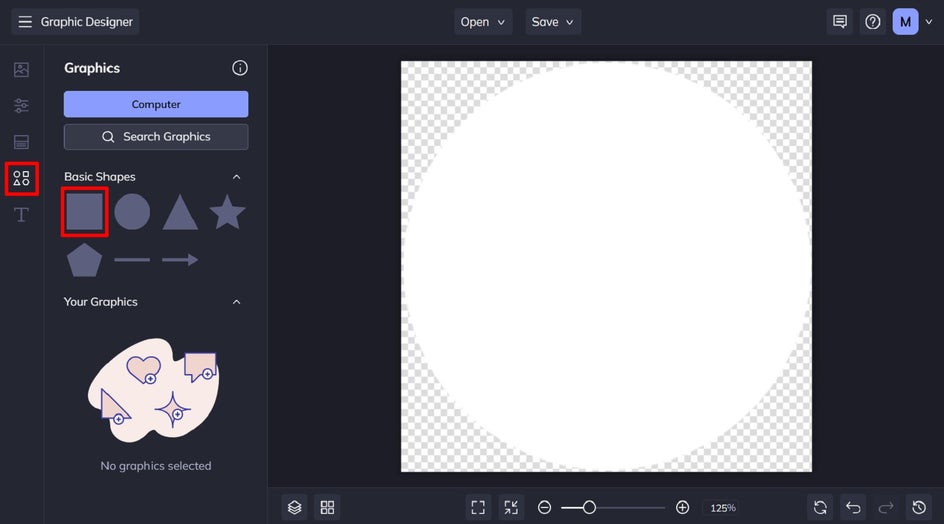
Next, we’ll add a circle overlay to the canvas so we can insert our photo into it in the next step. Click on Graphics in the main menu, double-click the circle underneath Basic Shapes, and resize it so it fills your entire canvas, as shown.
Step 2: Add Your Photo
To add your profile photo to this circle, you’ll first need to upload it. Click Image Manager from the main menu, followed by Computer. Select your image file and it will be uploaded. Then, just drag and drop it over so it fills your circle.
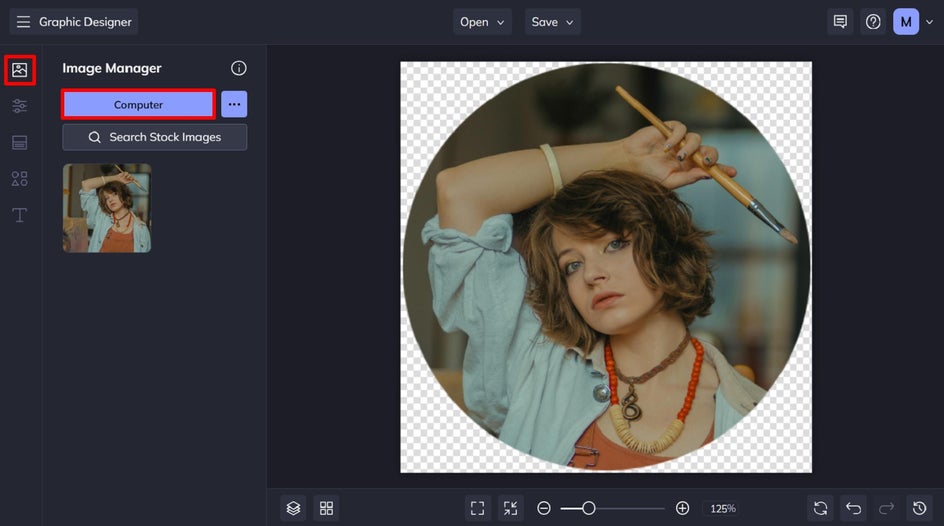
Step 3: Customize It
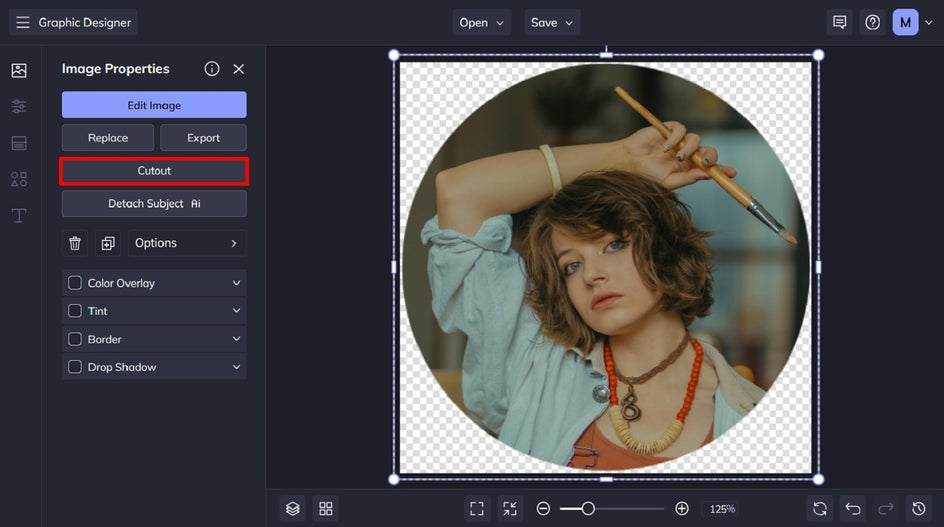
If you want to add a plain-colored background to your profile picture, you can! Just click on your photo, then select Cutout from the Image Properties panel.
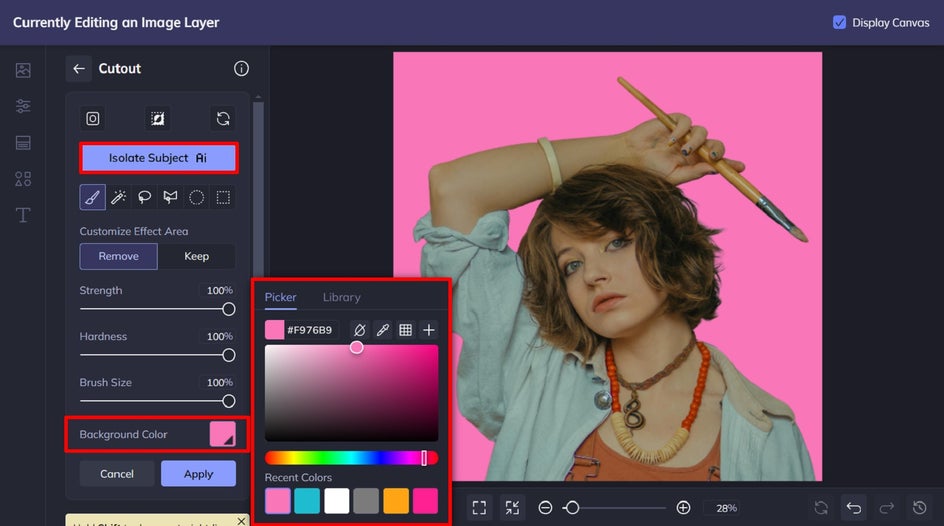
Next, click Isolate Subject, then choose your new background color by selecting it from the color picker.
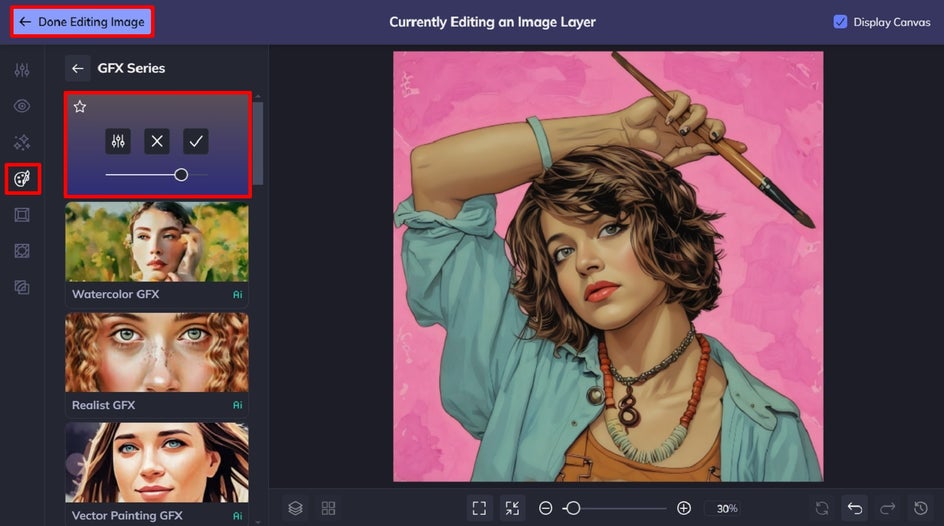
Want to take your Bluesky profile photo to the next level? We also have a wide range of photo effects for enhancing your image, including our revolutionary Artsy GFX effects.
Select your portrait, then click Edit Image. This will open the image in our Photo Editor, where you can apply any photo effect or Artsy effect you desire.
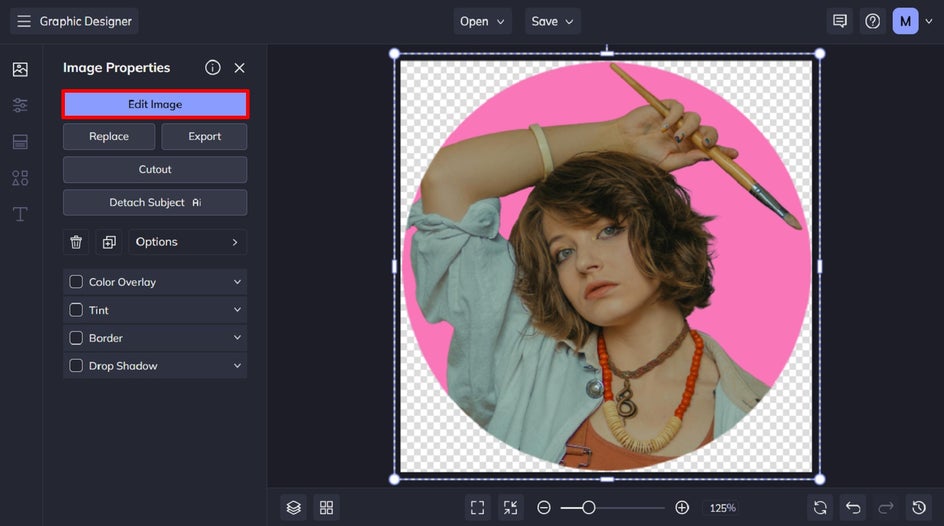
For this profile photo, we’ve applied the Graphic Novel GFX effect, which is available in the Artsy tab. When you’ve finished applying your photo edits, just click Done Editing Image to continue.
Step 4: Save Your New Bluesky Profile Picture
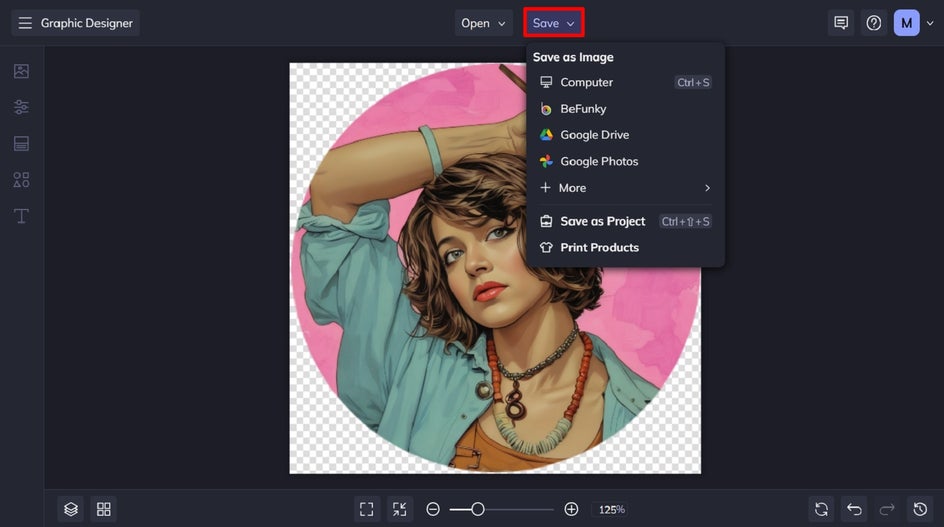
Finally, all that’s left to do is to save your profile picture so it’s ready to upload to your Bluesky account. Click Save at the top of the screen, and be sure to save your image as a PNG file to maintain its transparency.
Make Your Bluesky Profile One to Remember
Customizing your Bluesky profile photo and banner is quick and easy with our wide range of banner templates and photo editing tools. From creating perfectly cropped profile pictures to designing standout banners, our tools make the process creative and fun.
Ready to make a Bluesky profile that’s as unique as you are? Head to our Graphic Designer today!


