How to Remove Parts of a Graphic With BeFunky
Here at BeFunky, we’re all about giving you the tools to bring your creative visions to life! Our massive Graphics Library is packed with thousands of hand-crafted graphics, so no matter the project, you’re bound to find something to enhance your next project. But let’s be honest, even the perfect graphic may need a few tweaks to fit your design. For making those small adjustments in just a few seconds – like erasing a speech bubble or getting rid of the stem of a flower – then this latest feature is for you! No design experience required.
How to Remove Elements From Your Graphics
Ready to dive in? Follow along to learn how to edit graphic layers with BeFunky!
Step 1: Choose a Graphic
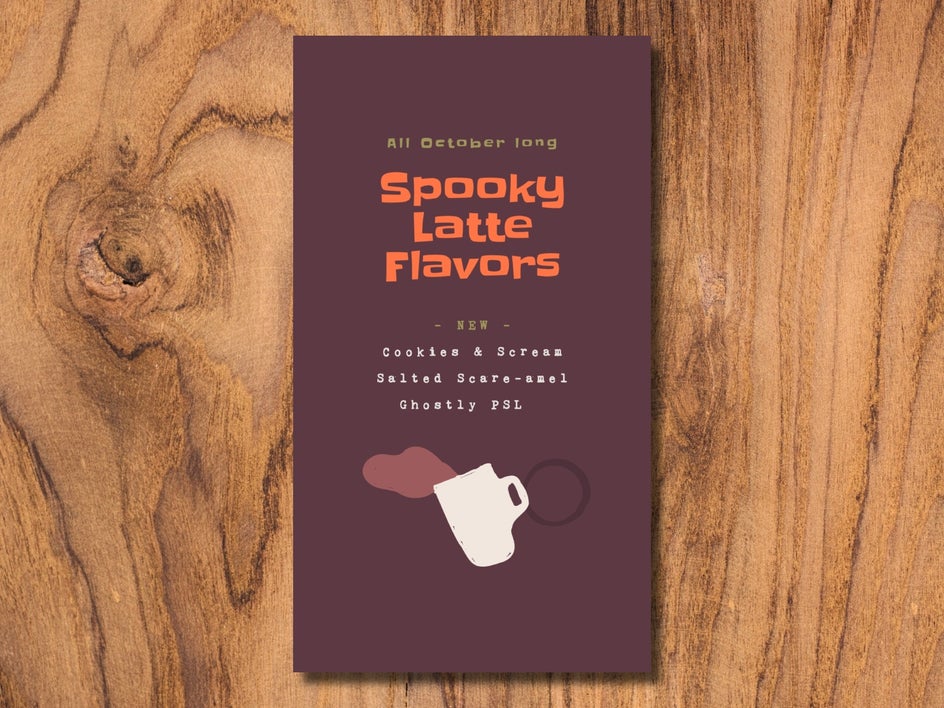
First, you’ll need to pick a graphic to work with. You can do this from the Photo Editor, Graphic Designer, or Collage Maker. In the Designer, you can choose a pre-made template or start from scratch with a blank canvas. For this project, we’re going to start with a template for a coffee shop’s seasonal menu.
No matter which section of the app you’re starting from, you can choose additional graphics by heading to the Graphics tab. From there, click on the Graphics Library to find exactly what you need.
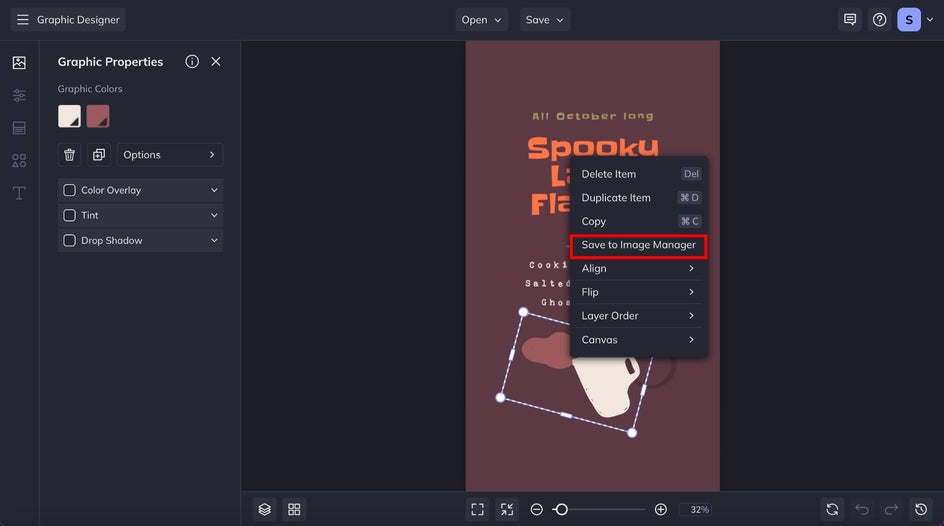
Note: Be sure to make any changes in the Graphic Properties menu before converting it into an image layer – especially if you want to change independent colors in multi-color graphics.
Step 2: Transform It Into an Image Layer
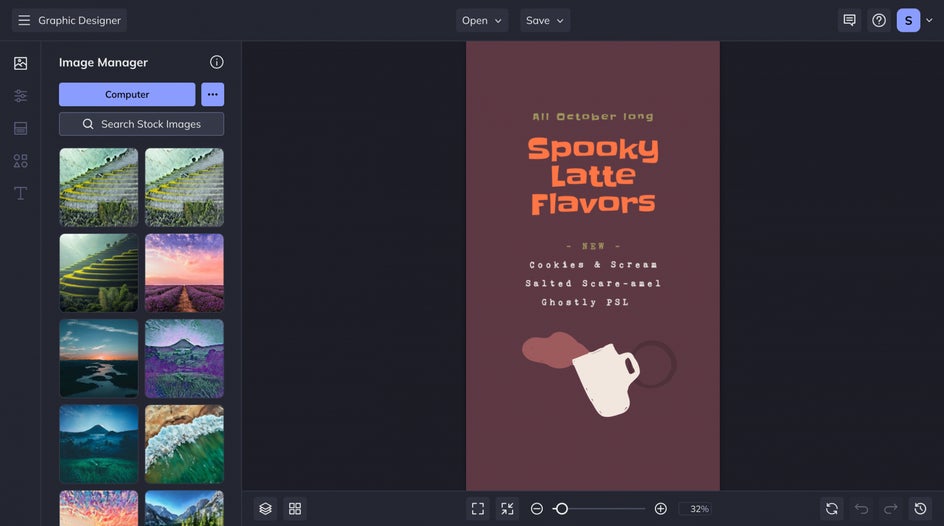
Once you’ve chosen your graphic, it’s time to transform it into an image layer! Right-click the graphic and select Save to Image Manager, which will save your graphic with a transparent background to your Image Manager.
Head to your Image Manager to find your new layer. From here, you can easily drag and drop it onto your canvas. Now, you’re ready to start customizing.
Step 3: Make Those Edits
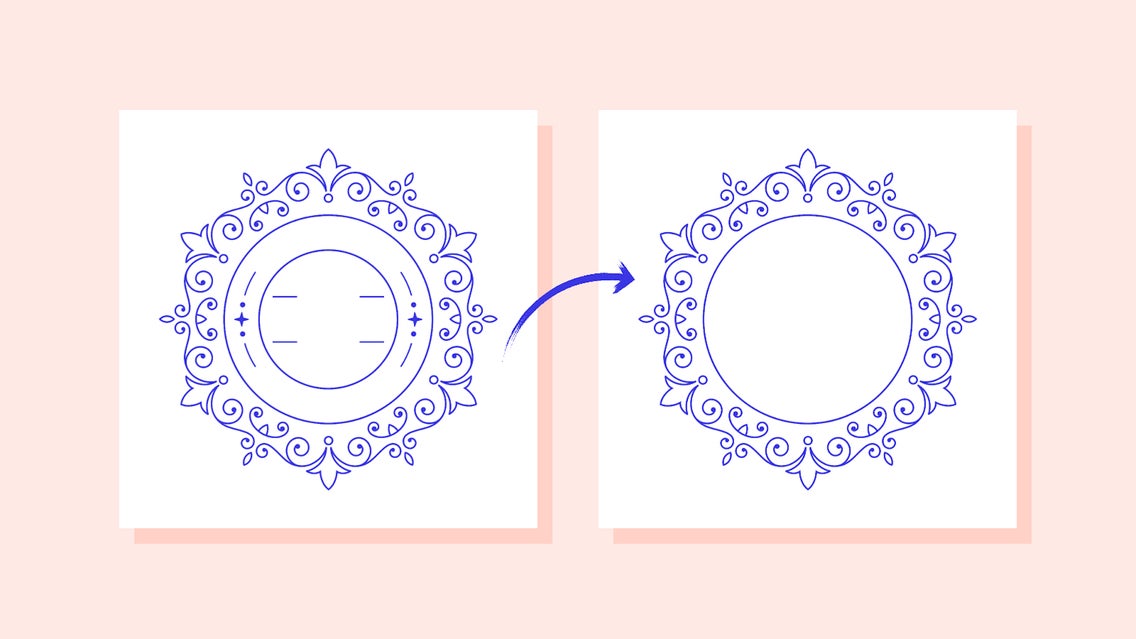
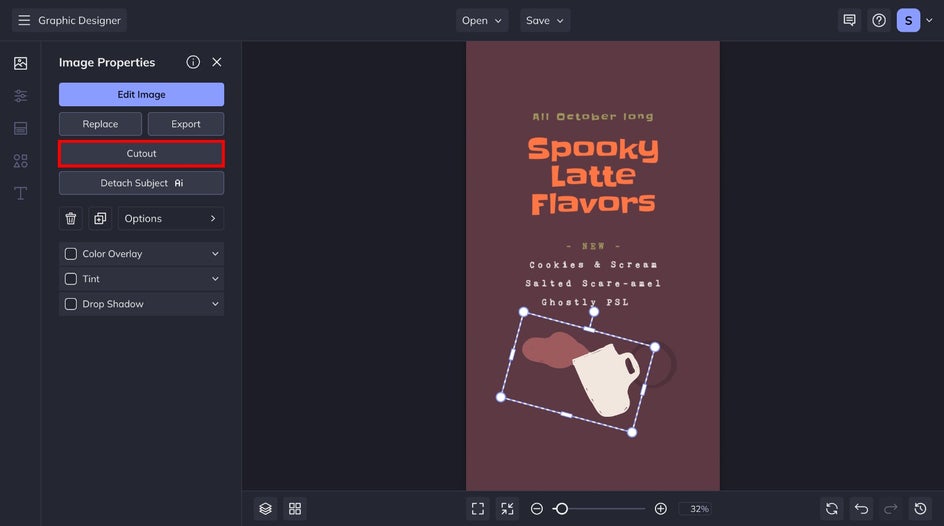
Now for the cool part – customizing your graphic! For this example, we’re going to remove the coffee pouring from this mug graphic. To remove parts of a graphic in seconds, select the graphic and click on the Cutout tool, found under the Image Properties menu.
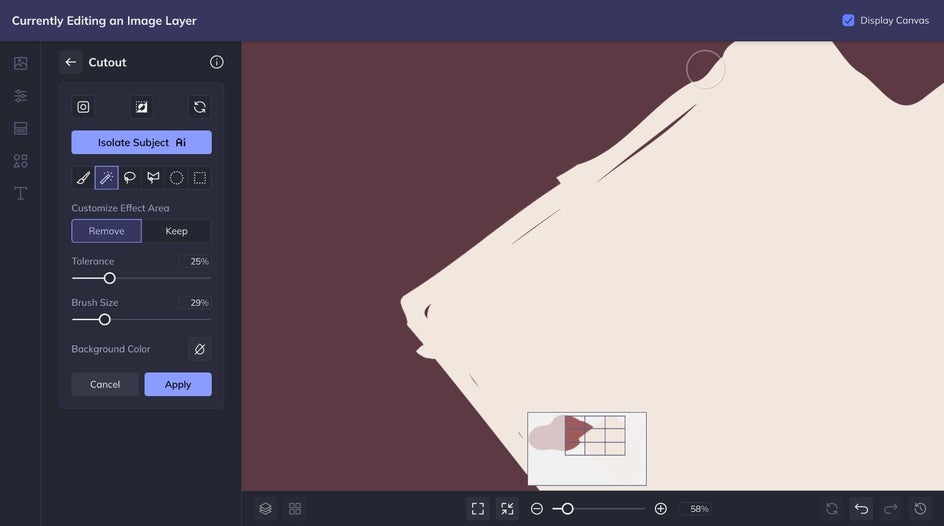
Use this tool to erase the parts you don’t need with just a few swipes of the brush. Once you’re done, click Apply to save your changes. We’re also going to resize the graphic to fit our template better.
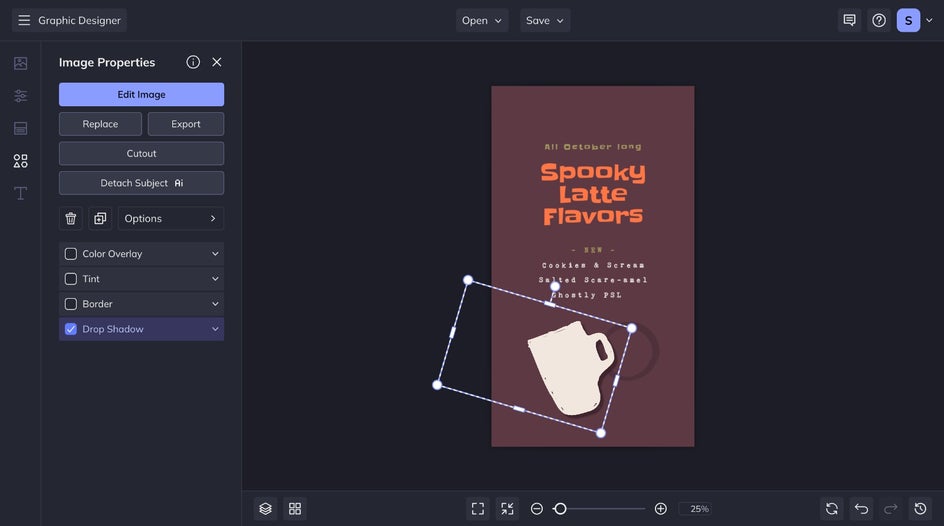
Keeping the graphic selected, you can also move, rotate, and resize your graphic to ensure that it fits your project perfectly. For this example, we’re going to apply the Drop Shadow feature to add some depth to our template graphic. Once you’re done editing your graphic, feel free to make any additional changes to your project. – customize the background color, add text, incorporate more graphics, and more. When you’re done, save your work and admire your custom creation!
Create Customizable Graphic Layers In Seconds
With this new feature, you don’t need to be a professional designer to create personalized graphics. Manipulate graphic layers to remove unwanted bits to make every graphic unique. Whether you’re using our Photo Editor, Graphic Designer, or Collage Maker, bringing your creative vision to life is easier than ever. So go ahead – get started and let your creativity flow!