Replace the Sky of Any Photo

Have you ever taken a photo of a beautiful beach scene or landscape, only to realize that everything in the foreground is crisp at the sacrifice of the sky being overexposed? Or perhaps you've felt compelled to swap out a gray day sky for something brighter?
In situations like these, one of the best ways to correct the shot is to replace the sky entirely. Don’t worry, it doesn’t have to be difficult, nor does it require expensive software.
BeFunky’s Photo Editor features the handy Sky Replacer tool, which uses powerful AI to replace the original sky within any photo – in just a few clicks! Keep reading and we'll show you how.

How to Replace the Sky Using BeFunky’s Sky Replacer
Ready to swap out the sky within your photo? Head to the Sky Replacer to get started, then open the photo you wish to edit. This tool is located under the Remove/Replace category of the Edit tab.
Step 1: Isolate the Sky of Your Photo
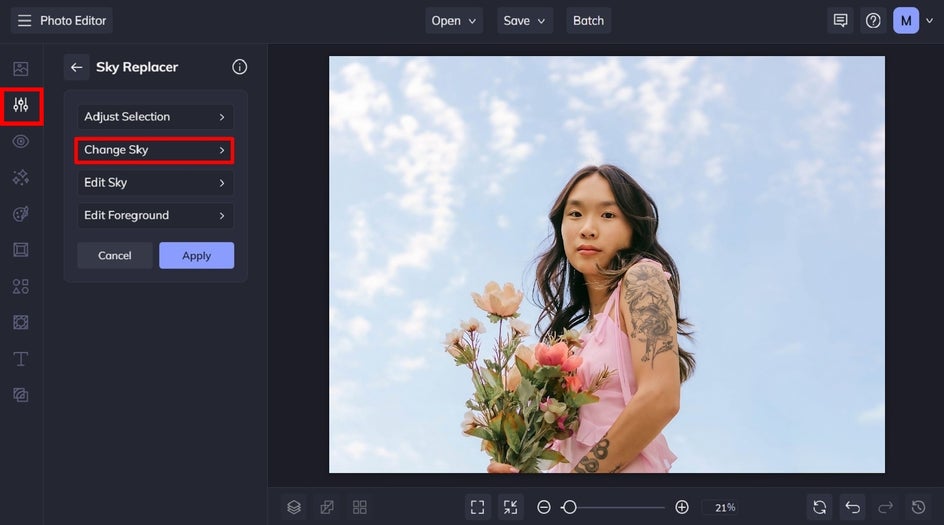
The Sky Replacer will automatically isolate the sky of your photo before offering four options – Adjust Selection, Change Sky, Edit Sky, and Edit Foreground. To replace your photo’s existing sky entirely, click Change Sky.
Step 3: Choose and Edit Your New Sky
Next, select Image, followed by Select Sky. If things look great as-is, awesome! But we're going to make some additional edits by selecting the Settings button, which is featured on the thumbnail of your new sky.

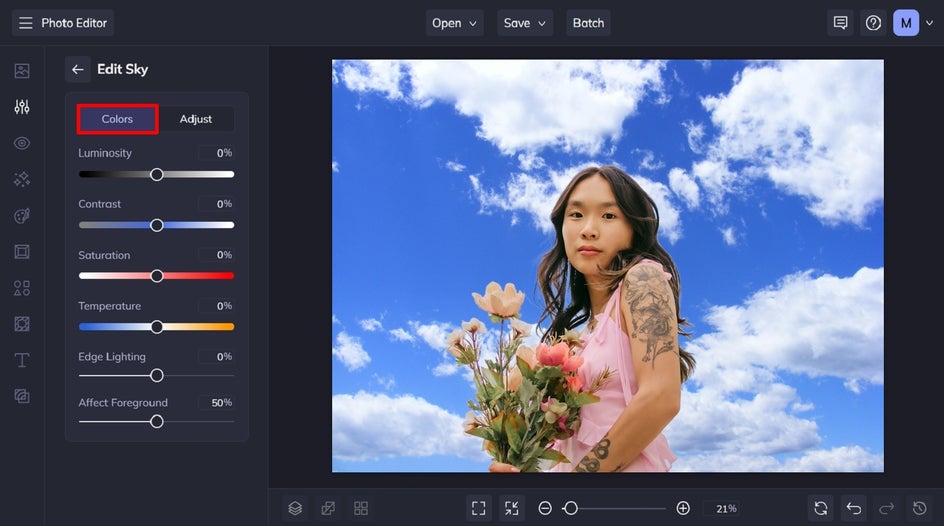
From the Colors tab of the Settings menu, you can customize the luminosity, contrast, saturation, and temperature. You can also adjust the edge lighting, which can help create a seamless horizon. This is great for when you want to add a natural glow or gradient. Additionally, the Affect Foreground slider lets you adjust how much those changes are applied to the foreground of your photo.
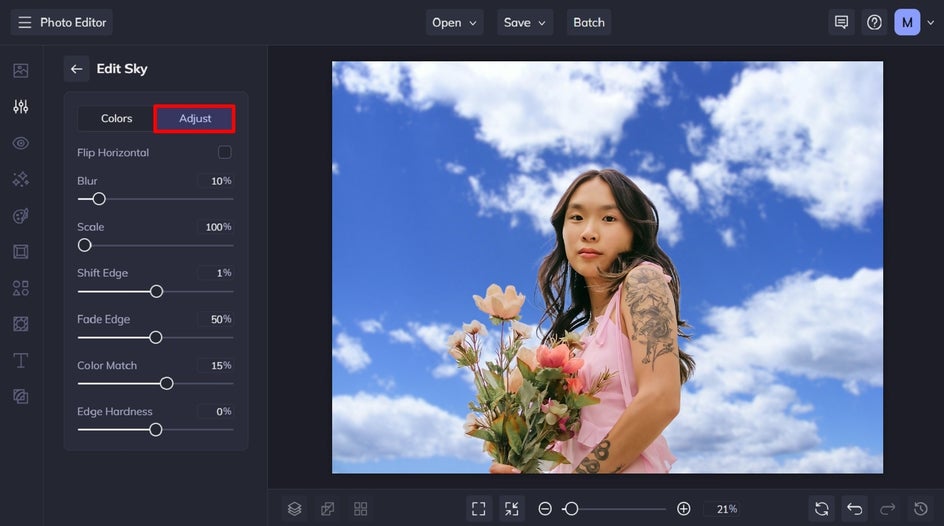
You can also click on the Adjust tab to edit your new sky further with the Blur, Scale, Shift Edge, Fade Edge, Color Match, or Edge Hardness sliders. In this image, we’ve increased the blur amount to give our image more depth of field. Additionally, we’ve adjusted the Color Match slider to apply the tone and temperature of your sky to match the foreground foreground.
Once you’re happy with your new sky, click the back arrow to go back to the main Sky Replacer menu, then click Apply.

Step 4: Save Your Sky Replacement Photo
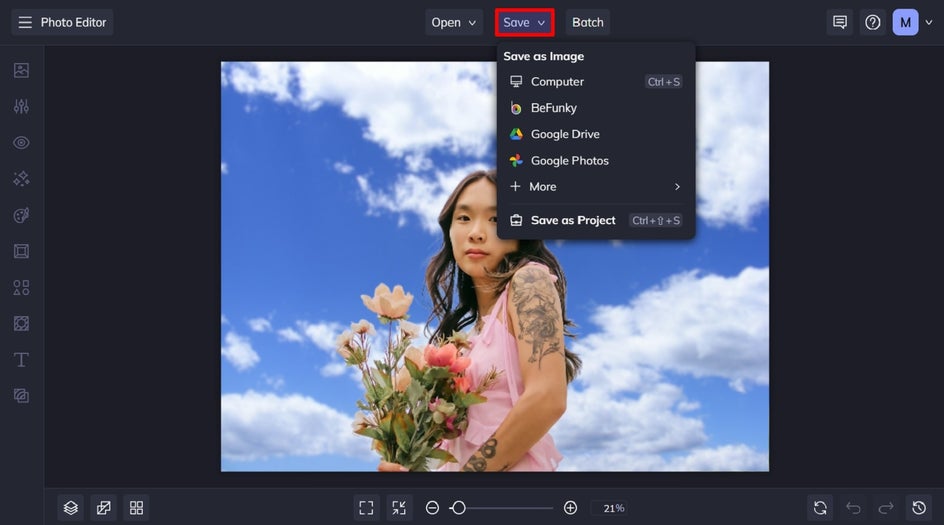
Finally, click Save at the top of the screen and choose your save destination.
Replace the Sky of Any Photo in Seconds
With our Sky Remover tool, sky replacement has never been so easy! Whether you’re looking to change the sky color or edit a different sky entirely, BeFunky has got you sorted.
Ready to replace the sky in a picture? Check out the Sky Replacer today to see just how helpful it is!


Other Ways to Use Our Sky Replacement Tool
There are many reasons why you should replace only the sky in an image. If you’re considering using BeFunky’s sky replacement tool but don’t know where to begin, the following reasons may inspire your next project!
To Create a Plain Blue Sky
Sometimes, a plain blue sky is all you need to let the subject of your photo truly shine. Whether you're shooting a product, portrait, or scenic landscape, adding a clear, blue sky can create a clean and fresh look that draws attention to what matters most in your image. Simply forego another sky image completely and opt for a solid color instead. This option is perfect for when you have a specific shade in mind, which can’t be replicated exactly through a photo.


To Mask Bad Weather
Have you ever snapped a great photo, only to realize the grey sky is ruining the mood? We’ve all been there, and it can be frustrating when bad weather gets in the way of an otherwise perfect shot. But with BeFunky’s Sky Replacer tool, you don’t have to settle for a dull, overcast sky. Whether you're working with a grey sky or even a stormy one, simply swap it out for a perfect sky to brighten up your entire image. Choose from a selection of vibrant, sunny skies, or upload your own to replace that dreary weather in just a few clicks.


To Create a Uniform Sky in Multiple Images
If you’re working on a photo series, whether for a blog, social media, or a professional project, it can be visually jarring to have different skies in each image. But when taking images from different angles and within several hours, it's unavoidable. A uniform sky can provide consistency and cohesion, tying all your images together and making the overall presentation more polished. You can also utilize the Affect Foreground slider to reflect the tonal change on your subject.
To Replace Clouds
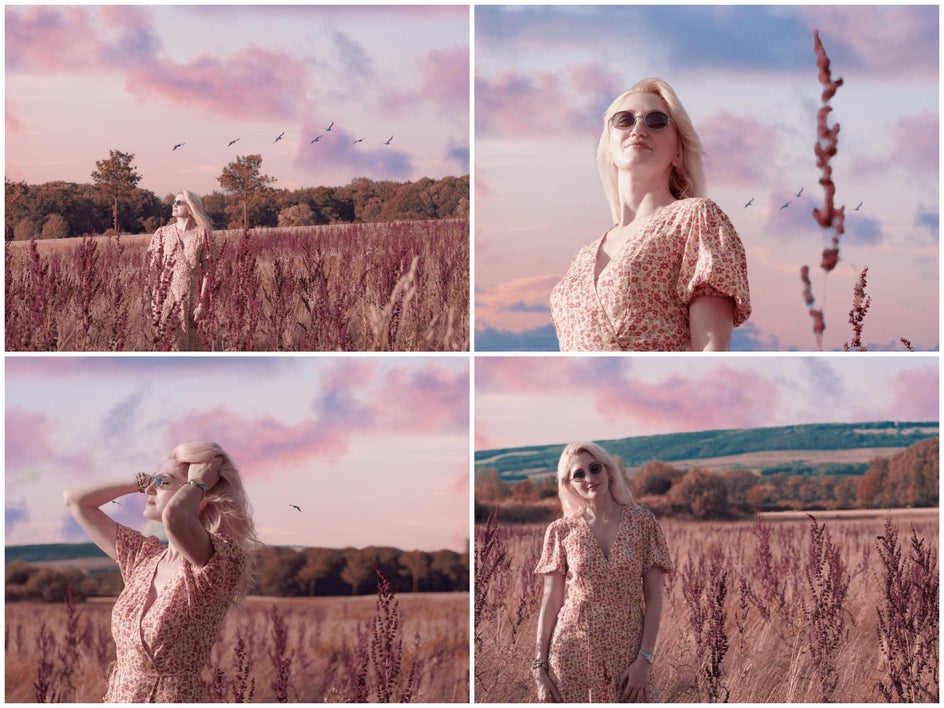
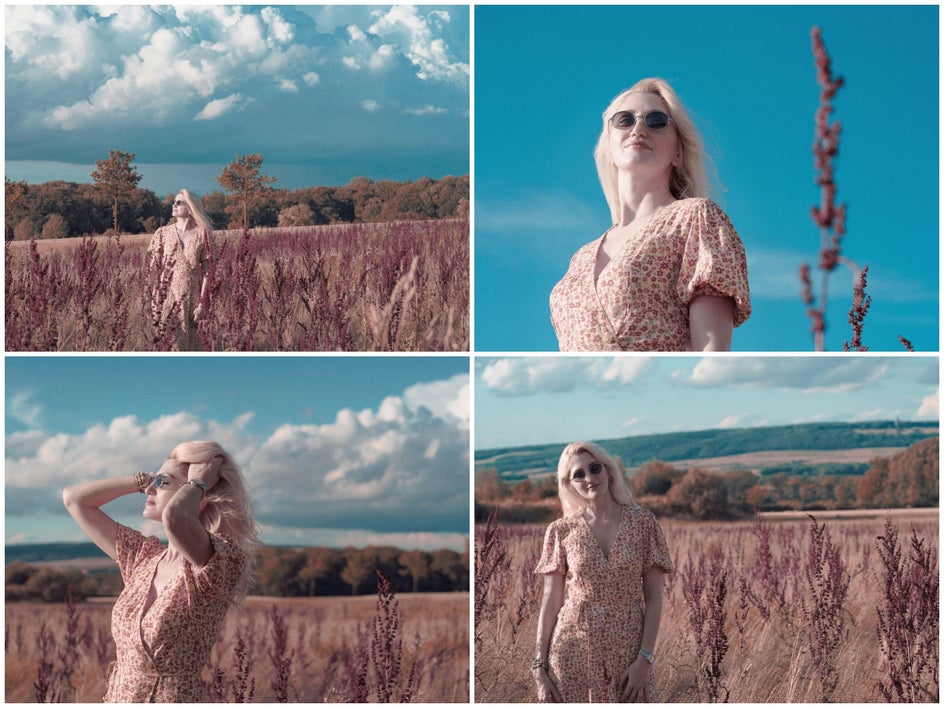
In the tutorial above you learned how to replace clouds, but you might be wondering exactly why (or when) you’d need to do so. Sometimes the sky in your photo isn’t necessarily bad, but you may want to make subtle adjustments to the look and feel of the clouds. Maybe your current photo has a few fluffy clouds, but you’re after a more dramatic, overcast sky, or vice versa. With BeFunky’s Sky Replacer tool, you can easily swap out one set of clouds for another, giving you complete control over the atmosphere of your image. It allows you to refine your sky while keeping the rest of your image intact.


