How to Use BeFunky’s Noir Comic Creator
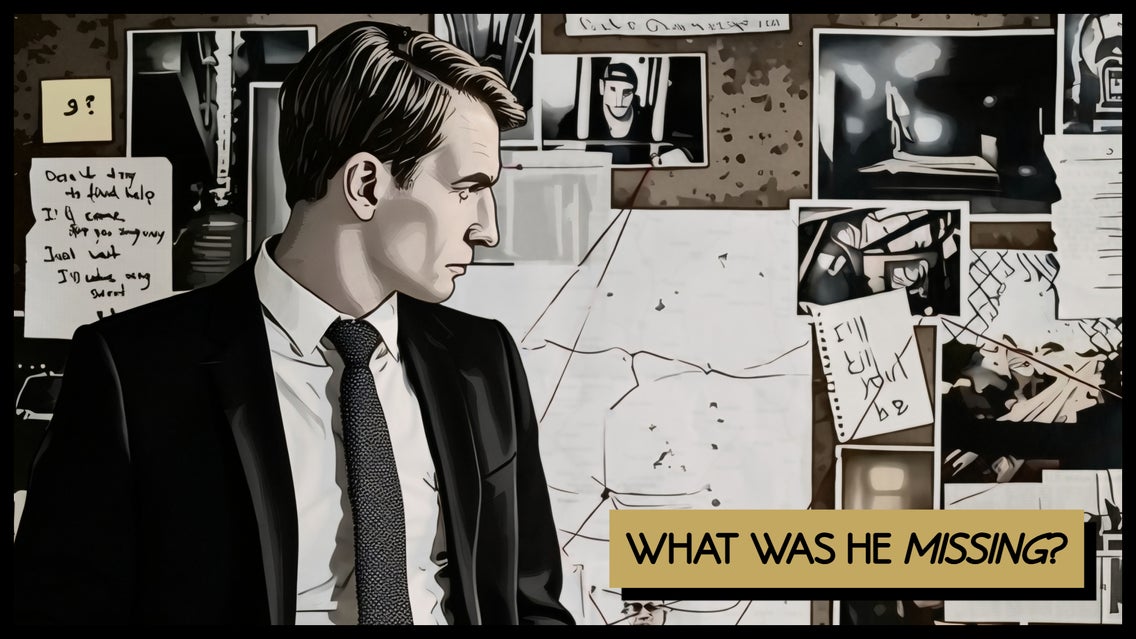
With the brooding, shadow-drenched aesthetic of classic film noir, it isn’t hard to see why noir comics are hugely popular. Originally influenced by the black-and-white aesthetics of 1940s cinema, noir comics often explore crime, mystery, and moral ambiguity, making them the perfect page-turner.
If you too are a fan of the dark and mysterious world of noir comics, then you’re in for a treat. BeFunky’s Comic Noir effect is an exciting addition to our Artsy effects, allowing you to create your own noir comics online in just seconds!
This effect brings moody and shadowy edges to your photos, making it perfect for turning your images into those gritty and vintage-inspired comic panels that noir comics are famous for.
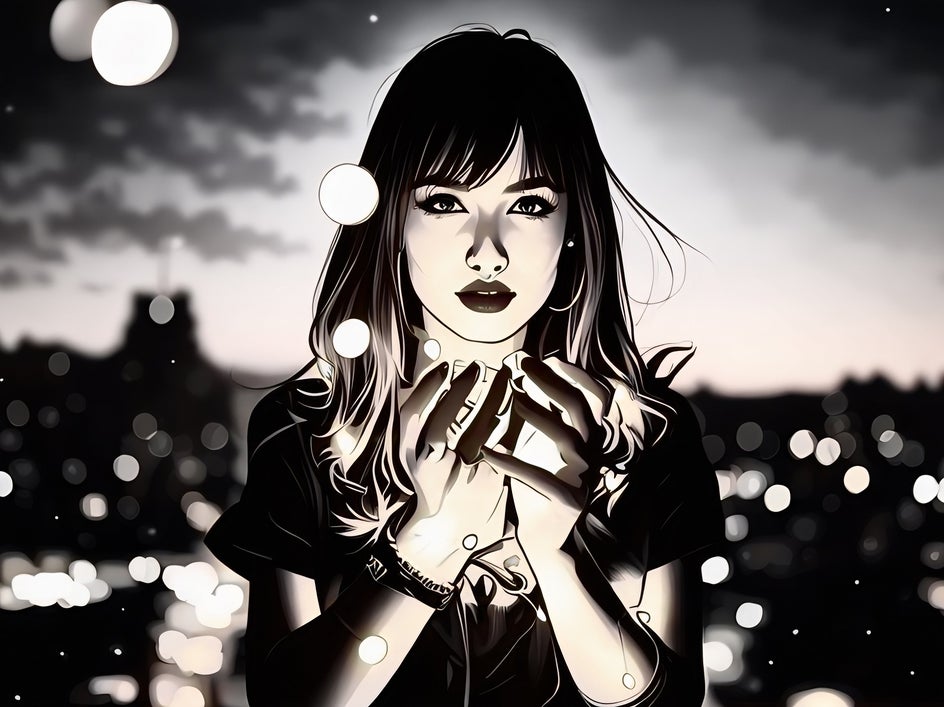
While BeFunky’s popular Graphic Novel effects bring a polished and colorful comic look to your images, the Comic Noir effect applies a darker, high-contrast palette with an emphasis on shadows and desaturated colors. So, if you’re interested in how to draw noir comics or want to add a neo-noir spin to your photos, this effect is certainly one to explore!
What Is the Neo-Noir Style of Art?
Neo-noir art is a modern take on traditional noir, and it embraces vivid color accents with high contrast, dramatic lighting, and edgy details. Think of the dark yet sophisticated visuals of films like Sin City or Blade Runner. They’re gritty yet polished, merging the mystery of classic noir with contemporary aesthetics.
How Can I Create a Comic Using the Comic Noir Effect?
Thankfully, creating noir comics online is incredibly easy. Just head to the Comics effects section of our Photo Editor and open the image you wish to edit. Then, follow the 4 simple steps below!
Step 1: Apply the Comic Noir GFX Effect
Within the Comics category of the Artsy effects, click Comic Noir GFX. This will sample the effect on your image.
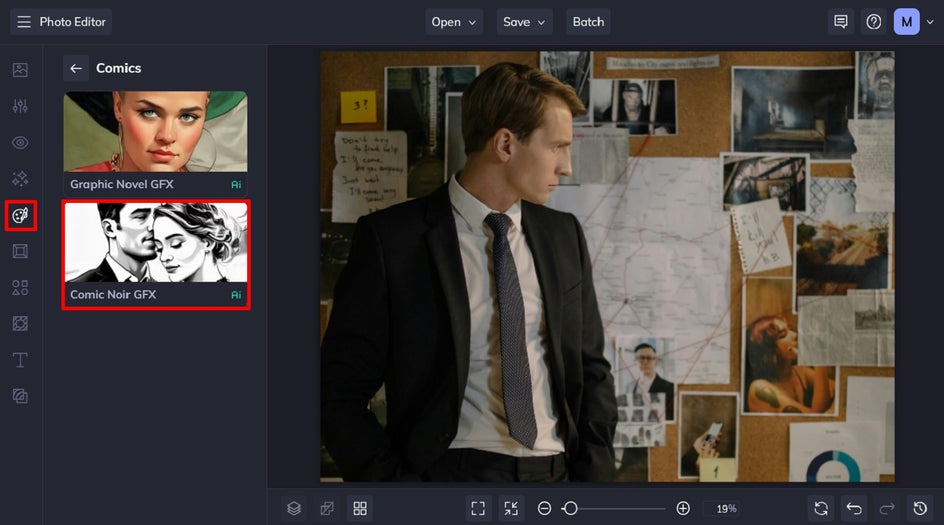
You can adjust the strength of the effect using the slider. You also have the option to click on Settings, which allows you to alter the effect further; Cancel, which cancels the selected effect; and Apply, which applies the effect as-is.
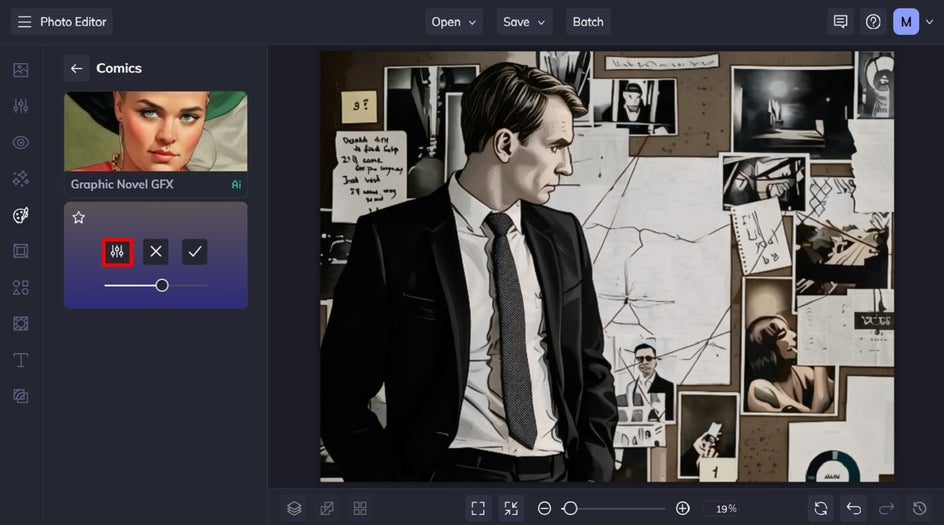
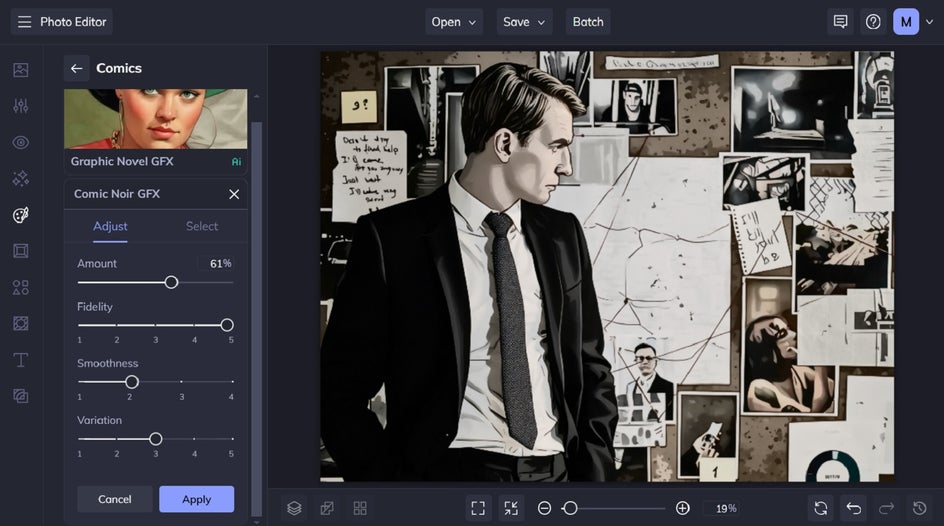
Click the left-most icon to open the Settings menu. Here, you have the additional option to adjust the Comic Noir GFX effect’s Fidelity, Smoothness, and Variation. Fidelity refers to how closely a copy resembles the original image without losing detail. Adjusting the Smoothness slider allows you to control how sharp or smooth your image’s lines are. Variation, on the other hand, lets you toggle through several different variations of your image with the same effect applied to it.
When you’ve finished making your adjustments, click Apply.
Step 2: Add a Border
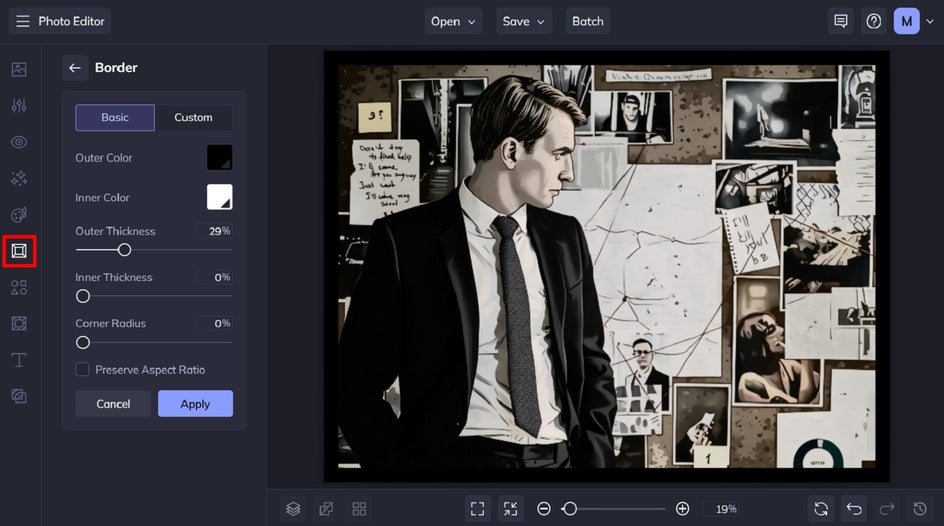
Next, we’re going to add a border to our noir comic. Click on Frames in the main menu on the left, then select Border. We’ve adjusted the Inner Thickness to 0%, the Outer Thickness to 29%, and kept the Outer Color black. Feel free to experiment with your settings if you have a different border in mind!
Step 3: Add Text
To complete our comic noir transformation, we’re going to add comic-style text to our image. Navigate to Text in the main menu on the left, then click Add Text.
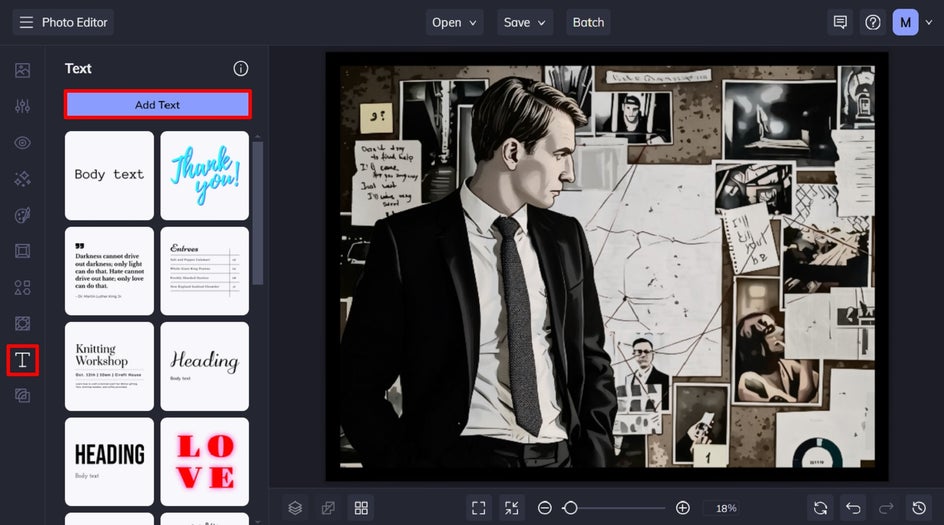
Simply double-click your new text box and type in what you want it to say.
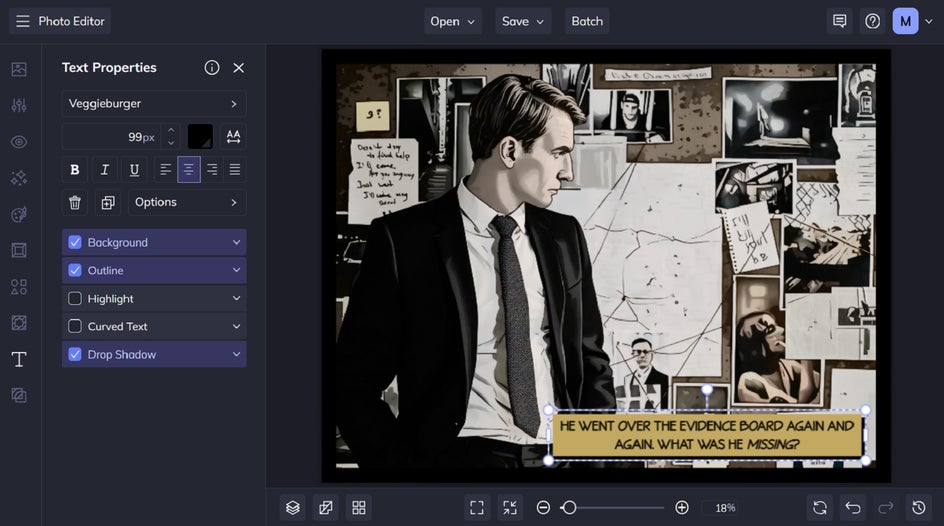
When you select a text box, you’ll also notice a Text Properties panel appears. From here, you can change things such as the font, font size, text color, spacing, and more.
To give our text a true noir comic look, we’ve used the font Veggieburger in all capital letters. We’ve also outlined the text to give it the perfect thickness, added a colored background, and a black drop shadow to make it pop.
Step 4: Save Your Digital Noir Comic
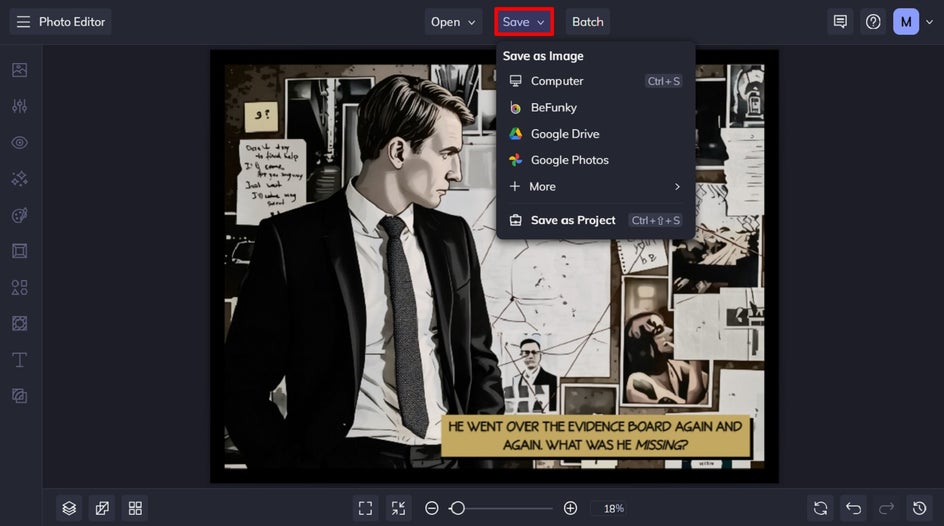
Once you’ve finished creating your noir comic, click the Save button at the top of the page, then select your desired save location.
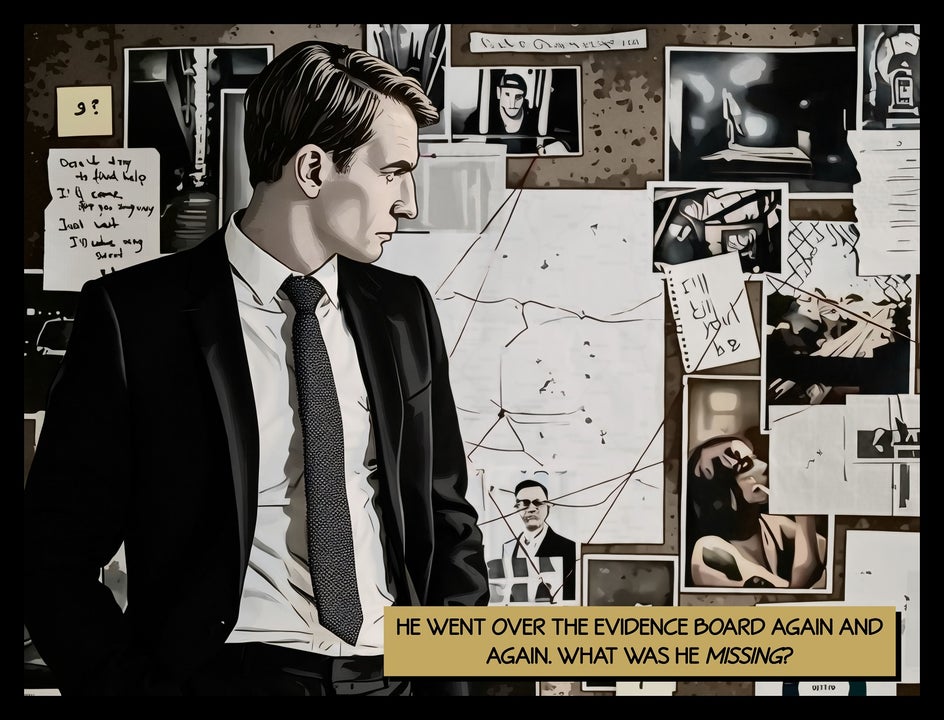
Final Results: A Noir Comic in Seconds
In just seconds, we were able to turn an image into a noir art-style comic, complete with a border and text. It doesn’t get any easier than that!
Other Creative Ways to Use the Comic Noir Effect
Need some extra inspiration for your next comic noir project? Consider getting creative in one of these ways:
Combine With Other Effects for Drama
To push that moody, cinematic look, try layering the Comic Noir Effect with additional effects. For example, a subtle Vignette can draw attention to the center of your image, while a Grunge overlay will add texture, giving your photo a rugged, vintage appearance. In this example, we added Vector Art GFX and a vignette to make our kitty pet portrait pop.

Isolate the Subject for High-Impact Contrast
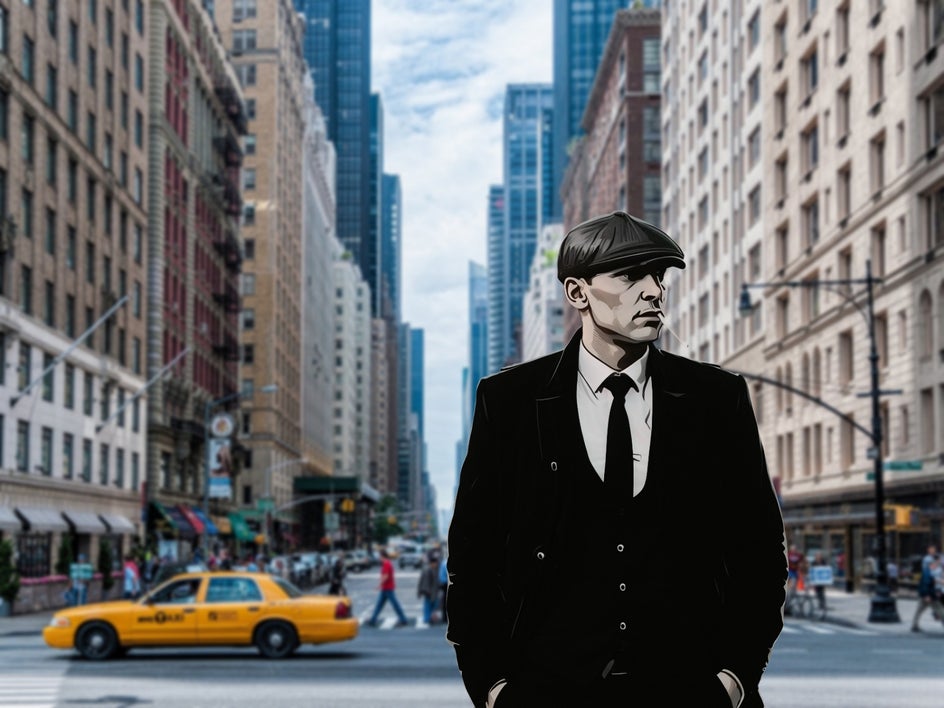
Use BeFunky’s Cutout tool to separate your main subject from the background, then apply the Comic Noir Effect only to the subject. This allows you to turn your comic noir subject into a vector image layer, which you can then add to a completely different background. In this example, we’ve created a time-travel theme by transporting our retro comic noir subject into a modern setting. This technique is great for adding a cinematic quality or capturing that classic “antihero” vibe that’s common in noir comics.
Create a Full-Page Comic Spread With Multiple Panels
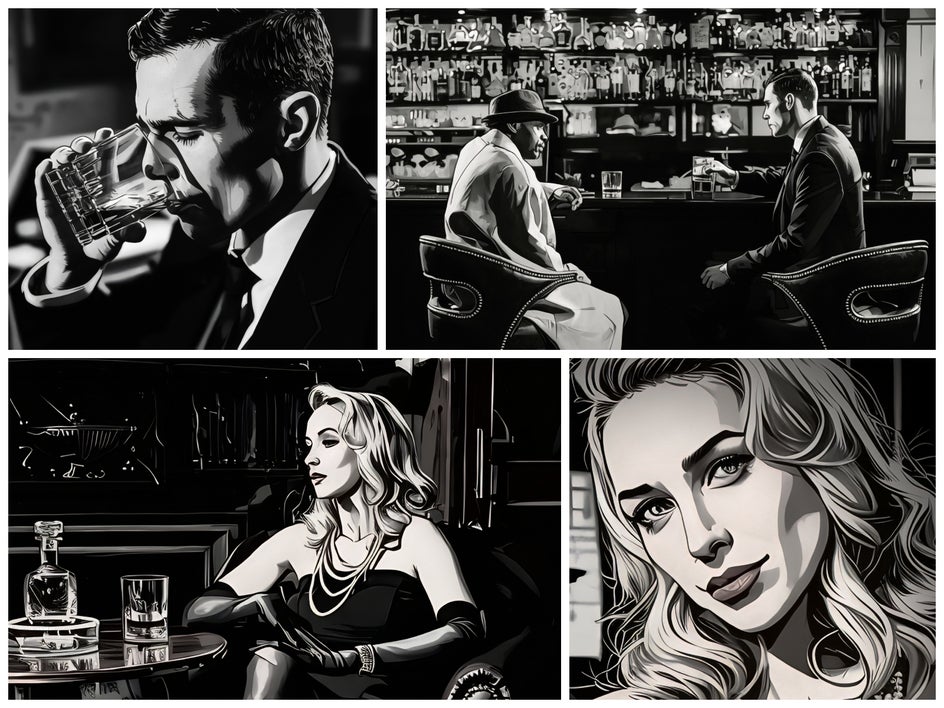
For those looking to tell a more complete visual story, try creating a full-page comic spread! Use the Collage Maker to arrange multiple images on a single canvas, each one with the Comic Noir effect applied. This allows you to build a cohesive sequence or layout of different scenes or expressions, with each frame contributing to a larger narrative. You can add comic-style borders to separate each panel, as well as text, just as we did in the tutorial above.
Create a Noir Comic Online Today!
Forget learning how to draw noir comics by hand. With BeFunky’s Comic Noir Artsy Effect, you can create your own neo-noir comic masterpieces with ease. Just pick your photo and let our Photo Editor do all of the hard work for you.
Check out our Comics Artsy effects to get started!


