Everything You Should Know About Designing Instagram Reel Covers
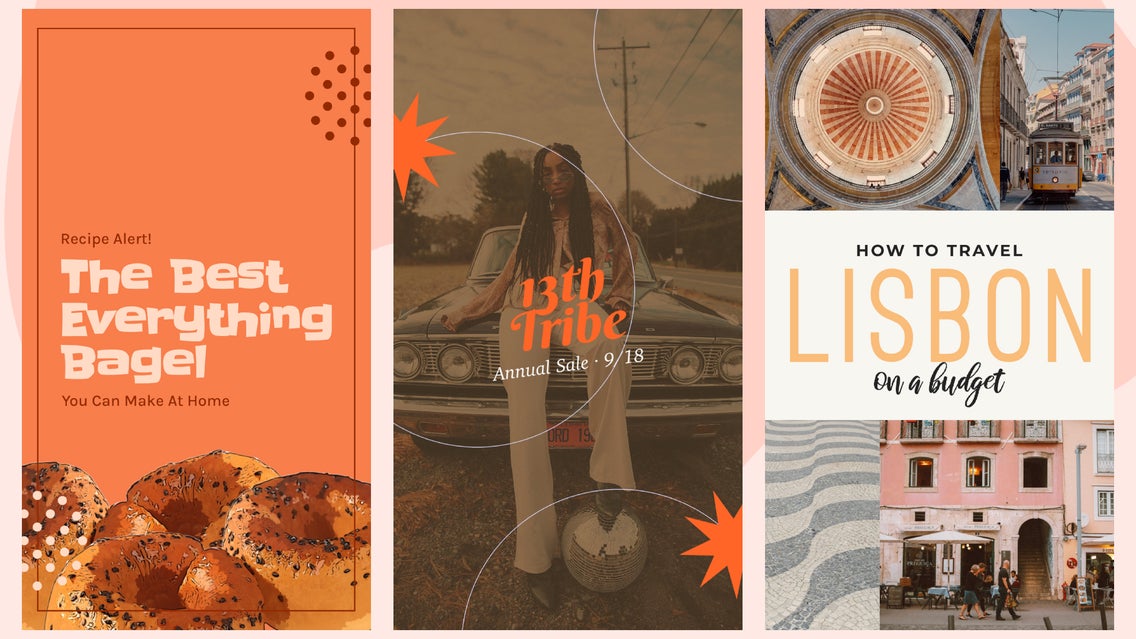
Instagram Reels have become an important part of any social media marketing strategy. More Instagram users than ever are sharing their own videos on Reels, with content ranging from all kinds of tutorials to fashion bloggers and thrift shops showing off their #OOTD. The Reels feature is incredibly versatile, competes directly with both TikTok and Shorts on YouTube, and is a major reason for growth on the app.
You can quickly take your Instagram Reels to the next level and increase your followers with Instagram Reels by creating custom Instagram Reel Covers. With BeFunky’s Graphic Designer, you can create your own custom Instagram Reel cover that will garner the attention you need on the app to grow your following.
3 Best Tips for Creating Instagram Reels Covers
While Instagram Reel covers are an excellent opportunity to be creative, there are some essential things to keep in mind as you’re designing your custom Reel covers. Here are four important features you should consider:
1. Keep the "Safe Area” in Mind While Designing
First up, and perhaps the most important factor, is the layout of your Instagram Reel cover. Instagram Reels appear in two sizes, depending on where they show up on Instagram. The first is 9:16, which is the traditional Instagram Story size. This is used if the Reel is discovered on your profile or within the Explore tab.

The second is a 1:1 thumbnail view if you decide to include the Reel on your feed. It is important to make sure that when you are designing your custom cover, the design you create at 9:16 doesn’t get cut off in the 1:1 thumbnail view.
The edges of your design will get cropped for some views. We call anything inside of these imaginary crop areas the "Safe Area." Be aware when designing, that you keep all of the important information in this Safe Area. Try to strategically place your text or any important visuals in a place on the design where it will be easily seen from both views.
2. Keep the Design Simple and Choose Easy-to-Read Fonts
While you may think that creating an Instagram Reel cover using lots of bright colors and bold fonts to catch the attention of your audience is better, it isn’t! Because Instagram users are endlessly scrolling, having a simple minimalistic design that is easy to read is best. You want to use both color and fonts to create a design that catches someone’s attention and quickly showcases what the Reel is about.
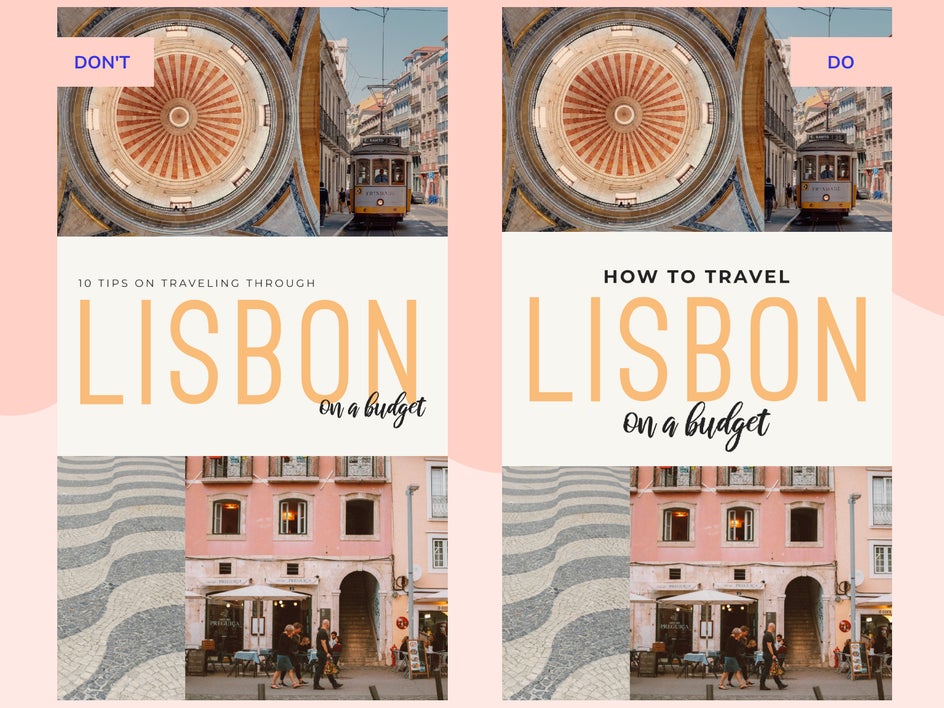
From a design perspective, choose two or three complementary colors that represent your video or brand and use them in your design. Bold colors or cool, trending designs can get a lot of attention.
Lastly, choose fonts that are easy to read, especially when you are pairing fonts for your Instagram Reel. Not only is this aesthetically pleasing but it also helps the viewer quickly read the design and potentially hook them into viewing more of your material. The goal here is to funnel your audience by catching them with your Reel and funneling them into other areas of your profile.
3. Use Trending Images and Designs to Capture Your Target Demographic
Making sure you have high-quality images when designing your Reel cover. Using high-quality images on your Reel cover shows professionalism and authenticity to your audience. Not only this, but you want to choose imagery that resonates with your target demographic.
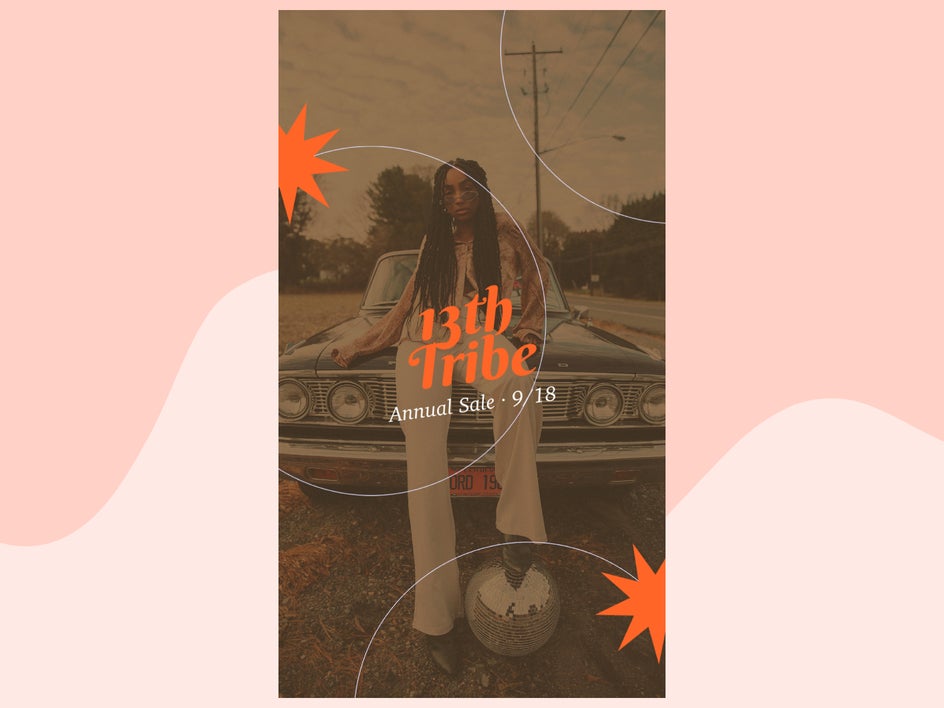
What kind of image would resonate with your target demographic? Do they like images of beautiful scenery? Do they like seeing an image of a person doing something exciting in a foreign city? Think about what will catch the attention of your audience and use when designing your custom Reel cover.
How to Design a Custom Instagram Reel Cover
If you want to take your Instagram Reels to the next level and increase your followers with Instagram Reels, then you’re going to want to design the right Instagram Reel Covers. Follow along to see how to create your own custom Instagram Reels with BeFunky’s Graphic Designer.
Step 1: Choose a Template
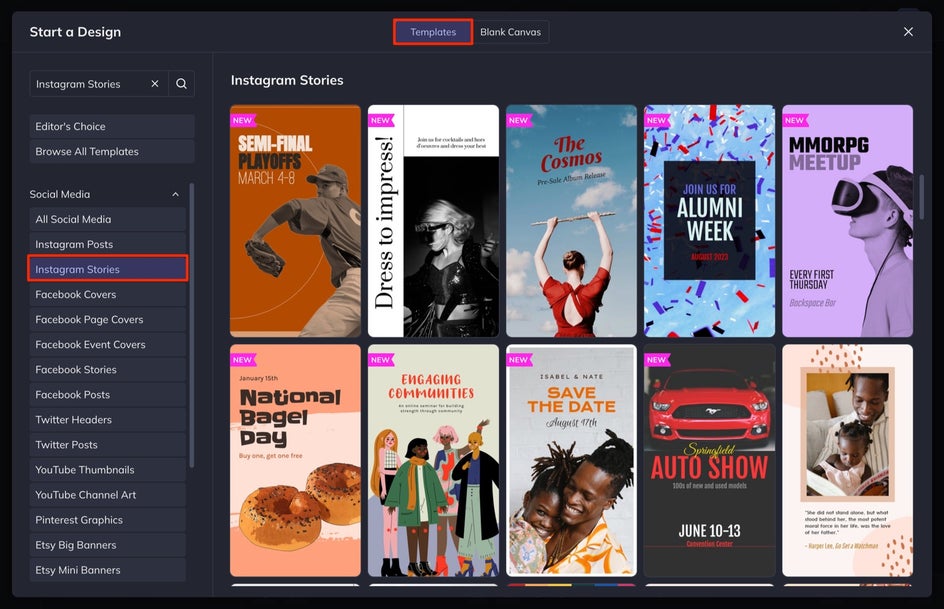
To create your own custom Instagram Reel cover, start by opening the Designer and selecting Templates or Blank Canvas. We are going to start from a Template. From here, select Instagram Stories and choose a template that suits your design vision. We are choosing this option because it matches the 9:16 ratio (1080x1920 px) we want to start with. Once you select a Template that you like, click Use This Template to begin.
Step 2: Add Custom Copy
First, we are going to adjust the text. To do this, either click Text from the left-hand menu and click Add Text or double-click on any text in the design to edit it with your custom text.
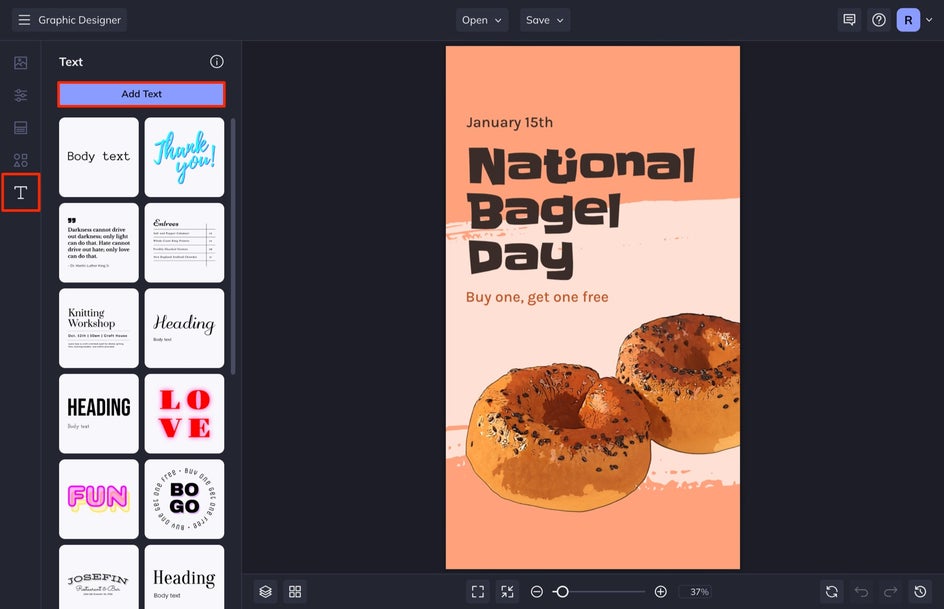
By double-clicking on the text inside of your design, you will access a Text Properties menu. From here, you can edit the text Color, Font, Size, and more. Remember when choosing your fonts, make sure that the fonts pair well together and are easy to read!
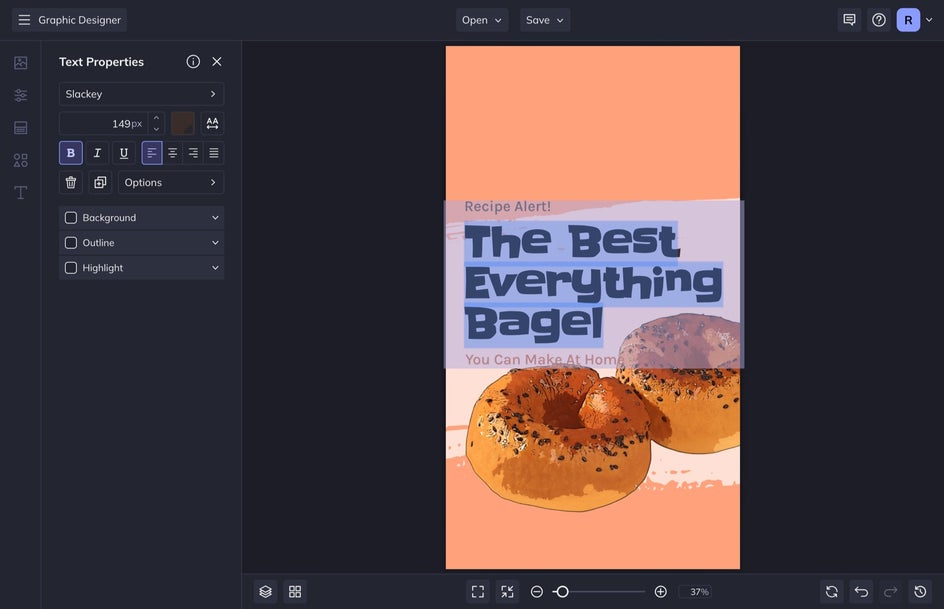
Include any pertinent information someone might need to know in your custom Reel design. Your custom Reel cover will act as an ad of sorts in your Instagram Feed. As an example, if you’re having a sale, include the dates and any promotions. Also, keep in mind the Safe Area mentioned above in tip number 1. To comply with that standard, we move the text down closer to the center of the image.
Step 3: Add Graphics to Your Reel Cover
Depending on if your template has images or graphics, we are going to adjust each of those in this step. To add graphics, navigate to the Graphics tab in the left-hand menu. Click Search Graphics to explore our expansive graphics library. It has plenty of options for every custom Reel cover possible. Select the graphics you want to add to your design and then close the menu. They will appear in the Graphics library, where you can drag and drop them onto your design. Keep the Safe Area in mind when positioning your graphics.
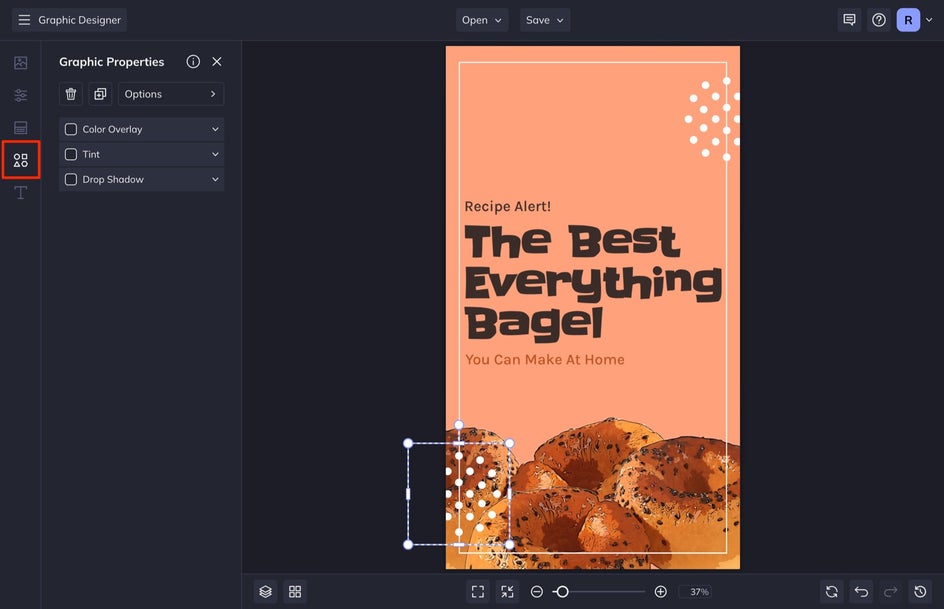
To further customize your graphics, click on them. From here a Graphics Property menu will appear where you can adjust the Color, Drop Shadow, and Orientation of the graphic. To adjust the size, select the graphic and drag the corners outward or inward. You can also rotate the object by selecting the central point and moving your cursor to the right or left.
Step 3: Adjust the Color Palette
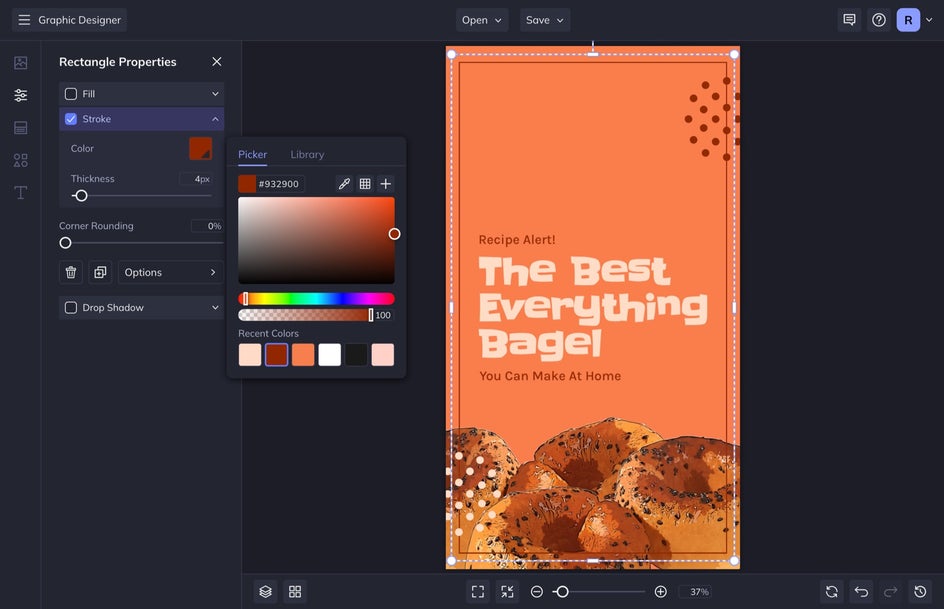
I always make sure that I fine-tune any of my color selections at the end so that the design meshes. First, I change the Background Color by selecting Customize in the left-hand menu. Select the first swatch to select your custom background color.
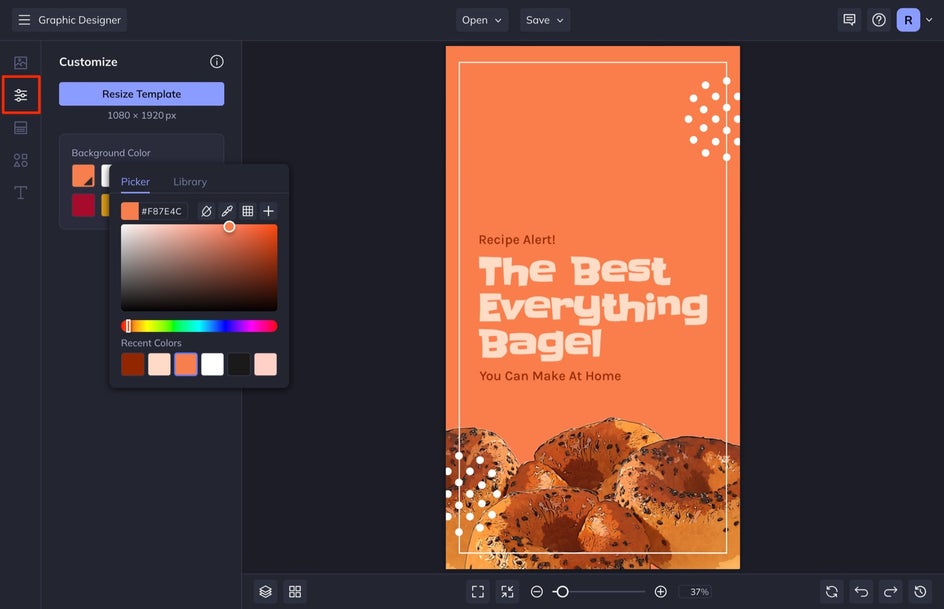
I then click on each element like photo overlay, graphics, and text, and in the designated Properties menu that appears, I change the color swatch for each item.
Step 4: Save Your Custom Instagram Reel Cover
Finally, navigate to the Save dropdown menu at the top of your screen to save your design to your Computer as a high-quality JPEG. I also make sure to Save as Project so that I can come back to the design to edit it at a later date.
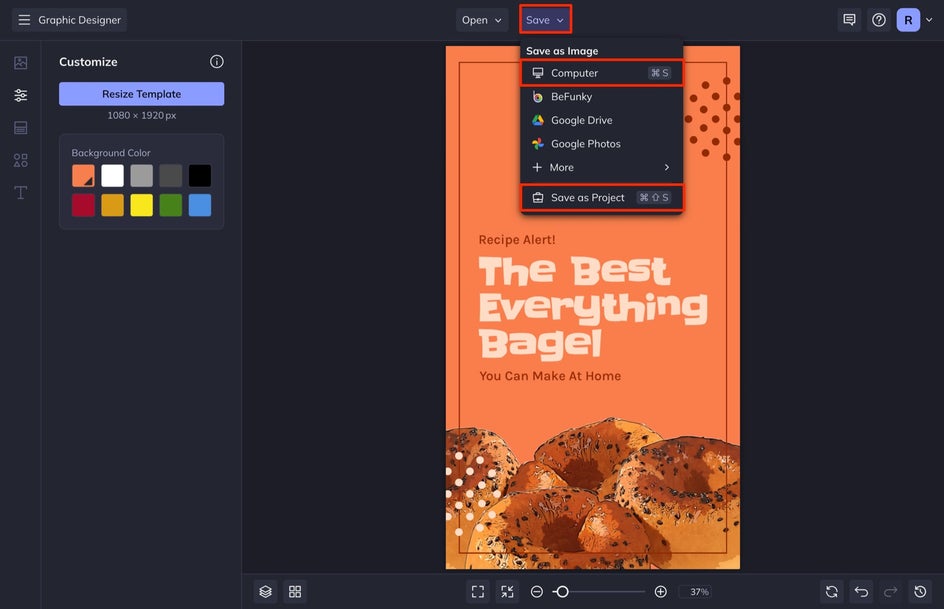
Here is the final product that you can see in both the 9:16 and 1:1 view. You can easily check how your photo will look on your Instagram Feed by uploading your image into BeFunky’s Photo Editor and selecting the Crop tool from the Edit menu. Select 1:1 and see how your image will crop!

Design Custom Reel Covers in Seconds
Now that you've created and saved your custom Instagram Reel cover, you can reuse and repurpose it as much as you want. To start designing, head to our Graphic Designer to customize your own Reel covers.


