Simplify Your Interior Design With Floor Plans
Do you want to redesign a room in your house, but find yourself feeling stuck? Are you overwhelmed by how much there is to do, and worried you’ll regret the end result? Floor plans are the perfect way to simplify your interior design process. They allow you to put your design on paper before committing to it. This means you can rearrange furniture, test out new layouts, and redesign your space – before you move that couch across the room. The Graphic Designer gives you the perfect playground for creating your new interior – you can even make a floor plan right from your phone!
What Is a Floor Plan?
You’ve probably heard of a floor plan in architecture. This describes the top-down layout of a house or any building with all its architectural features: Doors, windows, hallways, etc. A floor plan has precise, to-scale measurements and first serves as the blueprint for building a house from scratch. It only contains the static elements of a building, like the shape of the rooms and where all the fixtures are located.
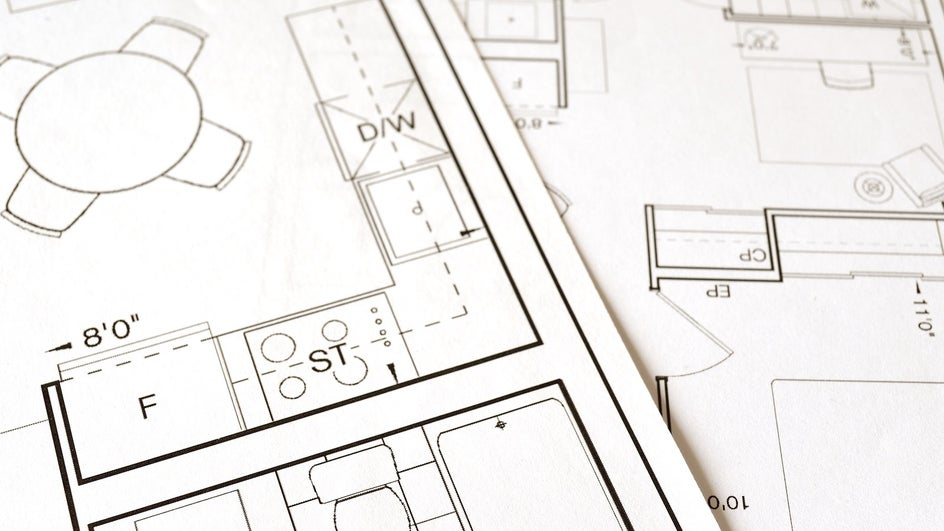
A floor plan in interior design, also known as a room layout or furniture layout, is a similar top-view drawing of an existing room in your house. However, it doesn’t necessarily need to have precise measurements, because the ultimate goal of a furniture layout is to allow you to experiment with where you place all your furniture and decor. In addition to doors and windows, these floor plans include couches, tables, lamps, and all your other furnishings!
Why Do I Need a Floor Plan for Interior Design?
Redesigning a room requires a lot of changes and heavy lifting. But there’s no guarantee that you’re going to love the way something looks once you move it. You may find that the furniture you’ve bought doesn’t fit correctly in your space. Or maybe there isn’t enough of a focal point to tie the room together. You could block some much-needed natural light, or fail to give yourself and your guests enough room to maneuver.

Planning ahead allows you to design a room that is not only beautiful but practical. If you’ve found a mistake in your planning after you’ve rearranged your whole room, it can be difficult to backtrack. If you find a mistake while you’re making your floor plan, like poor sight lines or a cramped corner, you can easily make changes before starting on the project in person.
What Makes a Good Floor Plan?
A good floor plan takes sight lines, negative space, and traffic flow into account. The sight line from the doorway should be open and inviting, and there should be 1-2 clear paths through the room. Balancing negative space is particularly important when designing a room: There shouldn’t be corners cramped with furniture or walls crowded with art, but there shouldn’t be sections of totally empty space either.
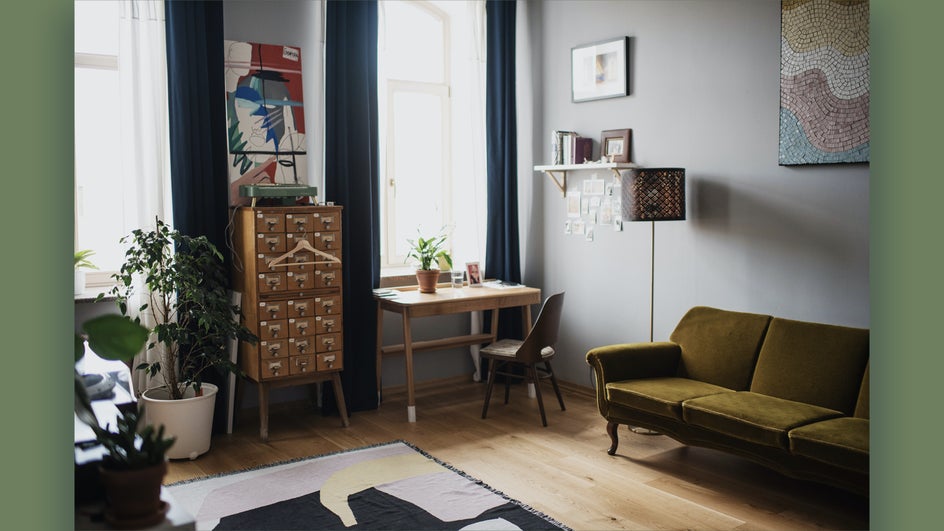
Your floor plan should also take into account your room’s focal point. A focal point can be a wall of shelves, a statement couch, a TV, a table centerpiece – basically anything that draws the most attention in the room. Building your design around this focal point will give your room a natural sense of cohesion. For more tips on how to improve your interior design, check out our 6 best interior design tips.
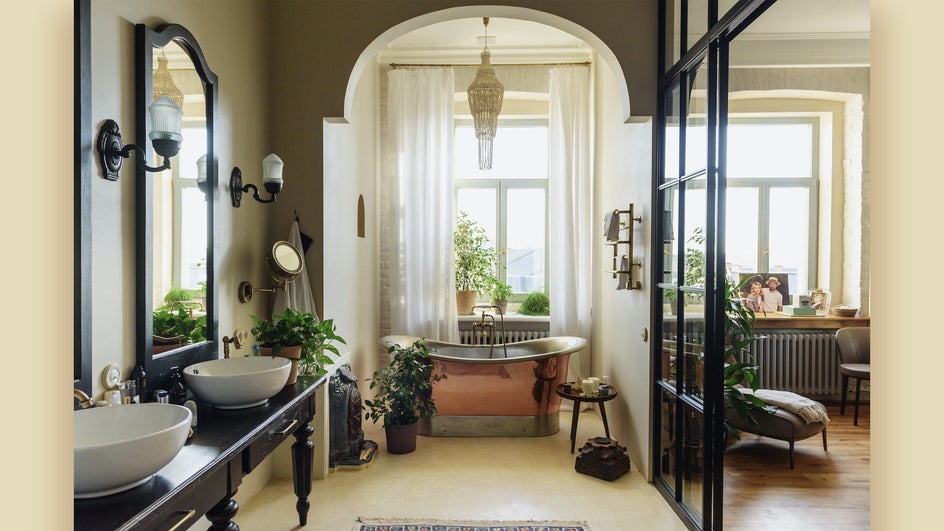
Don't forget about vertical space! While a floor plan comes in handy in figuring out how to arrange all your big pieces of furniture and figure out your sight lines, the height of your room allows for additional design features like wall decor and vertical storage. Take this into account if you ever find yourself worrying about the amount of space you have left on your room layout.
How to Create Your Own Floor Plan
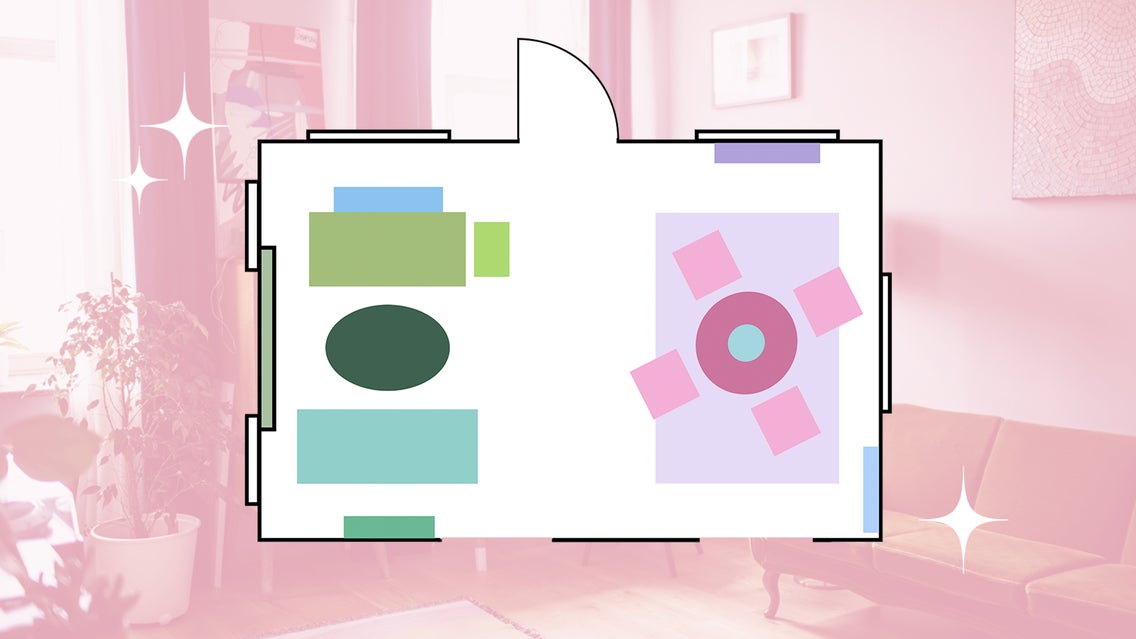
To make a floor plan, all the tools you need are available in the free Graphic Designer. This allows you to create a clear, readable layout and rearrange elements with ease. You can even color-coordinate the symbols you’re using for a clearer end result!
Step 1: Open Your Canvas
To create your floor plan in the Graphic Designer, first open a Blank Canvas in Letter Size.
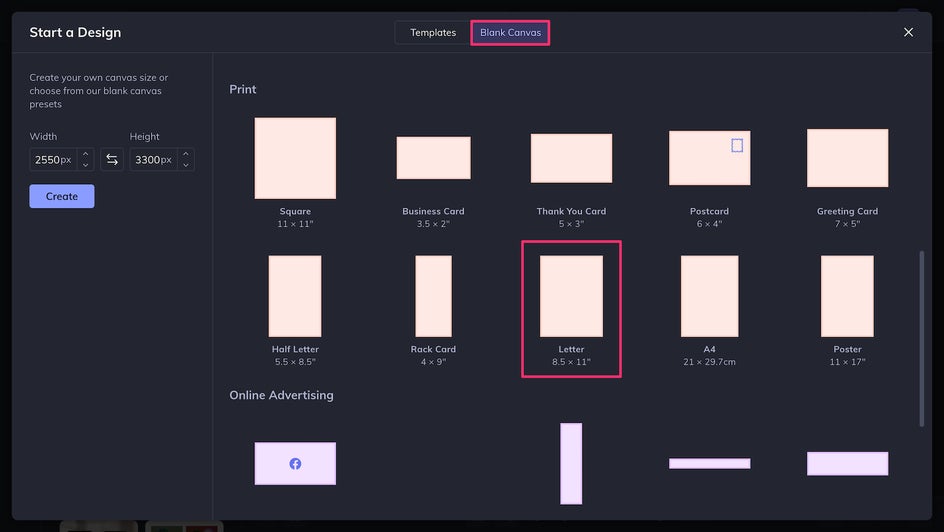
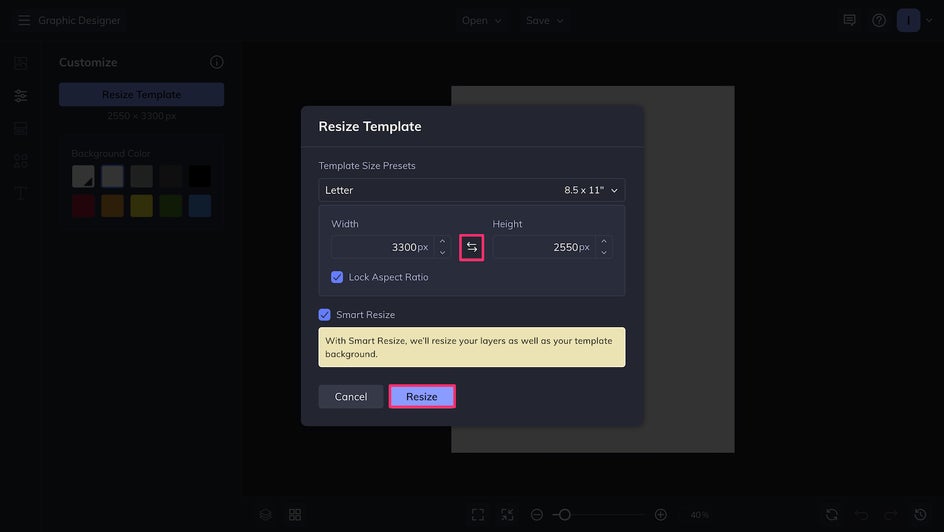
You can rotate it to the orientation that best suits your room using the Resize tool.
Step 2: Lay Out Your Floor Plan
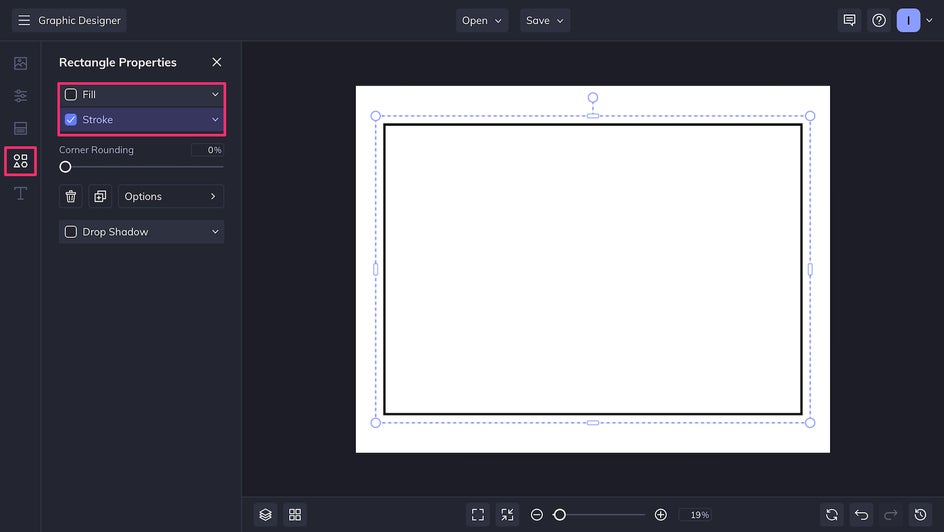
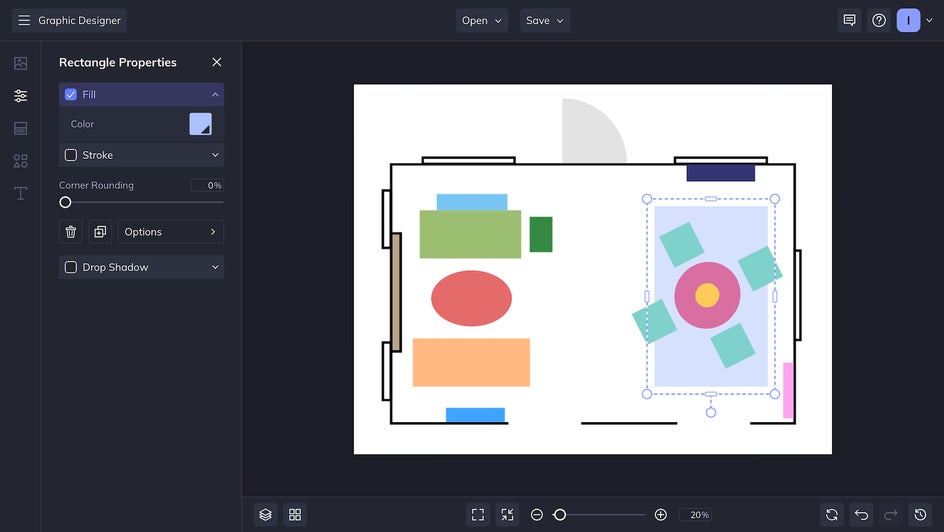
Making your floor plan is as simple as adding rectangles, circles, and ovals with the Graphics tool. The room can be made by unchecking the Fill tool and adding a black Stroke.
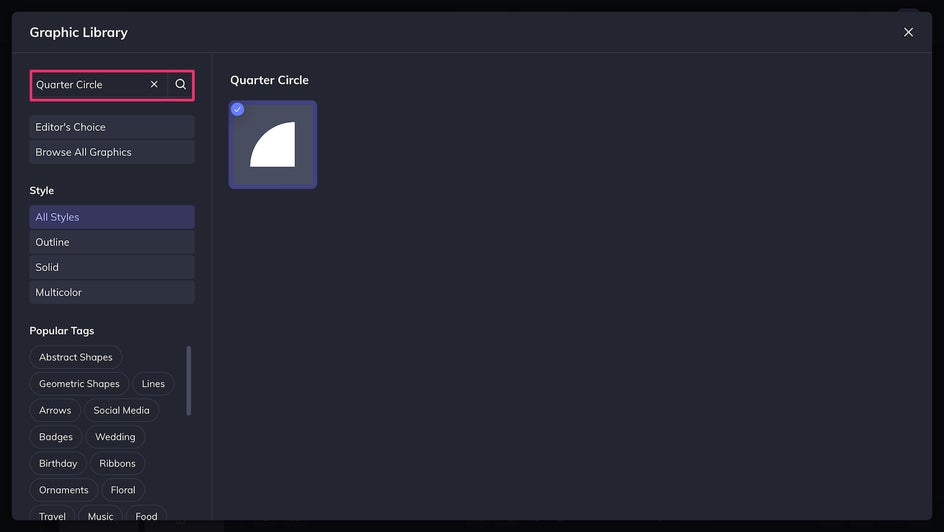
To mark windows, a narrow closed rectangle is the traditional symbol. For doors, use the Search Graphics tool to look up “Quarter Circle” in the Graphic Library. You can add this graphic to your canvas and rotate it depending on which way the door opens and closes.
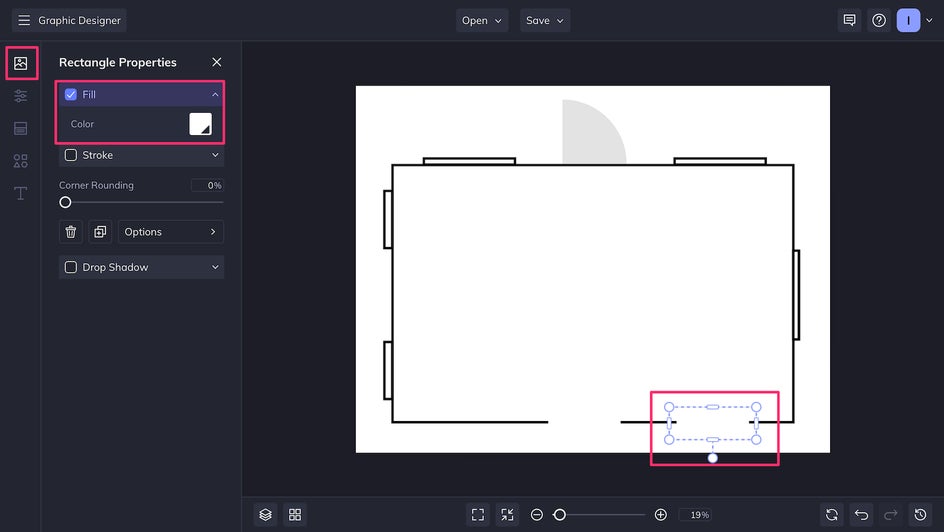
To mark openings that don’t have doors, you can remove the Stroke and add a white fill, then place this over the outline of the room.
Step 3: Add Furniture
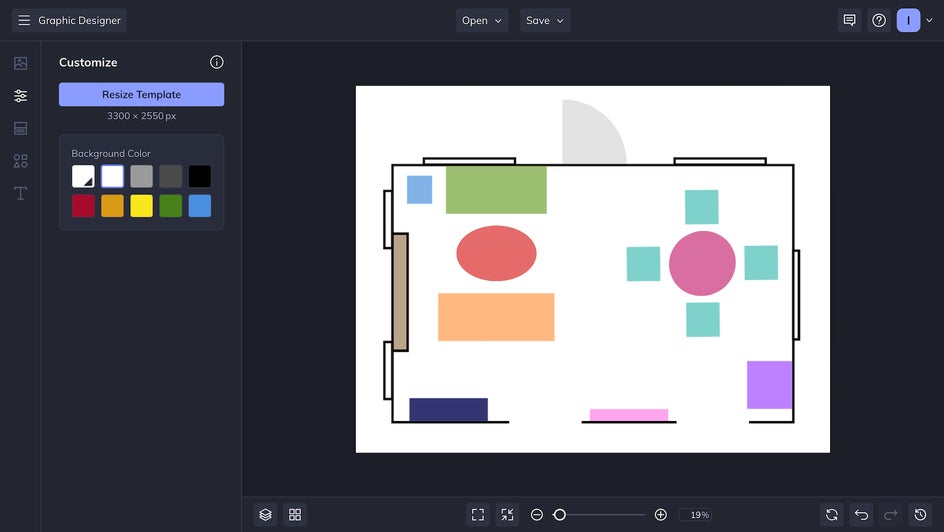
Now, just add your furniture, appliances, and any immovable fixtures! You can change the colors to suit your needs using the Fill tool: We recommend using one color for each identical element, or each set of matching elements. So if you own a pair of nightstands or a set of dining chairs, these can be the same color! To duplicate an element, just click it and then tap the D button on your keyboard.
Step 4: Design Your Interior
Once you have all the elements in a room laid out, you can rearrange them as you’d like by clicking and dragging. You can also add new elements at any time to represent the furniture you’re thinking of adding to your room! If something doesn’t work, you can easily move things around or delete them.
Here, we’re going to rearrange the room so that it’s more balanced, it’s easier to walk through, and there are two distinct focal points for each section of the room. Plus, we’ll replace or remove some of the smaller pieces of furniture.
Step 5: Save Your Design
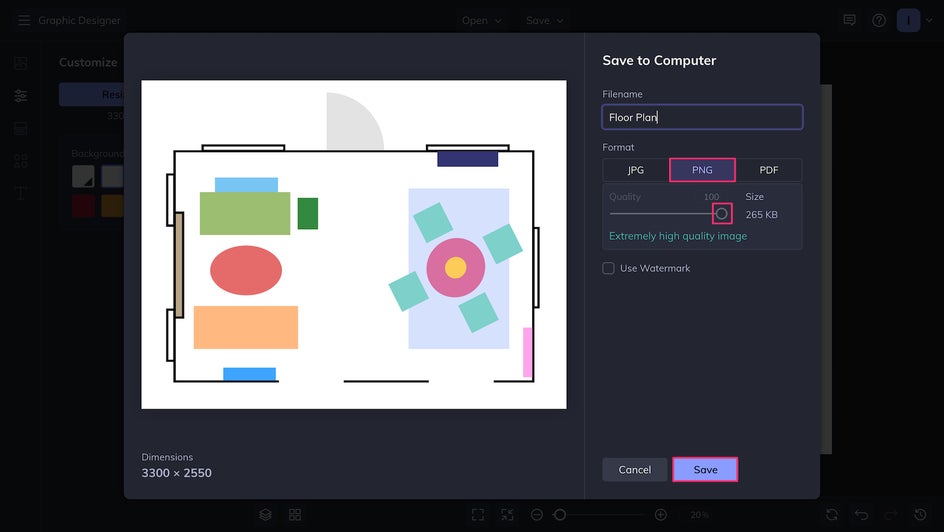
After you’re satisfied with your design, it’s time to save it as a high-quality PNG. You can now keep this file on your phone or desktop as a reference, or print it out and keep it in the room you’re redesigning.
Make Interior Design Simple With BeFunky
Designing and decorating your home should be an experience you look forward to, not one you dread. With BeFunky, you can make planning your room as simple as a few clicks. Start your interior design project off on the right foot by creating a floor plan today in the Graphic Designer!


