How to Use Photos to Make and Print Your Own Comic Book
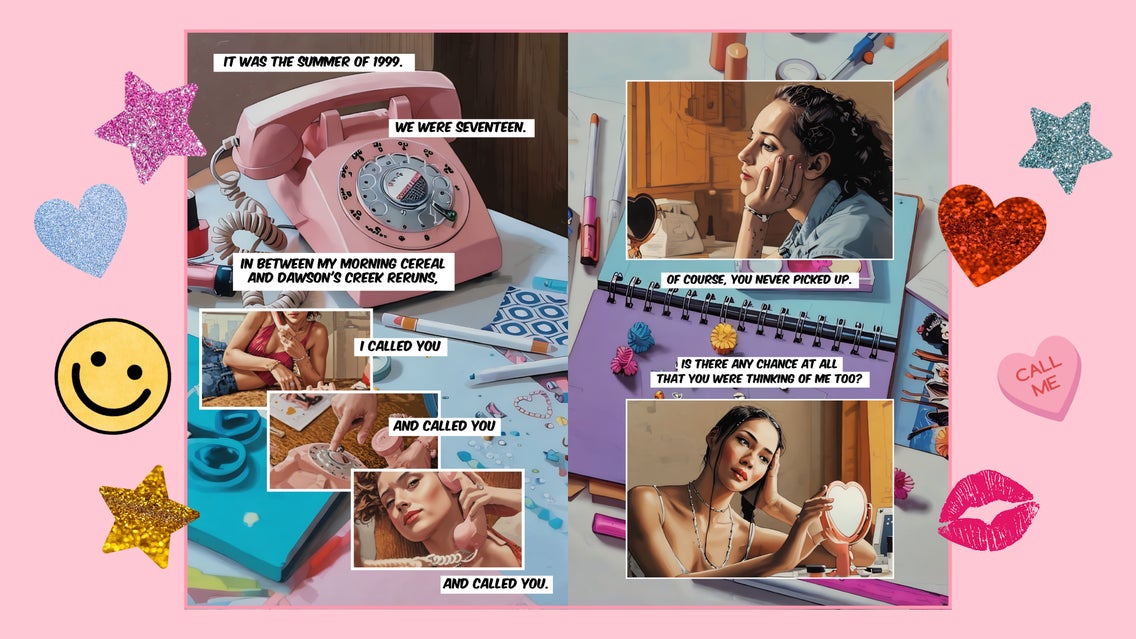
Creating a narrative through images is an ancient human pastime. It goes back to the oldest known cave paintings, over 50,000 years ago. In other words, if you’ve ever felt the urge to create your own comic book or graphic novel, you’re not alone. But drawing individual panels is so time-consuming that most modern comic books are made with entire teams of artists, colorists, and letterers. How do you make your own when your time is limited? Our secret to creating amazing comics quickly is using Graphic Novel GFX in the Photo Editor.
In this tutorial, we’ll show you how to use this effect to create comic book pages in seconds, as well as how to print and bind comic books for reading or selling. If you feel ready, you can even use these methods to print your own full-sized graphic novel.
How Do I Tell a Story Through Comics?
Comics, in their basest form, are pictures with words. The words can be part of the narration or part of the dialogue. Both the words and images work together to move the story along. Newspaper comic strips are very pared down stories: They tell a joke or show a scene. If you’re just starting with comics, it can be fun to try writing just three or four panels with their own self-contained story. If you have a really dense story to tell, you can create your own graphic novel. A good in-between spot is a short comic book that’s just a few pages long – anywhere from 8 pages to 32.
What Should a Comic Book Look Like?
When you think of comic books, you might think of a certain aesthetic. Using Graphic Novel GFX results in a style that’s very similar to modern-day superhero comics, with full color, rendering, and a shiny finish. Most single-issue comic books are 32 pages long. But comic books and graphic novels can actually have any kind of art style and be any length. If Graphic Novel GFX isn’t your style, there’s also Vintage Comic GFX, Comic Noir GFX, and other effects like Cartoonizer and Digital Art effects. Once you’ve mastered using one effect, you can use any – so feel free to play around to find your personal style!
How to Make Your Own Printable Comic Book
To create a printed comic book or graphic novel, you’ll have to print out pages and then bind them together. Each page can be made following the steps in this tutorial. To begin, first head directly to the Comics section of the Photo Editor.
Step 1: Upload a Photo / Apply Graphic Novel GFX
For your first panel, click Open at the top of the page to upload an image from your computer, Google Drive, or BeFunky’s stock image library.
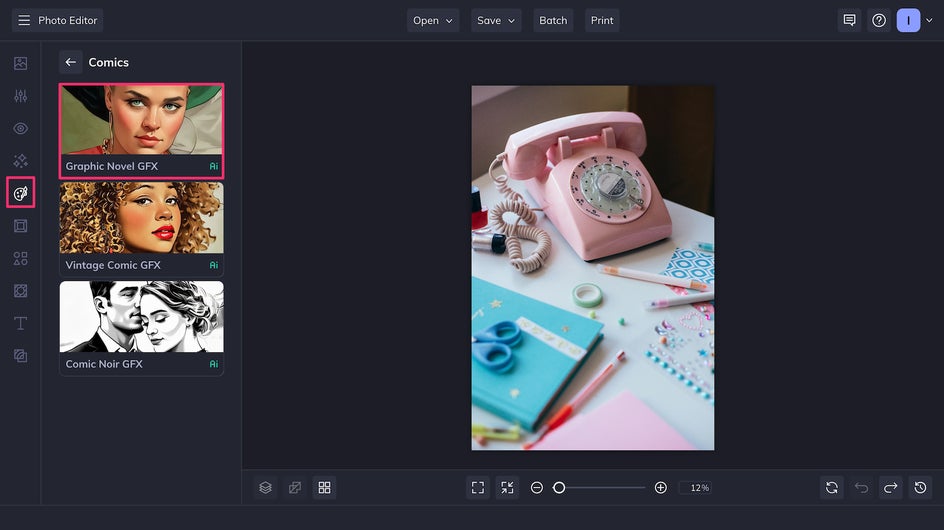
Click Graphic Novel GFX for the comic book-style effect to be applied instantly. From here, you can choose to customize the graphic novel filter using the adjustment sliders, or leave it as is.
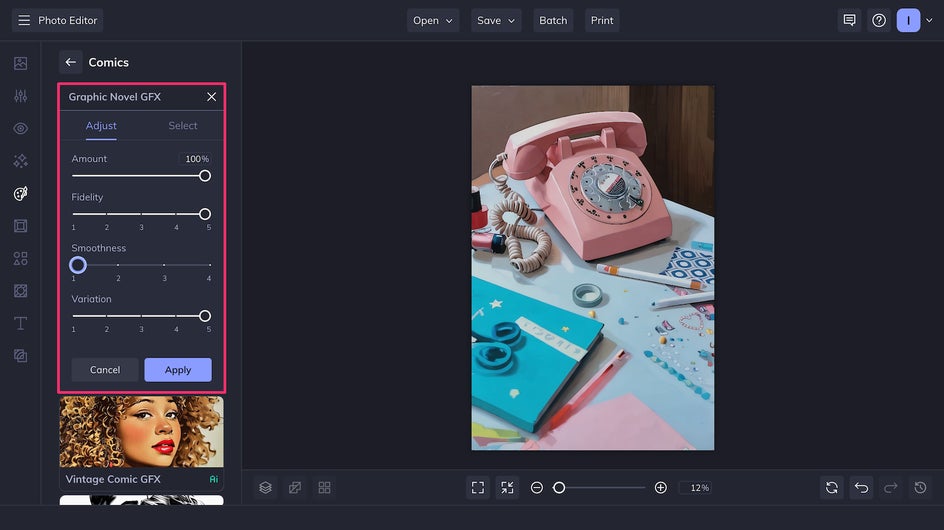
Fidelity controls how true the results are to the original photograph. Smoothness affects how the colors and values blend into each other. Variation allows you to pick from slightly different styles – you can think of it as several different artists drawing from the same reference.
Step 2: Add and Edit Panels
To format multiple panels on one page, you have a few options. You can save individual images and then use the Collage Maker. You can also drag and drop photos directly onto your existing canvas in the Photo Editor using the Image Manager. If you’ve never made a comic before, check out this article for advice on how to format your comic book pages!
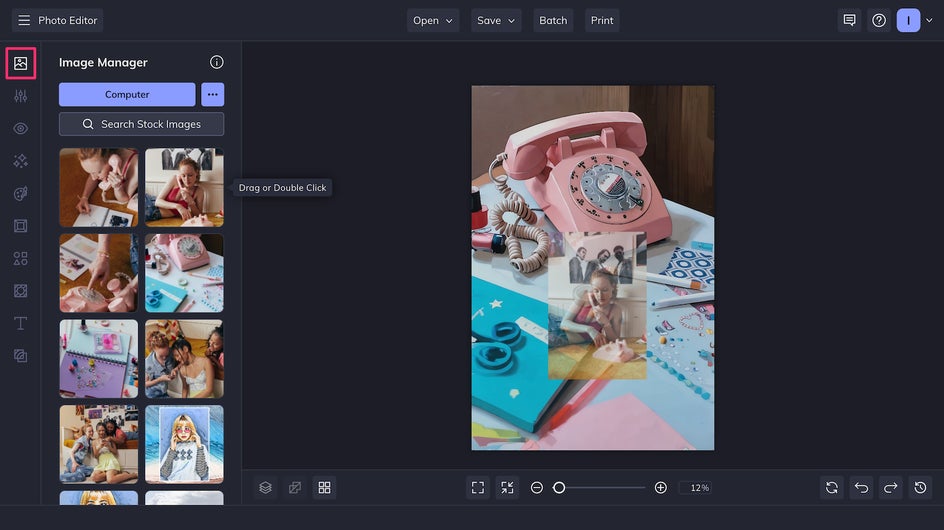
To make sure your panels stand out, drag to select your images and check the Border box in the Image Properties tab. You can also edit the thickness and color of the border.
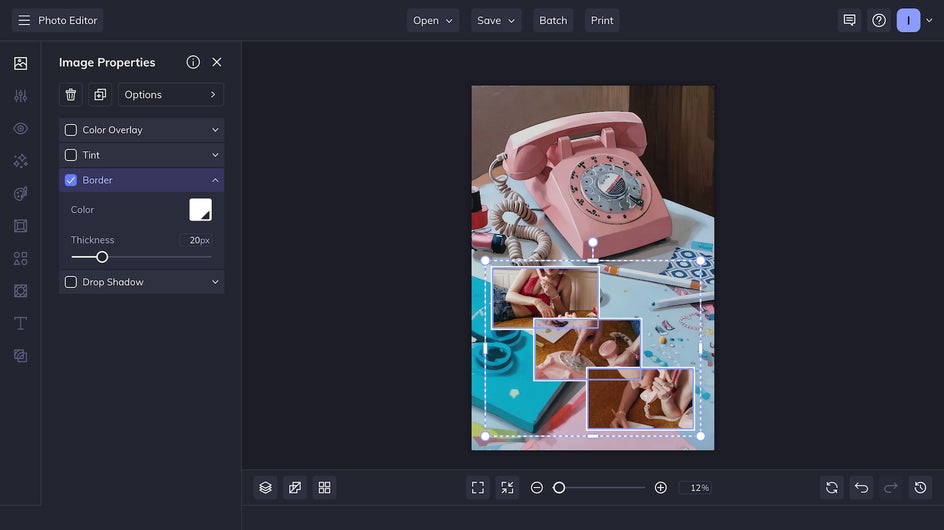
In the Image Properties tab, you’ll also be able to Edit Image. (Make sure you’re selecting just one individual photo.)
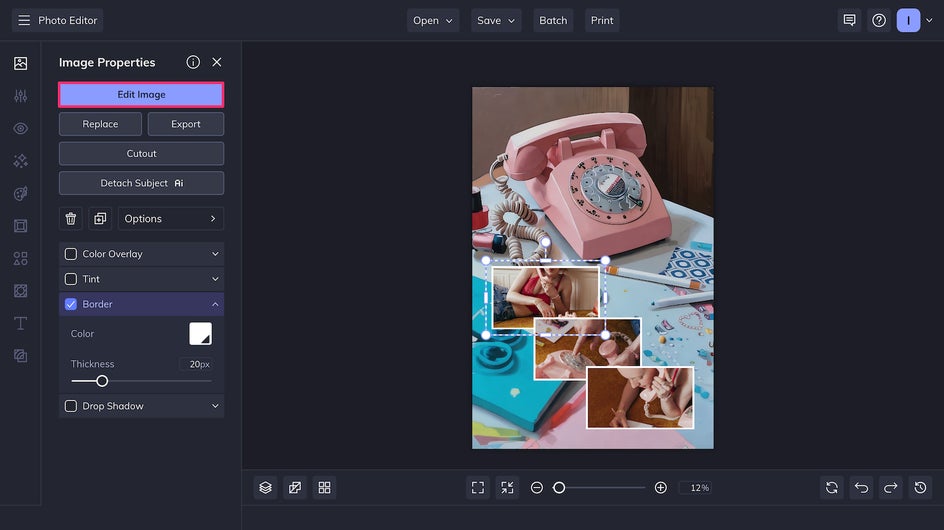
This opens the image in a separate Photo Editor tab. Here, you can add the same drawn comic book effect by choosing Artsy → Comics → Graphic Novel GFX. Repeat this process for each panel and you’ll have a finished comic book page!
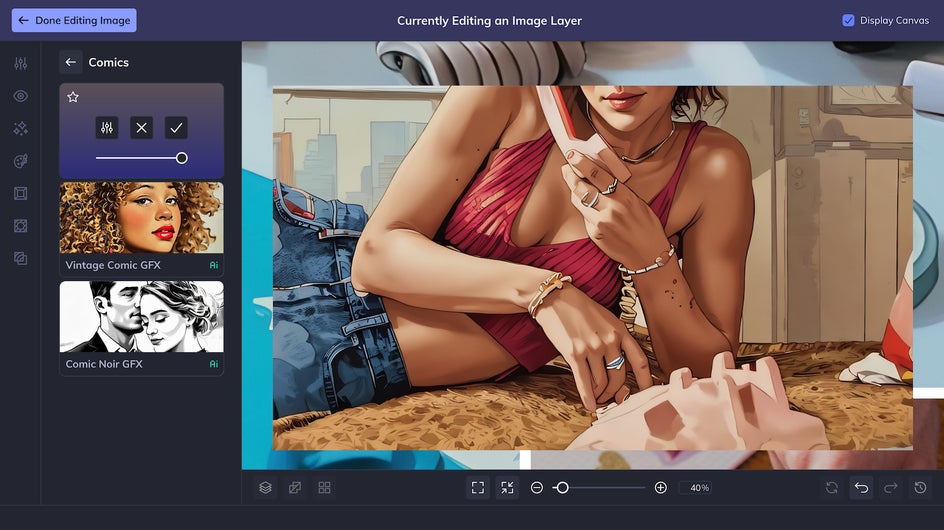
Step 3: Add Text
Ready to move your story along? Just click the Text tool in the sidebar and then Add Text. Here you can choose from hundreds of free typefaces – just make sure to choose a font that stands out or add a Background so that it’s readable!
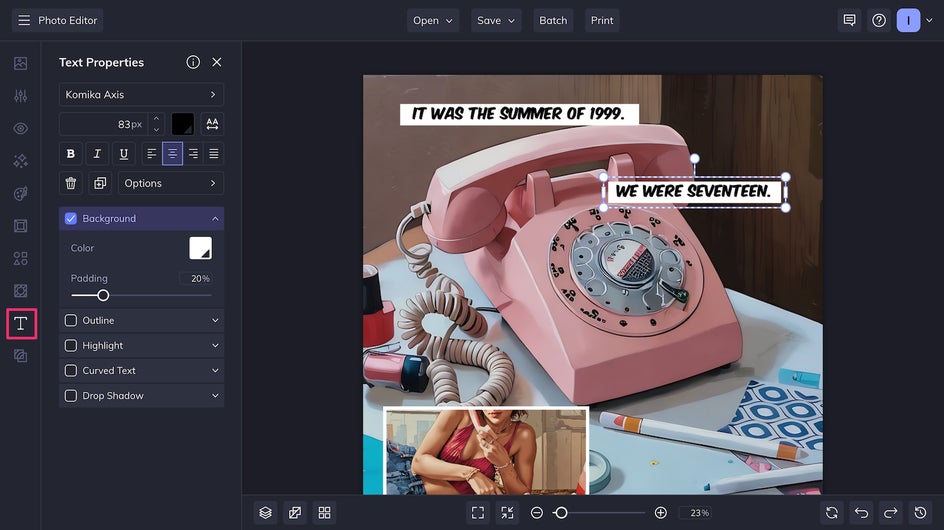
Comic books and graphic novels usually use the same font throughout, except maybe in the case of visual sound effects.
Step 4: Save Your Comic
Click Save at the top of the page to save your comic book page to your computer or the cloud – or to BeFunky for future editing. If you’re finished with the file, save it as a high-quality PDF for the best printing experience.
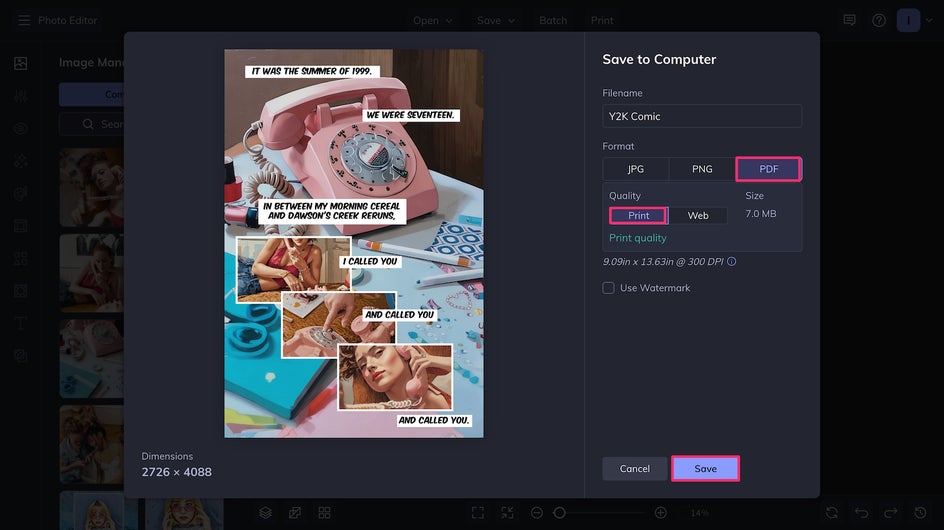
And that’s it! A few clicks later, you’ve created a full-fledged comic page. Make just a few more pages using this process and you’re ready to print an entire comic book!
How to Print Your Comic Book or Graphic Novel
If you have a printer at home, it’s easy to print a short comic book without breaking the bank. Simply stitch your pages together into a single PDF (don’t forget to make sure that you’re arranging your pages correctly) and print two comic book pages to every one sheet of letter-sized (8.5” x 11”) paper.
Copy paper works just fine, but for the best results, use heavier paper (24-32 lb.) so the ink doesn’t bleed through. Once printed, stack your pages in order, fold them along the spine, and staple. Voila – you’ve got a basic booklet.
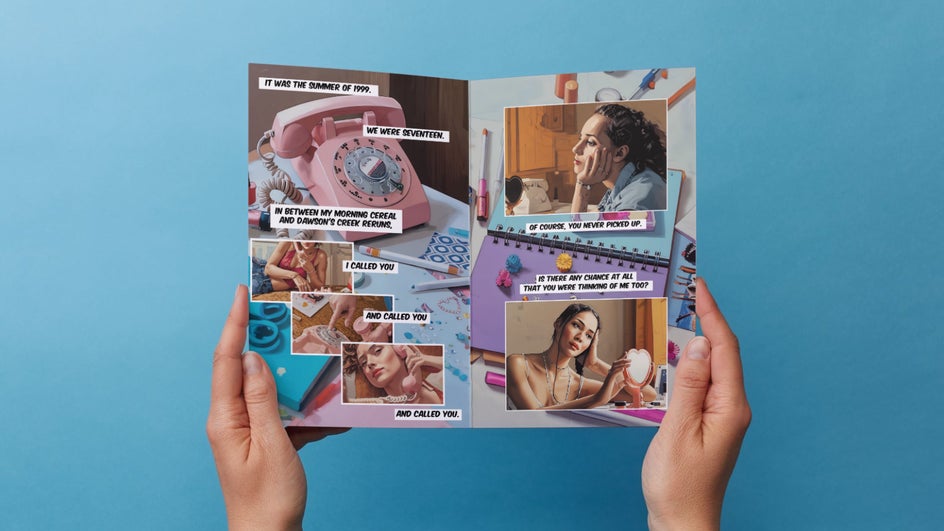
If you want a slightly more polished look, you can check out a local print shop or online print-on-demand services. These places usually offer options for small print runs. You can pick from different paper types, like glossy for bright colors or matte for a softer feel. Plus, they often have templates to help you set up your layout. It’s a bit more costly than doing it all at home, but still affordable for small batches – not to mention professional results. This is a particularly good option if you think you might want to sell your comic book, or if you want to make a longer graphic novel.
For a low-budget, DIY comic book that’s easy to pass around to your friends, you can also make mini comics in a zine style. This method uses a single sheet of paper, folded and cut to create an eight-page mini-booklet.
All of these options let you turn your art into something physical and shareable without needing professional equipment. Social media has made sharing art easier than ever, but there’s nothing like a printed comic book that you can hold in your hands!
Print Your Own Comic Book Today
With BeFunky’s Graphic Novel GFX, creating comic books from photos isn’t just easy, it also yields incredible results. Whether you want to create a short, humorous comic or a plot-heavy graphic novel, you’ll be on your way to printing your own comics in no time. Try out BeFunky’s Comics effects for yourself today!


