How to Create a Monthly Vision Board

While we’re all familiar with making lists of goals or even just daydreaming of what could be, there’s no better way to manifest your vision than by creating a visual interpretation of it! Vision boards can serve many purposes, and manifestation is just one of them. If you’re planning to promote a new brand or plan out a social media aesthetic, vision boards are also a valuable tool to showcase your creative identity online with a tangible piece of content to refer back to whenever you’re feeling stuck.
BeFunky’s Collage Maker is the perfect tool to get your dreams started! The Collage Maker comes with a variety of vision board templates that will get your visions out of your head and into the world in no time. Follow along for a short tutorial on how to set up your very own vision board.
How to Create a Monthly Vision Board in the Collage Maker
To create your vision board, start by opening the Collage Maker.
Step 1: Upload or Select Stock Images
To get your images into BeFunky, start in the Image Manager. Here you can either upload files directly from your computer by clicking the blue Computer button or use the Search Stock Images to find images that inspire you. You can also click the three dots to find images saved to BeFunky, Facebook, or Google Photos.
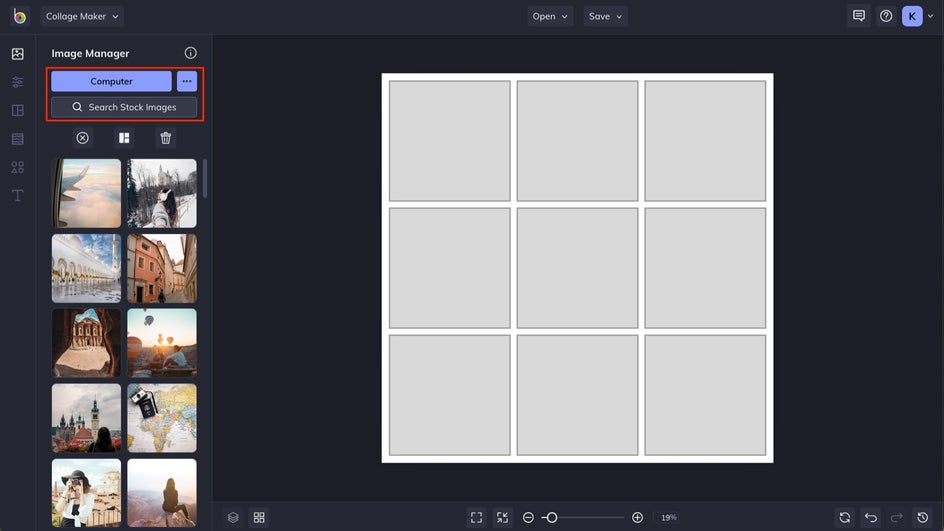
If you’re searching stock images, enter a search term then select the images you want to add to the Image Manager. Any images you select will have a blue border around them and will populate in the Image Manager.
Step 2: Choose Your Layout
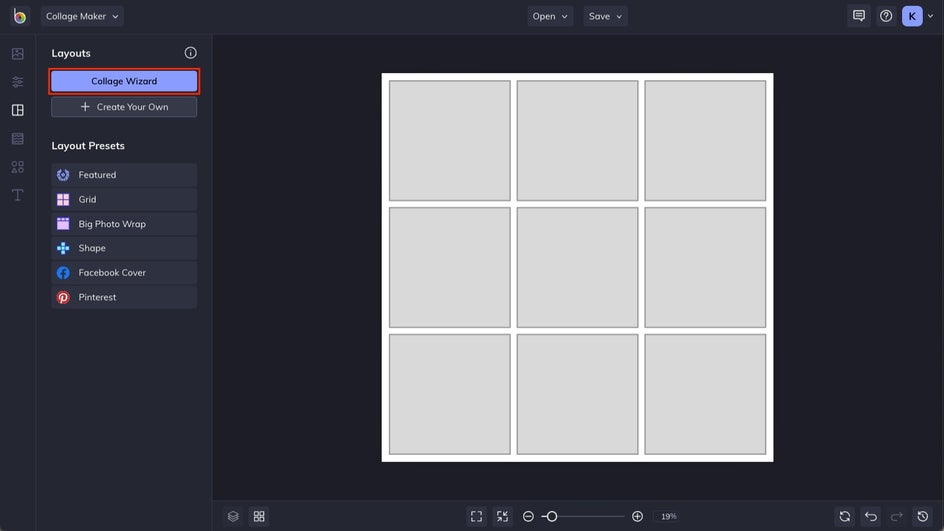
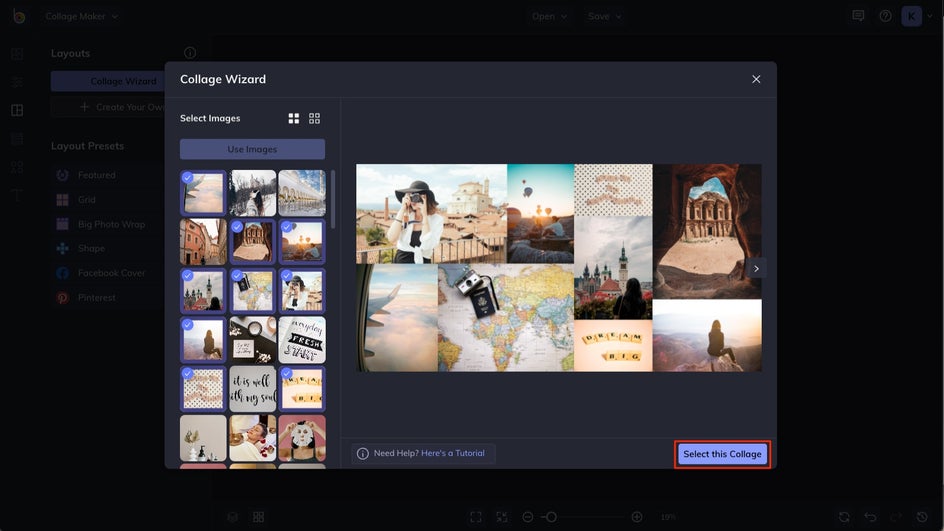
Once your photos are uploaded or selected, go to the Layouts section. We recommend using the Collage Wizard tool, which will provide you with a variety of layout options to display your photos.
Select each image you want to include under Select Images and then click Use Images to add them to the layouts that the Collage Wizard will suggest.
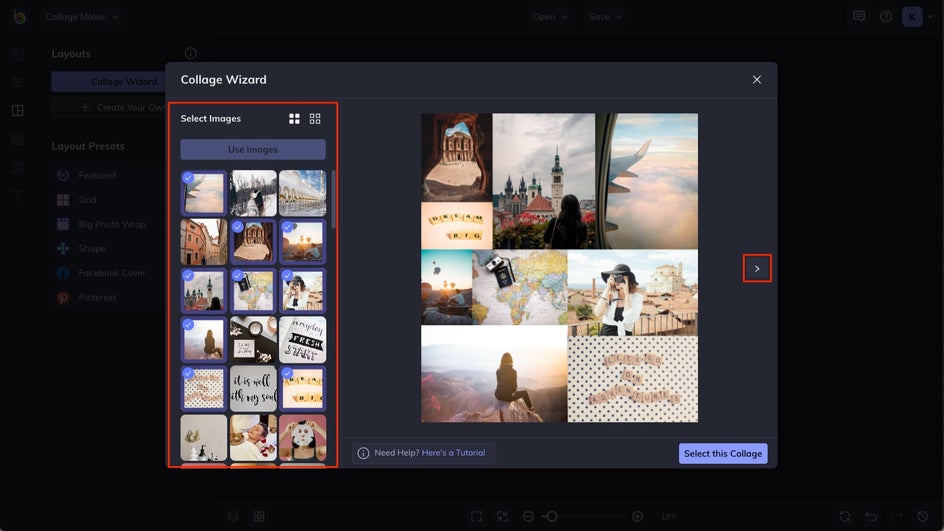
To explore the different layout options, click the arrow button until you find your favorite. Click Select this Collage to populate it on the BeFunky canvas.
Step 3: Make Edits to Individual Images
If you want to make any changes to an image on your board, click on its cell and you’ll see an option to Edit Image. This will take that individual image into an Edit Image dialogue.
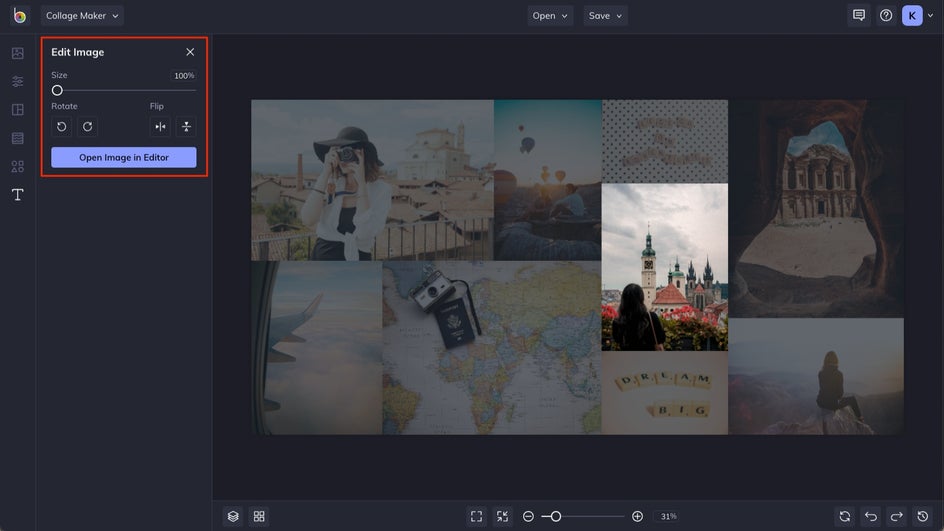
Here you can make simple edits like changing the size of the image in the cell, rotating or flipping it, or clicking on Open Image in Editor to take it into the Photo Editor to have access to the full spectrum of image editing options.
Step 4: Add Text (Optional)
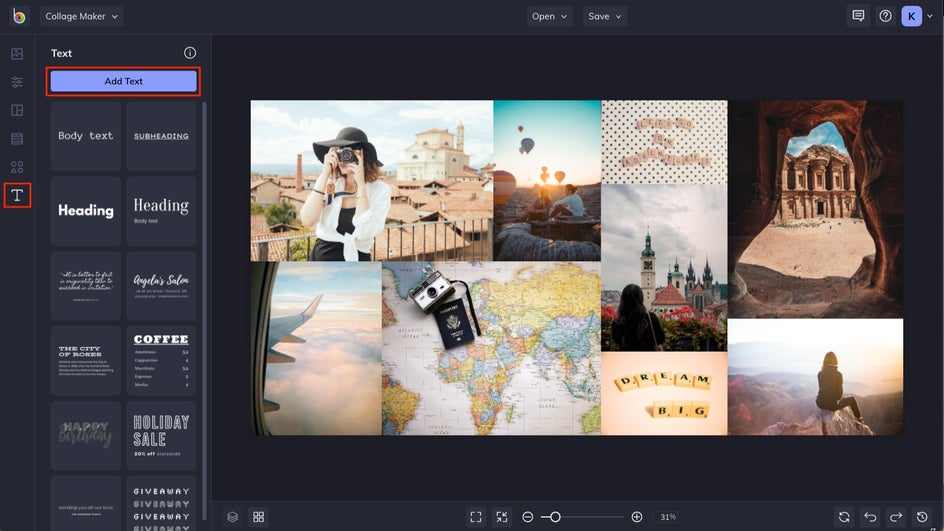
To truly customize your vision board, add text to it! Add an inspiring quote or a goal you’re looking to manifest in your board. Start by going to the Text menu, then click on Add Text or choose one of the pre-set text options.
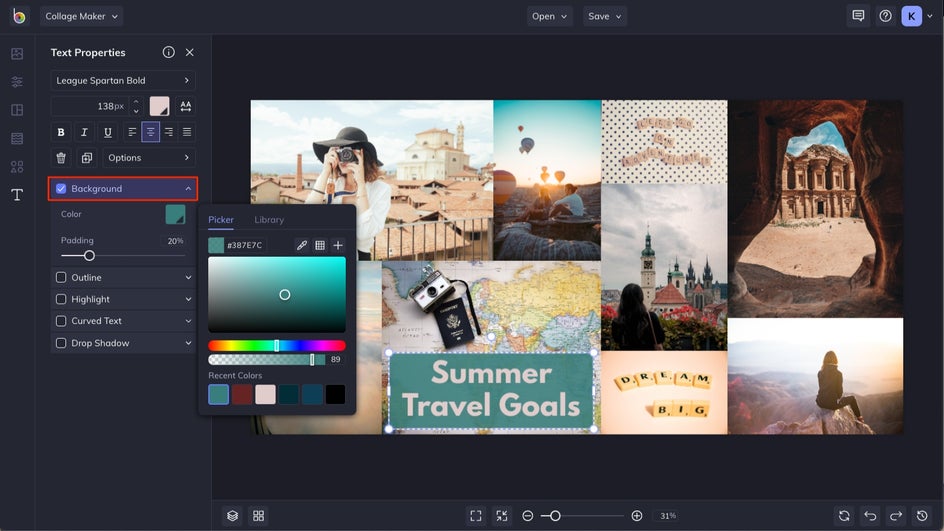
Use the Text Properties menu to change the size, font, and styling options. You may want to add Background color to help your text stand out over the images you selected for your vision board.
Step 5: Add Graphics (Optional)
To go even further, use BeFunky’s massive graphic library to add some more flair to your board! Click on the Graphics menu, then click the Search Graphics button.
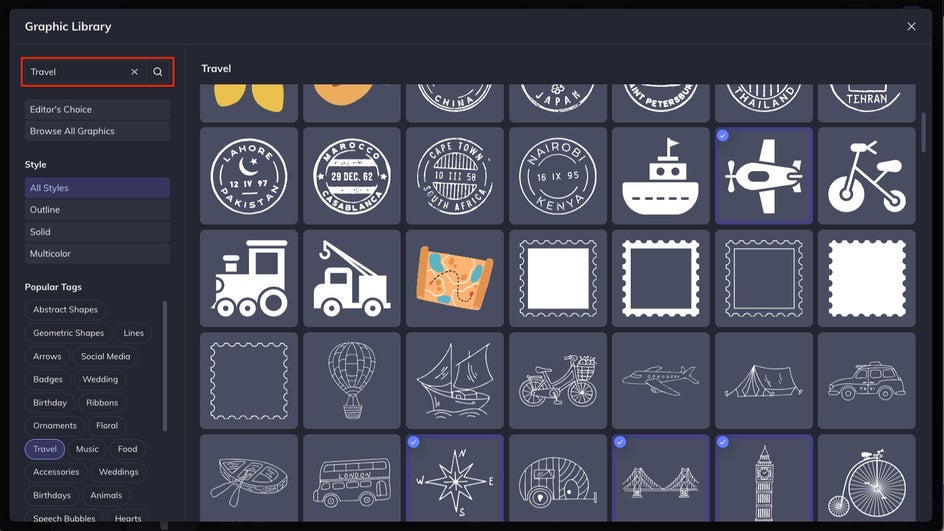
Enter a search term related to the graphics you want and you’ll see options appear in the Graphic Library. Select any graphics that you like and they’ll appear in your Graphics menu. Double-click or drag them to the canvas to move them around.

When you add a graphic to the canvas you’ll see a Graphics Properties menu appear. Use this to add Color Overlays or other options to customize your graphics.
Step 6: Make Any Final Customizations
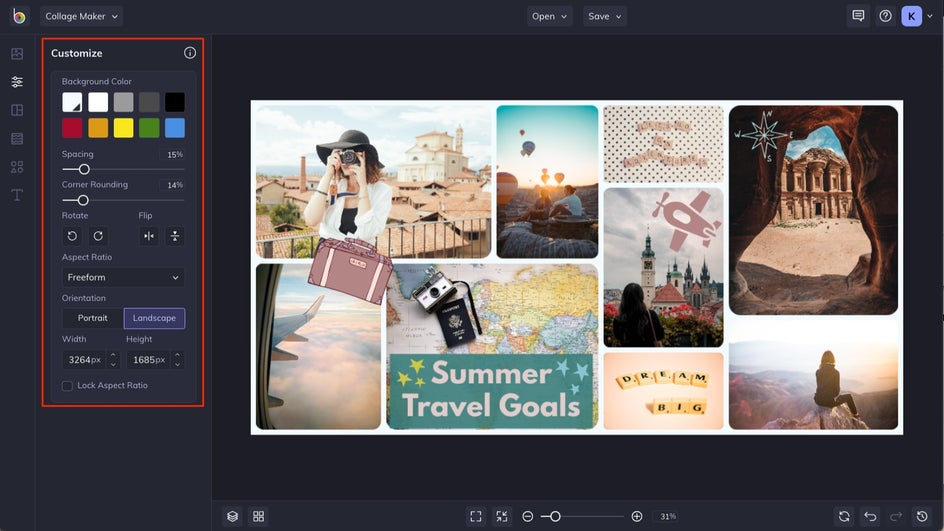
Under the Customize menu, you’ll see some more options for your board. Choose different background colors, add spacing or corner rounding, and more.
Step 7: Save Your Vision Board
Once you’ve perfected your vision board, just click Save at the top of the menu to the location of your choice. Choose to save to your computer, your BeFunky account, or one of your other connected accounts. You can also Save as Project to save an editable version of your board in case you want to change it up later.
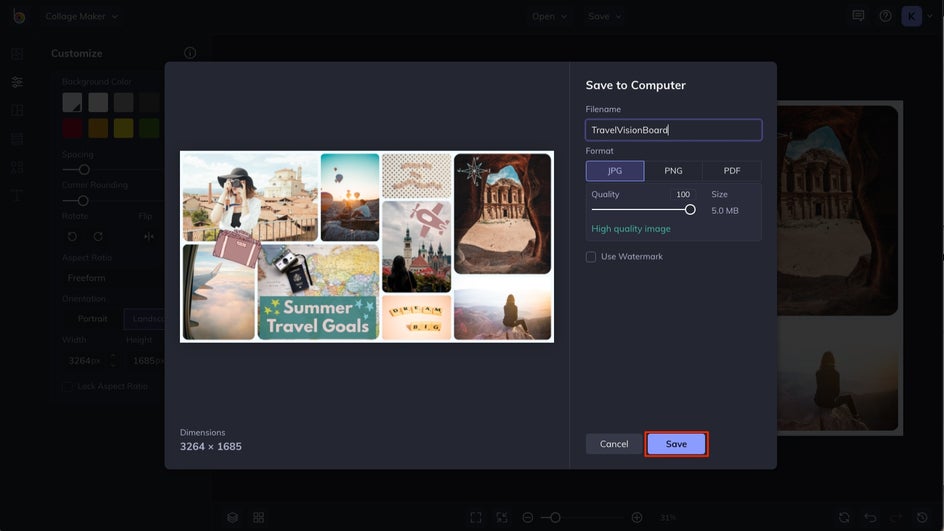
Now you just need to name your file, choose the file type (JPG or PNG would work best for this project) and click on Save!
Share Your Vision With the World!
Vision boards are a powerful tool you can harness to manifest your goals and get a visual interpretation of an inspiring future. You can also consider using them to plan out your social media aesthetics or show off a brand identity to potential clients.

Whether you’re making this vision board for yourself to return to when you’re feeling stuck, or creating a professional asset to promote your small business, you have BeFunky on your side to help out! The Collage Maker provides you with fully customizable, pre-made layouts that will get your vision up and running in just a few clicks. Head over to BeFunky's Collage Maker and turn your dreams into reality, today!


