Craft Mother’s Day Cards in Our Collage Maker

Looking for something special to make for your mom this Mother’s Day? Show your mom your appreciation for everything she does by creating a Mother’s Day collage filled with her favorite family photos. You can even add a heartfelt message, so she’ll treasure it for years to come!
If you’re wondering how to make a Mother’s Day collage, don’t fret. We’ve included everything you need to know to create your own using BeFunky’s incredible Collage Maker. Trust us—it’s the best free collage maker online!
How Do You Make a Mother’s Day Collage?
First up, let’s show you exactly how you can make your very own Mother’s Day collage using BeFunky’s Collage Maker. To get started, head to the Collage Maker and follow the simple steps below.
Step 1: Choose Your Collage Layout
Firstly, you’ll want to choose how your collage will be laid out, including how many photos it will hold. To do this, navigate to Layouts in the main menu to the left, then choose a Layout Preset category to view all the collage layouts on offer.
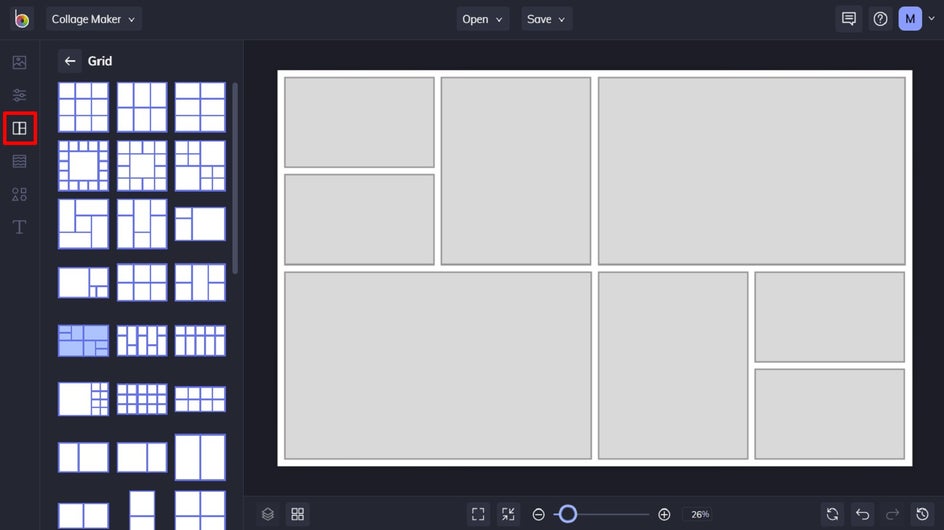
Keep in mind that if you want to leave room for a personalized message, you’ll need to choose a collage layout that contains an extra cell than the number of photos you wish to include.
Step 2: Upload Your Photos
Navigate to Image Manager from the main menu on the left (it’s the first symbol). From here, you can upload your chosen photos from your computer, as well as your BeFunky account, Facebook, or Google Photos.
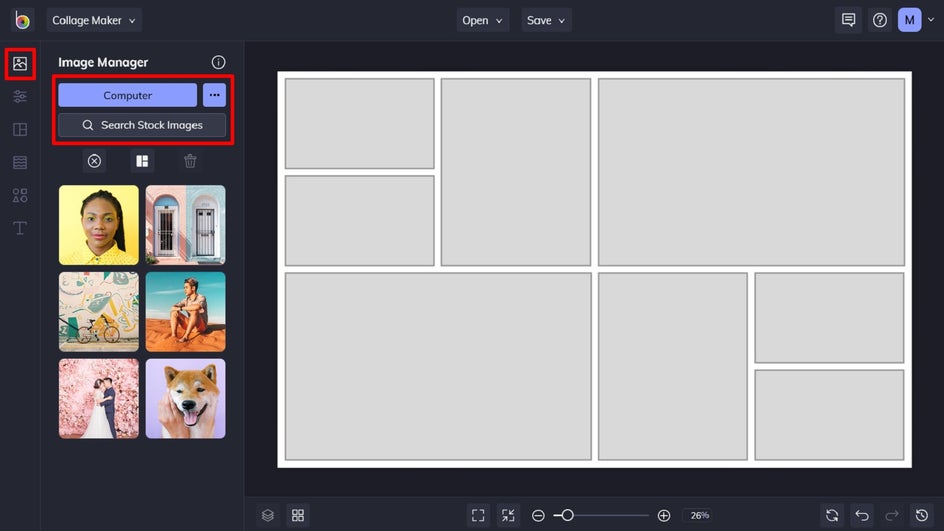
If you’re looking for a decorative image for your collage, you can also click Search Stock Images to access BeFunky’s library of over a million free-to-use images.
Once you’ve uploaded your images for your collage, they will appear within your Image Manager.
Step 3: Arrange Your Photos In the Collage Cells
To fill the collage with your photos, simply click and drag them into their desired position. Alternatively, you can select the second symbol above your images (in between the cross and trash can symbols) to fill your collage automatically with your images.
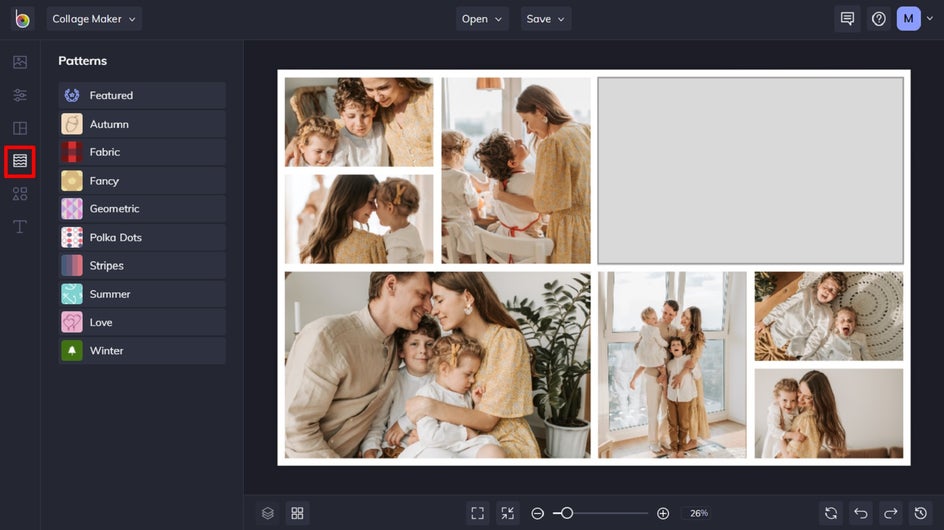
If you place an image in the wrong cell, you can simply click and drag a new image into its place instead or click on the image and select Remove Image from the options that appear.
Step 4: Add a Background to Your Message Cell
Remember how we said to choose a layout that allows you to leave a cell blank for your message to mom? For this part, we’re going to add an image to that cell to serve as a background to your message.

You can either navigate to the Image Manager and click Search Stock Images to find a specific image or navigate to Patterns in the main menu to choose from one of the fun patterns there.
Step 5: Add Your Message
Add a new text box by navigating to the Text tab in the main menu on the left and then clicking Add Text. Alternatively, you can choose from one of the preset texts below. Click and drag your text box into place on your collage, then double-click it to type in your own Mother’s Day message.
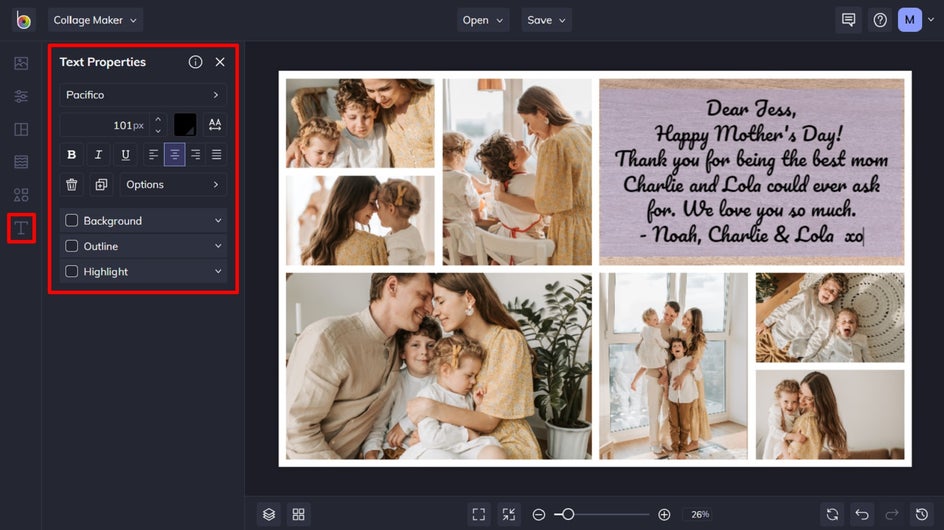
When you select the text box, a Text Properties toolbar appears where you can also adjust things such as the Font, Size, Color, Spacing, and more.
Step 6: Customize It a Bit
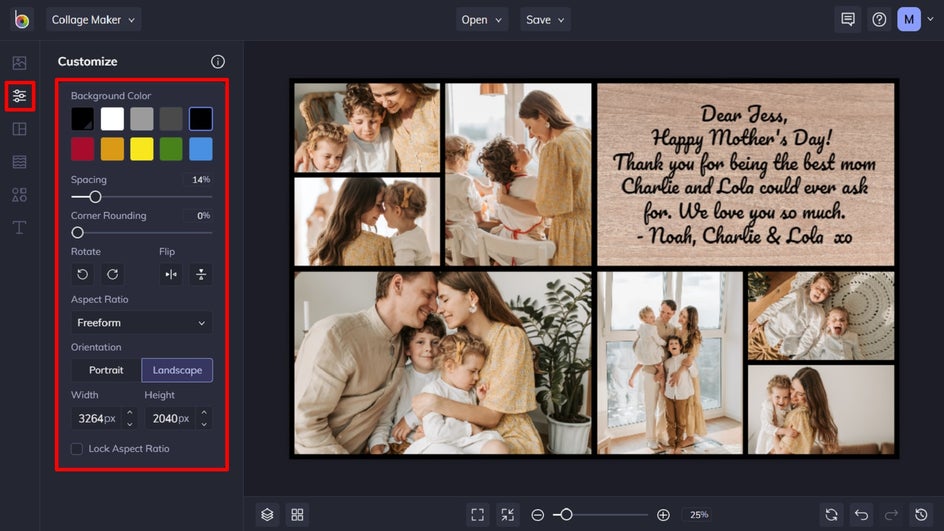
Before you finish your Mother’s Day collage, you can also tweak elements such as the Background Color, Spacing, Corner Rounding, Width, Height, and more by navigating to Customize in the main menu.
Step 7: Save Your Mother’s Day Collage
Once you’re happy with how your Mother’s Day collage looks, it’s time to save it. Simply click Save at the top of the screen, then select your desired save location.

Final Result
There you have it – your very own Mother’s Day collage made with love! Why give mom a store-bought card when you can create a collage that’s filled with her favorite memories?

Show Mom You Care With a Custom Collage
What’s better than a single photo? A whole collage of them, of course! This Mother’s Day, treat your mom, grandma, or any other special mother in your life with a custom collage filled with your special memories over the years.
Create a heartfelt Mother’s Day gift using our Collage Maker today!


