How to Edit Photos Using the Paint Brush and Magic Brush Tools

In the past, editing a photo meant applying a single effect all over your image, without the ability to customize it further. Thankfully, those days are long gone. Now, the ability to add creative flair to selected parts of your image is more powerful than ever.
What Can You Do With the Magic Brush and Paint Brush Tools?
This is especially true with the Paint Brush and Magic Brush tools, available in our Photo Editor. With a simple sweep of your cursor, you can retouch areas of your photo, choose specific parts of your image to remove or keep, and even add Artsy effects selectively for extra wow factor.
Don’t just take our word for it though. Keep reading to see how you can use the Paint Brush and Magic Brush tools to instantly transform your own images!
Cut Out Objects From Photos With Precision
Ever wanted to cut out objects from a photo and place them on a new background, or create transparent backgrounds around objects in an image? The Cutout tool, located in the Edit section of the Photo Editor, makes this a breeze – especially when using the Paint or Magic Brush options.
You’ll find these brushes within the Cutout tool, located underneath the Remove Background button.
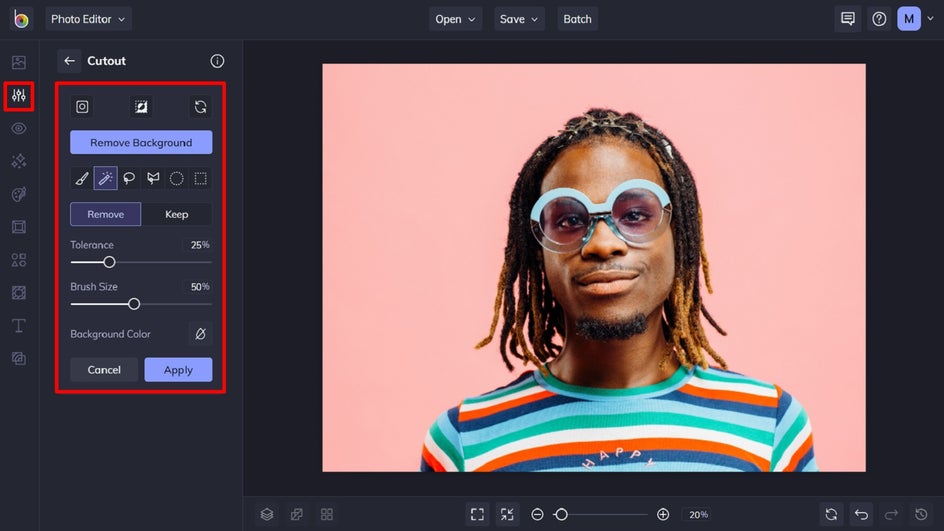
The first brush, Paint, allows you to paint over any area of your image to create transparency.
The second brush, however, is perhaps the most powerful paint brush of all. Known as the Magic Brush, it works by removing the background color wherever you click and drag, leaving non-similar colors alone. The Magic Brush is perfect for quickly cutting out objects that differ in color from the background they’re photographed on – whether it’s a solid-colored background or a busy one.
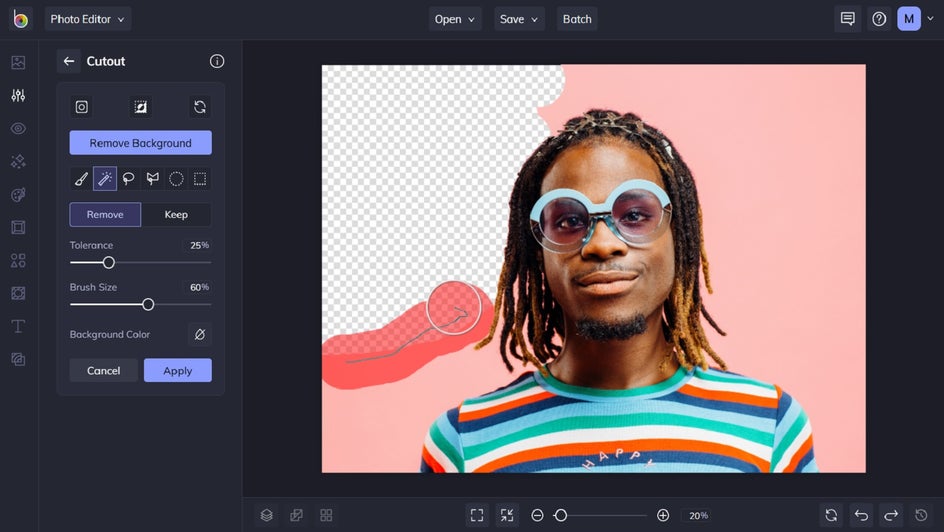
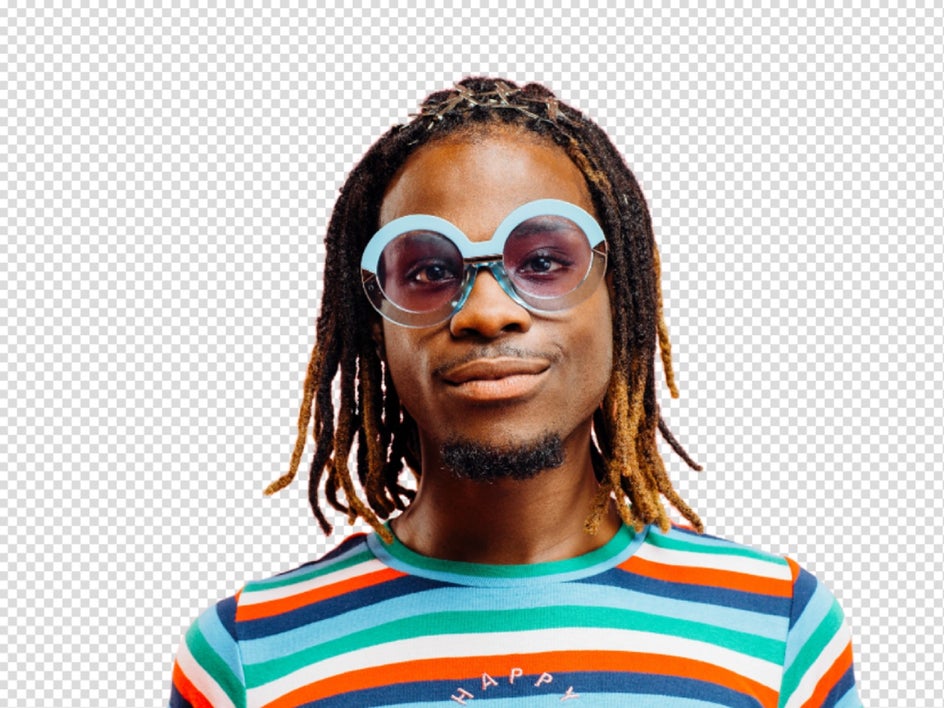
Take a look at the final result below. Using the Magic Brush, we were able to remove the background color in this photo within just seconds!

Touch Up Photos for an Efortless Look
The Paint Brush tool is also a key feature of our Touch Up tools. Within the Touch Up menu, you can remove blemishes, apply makeup (such as lipstick, mascara, blush, and more), and even use the Clone tool.
Most of these are applied selectively using the Paint Brush tool. This allows you to touch up your photo pixel-by-pixel for ultra-precision.
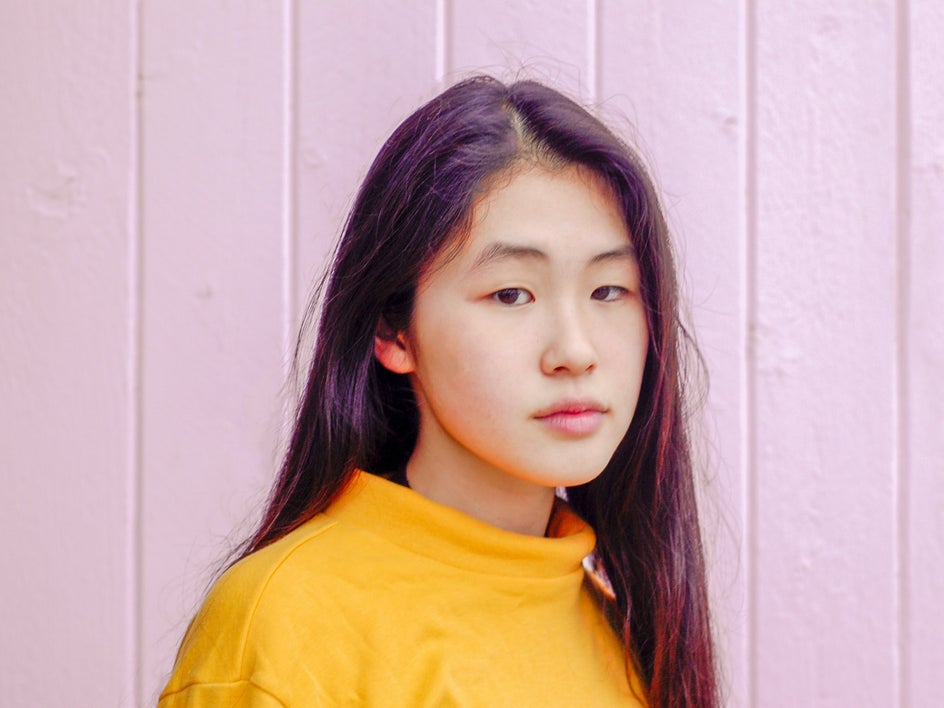
When you click on a Touch Up tool, you’ll have the option to adjust the Brush Size, as well as other elements such as Strength, Brush Hardness, and even color – if applicable. For this example, we’re going to apply lipstick to a portrait.
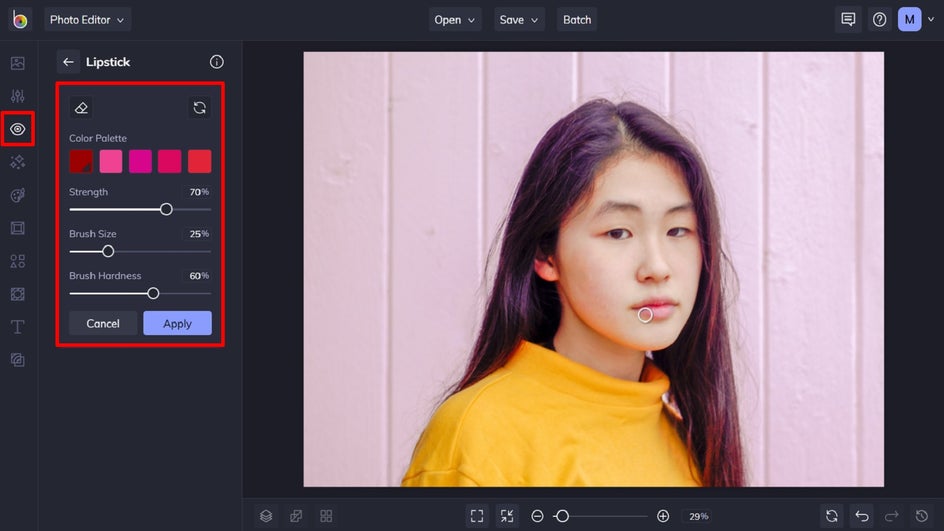
The brush will appear as a round circle at your cursor as you hover it over your image. Then, simply click and drag to paint the effect onto your image. To make it easier when dealing with smaller sections, use the slider underneath the image to zoom in.
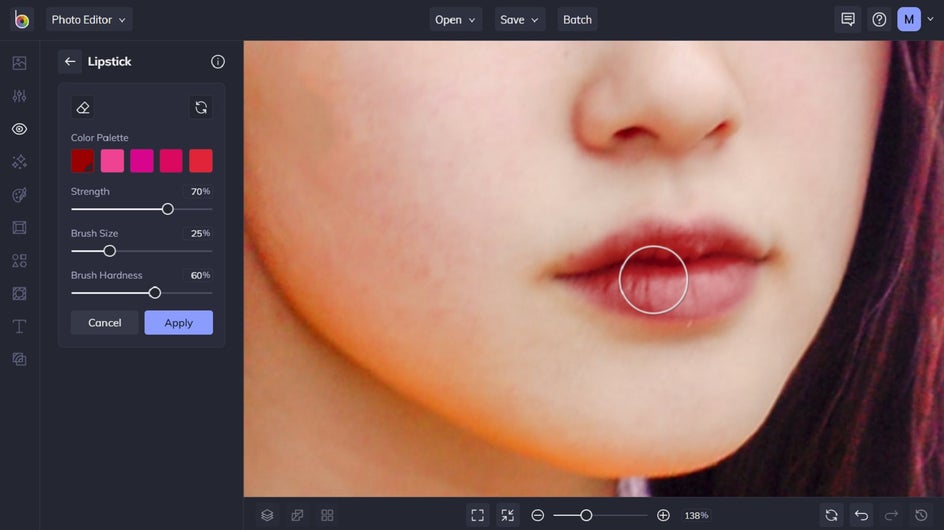
This pop of dark red lipstick is flattering, eye-catching, and very realistic, thanks to the precision of the Brush applicator!

Apply Photo Effects Selectively
Just as you can selectively apply the Touch Up tools to your images, you can also do this with Photo Effects, Artsy Effects, and even Textures!
There are plenty of scenarios where you might want to only apply an effect to parts of your photo. Perhaps you only want to change the color of the sky, for example, or you want to highlight a specific element by making the rest of the image black and white.
To locate the Paint Brush tool within any of these effects, simply click on your desired effect first. For this example, we’re using the Artsy Effect Pointillism 1. Then, select Settings, which is the first button next to Cancel and Apply. Within the Settings, click on the Erase tab at the top-right.
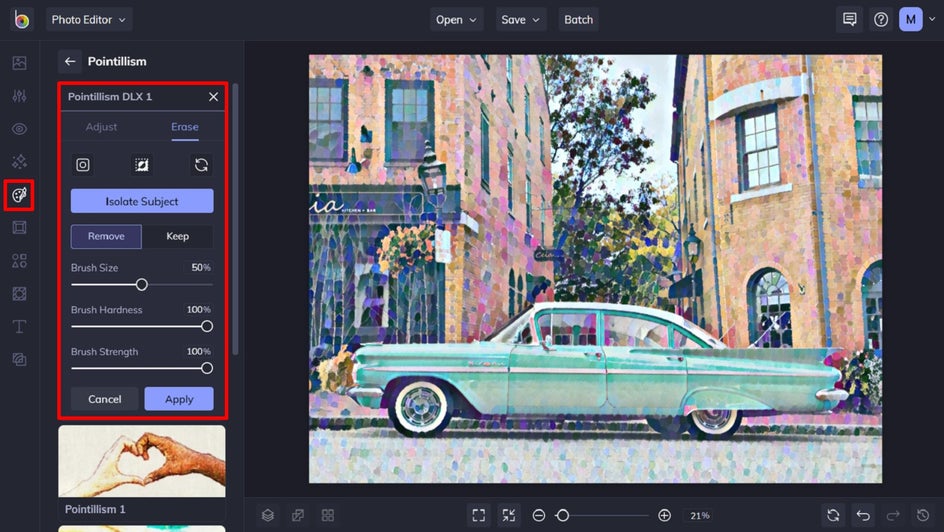
You can work in two ways to selectively apply an effect. You can erase the effect from selective areas of your image. Alternatively, you can selectively apply the effect to parts of your image. To do this, select the Inverse button to return your image to the state it was previously in. Select the Keep button, then begin painting the effect in the areas you wish to apply it.
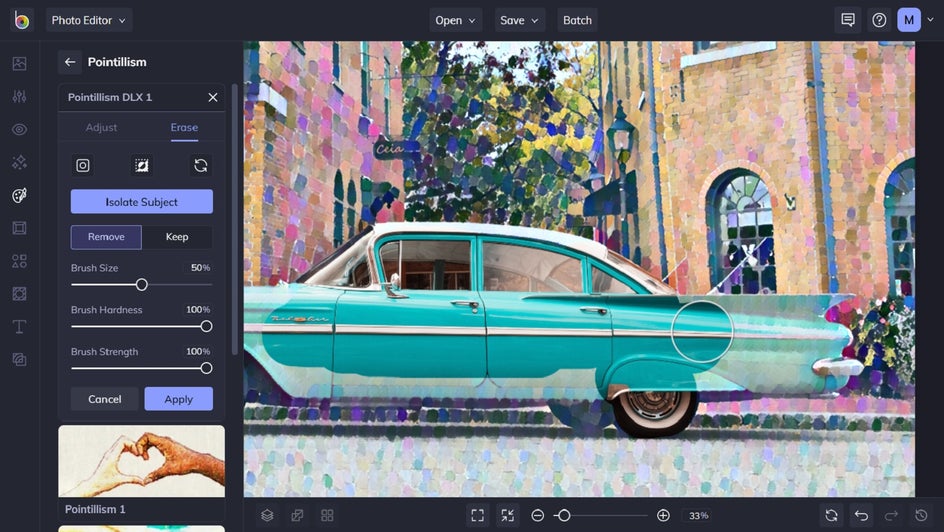
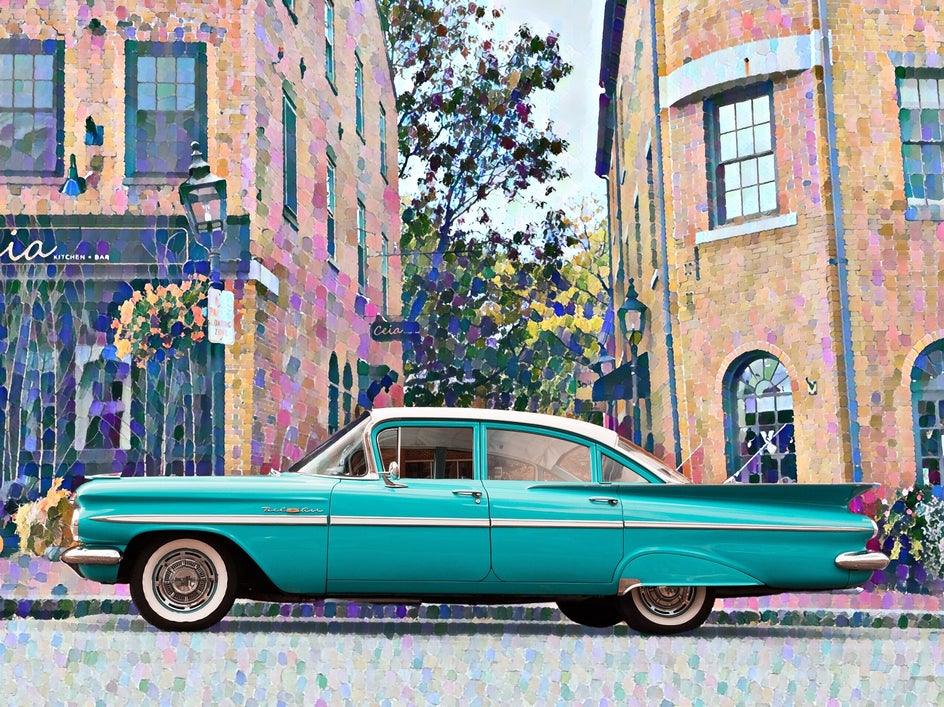
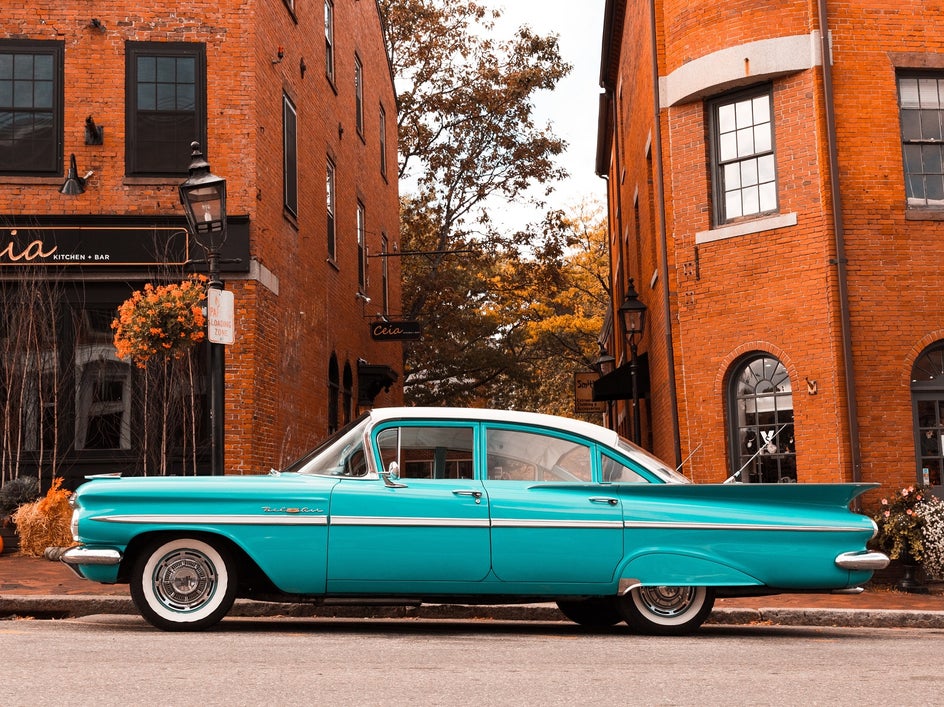
In this example, we wanted to keep the car true to life while leaving the photo’s background as a Pointillism-style artwork. Using the Paint Brush tool in this way is a great idea for creating a one-of-a-kind artwork!
Draw Freehand With Your Mouse
Did you know that we also have a Paint Brush tool that’s specifically for drawing onto any part of your image? Whether you want to add some color, create your own freehand border, or add doodles for an artistic vibe – all of this is possible, and more!
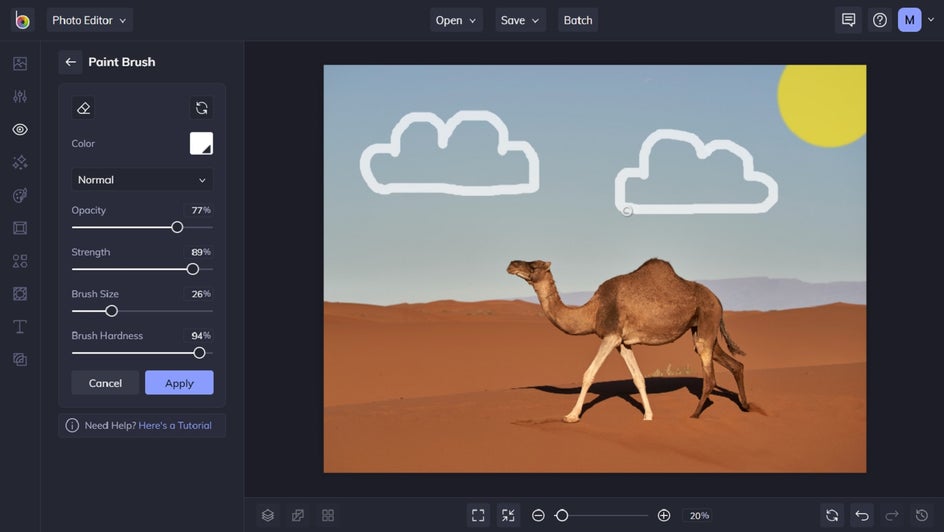
You’ll find the Paint Brush tool within the Touch Up menu, underneath Miscellaneous.
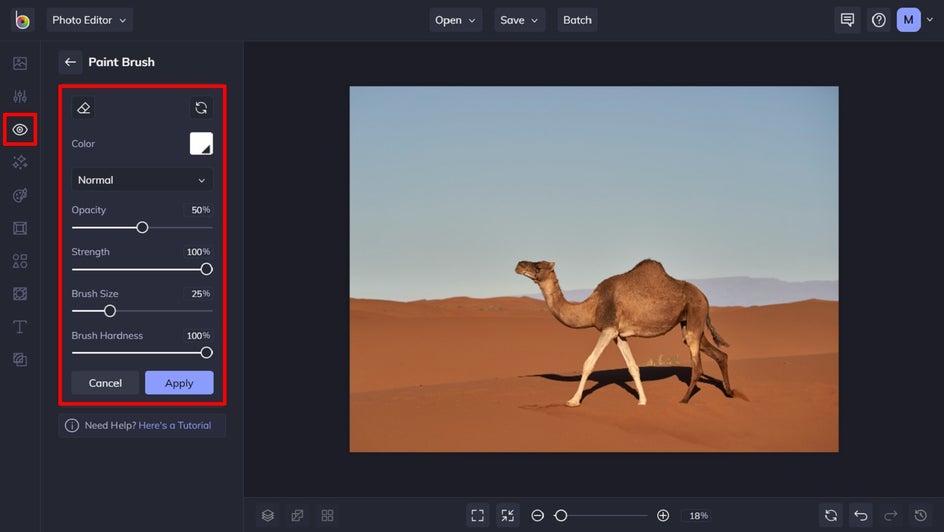
Simply select your desired color, before adjusting elements such as Opacity, Strength, Brush Size, and Brush Hardness. There are also preset blending filters that change how the layer blends onto the image. You can experiment with these to see how they work on your image. Then, simply use your cursor to drag the Paint Brush around your photo.
If you make a mistake, don’t fret. The Erase option in the top-left corner will remove any Paint Brush effect you wish to get rid of. Just click and drag the Eraser over the paint you wish to remove.
As you can see, the final result is creative and quirky, not to mention a whole lot of fun!
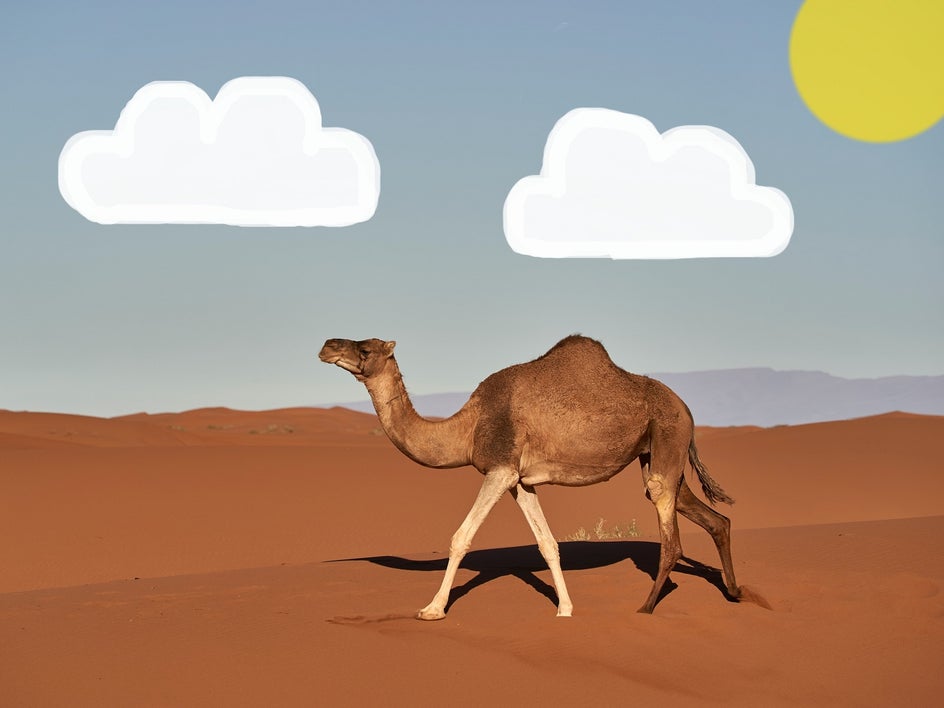
Photo Editor Paint Brush Tools, Made Easy
Thanks to our Paint Brush and Magic Brush tools, adding a creative flair to your photos has never been easier, or more fun! Whether you want to selectively apply an effect, touch up a portrait, or add freehand doodles to your images, our Brush tools have got you covered. Ready to try the Paint Brush and Magic Brush tools for yourself? We guarantee you’ll love them!


