Perfect Your Fashion Photos With the Object Eraser

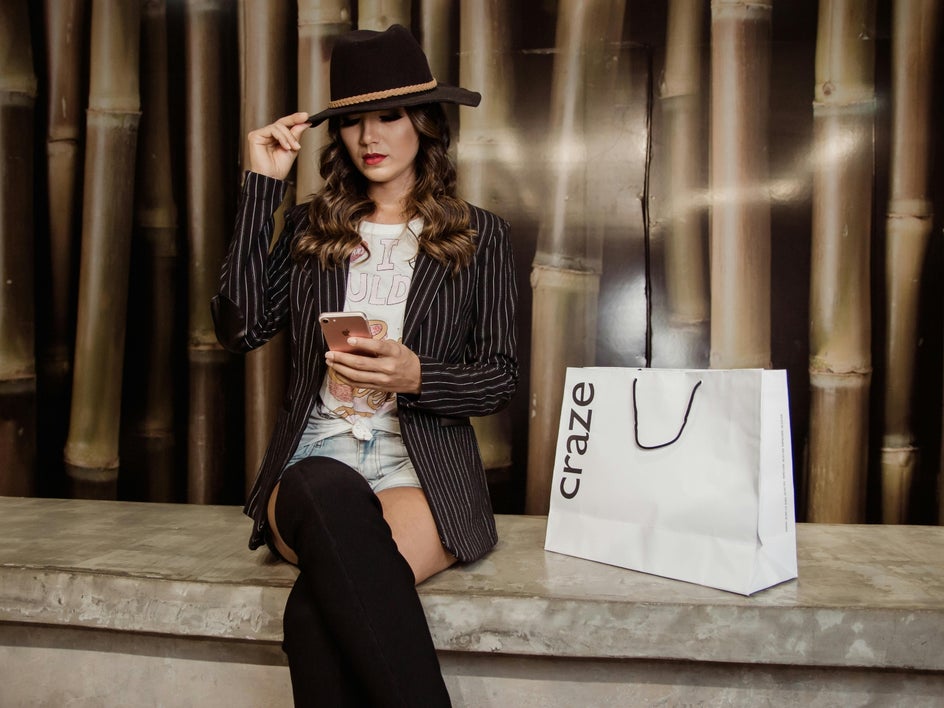
your pose is effortless. Every detail comes together to create a striking image until you notice an unwanted distraction in the background. Maybe it’s a stray hanger from your last outfit change, a pile of clothes just out of frame, or a passerby walking through your otherwise flawless shot. Even the smallest visual disruptions can take away from the polished and professional look you worked so hard to achieve.
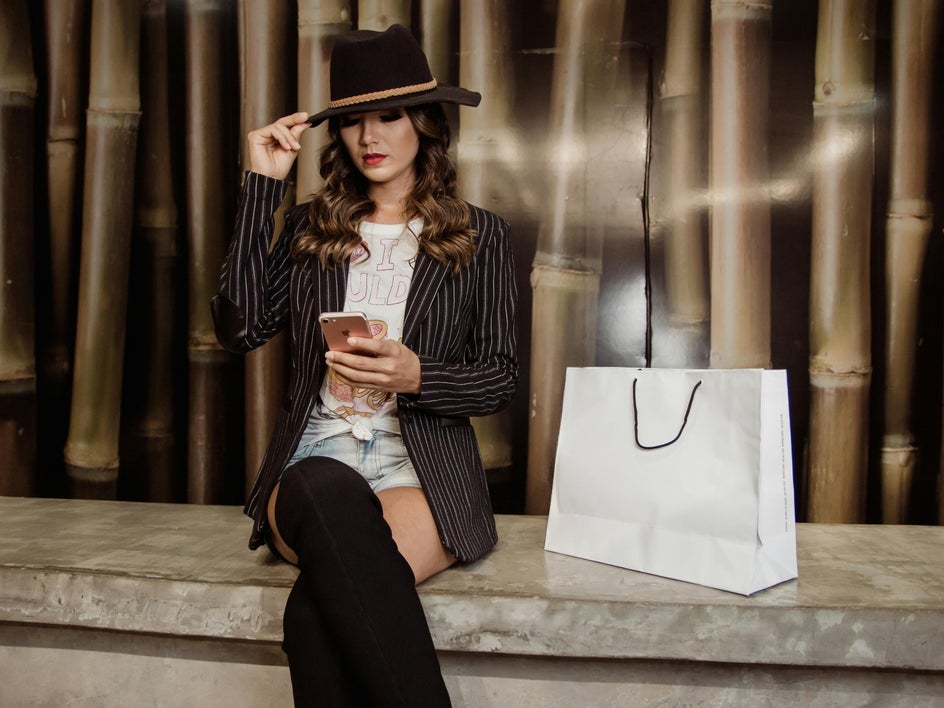
For fashion bloggers, designers, and e-commerce sellers, high quality images are essential. Clean and distraction free photos can elevate your brand, showcase your personal style, and make your products stand out. A cluttered background or misplaced object can draw attention away from what really matters, your fashion.
With BeFunky’s Object Eraser, you can perfect your fashion photography in just a few clicks. Say goodbye to background clutter, accidental branding, and unexpected photobombers and hello to sleek and professional images that are ready for your blog, social media, or online shop
Why Use the Object Eraser for Fashion Photography?
Fashion photography is all about aesthetics. Every detail in your photo should complement your style, not compete with it. With the Object Eraser, you can:
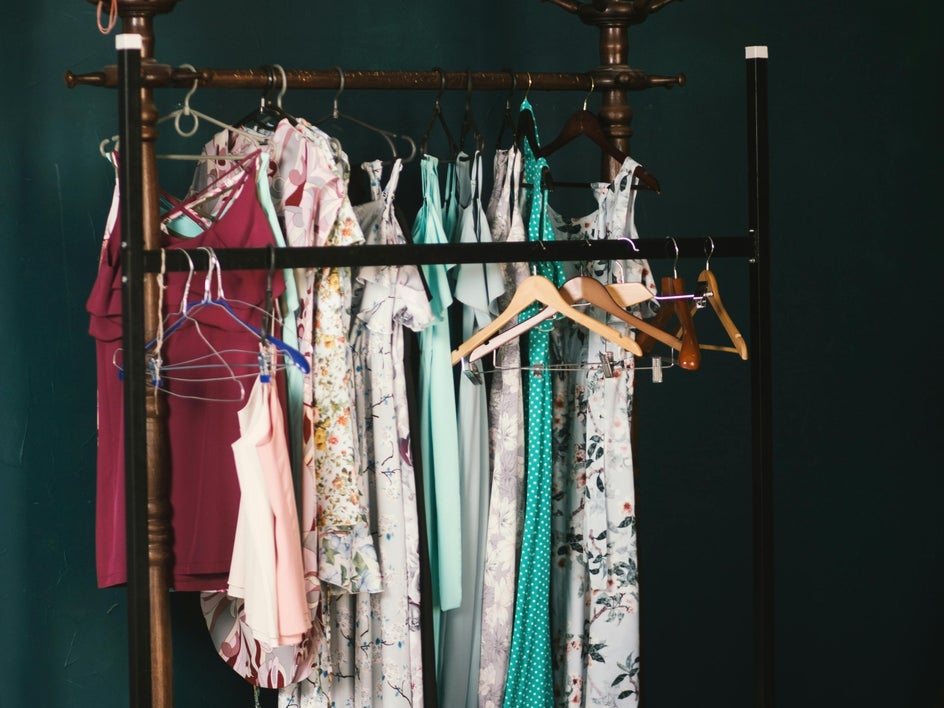
Remove Background Clutter
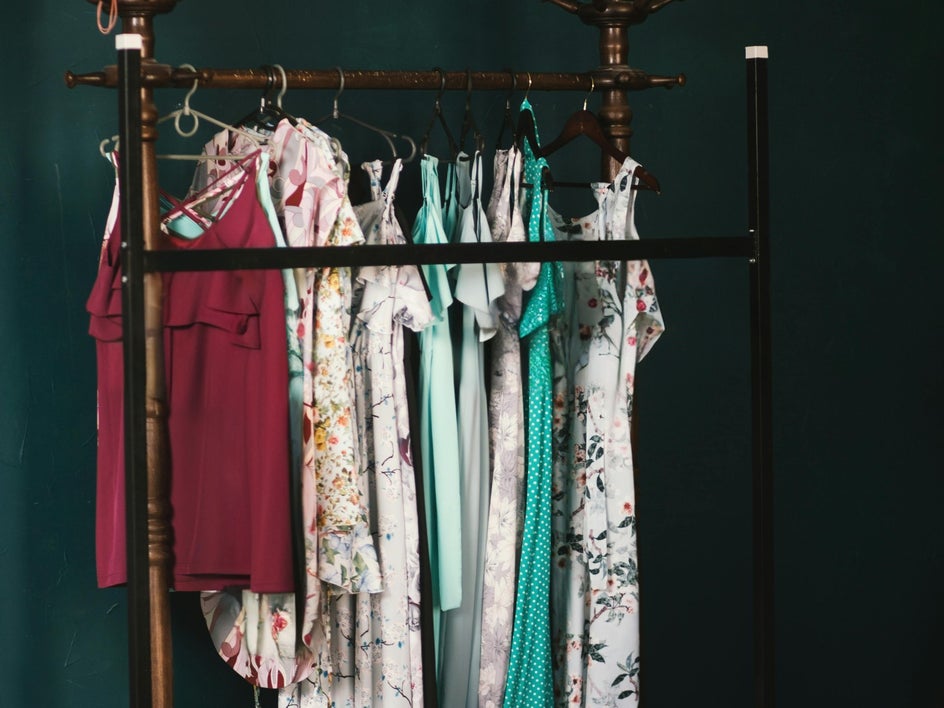
A well-composed fashion photo should feel intentional and polished, but unwanted background elements can easily throw off the aesthetic. If you're shooting product images for Poshmark, Depop, or your online store, cluttered backgrounds – like stray hangers, loose garments, or even an open closet – can make your listing look unprofessional. For fashion bloggers and influencers, messy studio spaces, wires, or unexpected props can take attention away from your outfit.
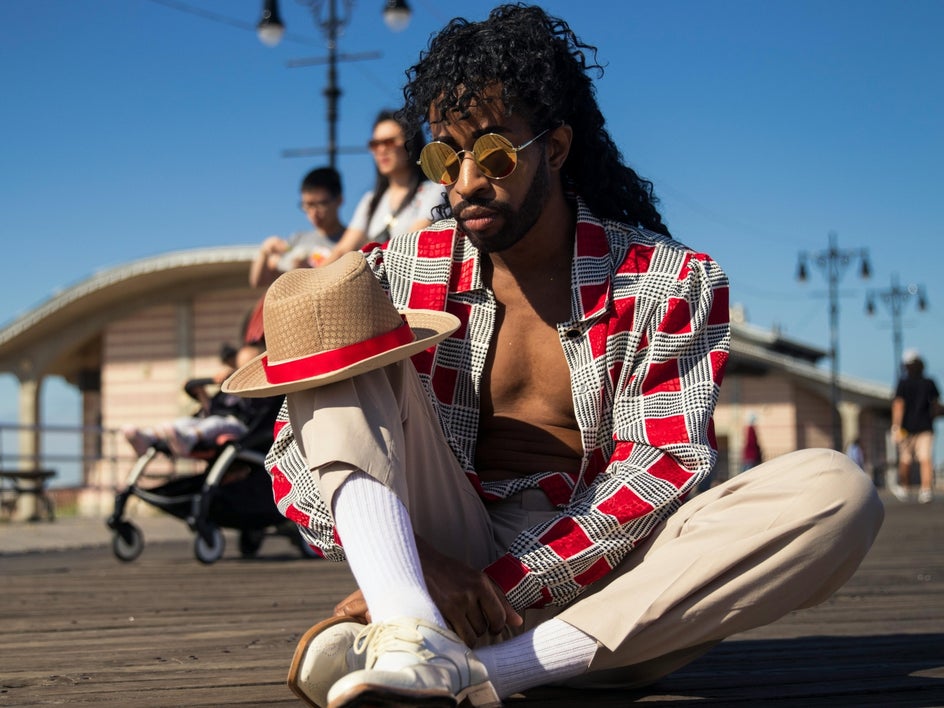
Erase Photobombers
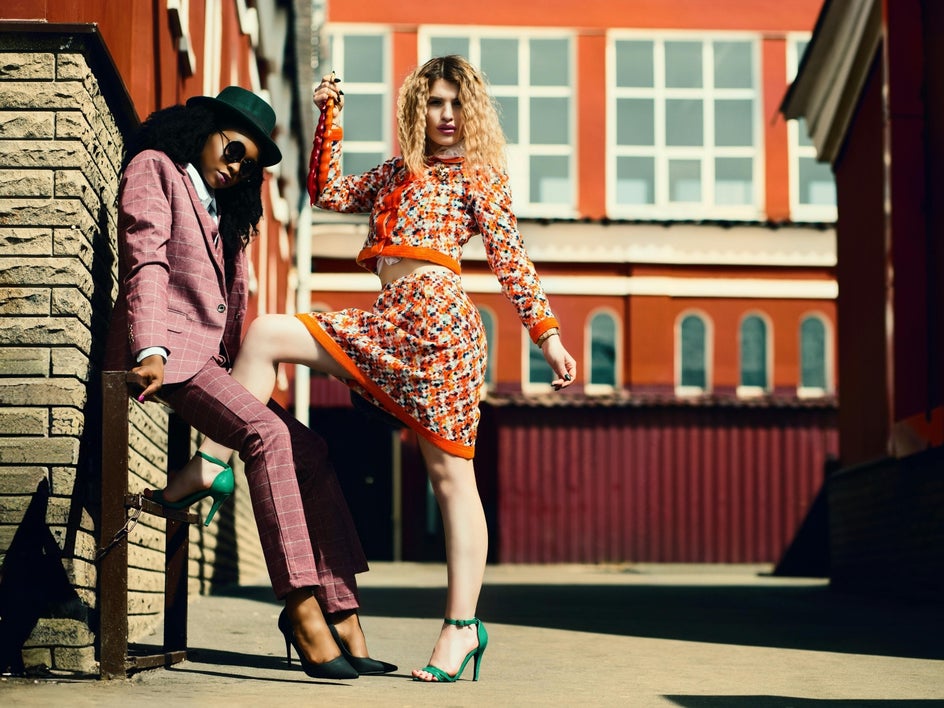
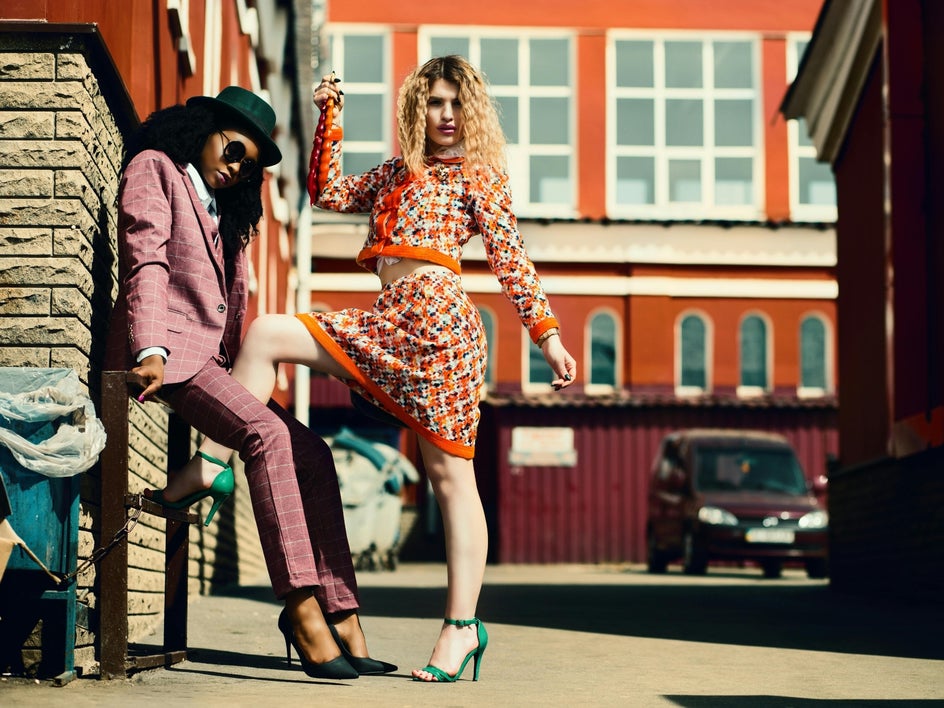
Nothing disrupts a street-style photo or an on-location fashion campaign like an unexpected person walking into the frame. Whether it’s a passerby on the sidewalk, another shopper in the background of your boutique shots, or even an unintentional reflection in a store window, photobombers can make your photos feel less polished.
Get Rid of Unwanted Logos or Text
Sometimes, even the smallest details can throw off the cohesion of a fashion photo. A visible clothing tag, a distracting store sign in the background, or an unwanted brand logo on an accessory can make an image feel cluttered or off-brand.
For e-commerce sellers, ensuring that your product shots are free from unnecessary branding or misleading text can make a huge difference in presentation. If you're a designer showcasing your work, you might want to remove excess branding from fabric samples or prototype pieces to keep the focus on your craftsmanship.
How to Remove Unwanted Objects From Fashion Photos
With the Object Eraser, you don’t need advanced editing skills to perfect your images. Here’s how to do it:
Step 1: Upload Your Photo
Head to the Object Remover in the Photo Editor and upload your fashion shot. Choose an image where an unwanted object is interfering with the overall aesthetic or distracting from your subject.
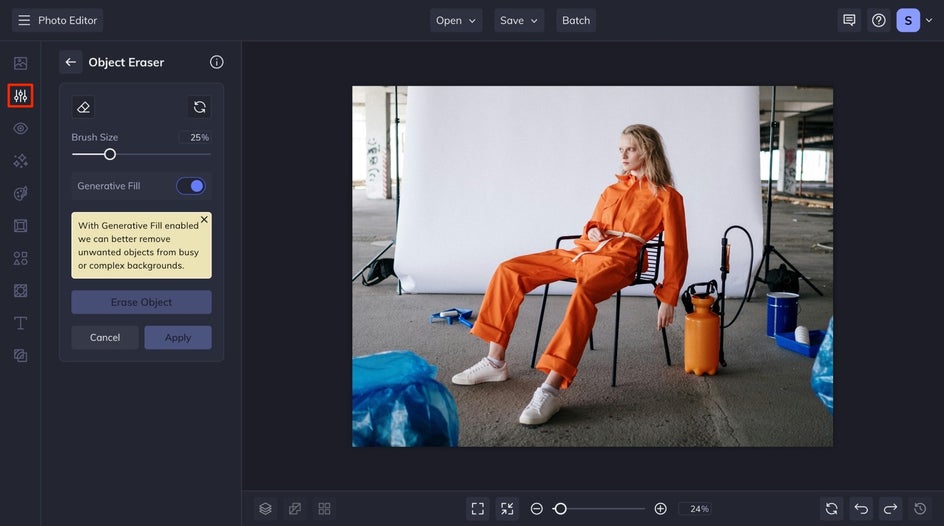
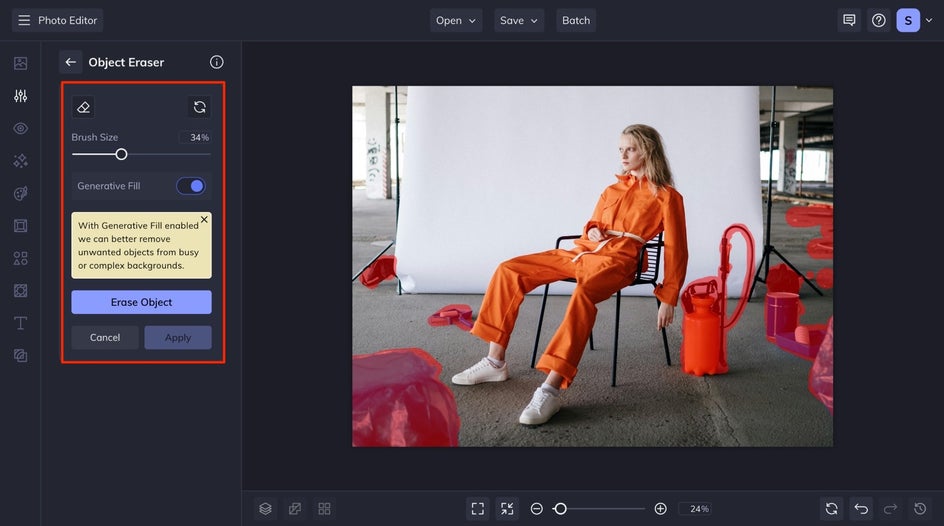
Step 2: Select and Erase the Object
Use the Brush Size slider to adjust your selection tool. Carefully paint over the object you want to remove, getting as close to the edges as possible. If you need to refine your selection, use the Erase Selection brush to make adjustments. Once satisfied, click Erase Object to let AI seamlessly remove it from the image.
For more complex backgrounds, be sure to goggle on Generative Fill to let AI intelligently fill in the space with matching background details.
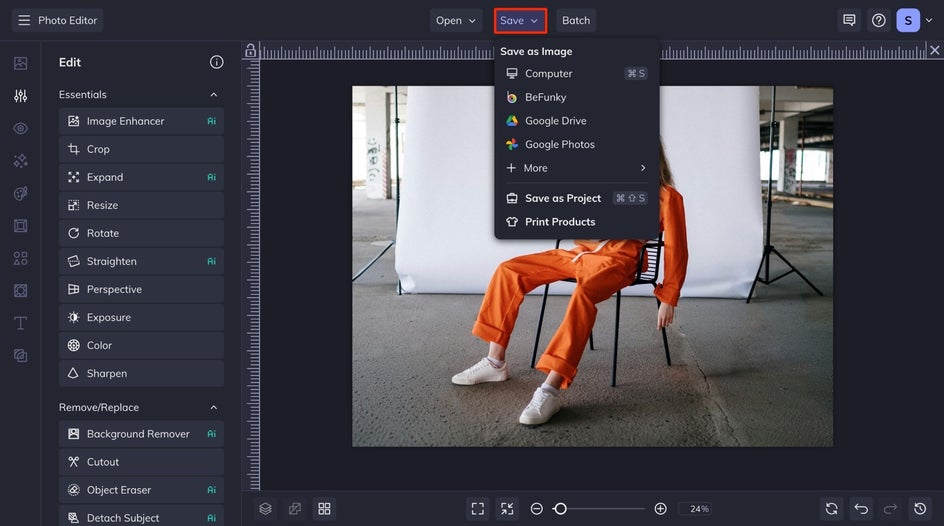
Step 3: Apply and Save Your Edited Photo
Once you're happy with your edits, click Apply, then click Save at the top of your canvas to save your high-quality image in the format of your choice – perfect for uploading to your blog, Poshmark listing, or Instagram feed.
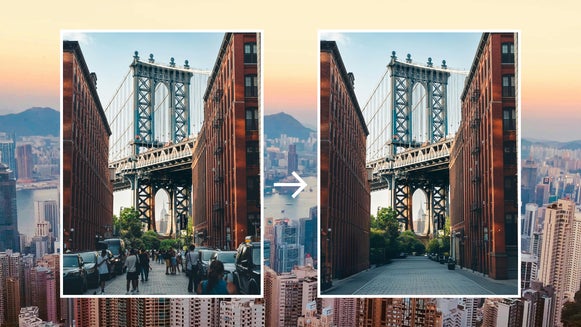
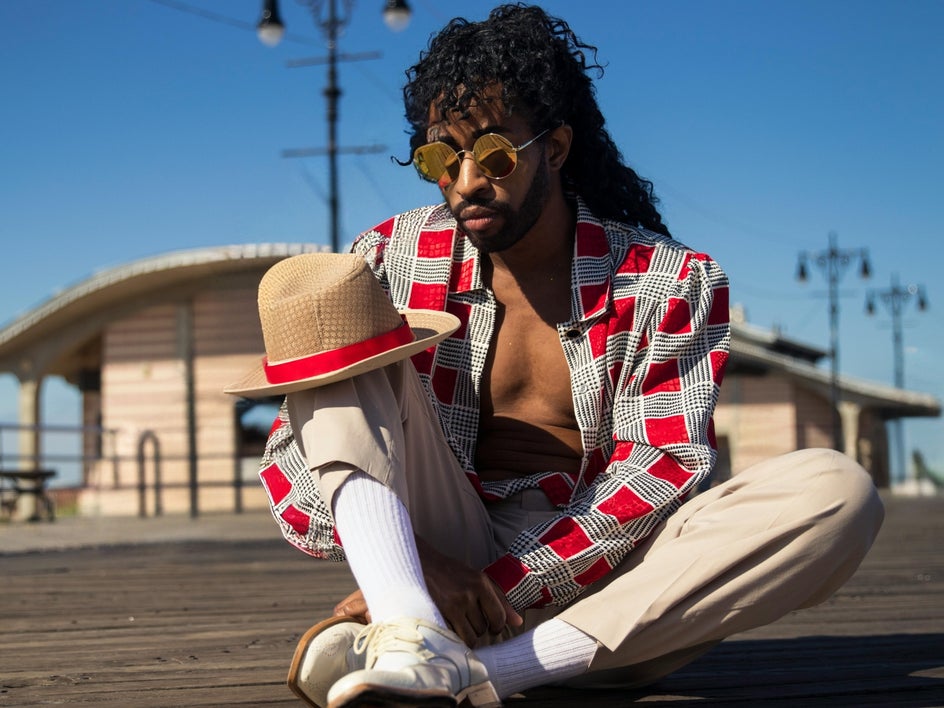
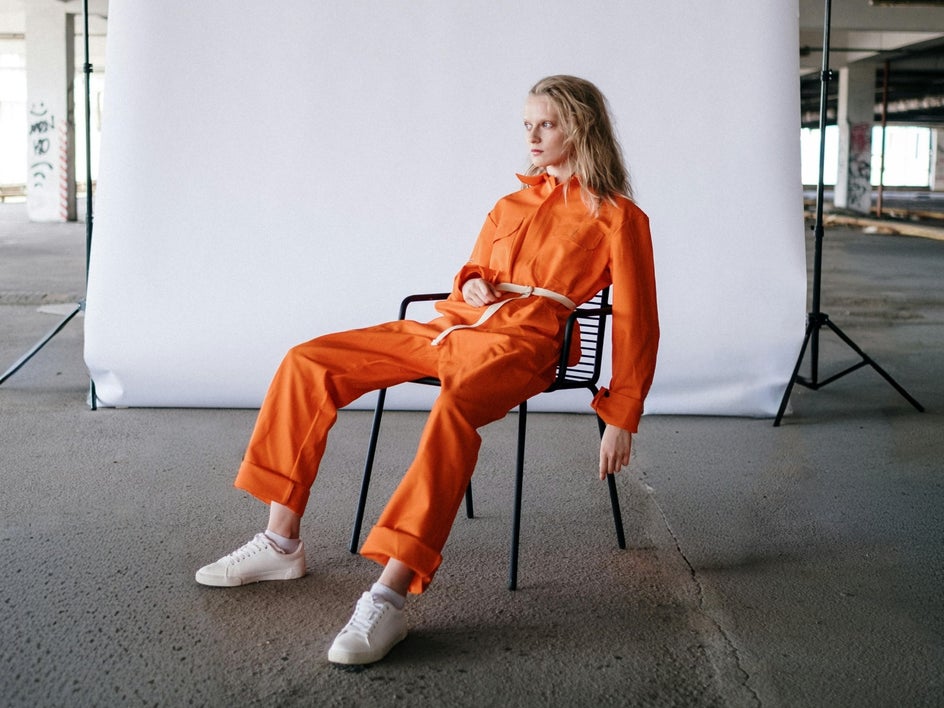
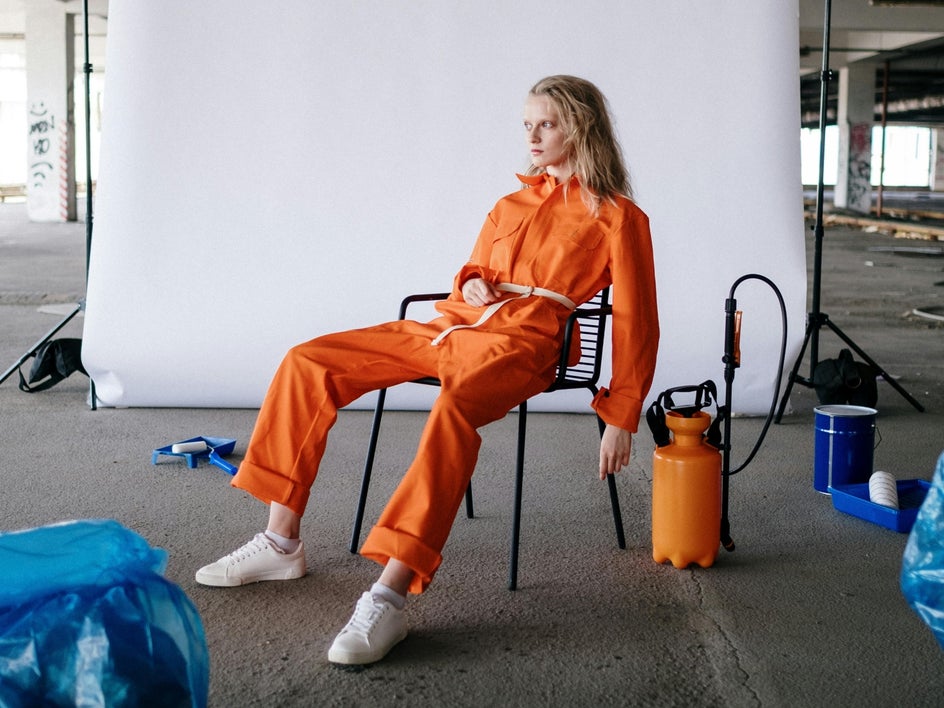
Picture-Perfect Fashion, No Distractions
Look how we transformed this fashion photo to be distraction-free in just a few simple steps. Whether you're styling the perfect Instagram post, creating professional product images, or capturing a stunning fashion editorial, a clean backdrop makes all the difference.
Transform Your Fashion Photos With Ease
A clean, distraction-free photo can transform how your fashion content is received. Whether you're curating a scroll-stopping Instagram feed, launching your latest collection, or uploading product shots, visuals that feel intentional and polished are what set you apart. Stray objects, busy backgrounds, or photobombers can instantly undercut the professional aesthetic you’re aiming for. Instead of wrestling with reshoots or spending hours editing, you can instantly refine your shots with BeFunky’s Object Eraser.