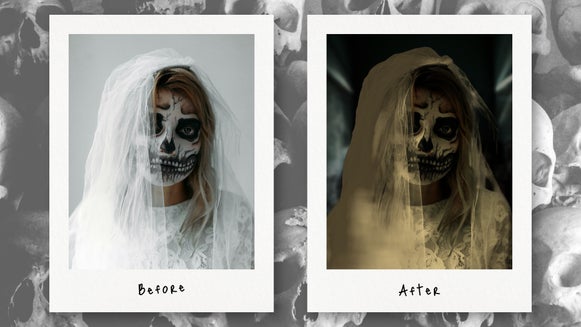
Portrait Relight: How to Shoot On Location – Without Going Anywhere
Have you ever had an idea for the perfect portrait photoshoot, but just can’t make it happen in reality? Shooting on location requires time, money, and transportation – not to mention it relies on outdoor lighting that’s often out of your control. You could use studios, lights, and editing software to achieve the results you want, but renting out studios and equipment can be expensive. But what if you could transport your subject to a completely new location in a single click? With Portrait Relight, you can do just that.
Our Portrait Relight effects, available in the Photo Editor, uses AI to instantly change the scenery of your portraits – and match the lighting of your subject to the new background. This makes your edits look real and vibrant, as if you actually shot them on location. To use it, you don’t even need to shoot in a studio – just take a well-lit photo of your subject anywhere. It could be in your house, on the street, in the woods – as long as your subject is clear, Portrait Relight will take care of the rest for you.
How Do I Make My Subject Fit Into a Different Background?
Tools like the Background Remover can help you create infinite new settings for your subject. However, these don’t automatically adjust the lighting and shadows of your subject to match the background. This means that you may need to make additional edits.
Portrait Relight, on the other hand, can transport your subjects and relight them to fit their new location in a snap. Whether it’s bright neon lighting, the lighting of a warm campfire glow, or the yellow-tinged light of sun-dappled woods, Portrait Relight uses multiple light sources to give you the most realistic results possible. Just pick your new background and you’re good to go.
Both tools have their advantages: The Background Remover allows you to replace the background with any image of your choice, while Portrait Relight has limited selections. But Portrait Relight gives you natural results in an instant, while replacing backgrounds with the Background Remover can require significant time and experience.
How to Use Portrait Relight to Transport Your Subject Anywhere
Portrait Relight can be used in just one click, but it’s also a robust tool that allows you to make precise edits if you so wish. In this tutorial, we’ll show you how to make full use of the Portrait Relight tool in order to transport your subject to new locations.
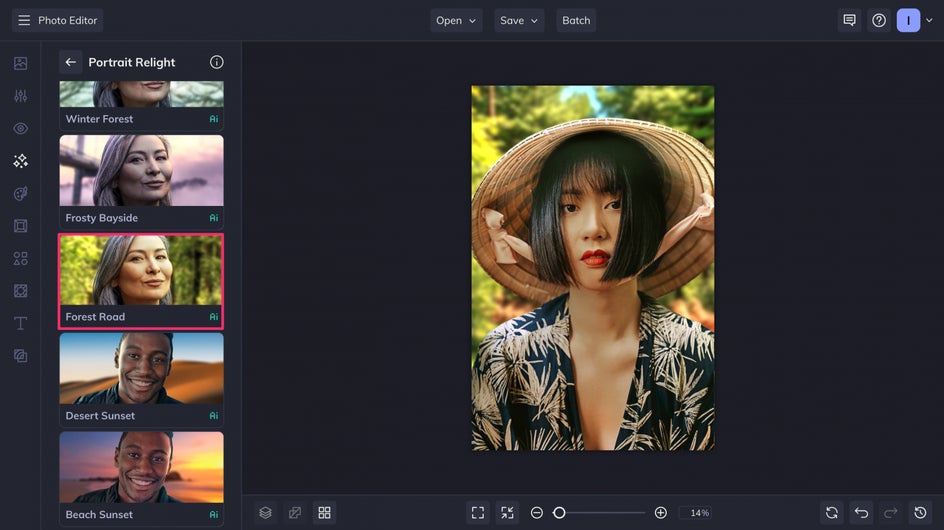
Step 1: Upload Your Portrait
To create an entirely new setting for your portrait, head to the Portrait Relight tool, located in the Effects tab.
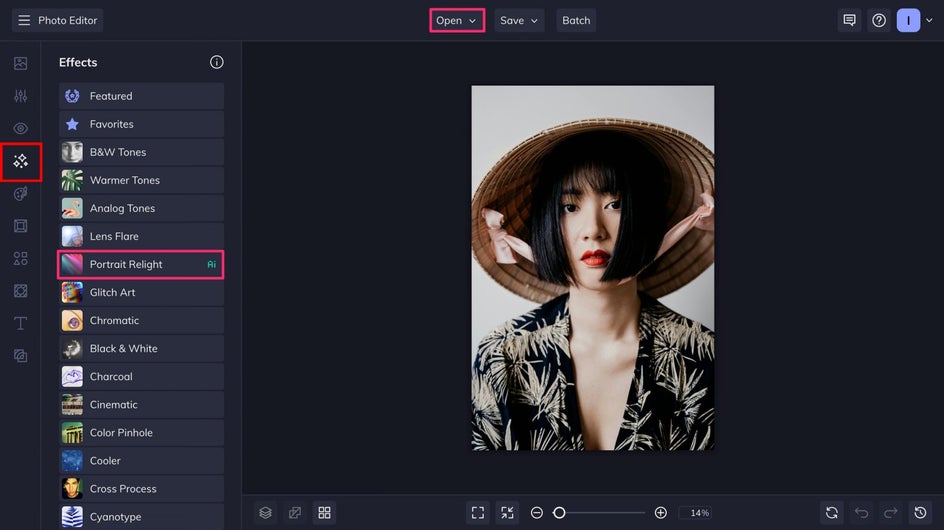
This effect is specifically meant for portraits as opposed to other kinds of photos, and works best if the image is from the shoulders up. Your portrait should have high resolution and be fairly well-lit. Some contrast is okay, but extreme contrast may affect the results of the Relight tool. Check out this article for more recommendations on which photos work best with Portrait Relight!
Step 2: Choose Your New Location
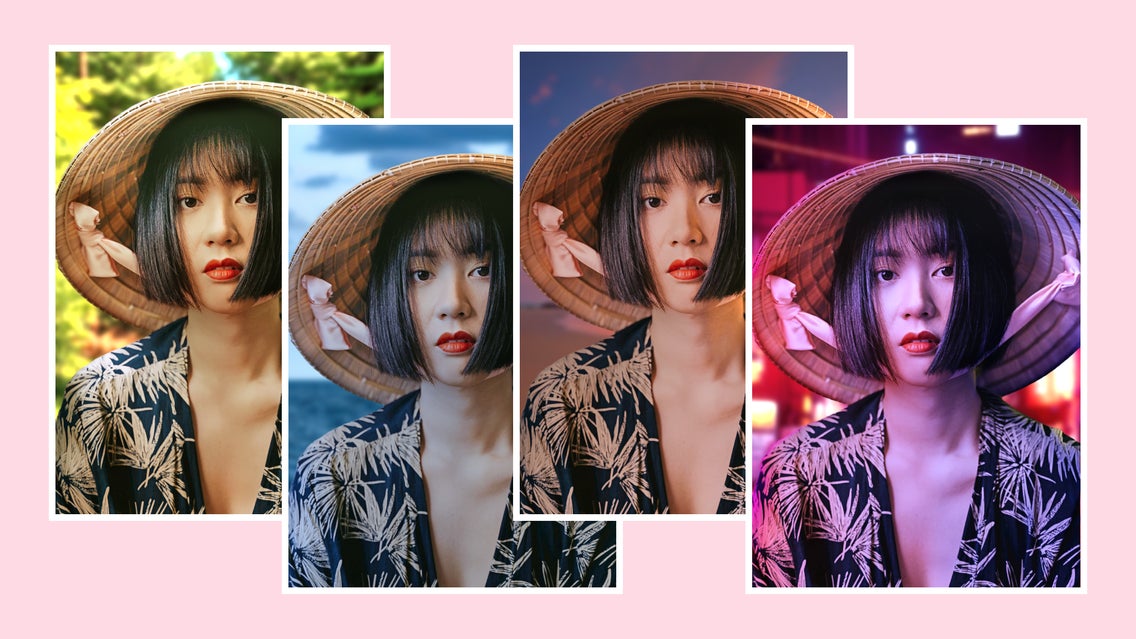
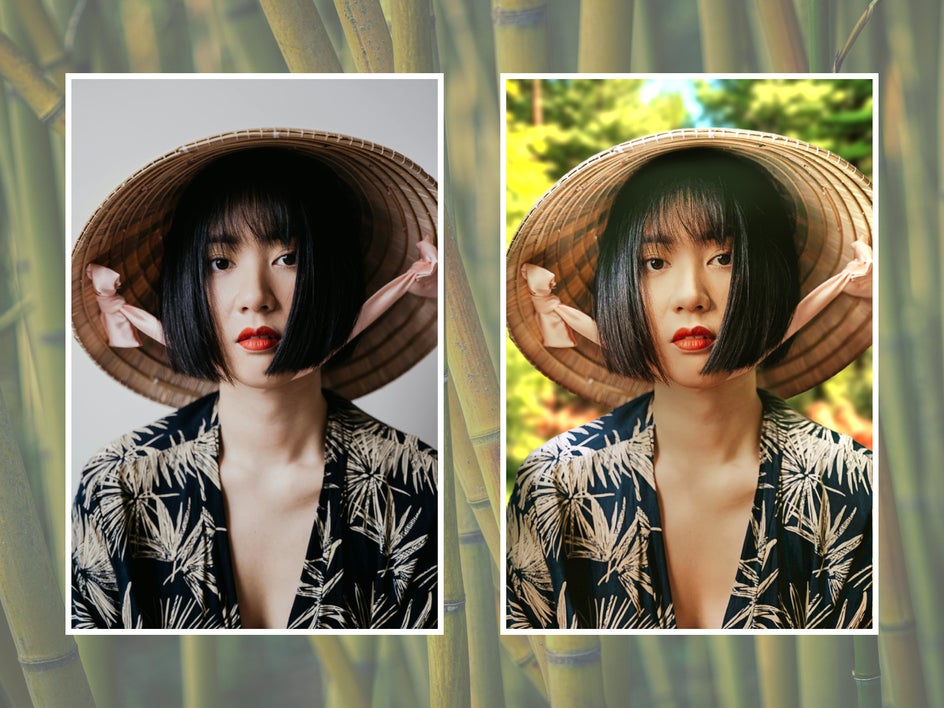
Portrait Relight can be used to create studio portraits with neutral backgrounds, but to transport your subject to another setting, scroll down just a bit for an array of different locations and lighting options. Each effect adds a unique vibe to your image, so try out a few! Here, we’re using Forest Road to make our portrait ethereal and sunlit.
Step 3: Adjust the Ambient Lighting
Once you pick your lighting, you’re given the option to make multiple tweaks and adjustments.

Ambient Lighting refers to the overall light in the image. You can change the Color and Intensity of this lighting, as well as the Saturation (how intense the color is), Highlights, and Shadows. These small adjustments can be used to make the relight effect look even more natural, and allow you to transform the overall brightness and contrast of the image. If you adjust the lighting for the Subject, consider also adjusting the lighting for the Background to match.
Step 4: Adjust the Individual Lights
In addition to the ambient lighting, you can adjust the individual light sources that are casting light and shadow on your subject. Click and drag the icons to move the light sources around. You can switch between Directional, which shines light in a single direction, Omni, which radiates soft light in all directions, and Off, which turns the light off completely. You can also change the light’s brightness with Affect Subject and Affect Background.
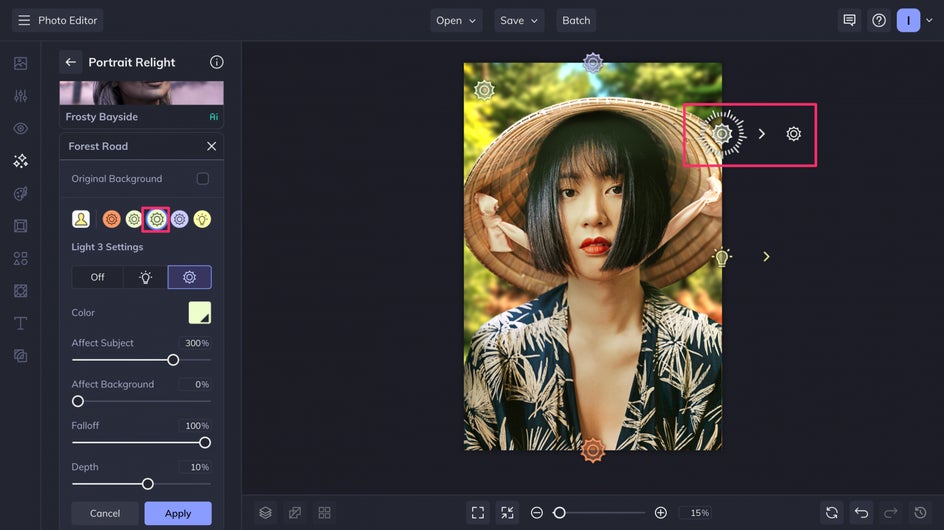
The Falloff slider allows you to decrease or increase the distance between the light and your subject. 0% is the closest the light source can be, offering the brightest effect. Increase it, or drag the secondary light icon away from the subject, to give this light source a softer, subtler effect. Adjust the Depth slider or rotate the dial around the light icon to change the light’s intensity and add new dimension to your subject.
Step 5: Save Your Portrait
Once you’re happy with your results, it’s time to save your new “on-location” portrait. Click the Save button at the top of the page to save it to the destination of your choice.
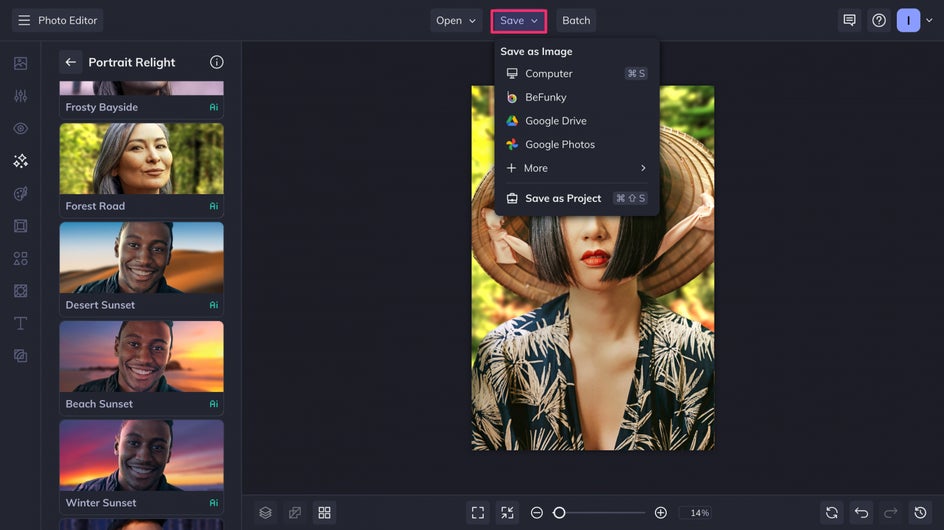
Make sure to save your image as a high-quality PNG for the best digital results.
Here’s how our forest Portrait Relight turned out!
Portrait Relight Inspiration
Portrait Relight gives you opportunities for many different lighting and location scenarios. Here are some of our favorite ways to use the Portrait Relight tool:
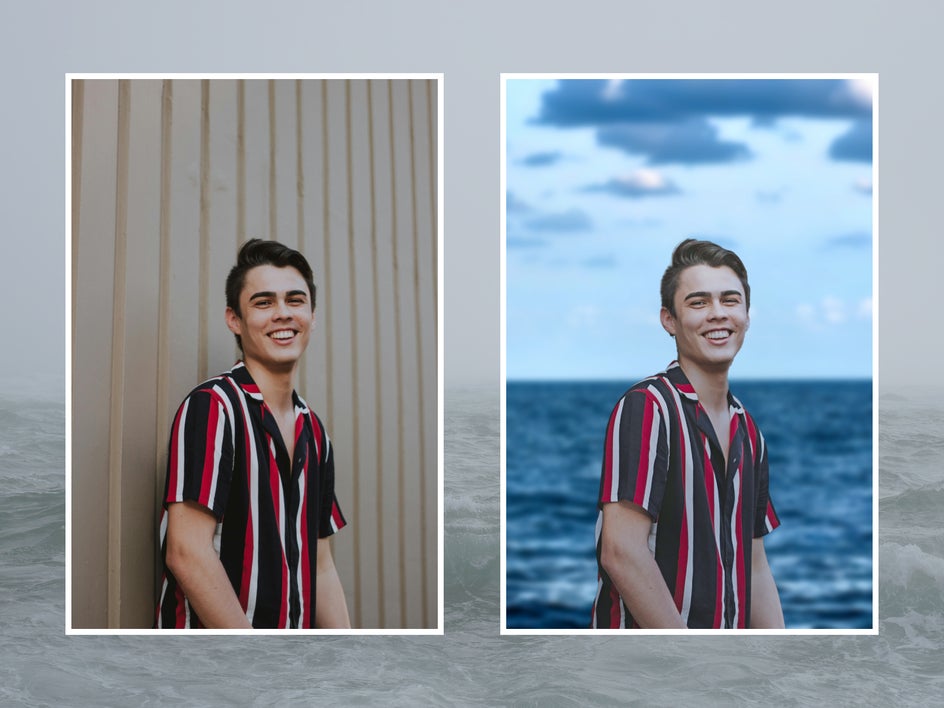
Beach Day
Make it look like your subject is at the beach and transport them against a backdrop of cool ocean waves with the Out at Sea effect.
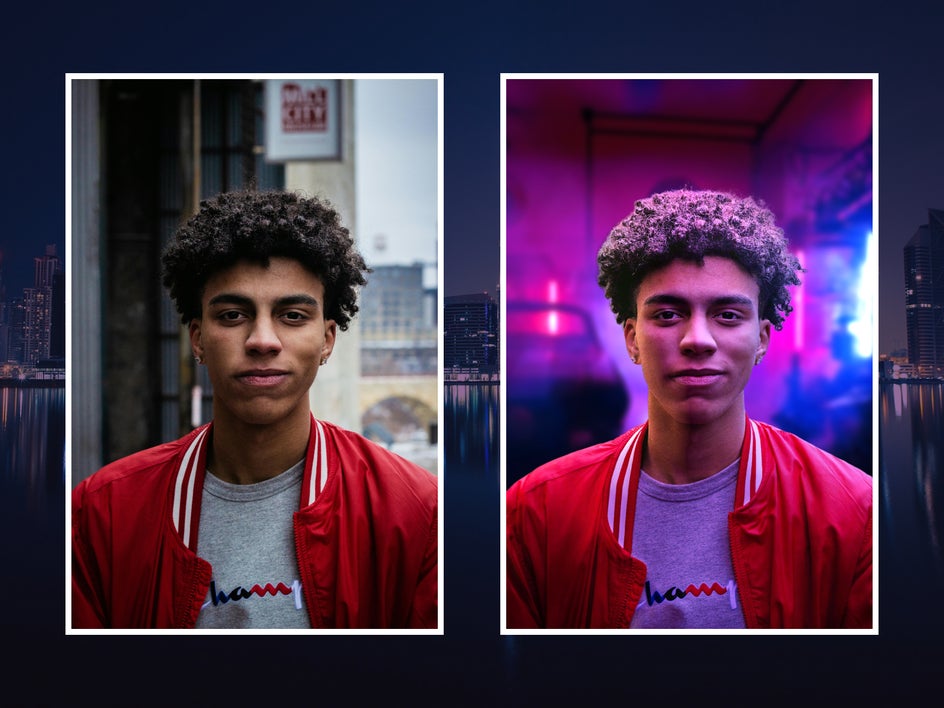
Neon Lights
Neon Garage can be used to add bright purple and pink lights to your subject against a high-contrast background, giving your portrait new depth and dimension.
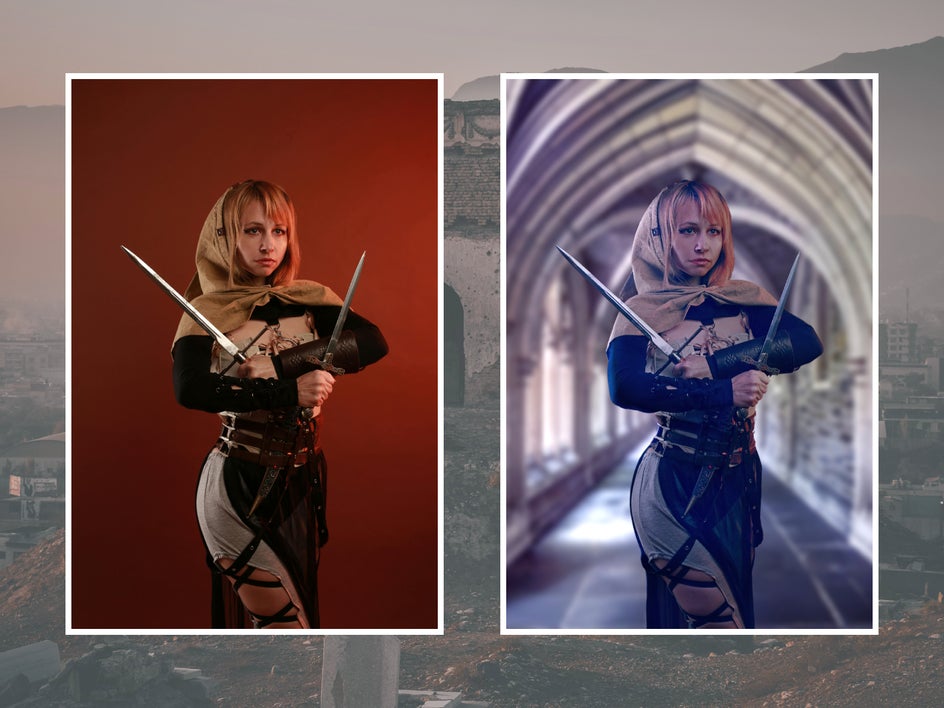
Fantasy Photoshoot
Want to turn fantasy into reality? Use Portrait Relight to transport elves, fairies, knights and maidens to castles and woods. This is especially perfect for Ren Faire and cosplay photoshoots. Here, we’ve used Sidelit Hallway.
City Streets
Make your subject a part of bustling city nightlife with Neon Streets.

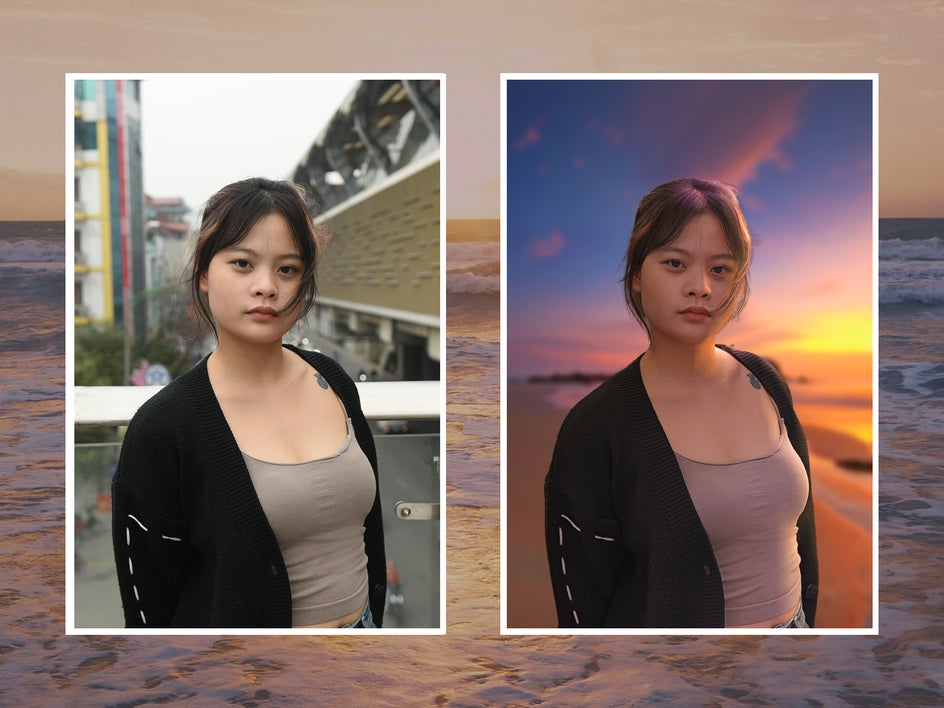
Tropical Sunset
Drop your subject against a sunset on the sand with Beach Sunset. This effect also makes for great social media profile pictures.
See Your Portraits in a New Light With Portrait Relight
Creating unique portraits doesn’t require lots of time or expensive equipment. With Portrait Relight, you can shoot on-location anywhere. Try it out for yourself today!