Poster Templates That Draw a Crowd
The most important thing about creating stellar posters making sure you have a goal in mind for them. If you are advertising your business's blowout sale, you want to make sure that you create a poster that communicates that effectively to your target audience, and draws new customers to your business.
Market Your Events Like a Pro
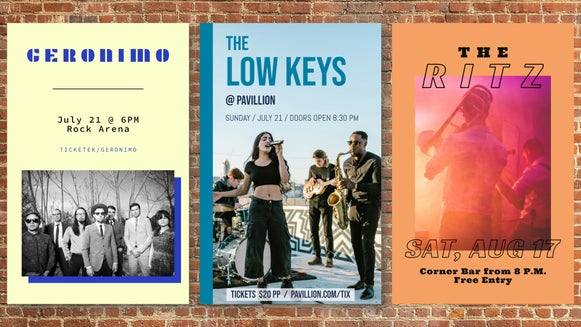
Is your band playing in an exciting summer festival? Draw in the crowds by making an awesome summer band poster with our poster creator and sharing it all over social media. Post it on your band’s Facebook page, share it across the interwebs via Twitter and Instagram, and plaster it across your city to grab the attention of potential fans.
How to Customize a Poster Template for Your Event
Planning an elegant and entertaining graduation party? Use BeFunky’s Poster Maker to create an engaging layout, and then create a poster design that reflects the way you want your party to feel. You will be celebrating years of hard work and a bright future, and you want your poster to show that in any way possible!
Step 1: Choose a Template
Head to the Poster Maker and choose a template based on your needs. Each comes with a combination of preset text, images, and graphics.
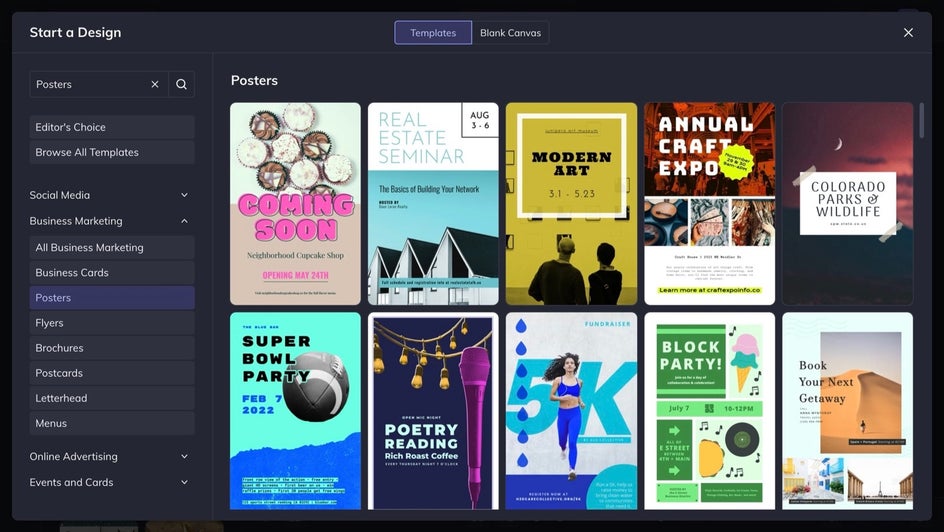
Pro Tip: To create posters of different sizes, you can always select our Blank Templates from the Event Graphics menu.
Step 2: Customize the Template
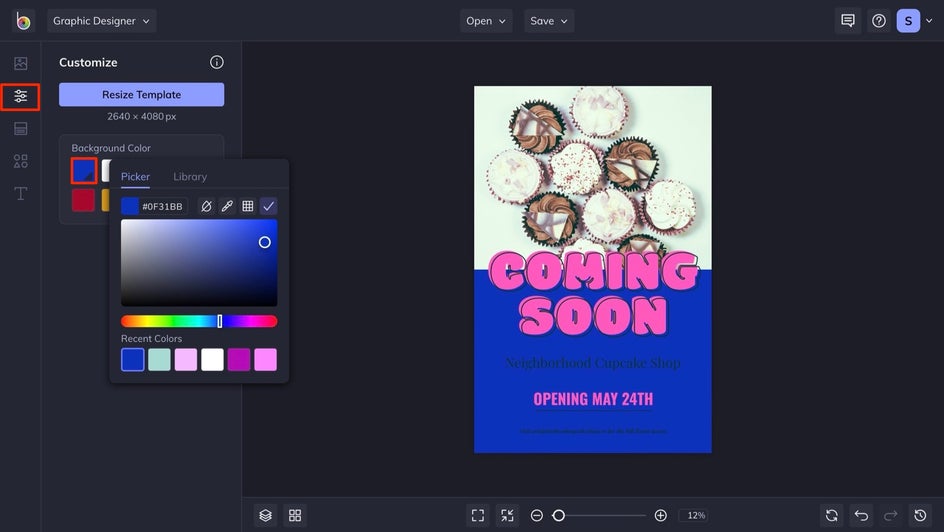
Head to the Customize tab to change the background color. Click on the top left color swatch to open your Color Picker.
Step 3: Customize the Text
Now it's time to customize the text to fit your event. Simply click on a preset text box and start writing. Doing this will also open the Text Properties menu, with which you can change the font, color, add a drop shadow, and more. If you want to add additional text boxes, head to the Text tab, followed by Add Text.
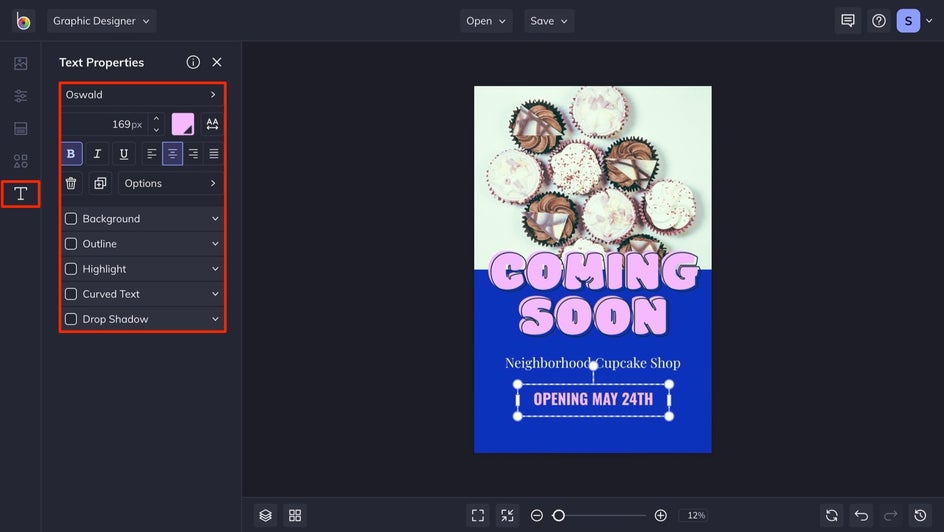
Pro Tip: Keep your text short, sweet and to-the-point.
Step 4: Add Your Photos
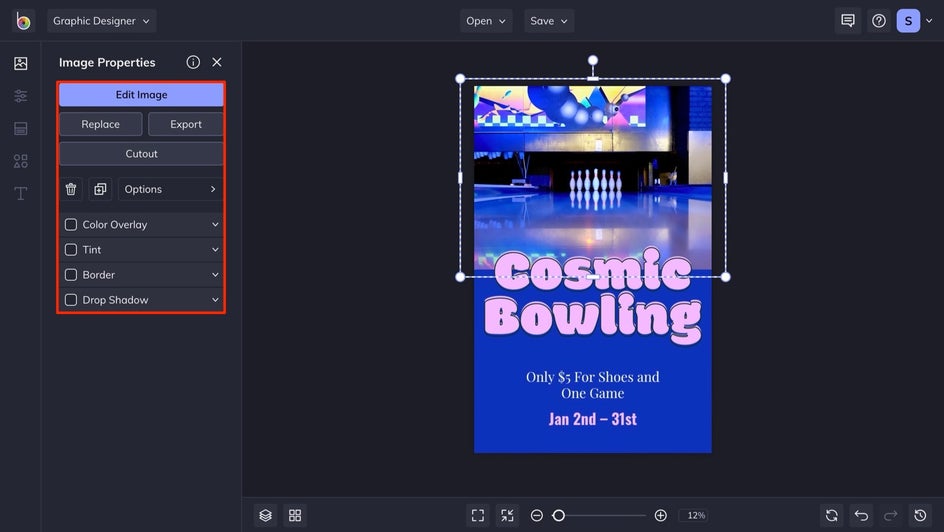
If you already have a photo in mind for your poster, upload it by dragging and dropping it onto your canvas, or by clicking on the Computer or ... buttons found in the Image Manager tab. From there, drag and drop photos directly into the preset spots, or double click to place them where you want.
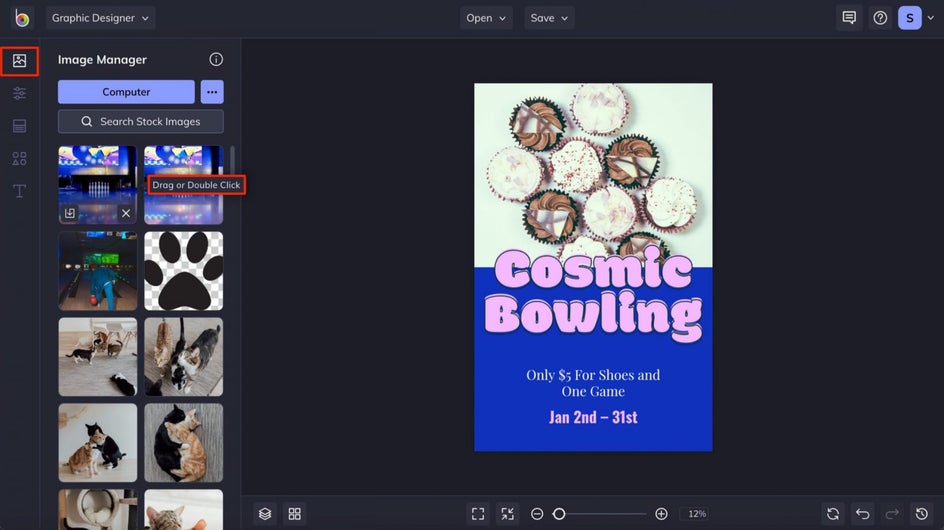
Pro Tip: Use a background photo that offers generous amounts of clean space to help make your text easy to read.
If needed, you can even edit your photo directly in the Designer. Spruce it up with some simple editing tools, such as Sharpen, Beautify, or Exposure. You can also have a little fun with Artsy effects, such as the Cartoonizer. Position your photos your liking, and move on to do any additional edits before saving.
Step 5: Add Additional Graphics or a Logo
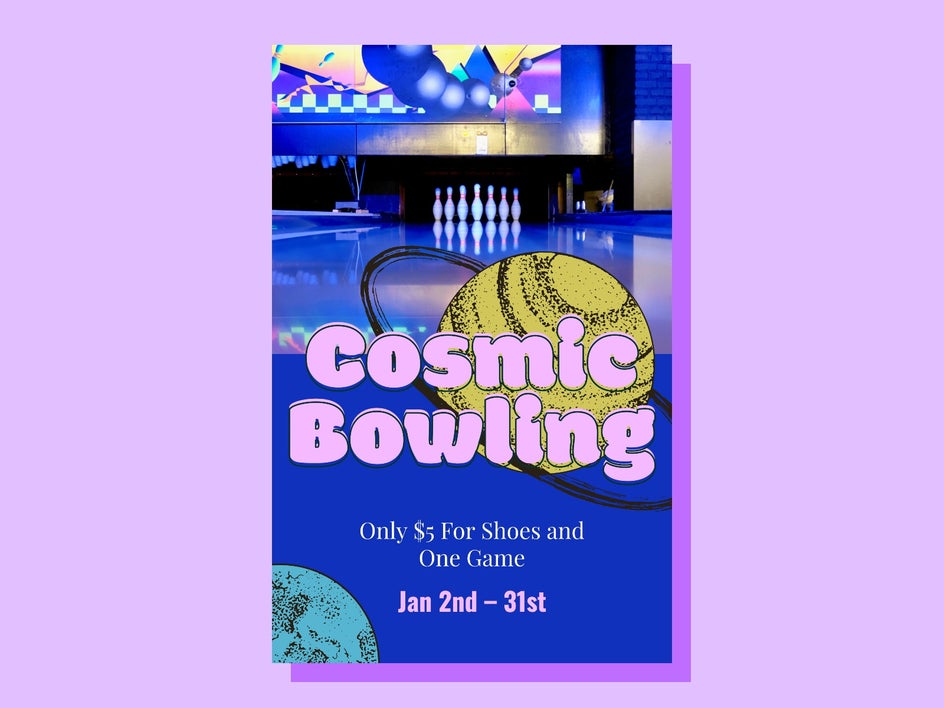
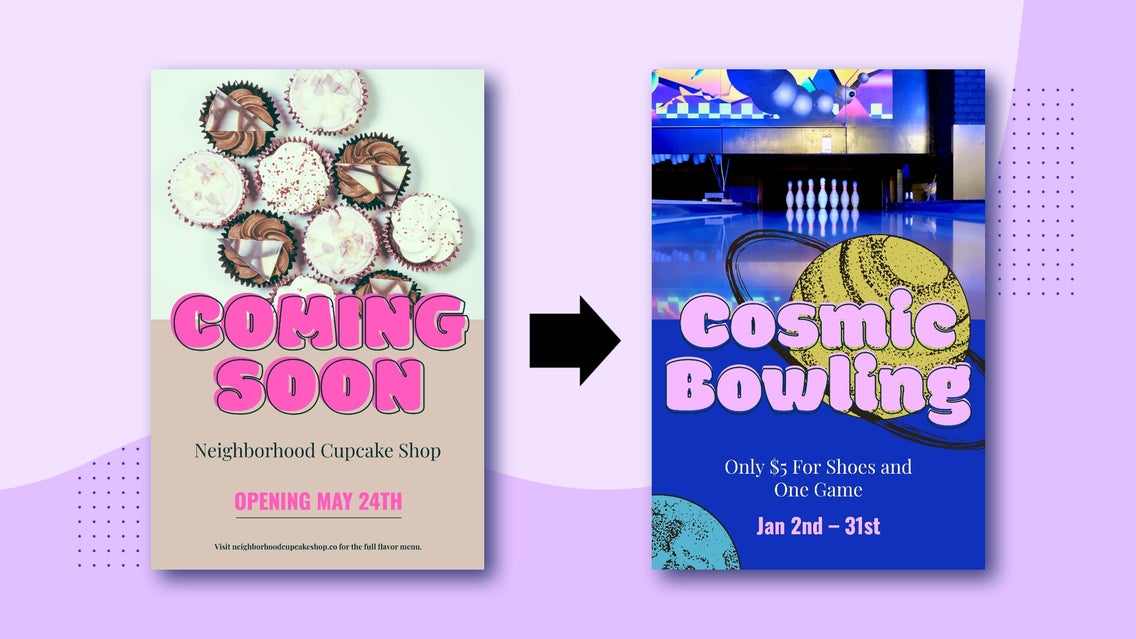
If your poster has a specific theme, you may want to add some graphics or other assets to bring it all together. Since our example features cosmic bowling, adding some planetary graphics really makes the poster pop. Head to the Graphics tab, and decide whether you want to upload your own or search our expansive Graphic Library.
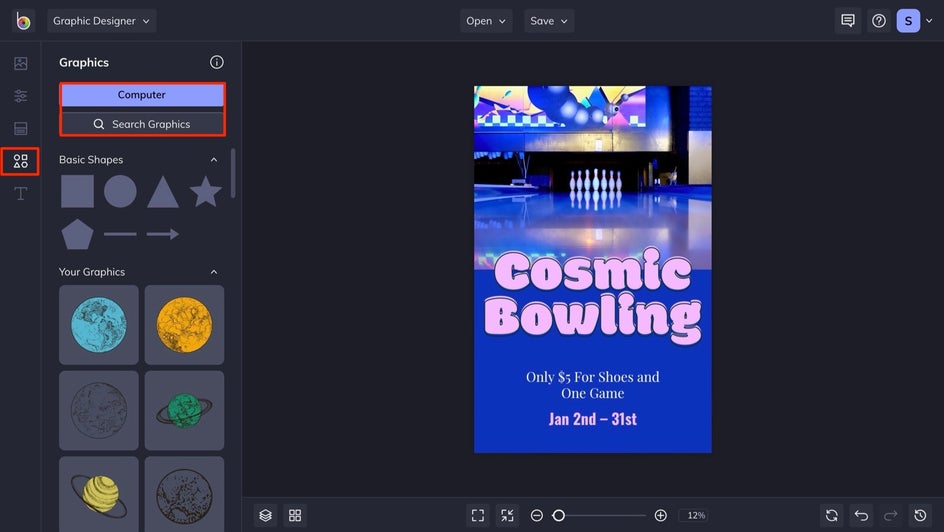
To customize a graphic, click on it to open the Graphic Properties menu. From here, you can change the layer order, add a tint, and more, depending on the graphic.
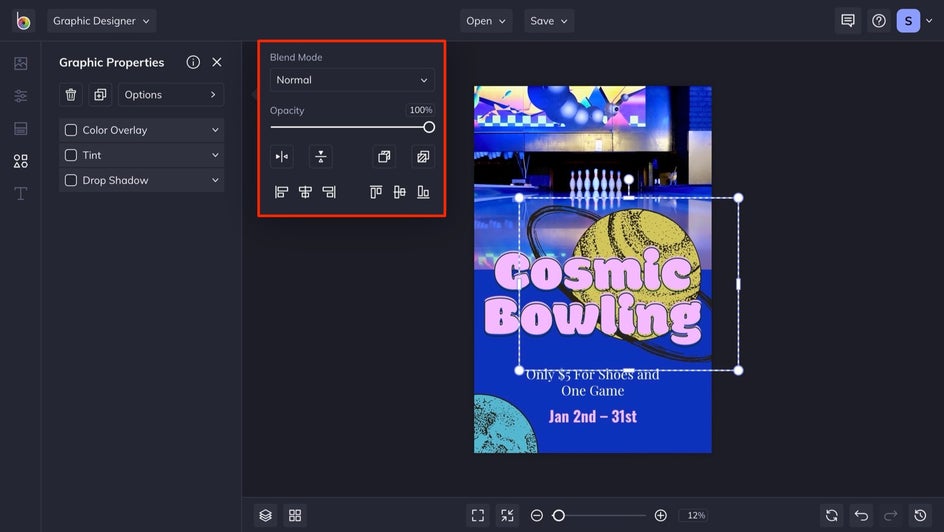
Adding your logo to your poster is a good idea, as it will make it look more official. And unless it's part of the design, it's a good idea to upload your logo with a transparent background.
Step 6: Save Your Poster Design
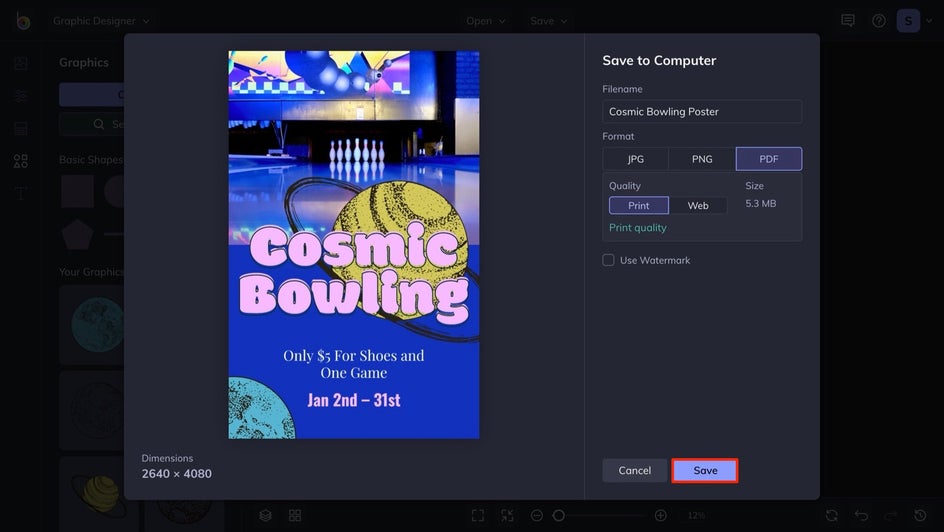
Once you're done, it's time to save your poster design. Click on the Save button, found at the top of your canvas. From here, we recommend saving it as a PDF for print or as a PNG or JPG for online advertising.
Create a Poster That Draws in a Crowd
In this tutorial, we transformed a template that had an entirely different theme into something unique. With the help of BeFunky's Poster Maker, you can effortlessly create custom, professional-looking posters for any event.
Draw in that crowd with BeFunky.
