How to Make DIY Recipe Cards
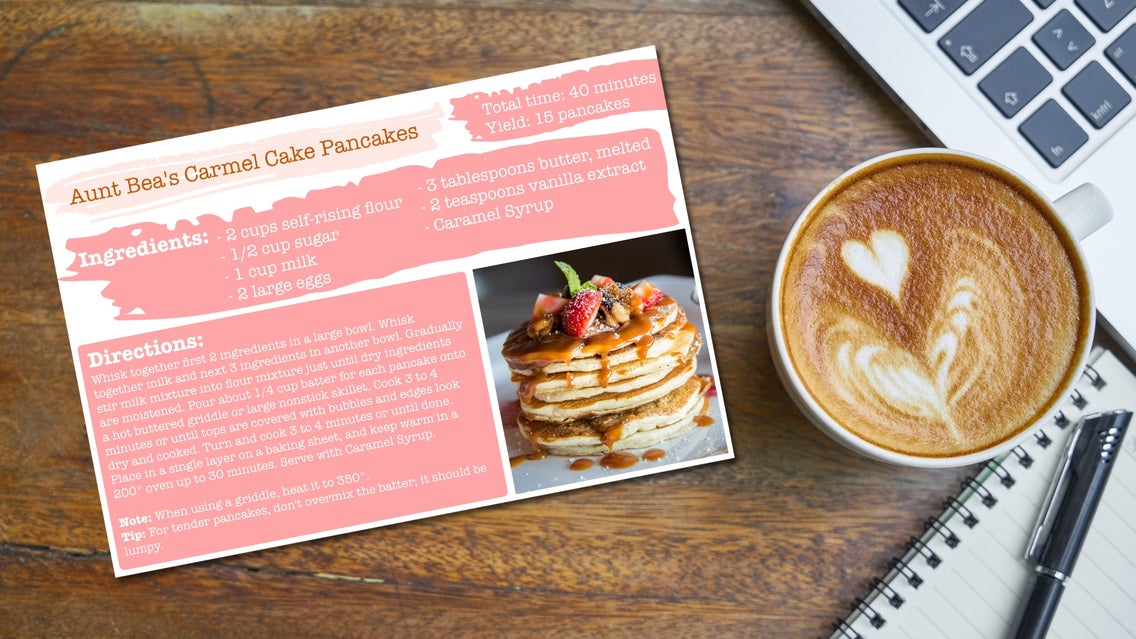
Recipe cards have been handed down for generations. They started from a place of necessity, a physical location for recipes that have been requested time and time again. In recent years, they have morphed into an heirloom that tells you more than how to cook something – it tells you the story of love through food. Now, you can turn your age-old recipes into your own eye-catching and easy-to-follow Recipe Cards to send to your friends and family. BeFunky’s Graphic Designer also acts as a Recipe Card maker, providing every tool or template you need to create your very own printable Recipe Cards. Let us show you how!
How to Create Custom Recipe Cards for Free
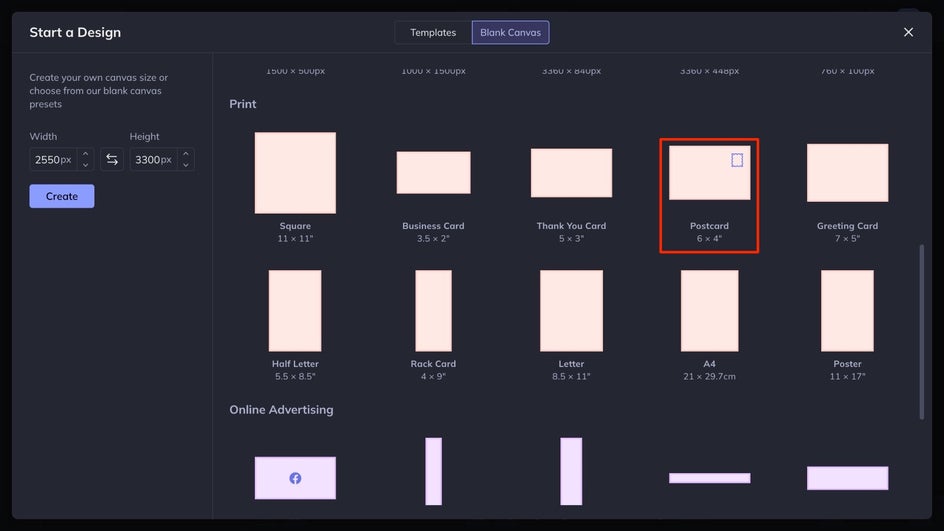
To get started, head to the Graphic Designer and start with a blank canvas. You’ll find the Blank Canvas tab located at the top next to Templates when you start a new design.
Step 1: Choose a Blank Canvas
There are many sizes to choose from for your Recipe Card, but we’d suggest any of the options located in the Print section. For this tutorial, we’ve selected Postcard 6x4”.
Step 2: Add an Image to Your Recipe Card
Navigate to Image Manager, then click the button featuring three dots to upload your image from your BeFunky account, Facebook, or Google Photos. To upload an original image of your completed recipe from the files on your computer, just click the Computer button. If you’d rather use a stock image to simply demonstrate what the final product should look like, click Search Stock Images. This will open the Stock Image Library, from which you can browse for the perfect image. Once you have found the image you want to use, double-click or drag and drop the image into your canvas.
Step 3: Create Sections With Graphics
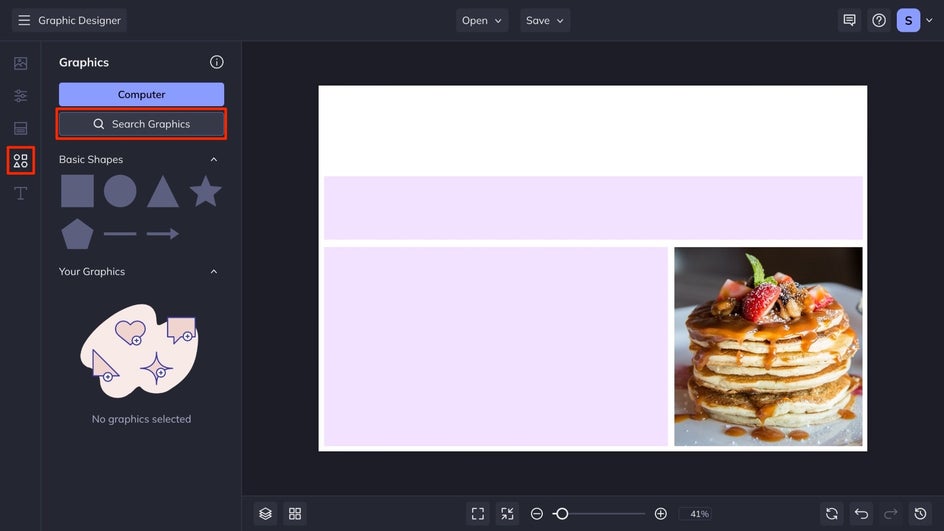
For the best organization on your recipe card, it is important to add graphics that distinguish the sections. This is helpful for whoever is following your recipe to visually see a difference when it comes to the ingredients list versus the steps to follow. Click the Graphics tab from the main menu, we’re using the square located in the Basic Shapes section. You can edit the shapes to be the size and color you desire to fit your recipe card, completely for free!

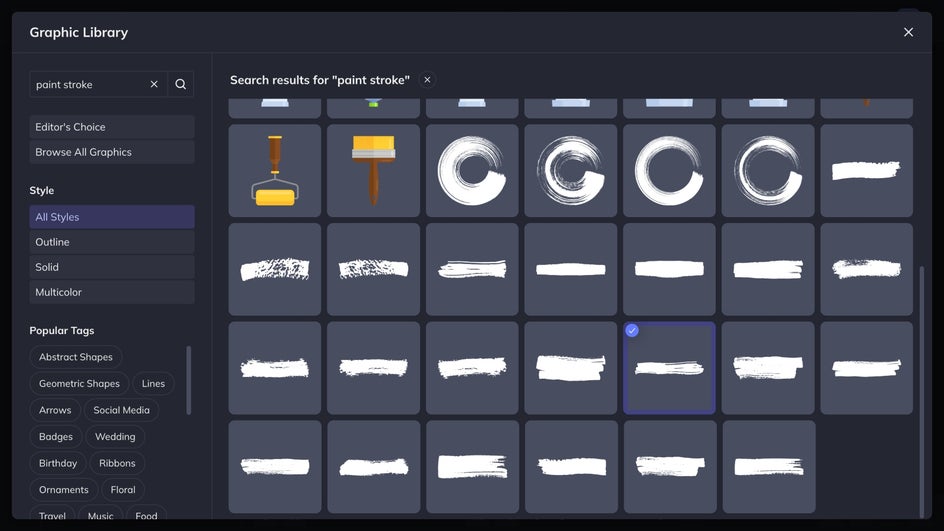
You can also browse BeFunky’s huge and free Graphics Library for additional graphics by clicking on Search Graphics. These are great for designing artistic blank Recipe Cards without images of the food you’re going to make. Once you have found a graphic you like, click on it and it will be added to your graphics library. To add it to your design you can drag and drop it, or double-click it and reposition it on your canvas.
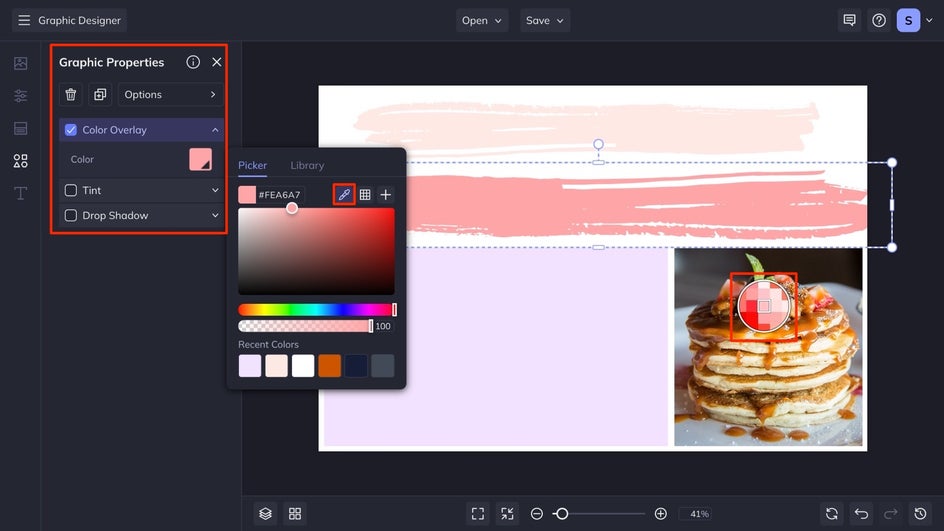
If you want to change the colors of your Graphics click on the graphic, then from the Graphic Properties panel, click on the relevant square to adjust the Fill, Color Overlay, or Graphic Colors. You can also adjust your shape’s Fill color, if available. Simply select a color, type in the HEX Color Code, or use the Eye Dropper Tool.
Step 4: Add Text to Your Recipe Card
Navigate to Text the Text tab in the menu on the left, followed by Add Text.
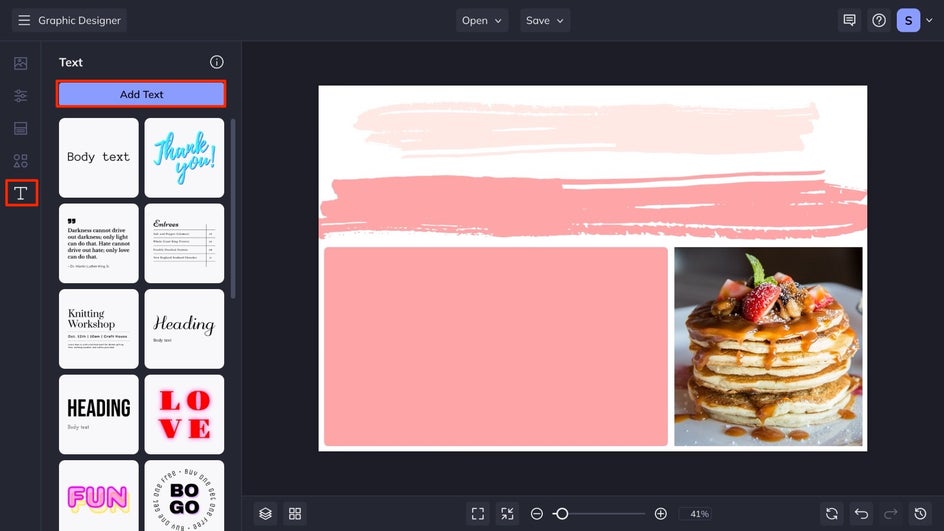
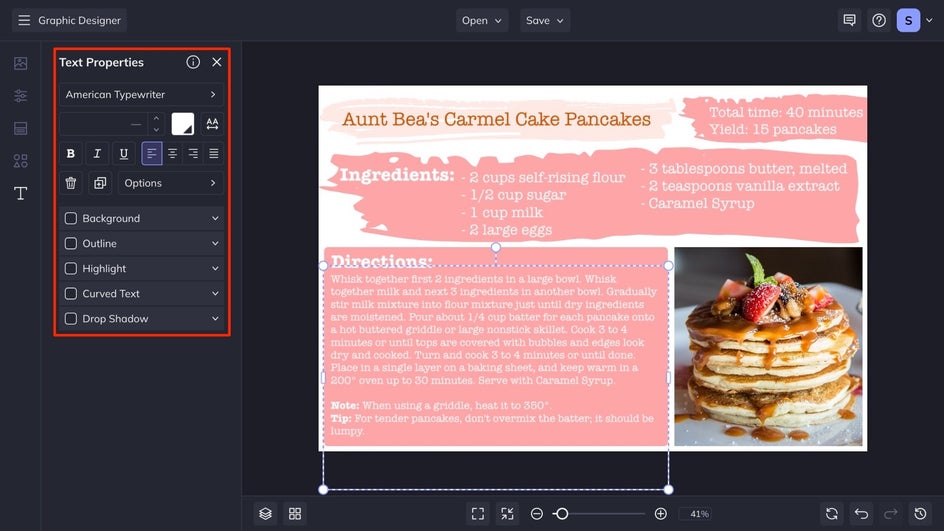
Double-click the new text box and type in what you want it to say, then use the Text Properties panel to adjust it as you wish. From the panel, you can change the font, size, spacing, text color, and more – all for free. Repeat these steps for as many text boxes as required, until you finish your recipe card.
Save and Print Your Recipe Card Design
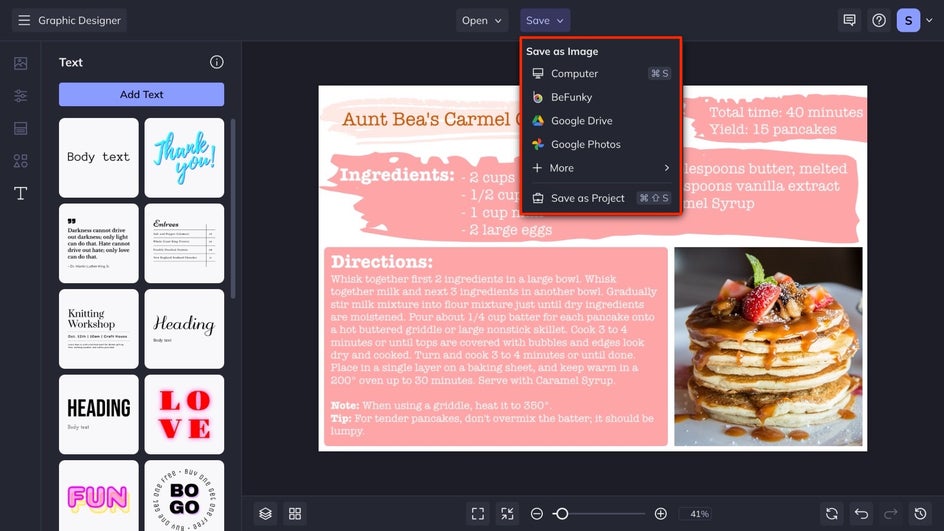
Once you are happy with it, it is time to save your design so it’s ready to be shared with your loved ones – whether in print or digital form! Click Save at the top of the screen, then choose your desired save location and format. For sharing digitally, it is best to save it as a JPG. If you plan to print it, a PDF is the best format.
Recipe Cards Inspiration
In need of some additional Recipe Card ideas? There is an infinite combination of fonts and graphics to make a recipe card to fit your style. Here are just 3 of our favorite ideas to inspire your next Recipe Card project!
Cookbook-Inspired
Take a page out of a cookbook with this style of recipe card! The trick is to feature a large image, along with plenty of whitespaces and a minimal color scheme. Take its personalization a step further and include an introduction to the recipe. Be sure to include why you or your family love it so much. A space for notes also adds that special touch by allowing its future users to jot down their own tips and tricks.

Double-Sided
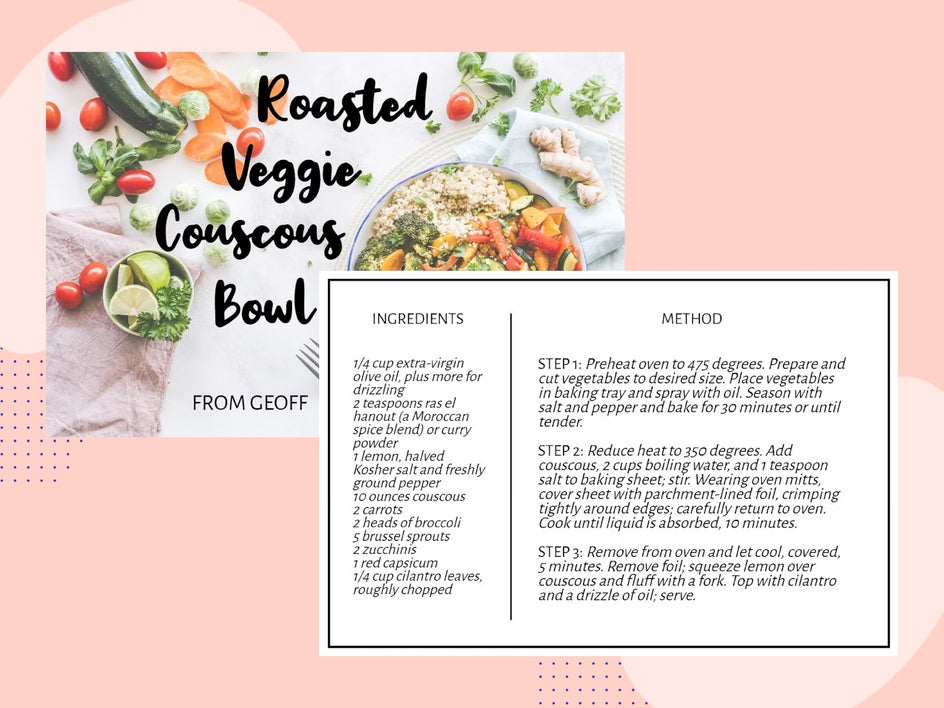
Drawing inspiration from a traditional postcard, you can make your recipe cards double-sided! This allows more space for your recipe, and features a larger image. It also lets you have the option to make a large and eye-catching recipe title, as well as a unique layout. We kept the underside of this Recipe Card simple, but there is no limit to what you can create!
Blank Template
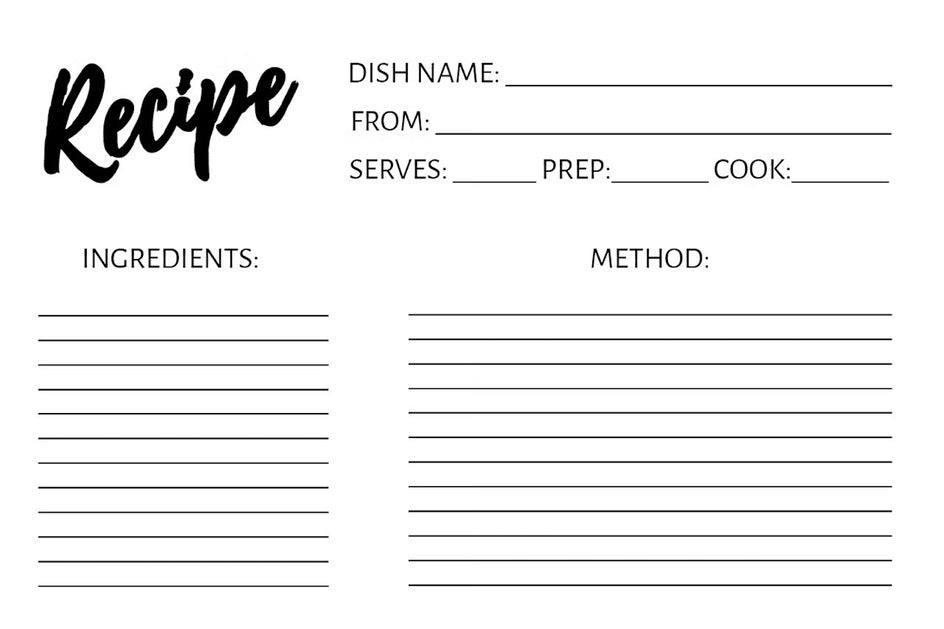
If you want to go the extra mile and handwrite your Recipe Card, a blank template may be your answer! Simply create a Recipe Card with plenty of lines to fill in and you’ve got yourself your very own Recipe Card that’s perfect for handwritten gifting on the go. Print several copies so that you are ready to give to folks at your next friend or family function. You will be ready to jot down your own recipe to give out, but also to record those dishes you just have to replicate yourself!
Start Designing Your Own Recipe Cards With BeFunky
With BeFunky’s Graphic Designer, you can create your own Recipe Cards that can get passed down for generations! Try your hand at a blank template if you are still unsure of your favorite recipe to add, or create your own design!


