Remove Clutter From Photos With the Object Remover
We’ve all been here before: you’ve just taken what you thought was the perfect photo, only to notice distracting clutter in the background. Whether it’s power lines in a scenic shot, stray objects on a tabletop, or a pile of laundry in an otherwise aesthetic home photo, unwanted elements can take away from your image’s impact. Luckily, BeFunky’s Object Remover makes it easy to clean up your photos in just a few clicks.
Powered by advanced AI technology, the Object Remover intelligently analyzes your image and fills in the erased areas with realistic details, ensuring a seamless edit. Unlike traditional clone stamping or manual retouching, this tool automatically blends the surrounding pixels to make it look like the clutter was never there. With just a few brush strokes, you can remove distractions, improve composition, and create a cleaner, more professional-looking photo – no advanced editing skills required.
Whether you're a photographer perfecting your shots, a small business owner showcasing products, or simply someone wanting to tidy up a personal photo, the Object Remover gives you full control over your images. Below, we’ll show you how to remove clutter, delete unwanted objects, and refine your composition – all with this easy-to-use tool!
3 Steps to Remove Clutter From Your Photos
Ready to delete some digital clutter? Head directly to the Object Eraser and open the image you wish to edit. Then, just follow these 3 steps below!
Step 1: Adjust the Object Eraser Brush
Move the Brush slider left or right to adjust its size. Then, using your cursor, click and drag your brush to highlight the clutter you want to remove. These painted areas will appear red.
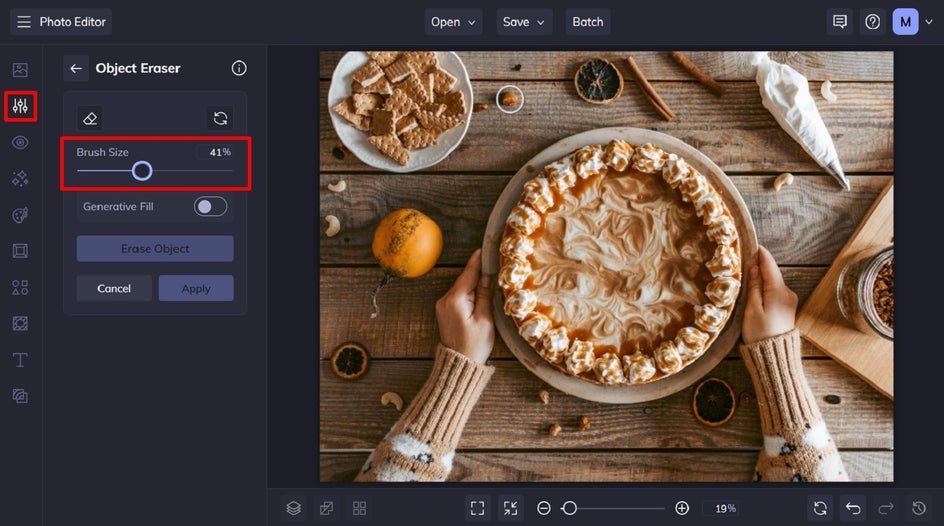
Pro Tip: Paint over and just outside the edges of the object(s) that you wish to erase. You can also adjust the brush size as you go to better suit larger or small objects.
Step 2: Erase the Clutter
Within the Object Eraser is a Generative Fill option that you can toggle on or off. Generative Fill helps seamlessly replace erased objects with AI-generated details that blend naturally into the background. Rather than leaving behind a blank or empty space, it intuitively fills in the area based on the surrounding elements. This ensures your object removal looks smooth and realistic.
You can click the Erase Object button to see the image without Generative Fill. If you'd like to preview how the AI fills in the erased area, simply toggle on Generative Fill to view the updated result.
Finally, click Apply to keep your changes.

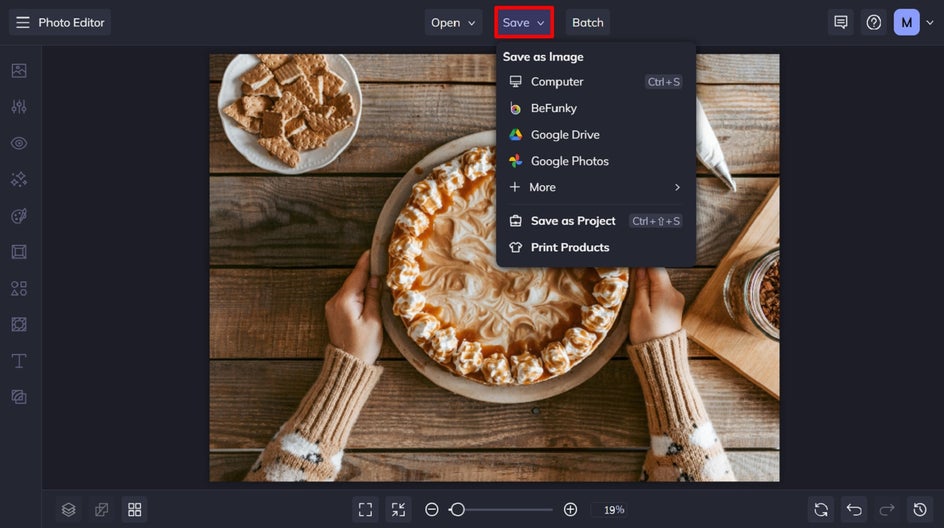
Step 3: Save Your Decluttered Photo
Now that you’ve erased the clutter from your image, all that’s left to do is to save it. Click Save at the top of the screen, then choose your desired save location.
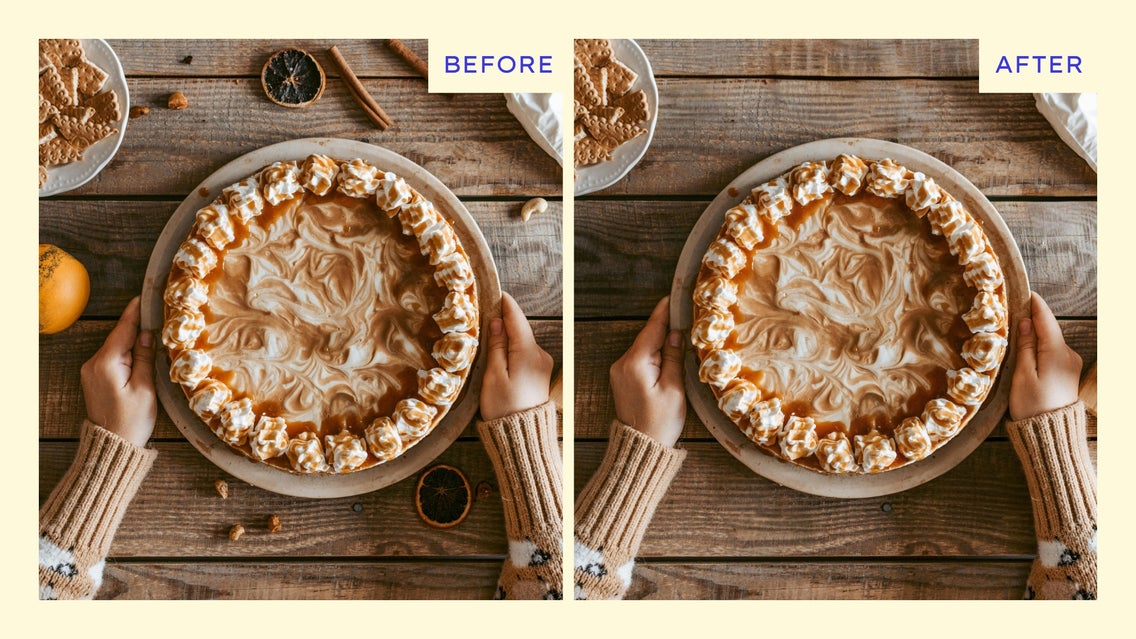
Before and After: Digitally Clean Up in Seconds
As you can see, even the smallest of tweaks using the Object Remover can have a huge impact on the cleanliness and composition of your image.


Other Ways to Use the Object Eraser to Erase Clutter
Need some more inspiration as to just how useful the Object Eraser tool is? Here are some other cool ways we’ve been using it to delete items that clutter – rather than complement – our images:
1. Simplify Distracting Street Photography
Urban photography can have a lot of character, but sometimes the background clutter – like power lines, cables, or excessive pipework – can distract from the subject. By using the Object Remover, you can clean up the scene, making your subject stand out while still keeping the natural energy of the location intact. A few simple clicks can remove these elements and create a more polished, professional-looking photo.
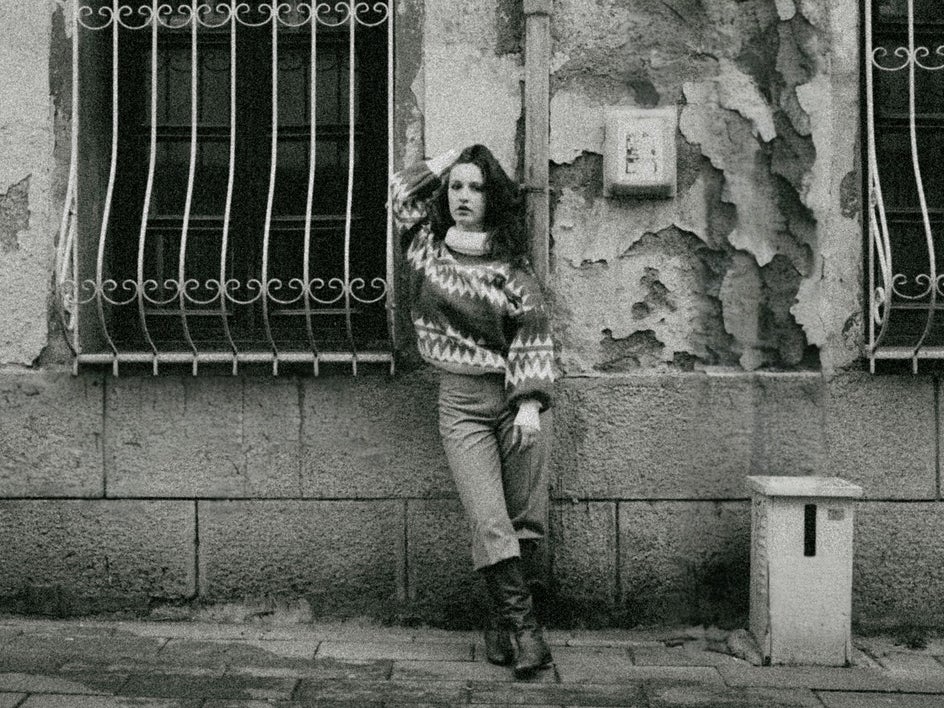
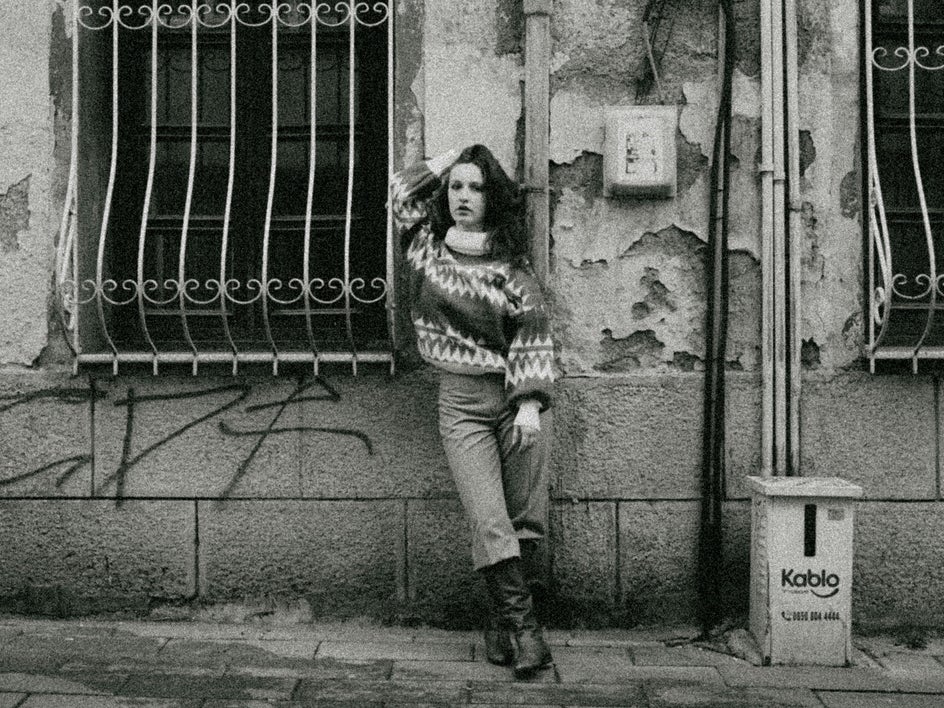
If you have any unsightly street signs or graffiti, you can also use the Object Remover to erase text!
2. Refine Product Shots
Product photography is all about presentation, and sometimes less is more. Imagine you’ve taken a cozy close-up photo of a mug, but the spilled coffee beans around it make the shot look messy. With the Object Remover, you can erase the excess beans to create a cleaner, more focused image that highlights the mug itself – perfect for online stores, social media, or branding materials.


3. Clear the Chaos in Lifestyle Images
Capturing kids in action makes for some of the most fun and candid photos, but sometimes the background clutter can take away from the magic of the moment. Say you have a great shot of two children playing with blocks on the floor, but the sheer number of scattered blocks is overwhelming. Using the Object Remover, you can delete some of the extra toys to bring the focus back to the kids and their expressions, making the photo feel more balanced and visually engaging.


Effortlessly Erase Clutter for Picture-Perfect Photos
No matter what kind of photo you're working with, a little cleanup can make a big difference. With the Object Remover, you can easily delete unwanted objects, remove clutter, and refine your images in just a few clicks.Ready to create clean, distraction-free images without the hassle of manual editing? Visit the Object Remover and start transforming your photos today!