How to Remove Flyaways From Portrait Photos

Have you ever zoomed in on a portrait of yourself, only to be let down by those pesky stray hairs? Known as “flyaways,” these jaunty hairs can often draw in the viewer’s eye and detract from an otherwise perfect shot. On top of that, they can also make you (or your subject) look as though your hair is messy and unkempt – and no one wants that.
If you've ever tried to edit out those pesky hairs by hand, you know how time-consuming and frustrating it can be. Not to mention, the end result often looks unnatural and heavily edited. Thankfully, BeFunky's Object Eraser is the fastest way to achieve natural-looking result. Keep reading to learn how to easily remove flyaway hair in seconds!
How to Remove Flyaways In Seconds
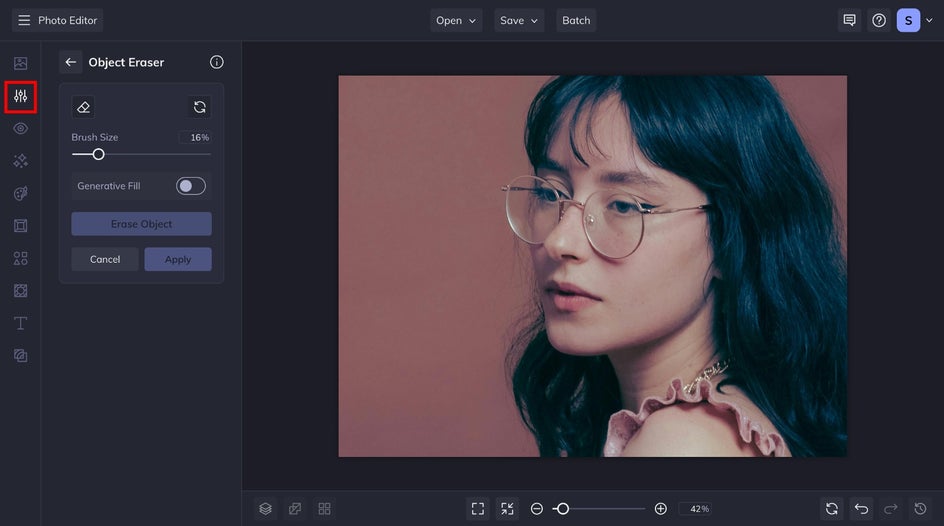
Ready to remove stray hair from a photo online? Just head to the Object Eraser and open any portrait. Alternatively, you can drag and drop the photo from your files into the Photo Editor.

The Object Eraser can be found under the Remove/Replace category of the Edit tab. This tool is perfect for removing flyaways from photos with detailed backgrounds, our portrait featured below.
Step 1: Highlight Any Flyaways
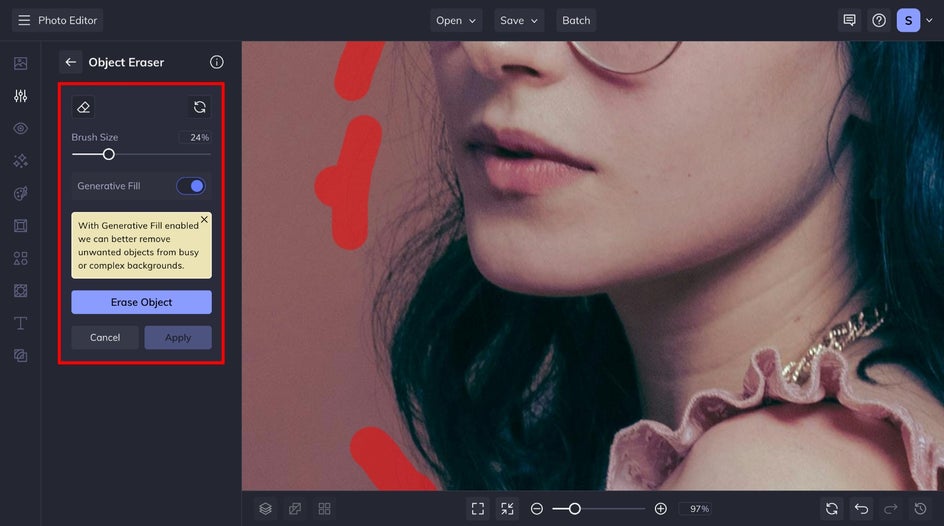
From the Object Eraser menu, adjust the brush size using the corresponding slider and use your cursor to brush over the flyaways you wish to remove. These areas will be marked in red. Then, to remove them, click Erase Object. This tool then uses advanced AI technology to blend the area around the flyaways to erase them seamlessly. If you're working with a very detailed background, you may want to take advantage of the Generative Fill feature.

If you accidentally brush over a part of your image that you don’t wish to remove, you can undo this by clicking the Erase icon in the upper left corner. Once you’ve removed those pesky flyaways and are happy with your changes, click Apply.
Pro Tip: When editing flyaways, it's important to zoom in on the area you're working on. This allows for more precise editing and ensures that you don't accidentally remove any necessary hair, which could create an unnatural look.
Step 2: Save Your Flyaway-Free Photo
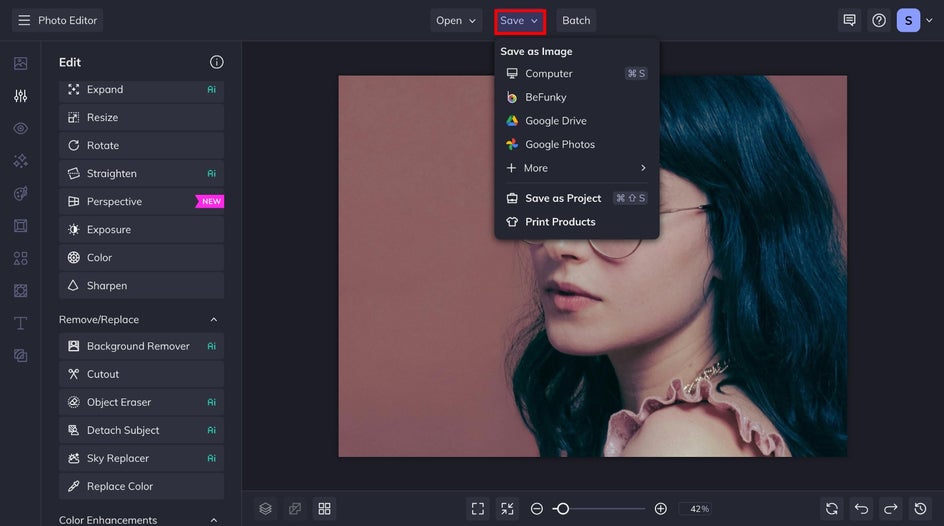
With those annoying flyaways discreetly removed from your image, all that’s left to do is to save it. Click Save at the top of the screen, then choose your desired save location.

Final Results: A Flyaway Free Portrait in Seconds
Whether you're a professional photographer or just an avid selfie-taker, this tool is a game-changer for anyone looking to achieve flawless photos. With just a few clicks, you can say goodbye to flyaways without losing the natural look of your subject.


More Ways to Remove Flyaways!
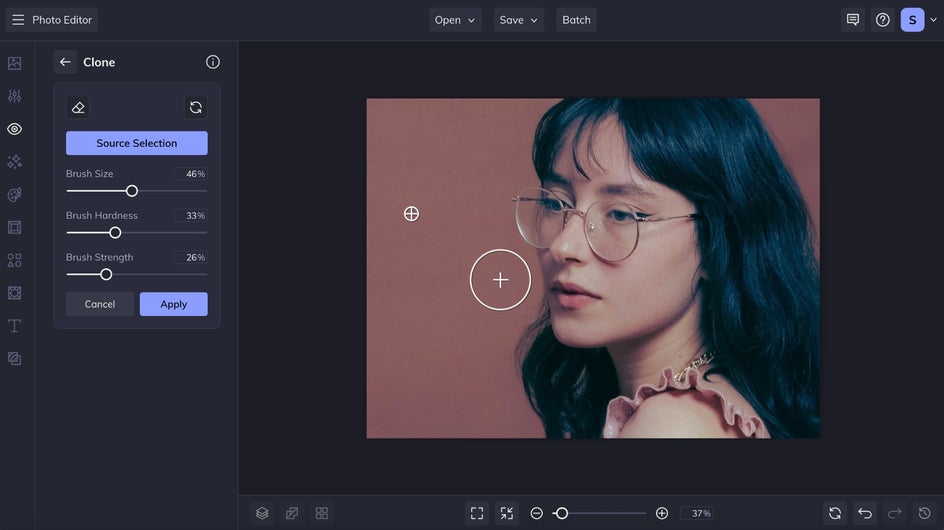
Note that if you're removing flyaways from a not-too-complicated background, the Clone tool, found in the Touch Up tab, is a great alternative to the Object Eraser. This tool allows for seamless “painting” over your undesired flyaways. Both offer seamless flyaway-free results in just a few brush strokes! Follow our easy, 3 step tutorial to learn how to take advantage of the Clone tool for all of your portrait editing needs.

Is There an App to Remove Flyaway Hair?
Of course, photos taken on your mobile phone aren’t immune to flyaways either. As a result, many photographers find themselves wondering if they can remove flyaway hair using an app. Thankfully, BeFunky’s entire creative suite is available as a mobile app for editing flyaways on the go. The mobile editing process is even the same as that outlined above!
Ready to Edit Flyaway Hair From Your Photos?
Say goodbye to flyaways and embrace flawless photos with BeFunky's Object Eraser and Clone tools. Removing stray hair from photos shouldn’t be time-consuming, nor should it require costly photo editing software.
Go on, check out the Photo Editor to start removing flyaway hair from your favorite photos! How to Remove Flyaways From Photos


