Discover the Magic of the Object Eraser: Remove Objects With a Click
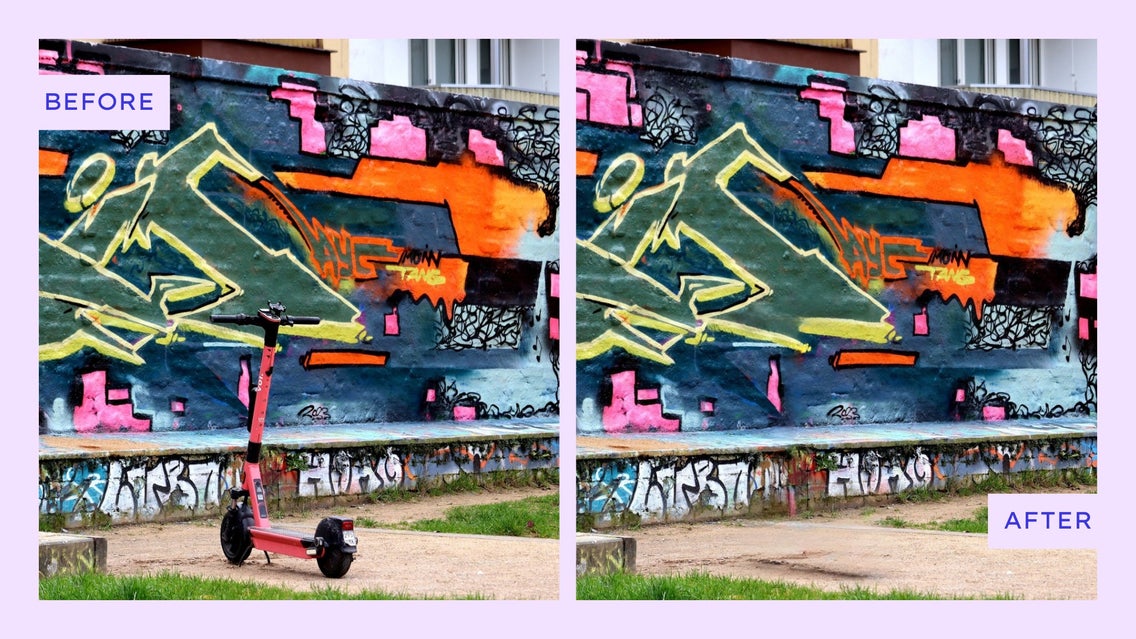
Have you ever taken a picture that's nearly perfect, but there's just one tiny element that seems out of place? Maybe it's an unexpected photobomber or an unwanted object in the background. An object remover acts as an eraser for your photos, allowing you to remove any visual elements in seconds. Whether you're a photography enthusiast looking to enhance your shots or just someone who wants to perfect their social media uploads, these tools can be a game-changer.
With just a few clicks and BeFunky’s Object Remover in the Photo Editor, you can make those distractions disappear, transforming your photos into something truly remarkable. BeFunky’s object eraser utilizes A.I. technology to analyze the space around your selection and fill in the blanks to have an astounding outcome. Unlike any other object eraser tool on the market, this works with high-resolution images just as flawlessly as low-resolution ones.

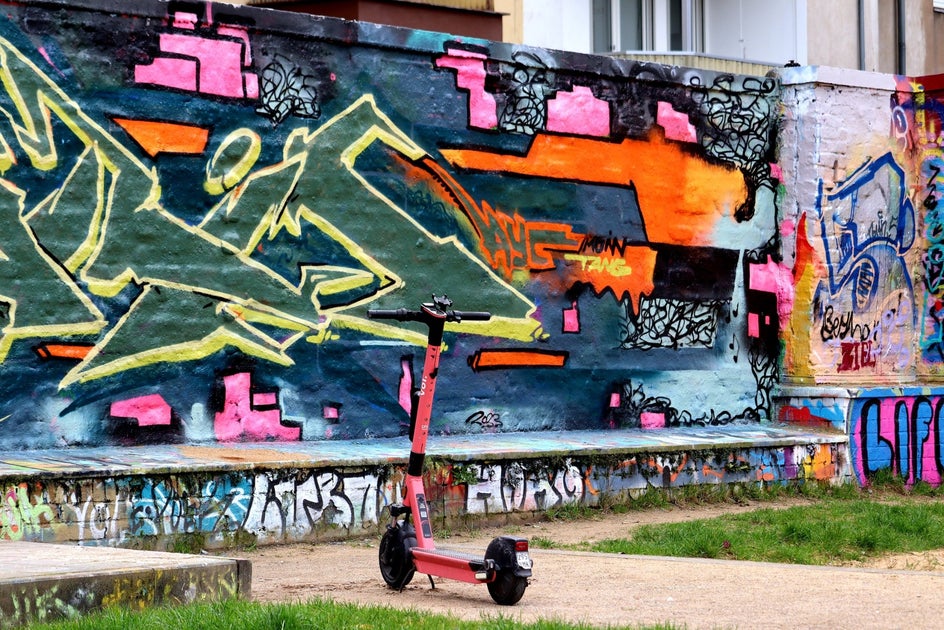
Get Inspired to Erase Your Own Objects
Before we get into how to remove unwanted objects from your photos, here are a few of our favorite ways to use the Object Remover tool.
Remove Objects on the Beach
Using the Object Eraser is a simple solution, whether garbage on the beach, a boat, or a floaty in the background of your ocean photos. It can look like you have the beach to yourself in just a few clicks.


Remove Objects in Family Photos
Family photos with kids can be a hard one to get a good photo out of. If you bring some fun distractions, like a ball or other toys, it can make for great photos of the people but with a few unsightly items for the final result. Using the object eraser will take away any unsightly item you want in seconds.


Remove Objects From Action Shots
In-action images are one of our favorite places to use the object eraser because it's a type of photo that you can’t really curate. There is no planning for it, it happens spontaneously and it may not be perfect. With the object eraser, you can take away the things that make it not perfect and leave a beautiful action shot.


How to Remove an Object From Your Photo
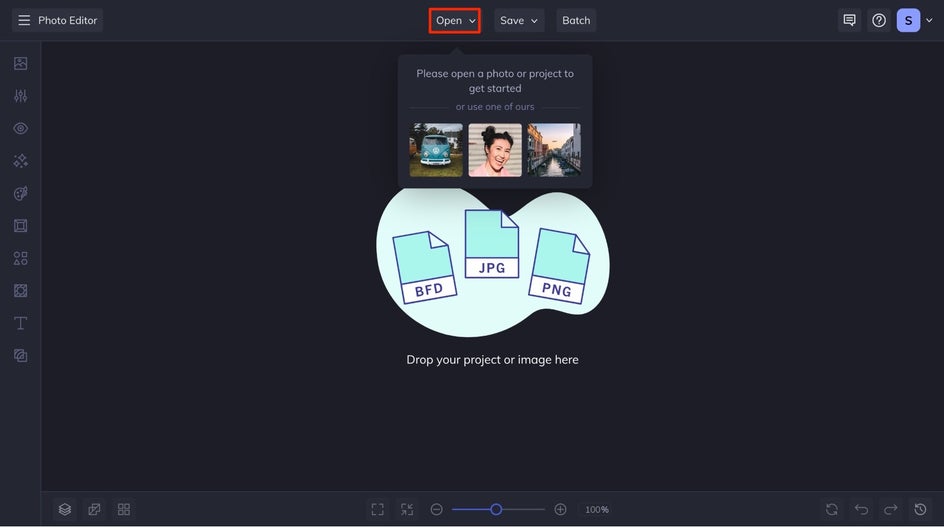
Get started by uploading your image in the Photo Editor. You can either upload from your computer by clicking the Open button at the top of the interface, drag and drop the photo you want to work with, or start with a stock photo. You can also head directly to the Object Eraser by clicking here.
Step 1: Find the Object Eraser Tool
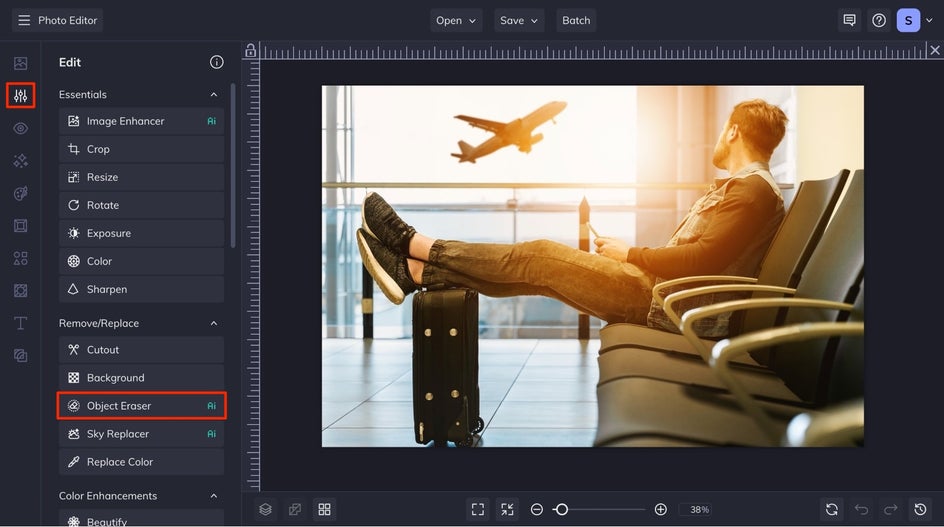
If you’re not already there, you can find the tool under the Edit tab on the left side of your canvas, under the Remove/Replace section of the menu, you'll find the Object Eraser tool.
Step 2: Select and Erase the Object
Once you click on it, it will take you to a simple menu that has a Brush Size slider, a Clear button, and an Erase Section button. Once you’ve adjusted the brush to your ideal size, simply start brushing over the object you want to erase. You will want to make sure that the whole object is covered with your brush strokes for best results.
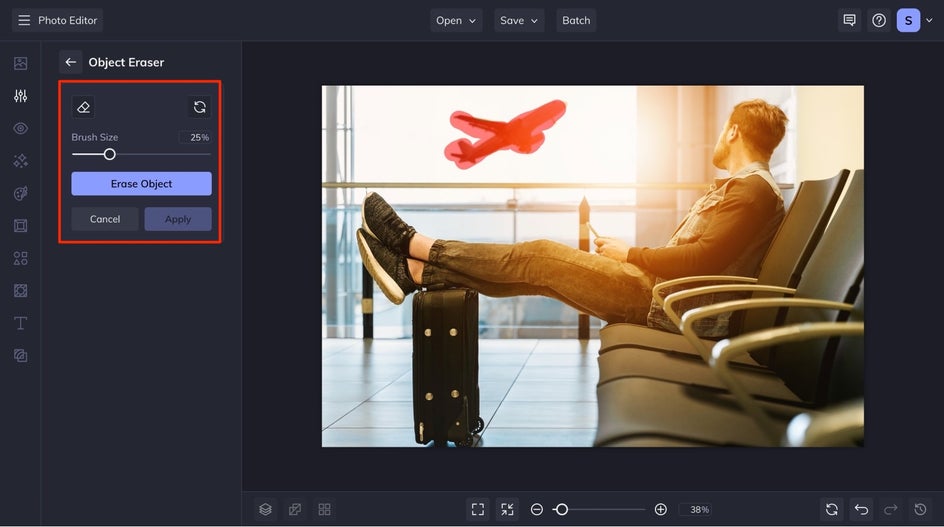
Once you are satisfied, click the Erase Object button, and your unwanted object will disappear! Click Apply to apply the changes to your photo.
Step 3: Save Your Freshly Edited Photo
Lastly, you are able to save your new image to your desired save location by clicking the Save button at the top of your canvas.
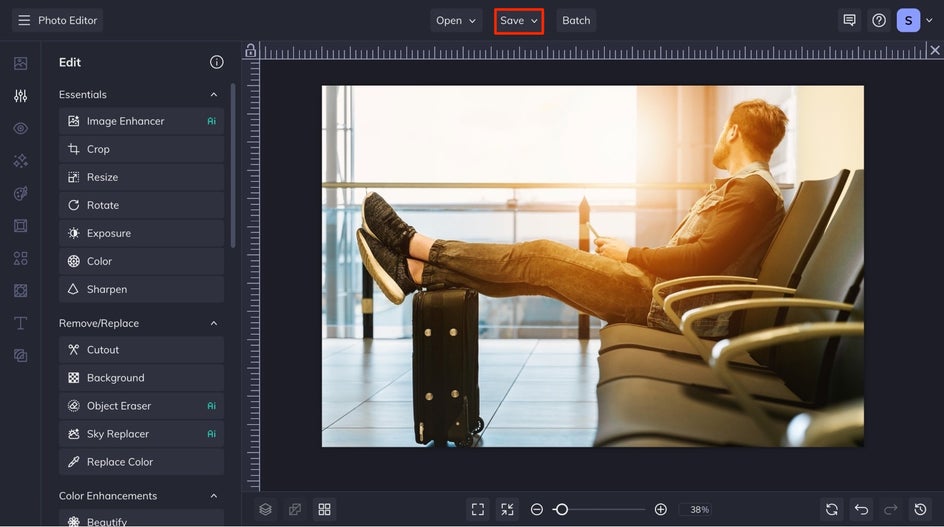
Final Results – Erase Objects in Seconds
In just a few clicks, you can remove any unsightly item from your photos. Long gone are the days that you have to worry about making sure that everything in a photo is perfect, now you can remove the things that you don’t want there with BeFunky’s Photo Editor in seconds.


