How to Create Cohesive Social Media Headers For Every Channel

In today’s world, social media reigns supreme, but have you ever taken a minute to think about the visual cohesiveness of your channels, particularly when it comes to headers? It doesn’t matter if your social media represents you as a small business, big enterprise, blogger, musician, or more – your headers are the most prominent part of any social media channel, so they shouldn’t be ignored!

Thankfully, creating cohesive headers across all of your social platforms is easier than ever. With BeFunky's Graphic Designer, you can customize any social media header template to best represent your brand, then resize that same design to fit every social media header dimension in just a few clicks! In other words, there's no need to ever start the design from scratch just to fit new dimensions. Not only will having these thoughtfully designed headers make your brand look more put together, consistency in your brand graphics is one of the easiest ways to increase brand awareness. Keep reading to find out how!
Step 1: Create a Social Media Header You Love
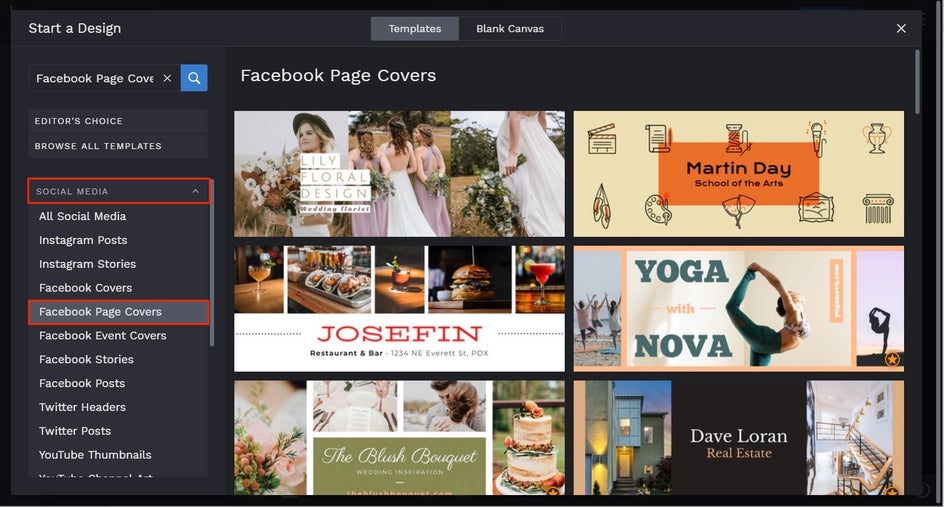
It doesn’t matter what social media header template you begin with in BeFunky, the size can be altered to fit whatever channels you need. For the sake of this tutorial, let’s say you want to create a Facebook Page Cover for your small business. First, head to BeFunky’s Graphic Designer, then click on the Facebook Page Cover category in the Social Media section on the left. When you find a template layout you love, select Use This Template to load it onto the canvas.
First up, you’ll want to edit your template’s existing text to reflect your own small business. To do this, double-click on any text box and begin typing.
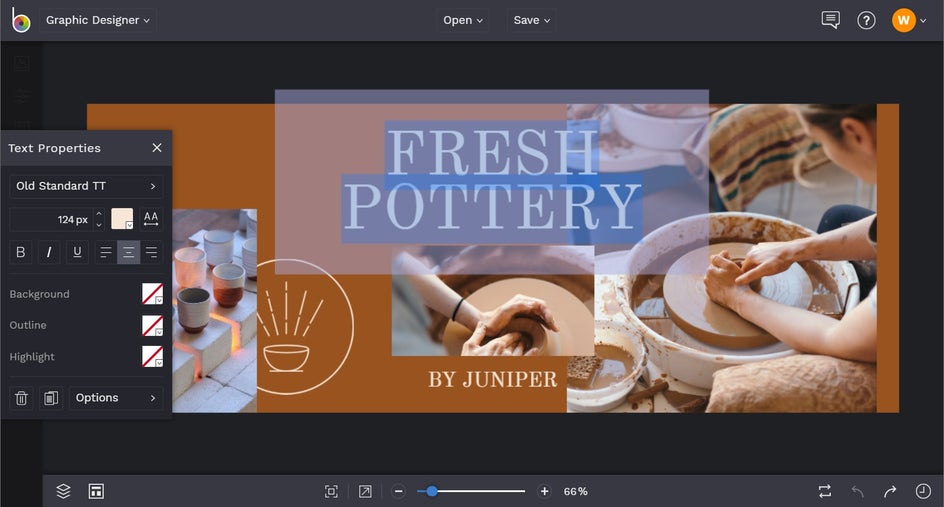
When you click on a text box, a Text Properties toolbar will appear. From this toolbar, you can also edit elements such as the Font, Font Size, Text Color, Spacing, and more. You can even use the Text Properties menu to upload any font stored on your Computer or browse hundreds of Google Fonts to curate a custom font library!
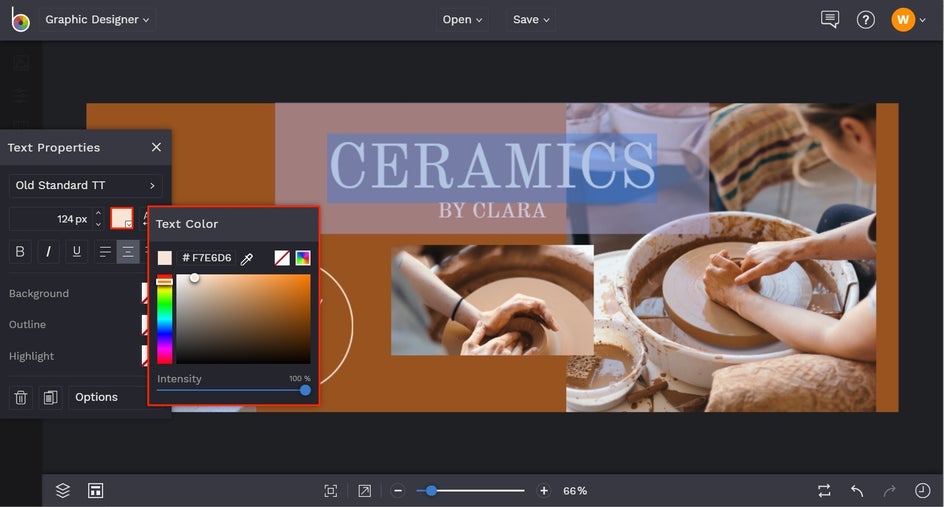
To change the color of your text, just click on the Text Color box. From here, you can select your desired color from the color palette, use the Eyedropper Tool to select a specific color already in your template, or input the Color HEX Code if you know it. You can also move your template’s text boxes (or any element, for that matter) by clicking on them and dragging them into place with your mouse.
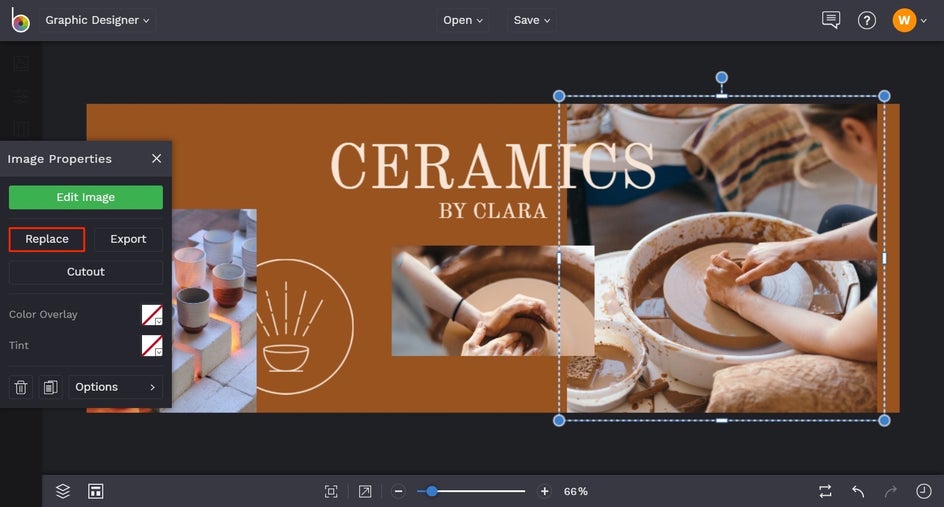
Next, you’ll want to swap out your template’s existing images for ones that better represent your own business. You can do this in either one of two ways: 1) you can click on an existing image on your template and then select Replace from the Image Properties toolbar which appears, then choose a file from your Computer to replace the image with.
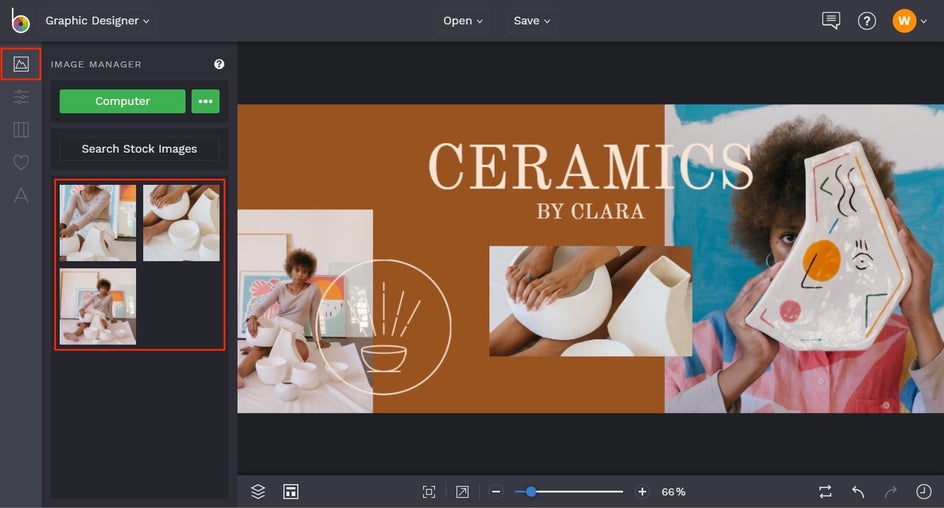
Or 2) you can navigate to Image Manager from the main menu on the left (the top icon) and upload your desired images from your Computer, Facebook, or BeFunky account. Once uploaded, these images will appear as thumbnails in the Image Manager. Simply drag-and-drop the image thumbnail onto the existing image on the template to replace it.
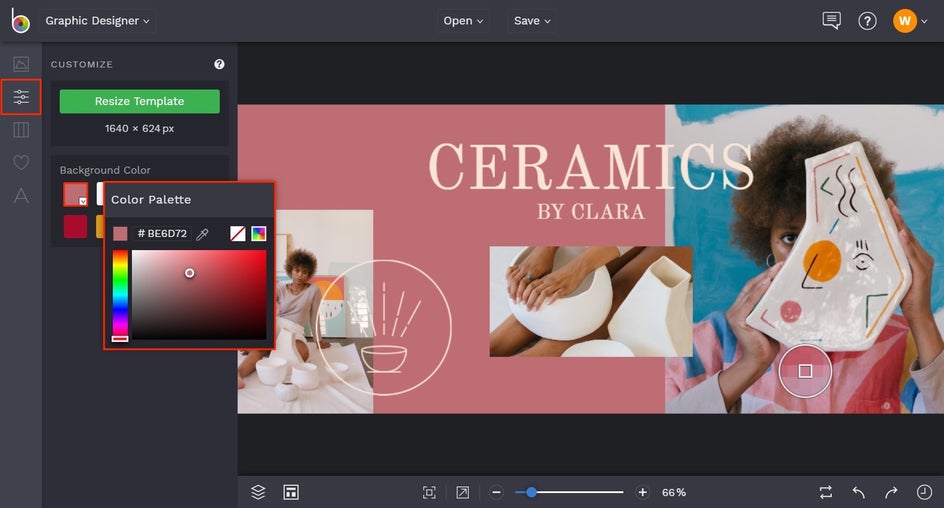
If you wish to change the background color of your Facebook Page Cover template, just navigate to the Customize tab in the main menu on the left. From here, select a Background Color swatch or custom color of your choosing.
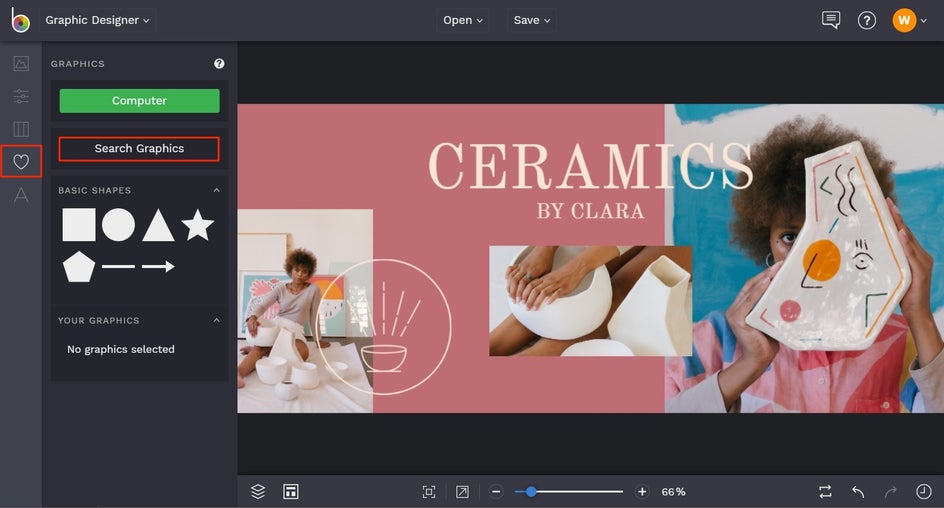
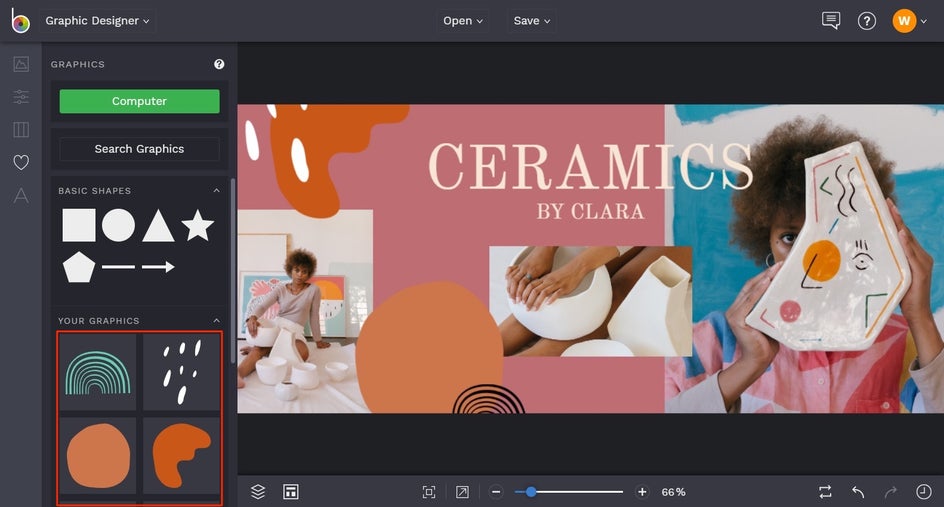
Additionally, you can add graphic elements such as shapes, symbols, social media icons, or more. To access the Graphic library, click on Graphics (the heart symbol) in the left side menu, followed by Search Graphics.
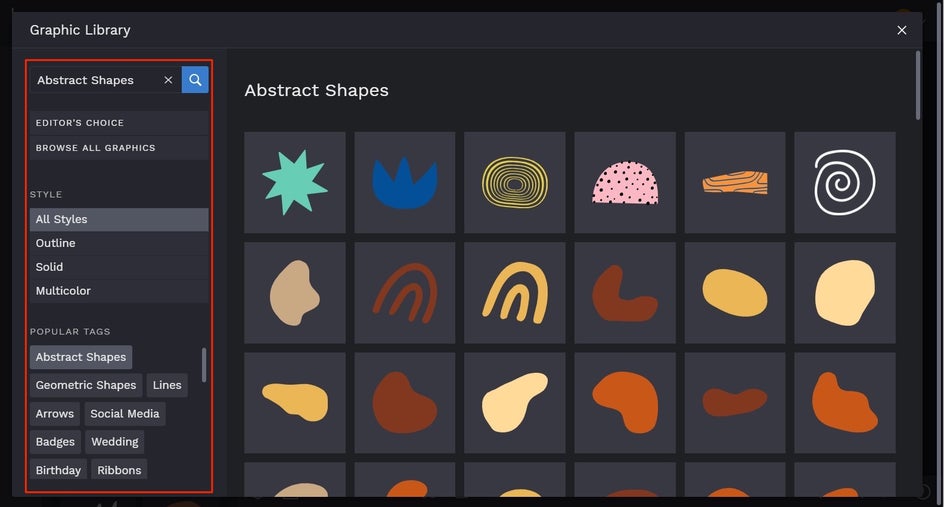
In the Graphic Library menu, use the search bar on the left to find exactly what you're looking for, or click on the Popular Tags as a starting point. There are hundreds upon hundreds of graphics in this library, which is why you'll also notice the ability to filter results on the left. Click on any graphics you love, then close the library to start designing with them.
Any graphics you selected will appear as thumbnails in the Your Graphics section in the Graphics tab. Simply drag or double click their thumbnails to add them to your social media header design and begin placing them where you want.
Once your Facebook Page Cover design (or whichever social media header template you started with) is finished, you’ll want to save it so it’s then ready to upload to your social media channel. Click Save at the top to save your work to your Computer (we recommend saving as a high quality .JPG file), or other destination of your choice.
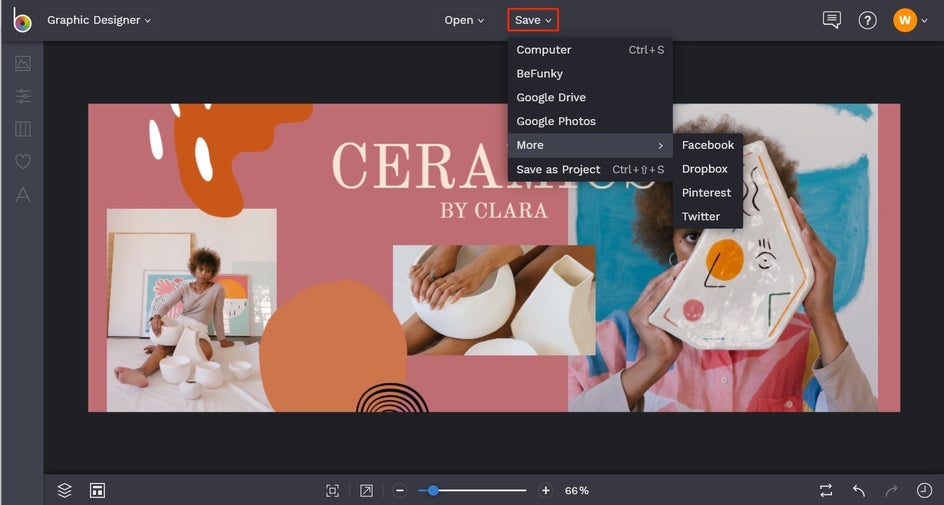
We also recommend choosing the Save as Project option, which lets you save your design as an editable file to your BeFunky account or Computer. This will allow you to come back to your template in the future to make changes to it, such as resizing it for other platforms or updating the imagery or information.
Step 2: Resize the Design to Fit All Your Social Media Channels
Now that you've designed a social media header you love, we’re going to show you a step-by-step guide on how to resize that same design to fit all of your other social media headers. We'll show you how to convert this Facebook Page Cover design into a Twitter Header, and the same steps apply no matter what size you need.
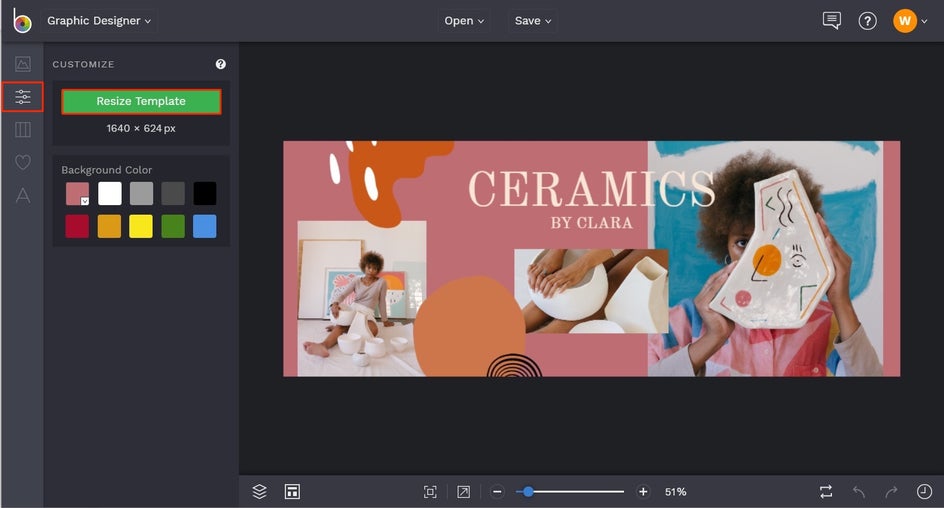
While your Facebook Page Cover is still uploaded in the Graphic Designer, click on the Customize tab in the left side menu, followed by Resize Template.
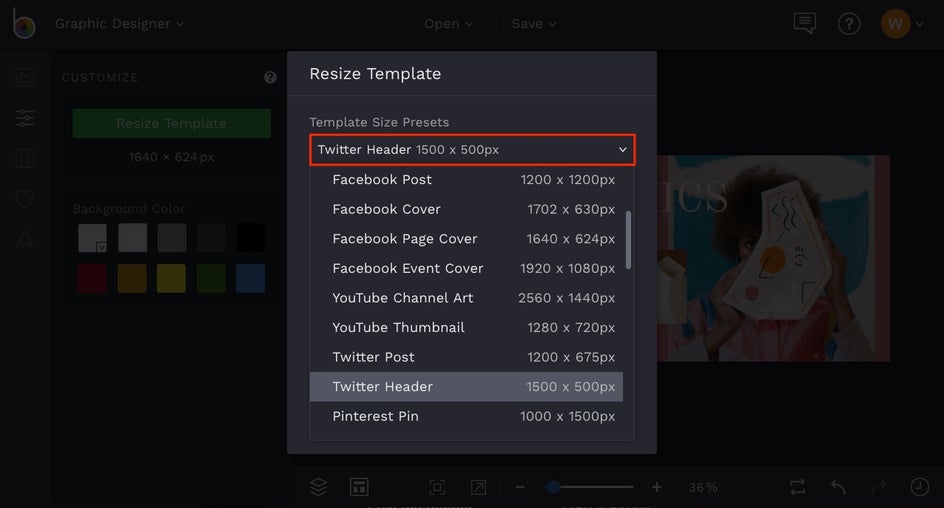
A Resize Template menu will appear with everything you need to size your design just right. First, click the dropdown menu under Template Size Presets to select a preset social media header size, such as Twitter Header.
Alternatively, you can type the dimensions you need into the Width and Height boxes instead of using a preset. Also, be sure to keep the Smart Resize checked, as this resizes both the layers and template size so that the new layout is easier to arrange. Then, click Resize.
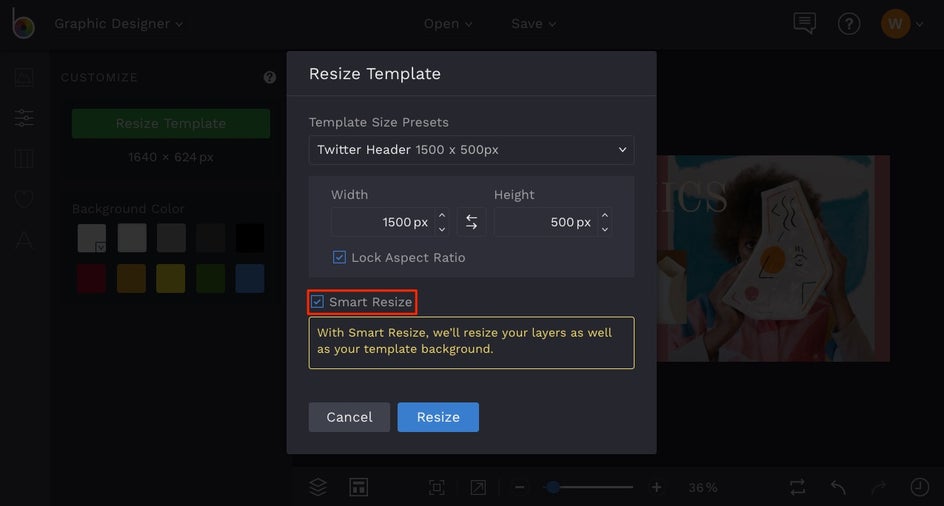
Now that your design is perfectly sized for your social media header of choice, click and drag to rearrange and resize any of the layers if need be.

All that's left to do is save your Twitter Header as a high quality .JPG file to your Computer, then continue resizing your design for any other social media channel headers you may need!
Step 3: Upload Your Designs
As you can see from the process above, resizing your template to suit every social media channel isn’t just possible, but incredibly quick and easy! After repeating the steps above for each of your social media platforms and saving each newly sized design as a high-quality .JPG file, all that's left to do is upload them as your new social media headers in each platform.
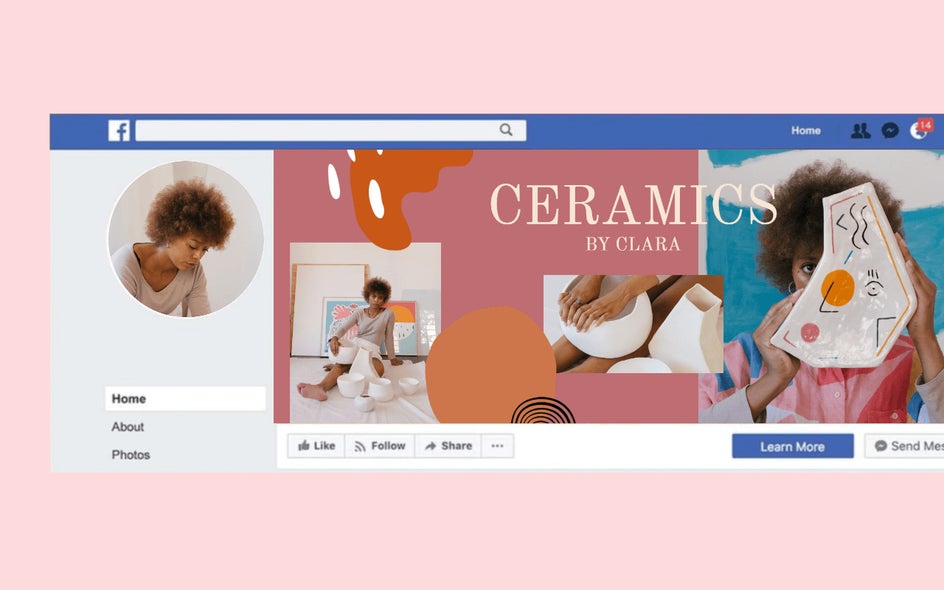
Ready to create a consistent social media header that can be used across all of your platforms to establish cohesive branding? Head to BeFunky’s Graphic Designer to get started!


