Create Unique Backgrounds With Stock Images

The stock images in our Image Library are an excellent starting point to create interesting backgrounds for any of your projects. Utilizing tools like the Background Remover to remove unwanted people or objects allows you to mix and match images to your heart’s content.
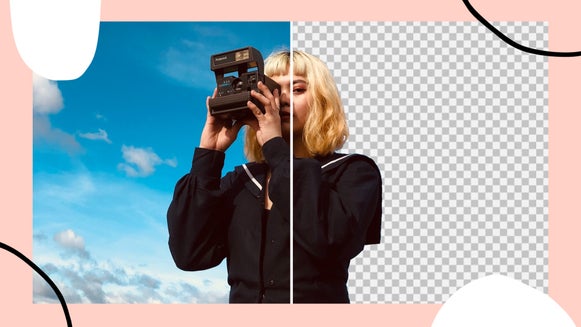
In this tutorial, we're going to remove and replace our subject's background with something more interesting – and add a few photo effects while we're at it.
Add a Stock Image Background to Your Image
Ready to replace your current background with something a bit more interesting from our Stock Image Library? If so, let's head to the Photo Editor!
Step 1: Upload Your Image
Use the Image Manager in the upper left menu to upload images from your computer.
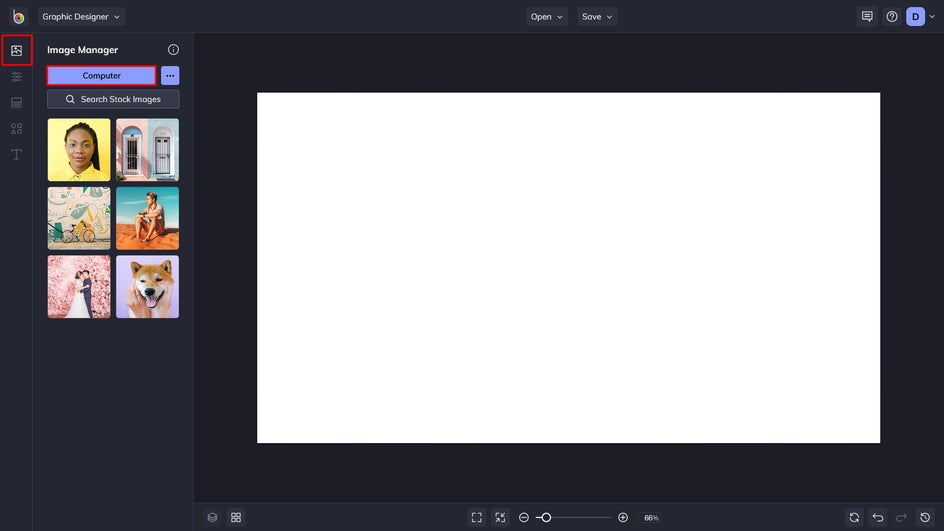
You can also click on the Search Stock Images button to choose from over a million royalty-free stock photos. And now is the perfect time to select your new background. Enter a search term into the field on the left, or click on the Popular Searches button below.
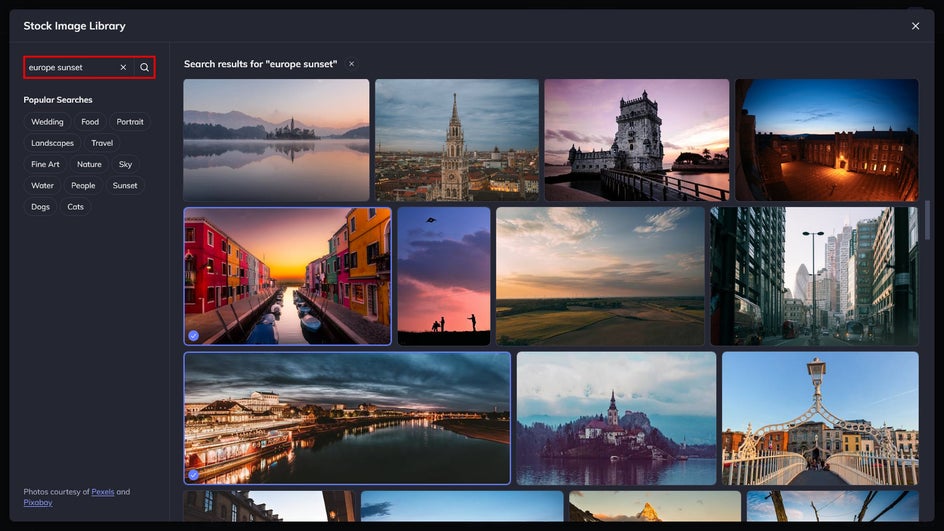
Click on the selections you want to use to add them to your Image Manager. Selects will have a blue checkmark.
Now, you can drag your images from the Image Manager and drop them into the template. All of BeFunky’s tools, including Photo Editor, Graphic Designer, and Collage Maker, have instant access to the Stock Photo Library.
Step 2: Remove the Background
After you upload an image that you wish to remove the background from, add your photo to the template from the Image Manager on the left by double-clicking, dragging, or right-clicking it to see menu options.
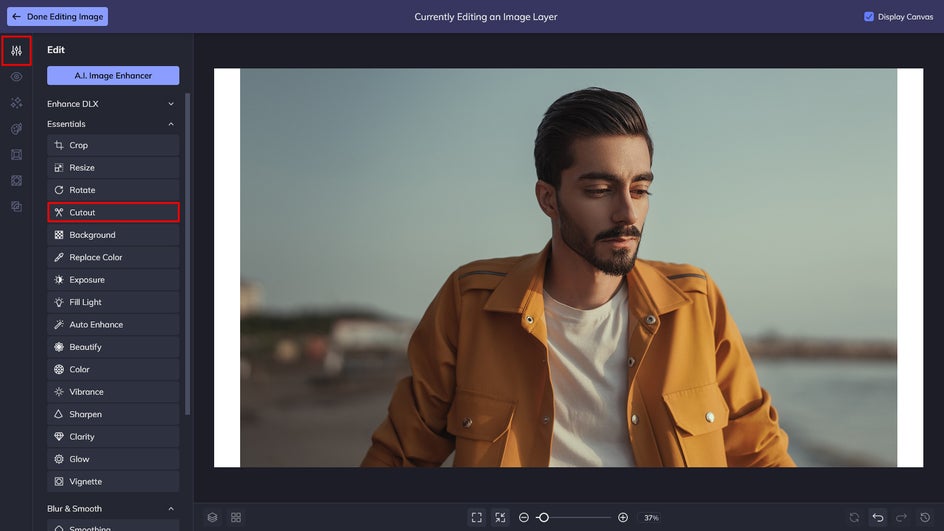
Once you add your subject, click the Edit Image button at the top left. Then, click the Edit tab and select the Essentials drop-down, followed by the Cutout button.
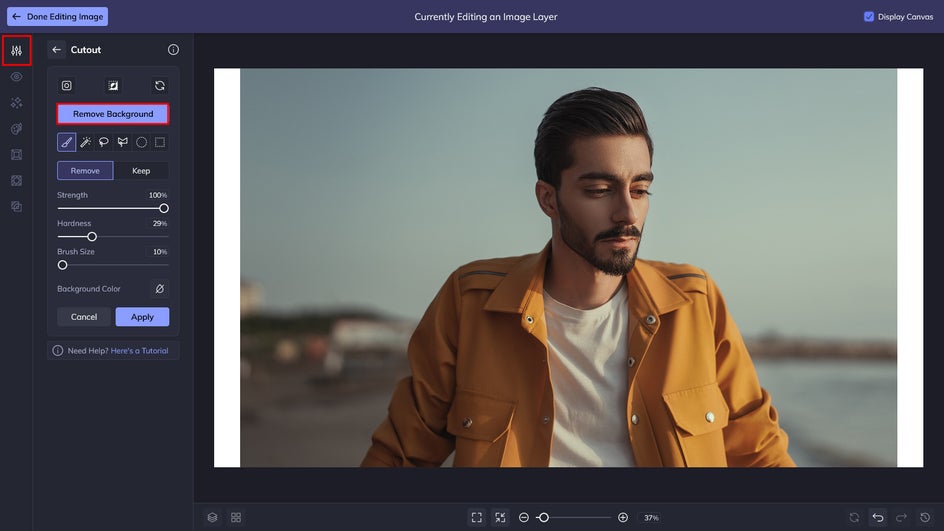
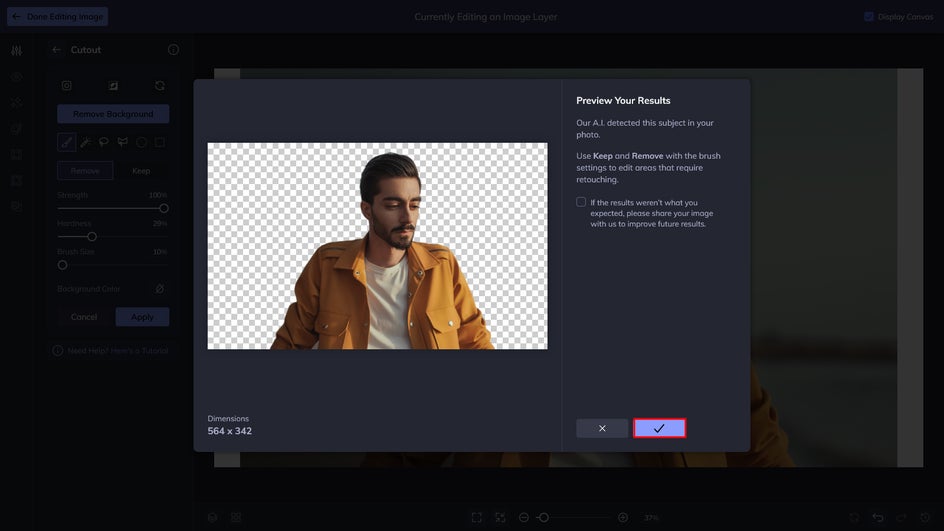
Once in the Cutout menu, simply click the blue Remove Background button. Here’s where our A.I. will take over.
If the Cutout tool doesn't get everything you want to remove, you can use the Brush tool to manually delete any excess.
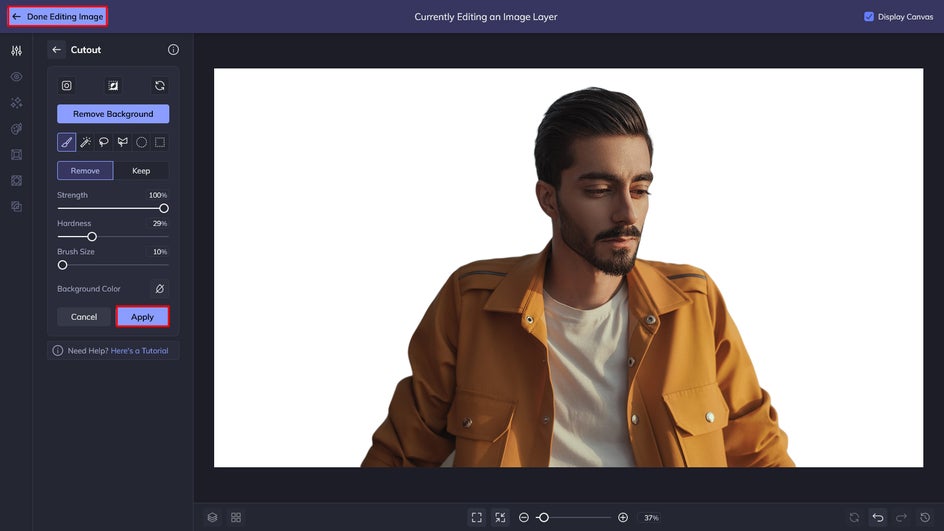
Click the Apply button when you’re ready.
Step 3: Add Your New Background
Here’s where you can add your background of choice. Simply head to your Image Manager, right-click the image, and right-click Set as Background. For this image, we're going to give our guy a beautiful, scenic background.
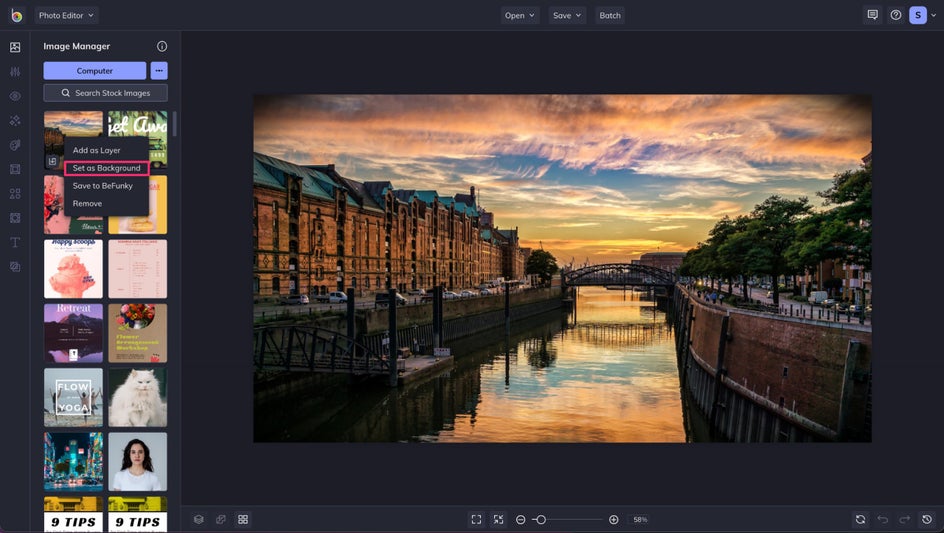
Step 4: Add Some Effects (Optional) and Your Subject
There are quite a few special effects and filters to experiment with that can further enhance your new background. Here, we're going to add a lens flare. Let's head to the Effects tab.
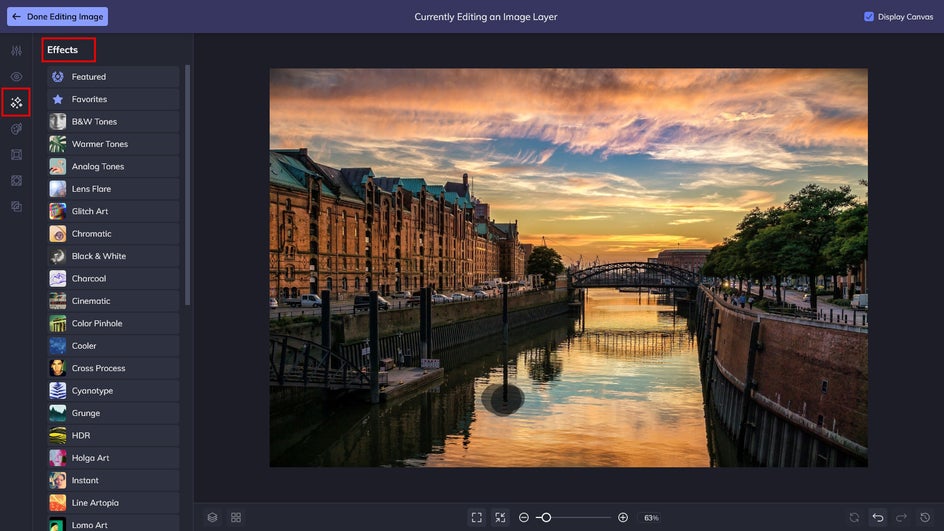
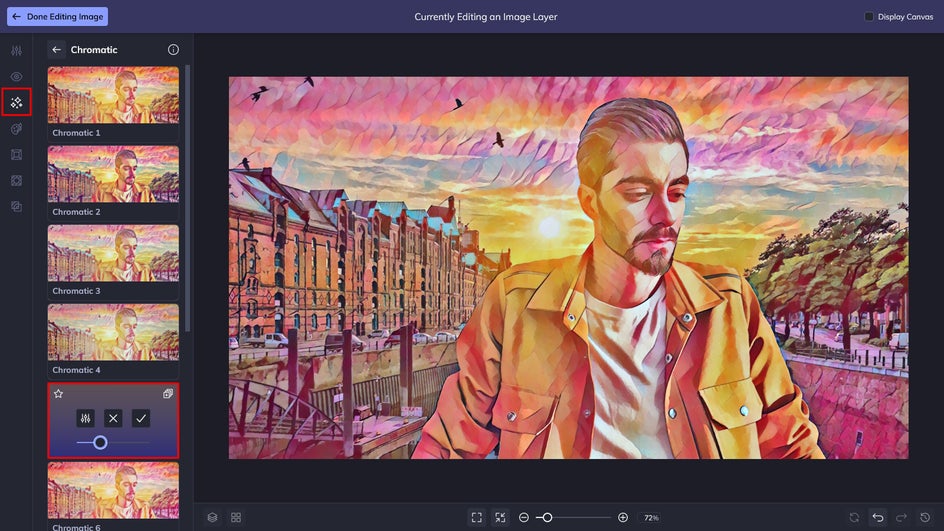
Next, place your subject by simply dragging the layer from the Image Manager onto the new background. You'll have the option to add an effect individually on each layer.

You can also add an Artsy effect for some texture and vibrance.
Step 5: Save and Share
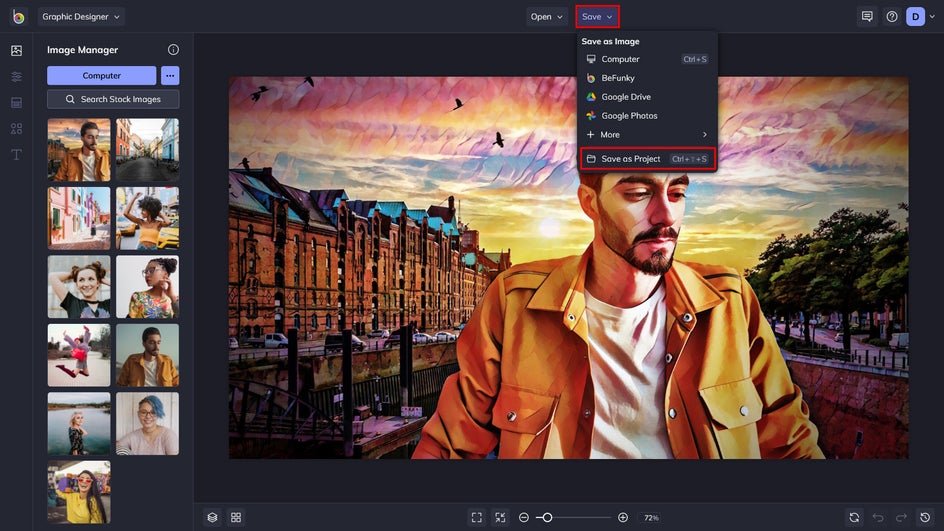
When you’ve completed your edits, it's time to save and/or share. It would be wise to save your project as you go along, so you don’t lose any work while you’re editing. Click on the Save button at the top of the window to choose your preferred method.
Use Stock Images to Create Unique Backgrounds
Ready to use BeFunky’s extensive Stock Image Library to add a unique background to your subject? Simply head to the Photo Editor and start browsing.

Stock Image Backgrounds for Social Media
Did you know that you can use the Stock Image Library to create unique backgrounds for social media purposes? Add a little extra depth and intrigue to your posts! Here's some inspiration for you to apply to your feed:
Beautify your Pinterest posts with artistic, abstract, natural, or funky backgrounds. Using free stock images with selfies or other portraits is a great way to create a mood or overall aesthetic for your followers.

Increasing engagement with Twitter is easy! Once you find an eye-catching background image, adding text and other effects to your post can help draw even more attention.

Want scrollers to stop on your post and comment? Use BeFunky to create visually dynamic images and a cohesive grid – thanks to some stock image backgrounds.
