How to Transform Your Photo Into a Ghost Portrait
Halloween is the season of spooks, and nothing says "haunting" quite like a classic ghostly theme. Whether you’re decorating for a spooky party or just embracing the eerie vibes of the holiday, ghost imagery has been a popular go-to for its serious scare factor. Now, thanks to BeFunky’s new Specter effect, you can easily turn your portraits into spine-tingling ghosts! You’ll find this exciting new addition within the Fantasy Portraits category of the Artsy tab.
This effect surrounds your image with a foggy, ethereal atmosphere, creating an illusion of transparency that makes your subject appear as if they’re fading into the shadows. A clear, close-up portrait works best for showcasing this ghostly effect, especially when you want to showcase those intricate, otherworldly details. Keep reading to see exactly how it’s done, as well as for some ghouly inspiration for your next ghost portrait!
How to Create a Ghost Portrait With BeFunky’s Specter Effect
Ready to transform your photos into ghostly masterpieces? Head to the Fantasy Portraits section within the Photo Editor, then follow these 4 steps.
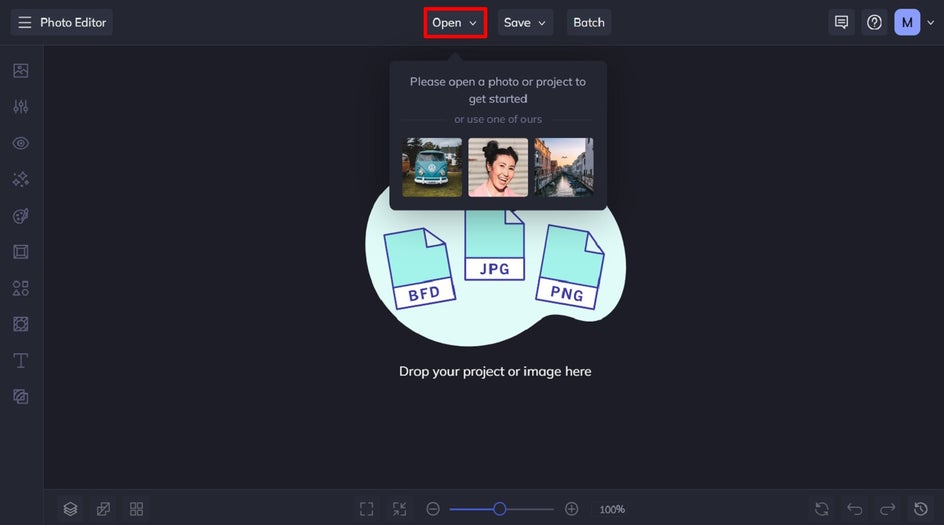
Step 1: Open Your Image in the Photo Editor
Begin by opening a well-lit, close-up portrait of your subject in the Fantasy Portrait category. The best results come from photos that have the person looking straight into the camera with a clear view of their face and shoulders.
Step 2: Apply the Specter Effect
Click on the Specter effect to apply it to your image. You’ll instantly see your portrait transform into a translucent, ghostly version of itself.
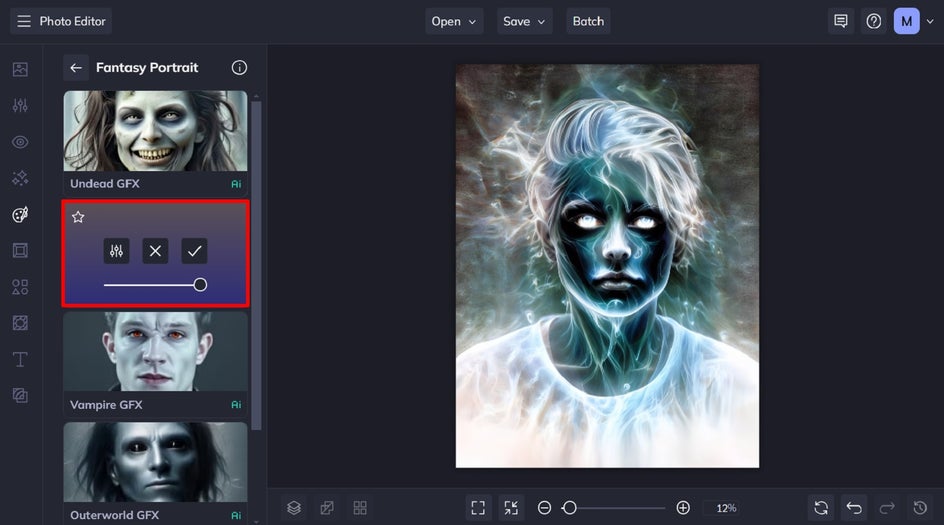
When you click on an effect, three options are available: Settings, which allows you to alter the effect further; Cancel, which cancels the selected effect; and Apply, which applies the effect as-is. You can also adjust the strength of the effect using the slider.
Click Apply if you’re happy with your ghost effect as-is. Alternatively, we’ll show you how to further customize the effect in the next step.
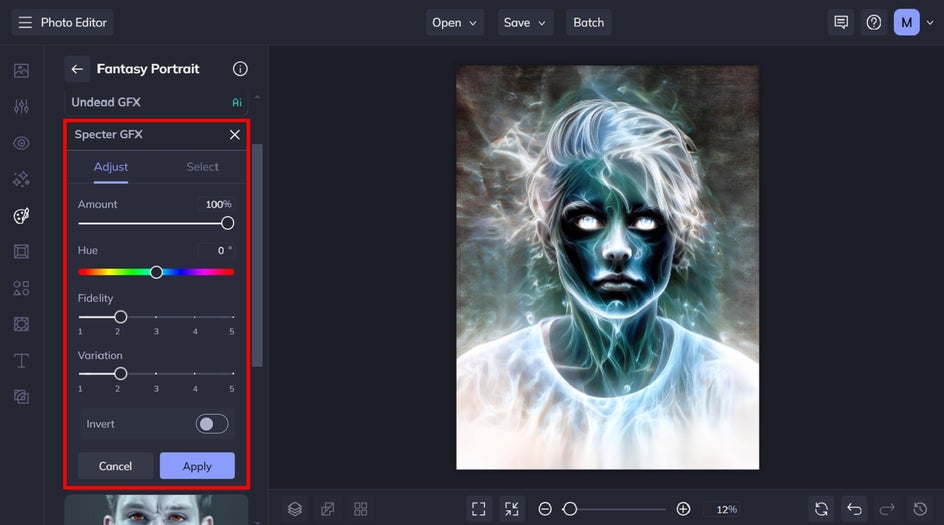
Step 3: Customize the Effect Settings
To fine-tune your Specter effect further, click Settings. You’ll then have several options available, including:
- Amount: This controls how intense the ghost effect appears on the image.
- Hue: This changes the overall color profile of your ghost portrait.
- Fidelity: This controls how closely the face resembles the original portrait or fades into a ghostly form.
- Variation: This slider gives you different versions of the ghostly effect, allowing you to choose the one that suits your aesthetic.
- Invert: This option allows you to reverse the colors in your portrait. Doing so can dramatically alter the mood and reveal new details, giving your image a completely different feel.
Once you’ve finished making your adjustments, click Apply.
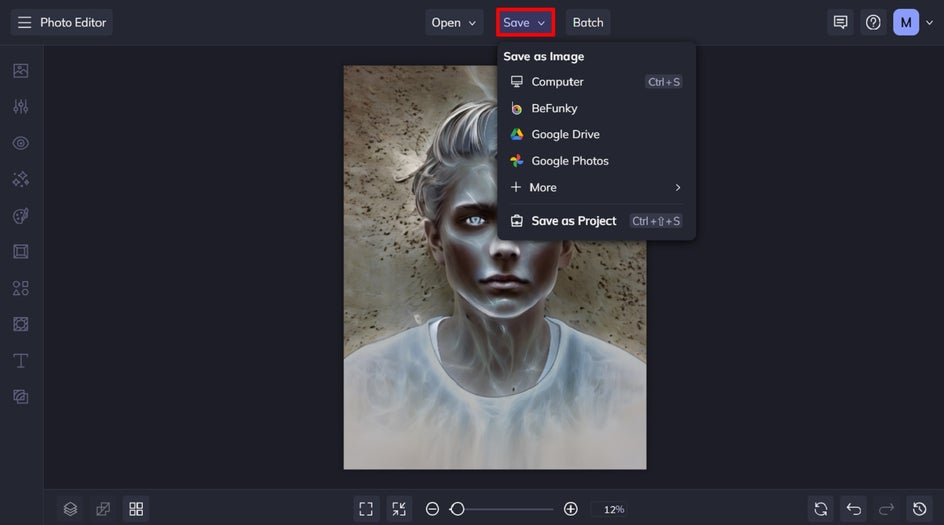
Step 4: Save Your Spirit Portrait
You can then continue to apply other photo effects or edits, if you want. To finalize your ghoul portrait, just click Save at the top of the screen and select your desired save location.
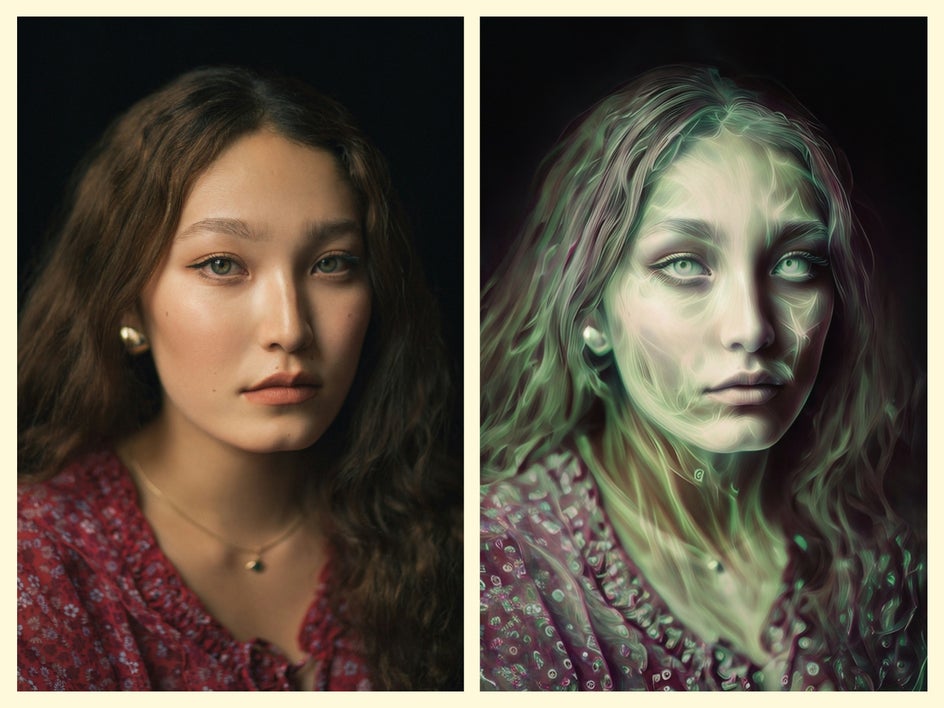
Before and After: Regular Photo to Ghost Portrait
With just a few clicks, we’ve transformed a standard portrait into one with some serious spook factor!

Ghostly Photo Inspiration
Ready to take your Halloween-inspired portraits to the next level? Here are three ways you can use the Specter effect to create unique and spooky images.
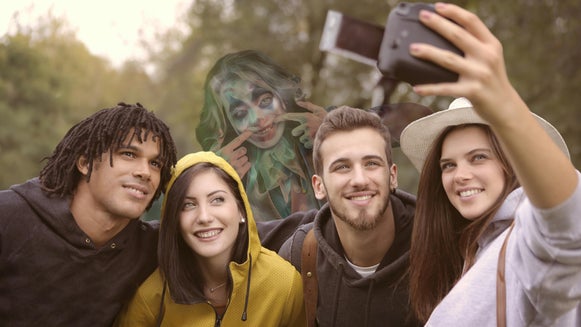
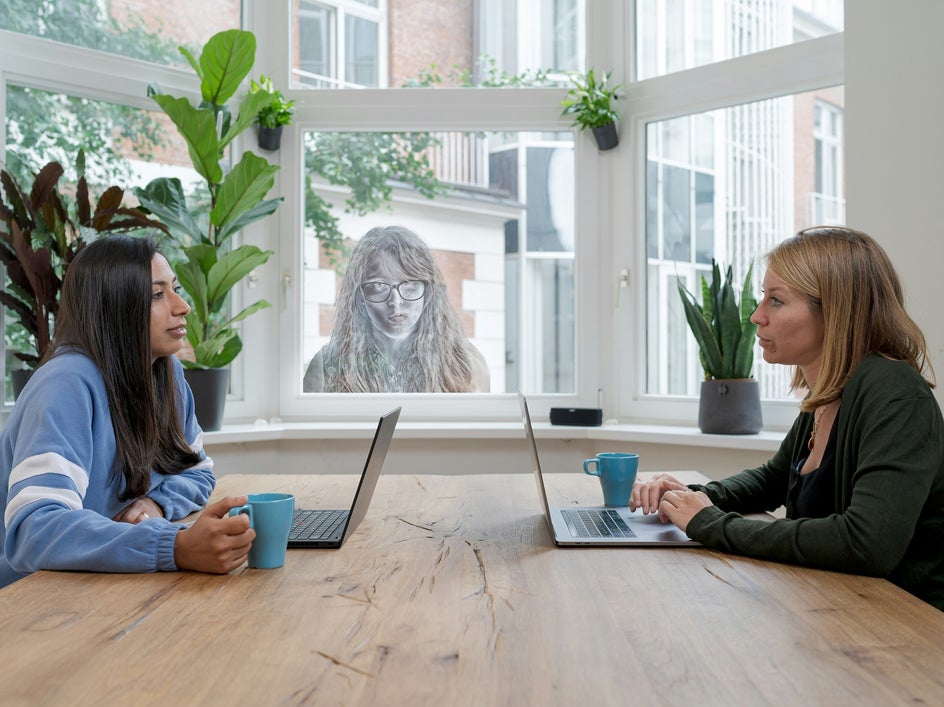
Ghost Photobomber
One fun way to create a hauntingly subtle surprise is by adding a ghost photobomber to your images. With BeFunky’s Cutout tool, you can easily cut out a person from one photo, apply the Specter effect, and then insert them into the background of another picture. This works great if you want to add a transparent, ghostly figure lurking in the corner of a family portrait or vacation snapshot, for example.
Simply adjust the transparency to blend the figure into the background, as if they’ve been there all along. It’s a playful way to give your images an eerie twist, making them perfect for Halloween-themed content or a paranormal surprise!

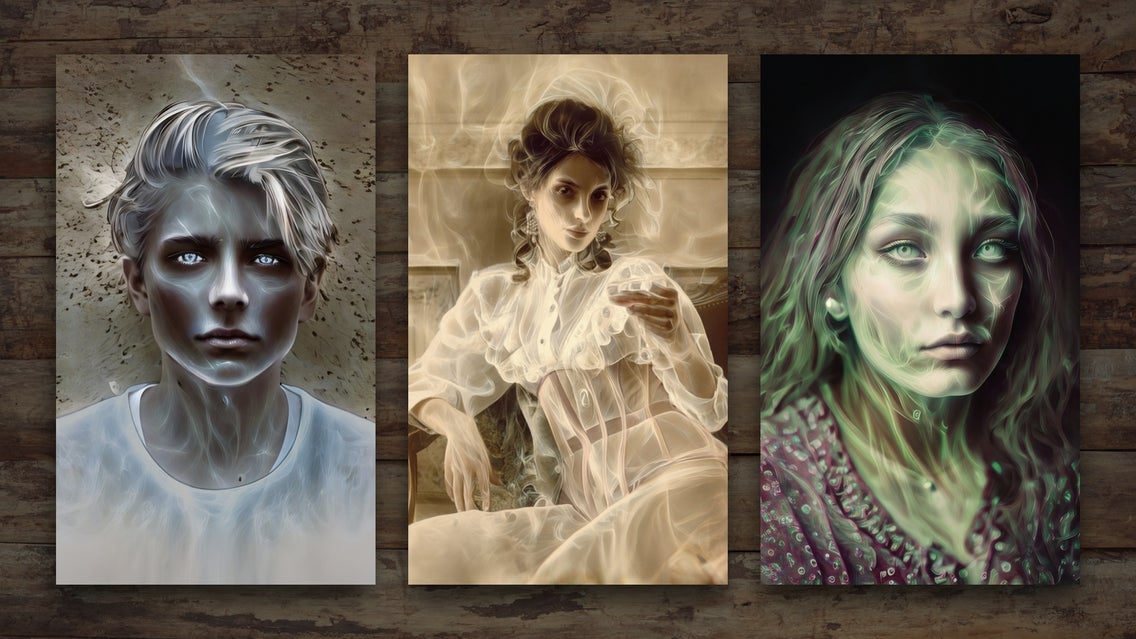
Ectoplasmic Green Tint
To add a supernatural glow to your ghostly portrait, try incorporating an ectoplasmic green tint. This technique gives your photo an eerie vibe reminiscent of the classic ghost stories where spirits ooze with an ethereal green light. After applying the Specter effect, simply adjust the Hue slider within the effect’s settings to make it seem like your ghost is floating through a mysterious green mist.
Vintage Ghost
For a more sophisticated, haunting aesthetic, try turning a vintage-style portrait into a spooky spirit image. Classic Victorian portraits, with their formal poses and antique look, are the perfect choices for this transformation. Applying the Specter effect will give the portrait a translucent and faded appearance, as though it has been lost to time. You can even create a Marie Antoinette-inspired ghost – a popular style for its historical intrigue and glamorous ghostly vibe! In this example, we’ve then added a Sepia photo effect to create the look of a centuries-old apparition caught on camera.

Elevate Your Halloween Portraits with BeFunky’s Ghost Effect
Forget trying to master ghost effect photography settings or spending hours trying to make a ghostly image in Photoshop; with BeFunky’s Specter effect, creating ghost portraits has never been easier.
Whether you’re looking to add a little spooky fun to your photos or transform a vintage image into a haunting masterpiece, BeFunky’s Photo Editor has everything you need to bring your ghostly visions to life. Check out these haunting photo effects for yourself!