Create Transparent Backgrounds for Product Photography

Want to know what separates a successful eCommerce store from one that struggles to make any sales? Product photography. When consumers are shopping online, a product’s image is the very first impression they have of your business, and the closest they can come to feeling the product without actually holding it in their hands. That means if you’re an online seller, the quality of your product photos is crucial to actually selling them.
Whether you’re selling on third-party eCommerce platforms like Amazon, eBay, and Etsy, or you’ve got your very own website to showcase your goods, one of the best ways you can make your products more appealing is simple – use a background remover to present them on a transparent or pure white background.
In the past, shop owners had to spend a small fortune on professional product photo editing services to achieve this look. However, with BeFunky’s AI-powered Background Remover tool, you can save yourself time and money.
Keep reading, because we’ll show you how to create white or transparent background product photos online in just seconds!
Why Backgrounds Matter in Product Photography
Backgrounds matter in product photography due to several reasons. Not only do they contribute to the overall visual appeal of the product, but they can also draw attention to the item’s features, details, and textures by minimizing visual clutter or interference.
A uniform background helps maintain consistency across an online store, creating a professional and cohesive look. Additionally, the background can be chosen to align with the brand's aesthetic, colors, and overall image. A well-chosen background also makes post-processing and editing more straightforward. Finally, many e-commerce platforms have specific requirements for product images, including background color and image format. Adhering to these standards is essential for a professional presentation.
What Background Is Best for Product Photos?
White and transparent backgrounds are the best choice for product photography as they provide a clean and classic look, therefore eliminating distractions and focusing attention on the product.
White is the most versatile color, allowing your eCommerce photos to seamlessly fit in with your brand image, marketing, and online storefront – no matter what type of product you’re selling.
A transparent background can also offer numerous advantages to sellers. Since there are a zillion different shades of white that vary from site to site, using a transparent background will ensure that wherever you upload your photo, the background will automatically match the background color of the site, which makes for totally seamless product displays.
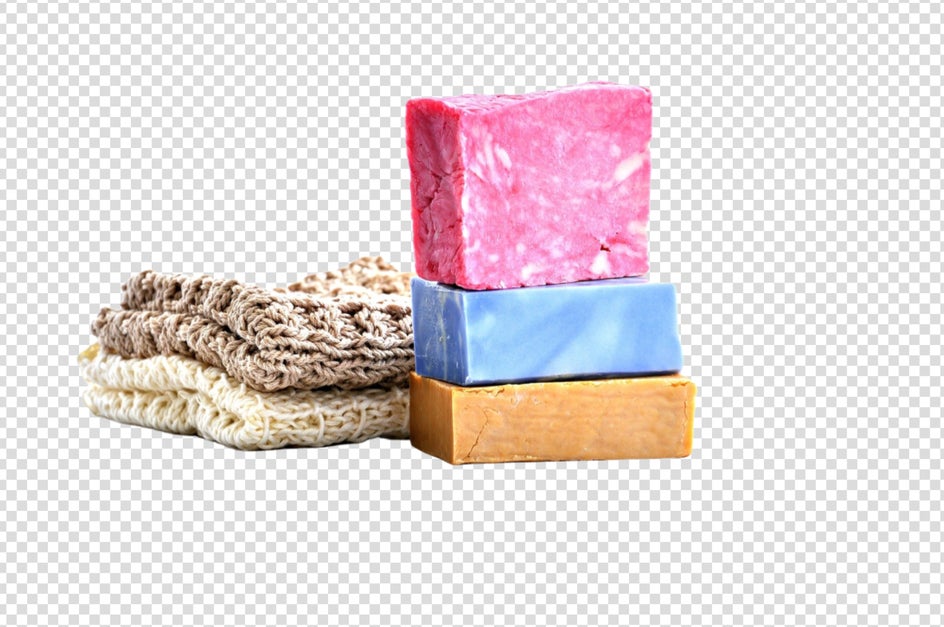
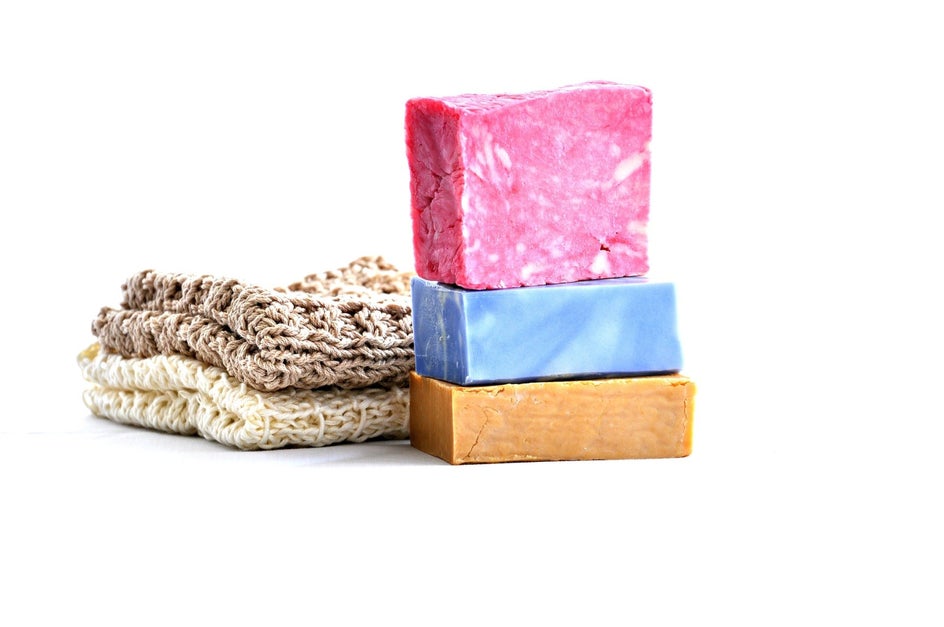
Additionally, using a transparent background decreases the file size of your image and speeds up loading time, which is essential for a pleasant and smooth buying process.
How to Remove the Background From Any Product Photo
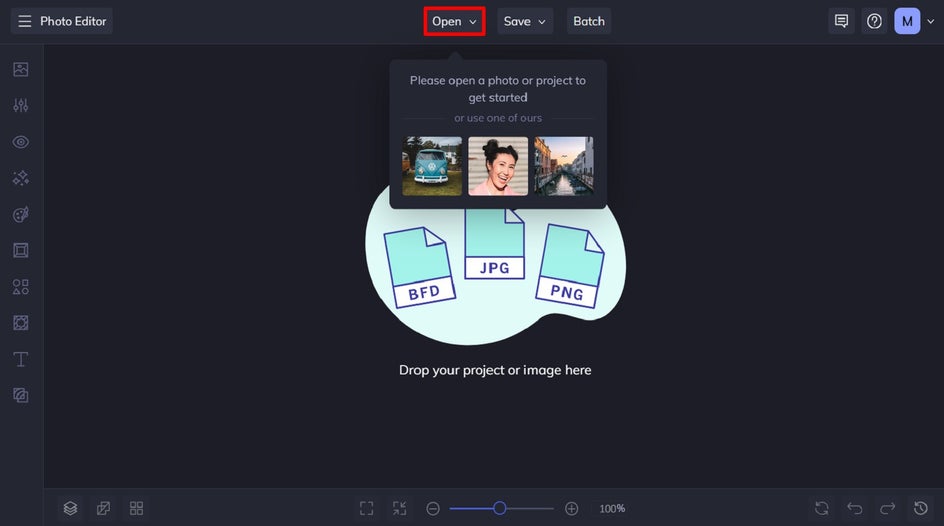
Ready to make your product photo’s background transparent or white? To get started, open your photo in the Background Remover.
Step 1: Apply the Background Remover
You’ll find this tool by clicking on Edit in the main menu on the left. Then, scroll down to the Remove/Replace category to locate the Background Remover.
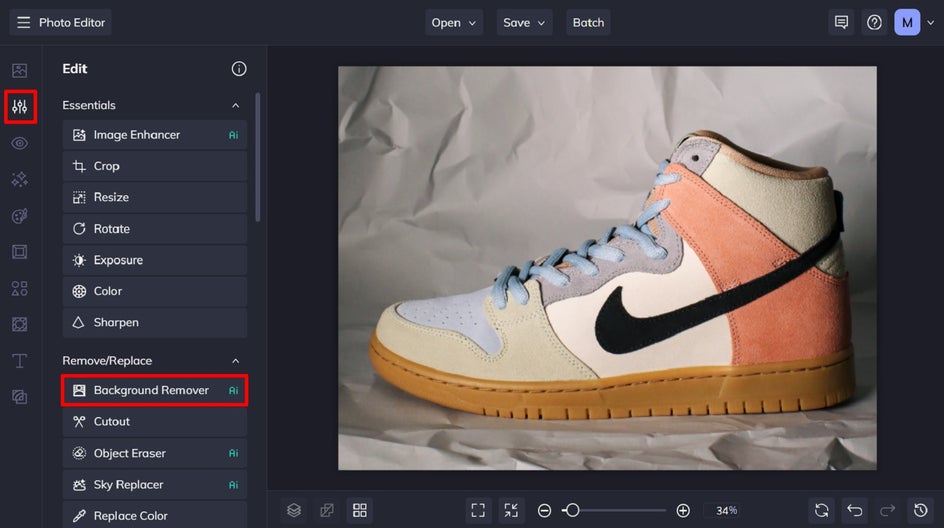
The Background Remover will instantly remove your product photo’s background and make it transparent.
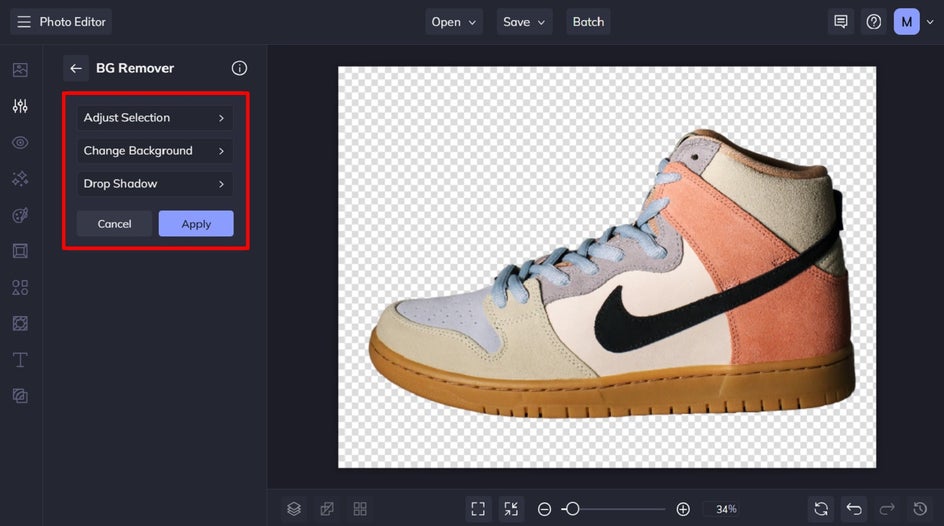
Step 2: Customize Your New Background
If you need to edit the area of your product photo that has been removed, then you can do so by clicking Adjust Selection. Here, you can keep or remove the effect by brushing it on or off with your cursor.
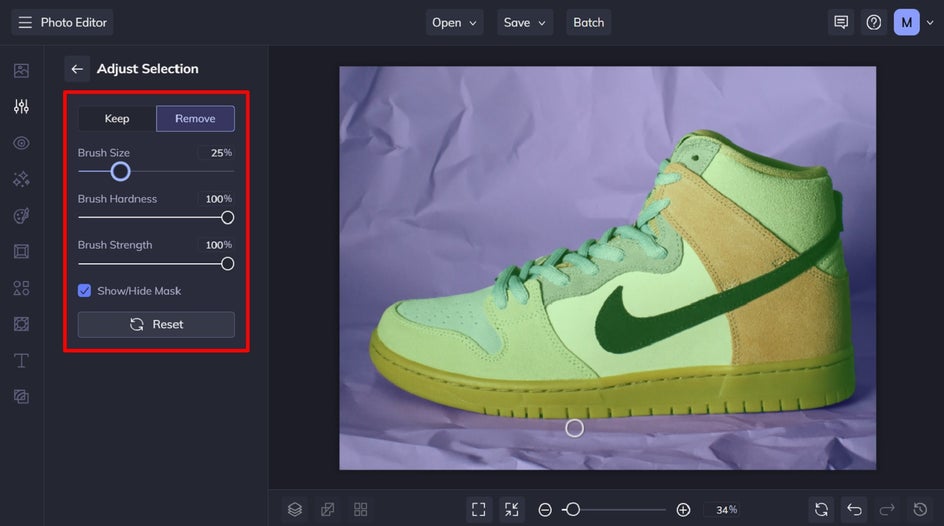
If you wish to keep your transparent background product photo and no further adjustments need to be made, simply click Apply.
Alternatively, to add a new background featuring a color, pattern, or image, click Change Background.
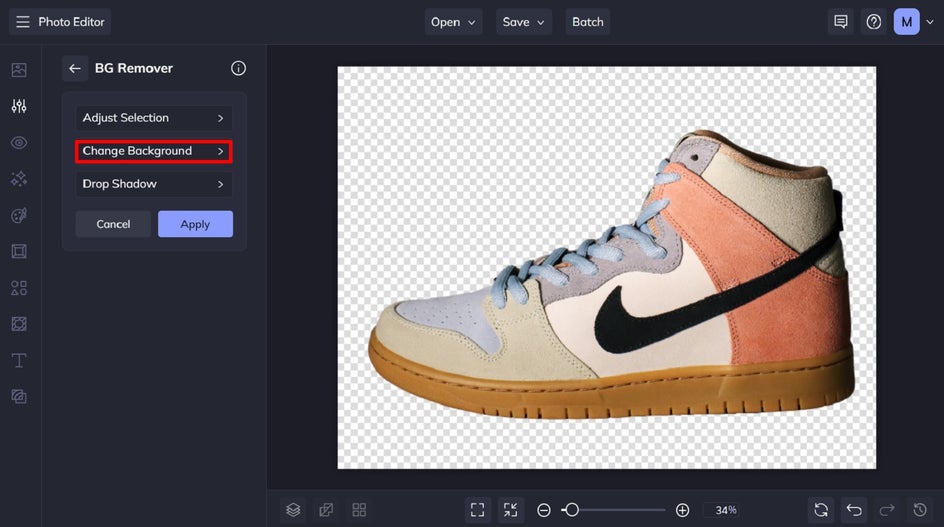
From the Change Background tab, you have the option to keep your image transparent or to select a new color or image instead.
When you select Color, 5 color swatches appear. You can select one of the existing color swatches, or click the first swatch to choose a new color from our Color Picker.
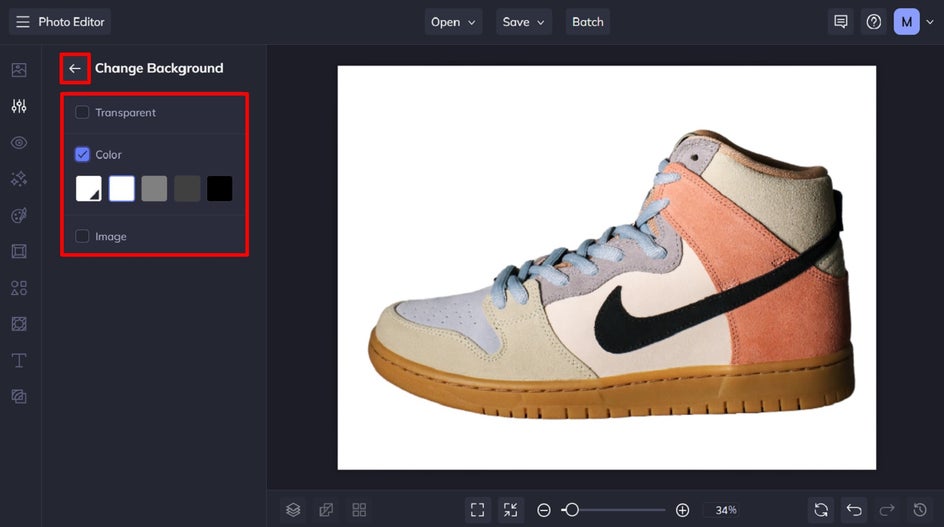
When you’re happy with your new background, click the back arrow to navigate back to the main Background Remover section, then click Apply.
Step 3: Save Your Product Photo
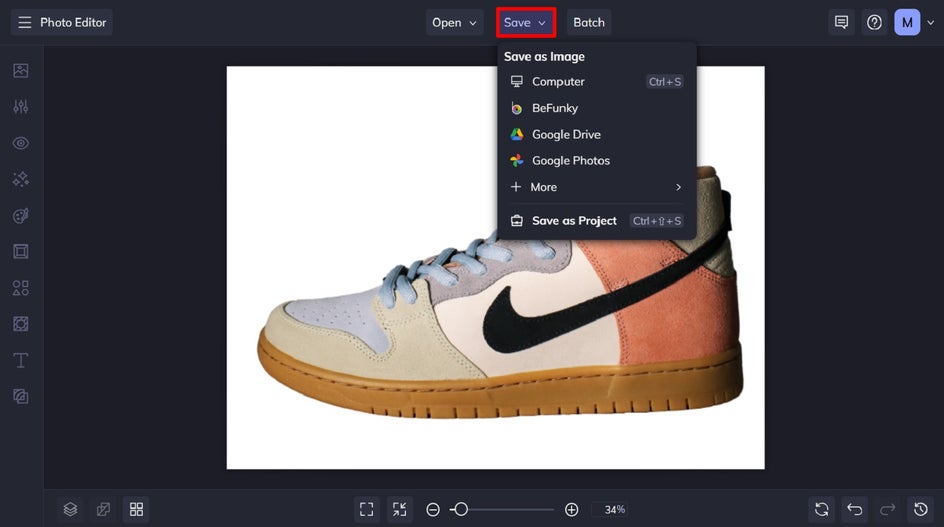
Once you’ve finished editing your product photo, it’s time to save it so it’s ready to upload to your eCommerce store. Click Save at the top of the screen, then select your desired save location and format.
Final Results: Polished Product Photography
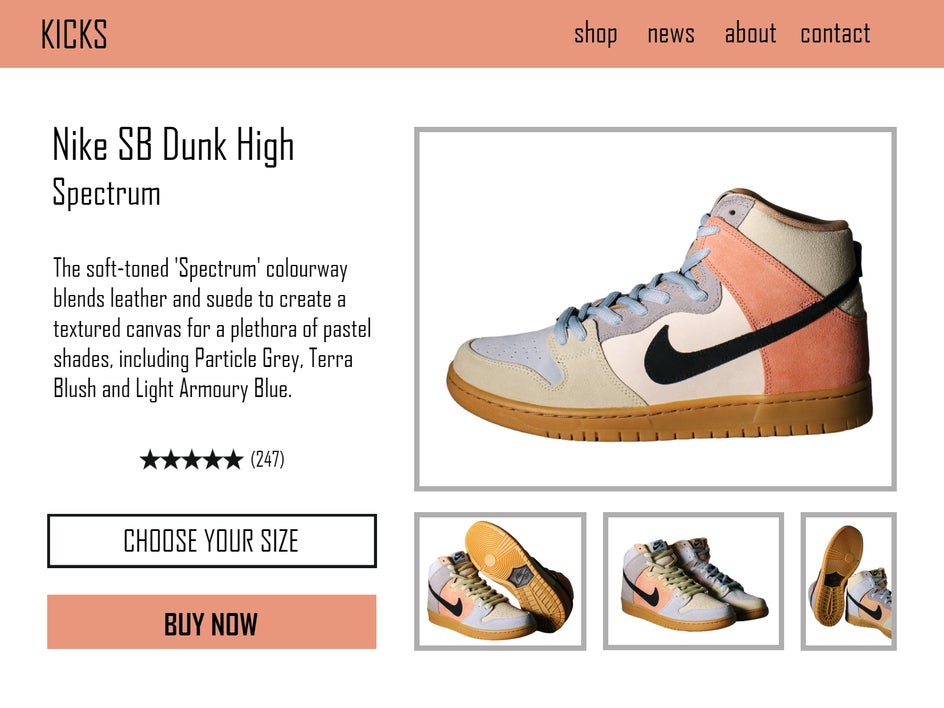
Adding a transparent or white backdrop to your product photography doesn’t detract from the image – rather, it allows your product and its features to truly shine. Just take a look at this before and after, for example. The white background instantly gives this pair of sneakers a clean, professional, and high-quality look.
What App Can Remove the Background of a Product Photo?
If you’re looking to convert an image to a transparent background while on the go, look no further than BeFunky’s mobile app. This handy app gives you access to BeFunky’s entire creative suite – including the Photo Editor – all in the palm of your hand.
This allows you to remove the background of a product photo straight after capturing it on your phone. You might be surprised to hear that BeFunky’s Background Remover isn’t the only tool we have available for removing the background of an image.
Create Professional Product Photos With a Plain Background in Seconds
There’s no denying that transparent and white-colored backgrounds are the most effective for product photography. Rather than paying to outsource this task to a professional, however, BeFunky’s Background Remover tool gives you a quick, easy, and affordable way to do it in seconds.
Want to see what all of the fuss is about? Go on, check out the Photo Editor today to try the Background Remover tool for yourself!


